The Ultimate Guide on the Best Way to Clean a Dryer Vent
- Jan 20
- 16 min read
So, what's the absolute best way to clean a dryer vent? It involves a detailed, step-by-step process using a specialized brush kit paired with a powerful vacuum to pull every last bit of lint out of the ductwork. While a DIY job can work for many homes, the safest and most thorough method is often calling in a professional, especially if you have a long or complicated vent run. This guarantees every inch is cleared, boosting both safety and your dryer's performance.
Why Cleaning Your Dryer Vent Is a Non-Negotiable Task
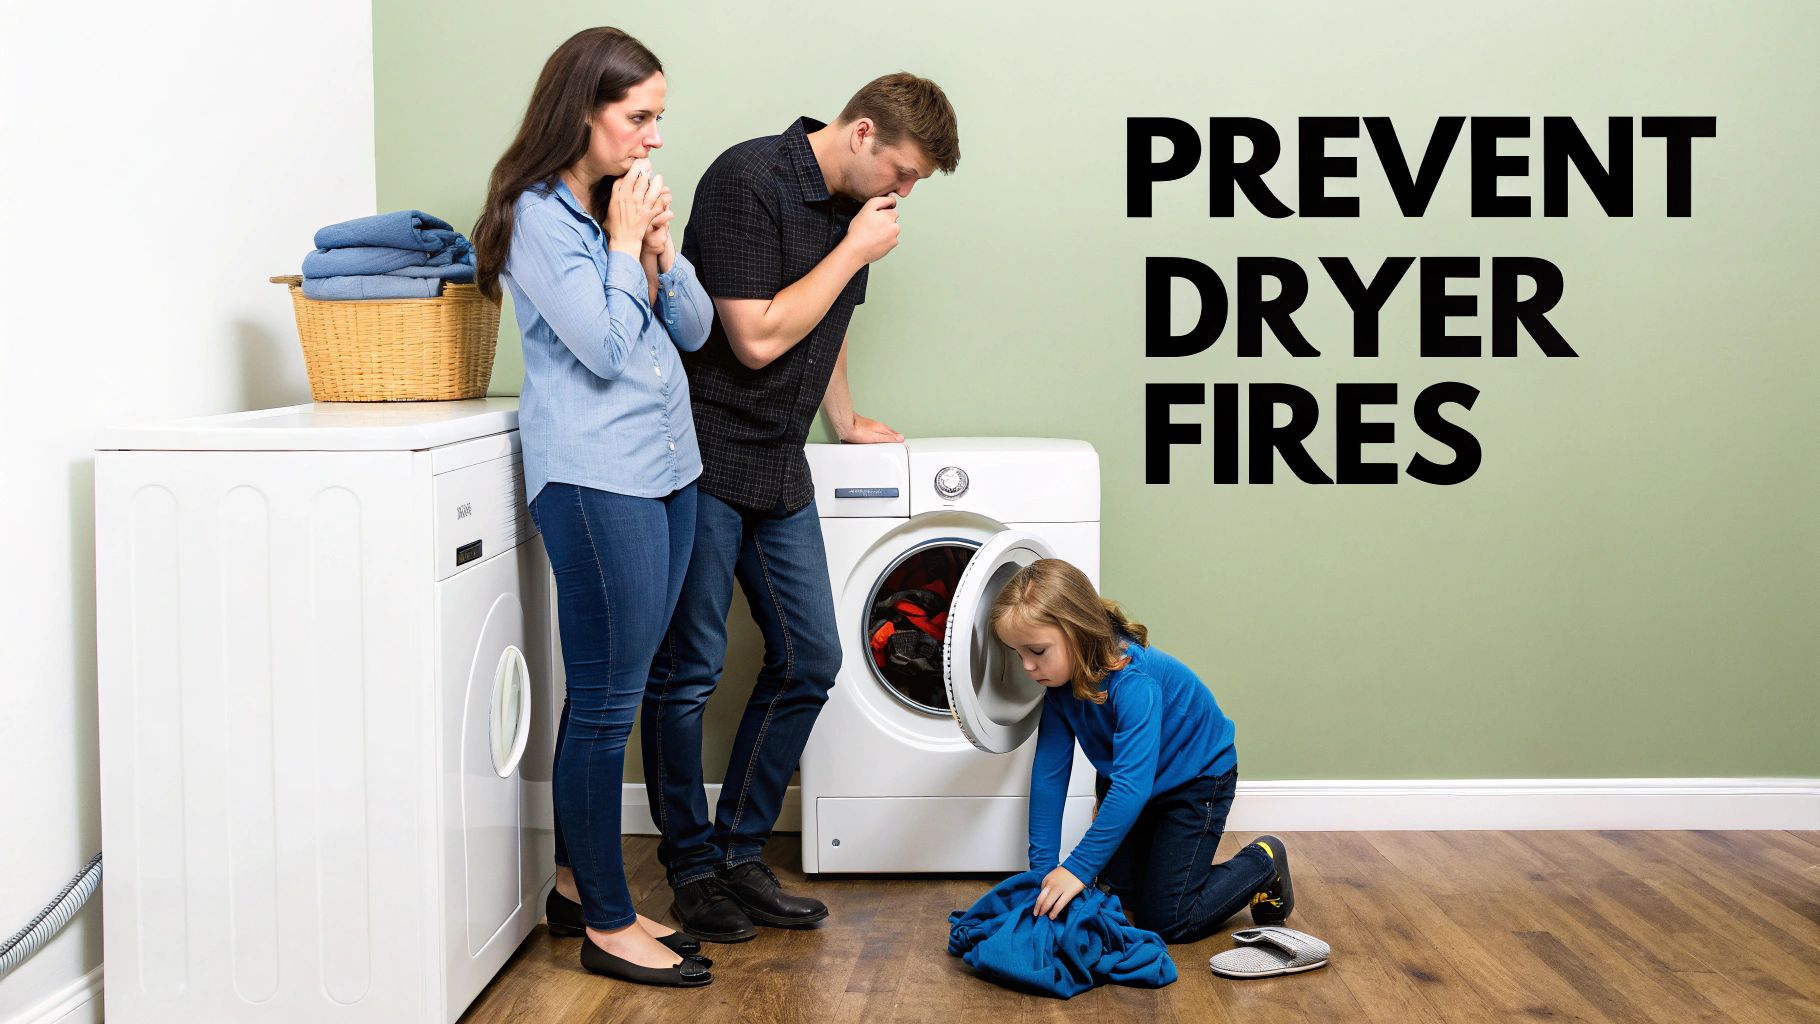
That mountain of laundry isn't the only thing you should be worried about. Inside your walls, a clogged dryer vent is more than just a minor headache; it's a genuine hazard that builds up silently. Most homeowners are aware of the fire risk, but the other consequences of neglect are just as serious.
Have you ever wondered why your clothes are still damp after a full 60-minute cycle? Maybe the laundry room feels more like a sauna, or there's a faint, musty smell you can't quite place. These aren't just quirks of an older machine: they are classic warning signs of a dangerously clogged vent.
Beyond the Obvious Dangers
When airflow is choked off, your dryer has to work much harder and run longer to do its job. That extra effort shows up directly on your monthly energy bills. The constant strain also puts premature wear and tear on critical parts like the heating element and motor, setting you up for expensive repairs or a full appliance replacement years ahead of schedule. According to the National Fire Protection Association, the #1 factor contributing to home clothes dryer fires is a simple failure to clean them.
The problem goes beyond your appliance and your wallet, too. A vent packed with warm, damp lint is an open invitation for some nasty, unwanted growth.
Mold and Mildew Growth: The trapped moisture and organic material become a perfect breeding ground for mold, which can then get pushed back into your home's air.
Poor Indoor Air Quality: These contaminants can tank your indoor air quality, potentially triggering allergies and respiratory problems for your family.
Pest Infestations: Blocked exterior vents are a welcome sign for birds and rodents looking for a warm place to nest, which creates an even bigger blockage and a sanitation nightmare.
It's time to start thinking of vent cleaning not as a chore, but as essential home maintenance. It protects your property, saves you money, and safeguards your family’s health from hidden threats.
The True Cost of Neglect
At the end of the day, a clogged vent is quietly chipping away at your home’s safety and your finances. The slow increase in drying time might seem like a small thing at first, but it’s a blaring signal that your appliance is struggling. Ignoring it means you're paying more for electricity while simultaneously shortening the lifespan of an expensive machine.
You can dig into a full breakdown of the key benefits of dryer vent cleaning for your home to see just how much value this simple task provides. Taking action isn't just a good idea; it's a non-negotiable part of being a responsible homeowner.
Spotting the Warning Signs of a Clogged Dryer Vent
Your dryer usually gives you hints that something’s wrong long before it just stops working. You just have to know what to look for. Being able to spot the subtle signals of a clogged vent can make you a proactive homeowner, catching problems before they get serious. A lot of people think a full lint screen is the only sign, but the real clues are much more telling.
These signs are your dryer's way of saying it’s struggling. When you ignore them, you're not just wasting energy and money on extra cycles; you're also allowing a major safety risk to grow right inside your home. Recognizing these warnings is the first step toward figuring out the best way to clean a dryer vent and get your machine running like it should.
Performance and Sensory Clues
The most obvious signs of a blockage are tied directly to how your dryer is performing and what you can see, feel, or smell around your laundry room. If your laundry routine starts to feel off, pay close attention.
Damp or Extremely Hot Clothes: Are your clothes still damp after a full cycle? That’s a classic sign that the moist air has nowhere to escape. On the flip side, if clothes feel scorching hot to the touch, it means heat is building up in the drum instead of being properly vented outside.
The Dryer Itself Is Hot: Put your hand on top of the dryer while it's running. It should stay relatively cool. If the casing feels hot, that's a dead giveaway that the machine is overheating because of restricted airflow.
A Persistent Burning Smell: Do you ever catch a faint, scorched odor in the laundry room? That smell is often lint inside the vent getting hot enough to smolder. This is a serious fire hazard that needs immediate attention.
All these symptoms point to the same root problem: poor ventilation. It's a growing concern for homeowners, which is why the global dryer vent cleaning services market is expected to grow at a compound annual growth rate of 9.5% between 2025 and 2033. People are prioritizing safety and efficiency more than ever.
Visual and Physical Inspections
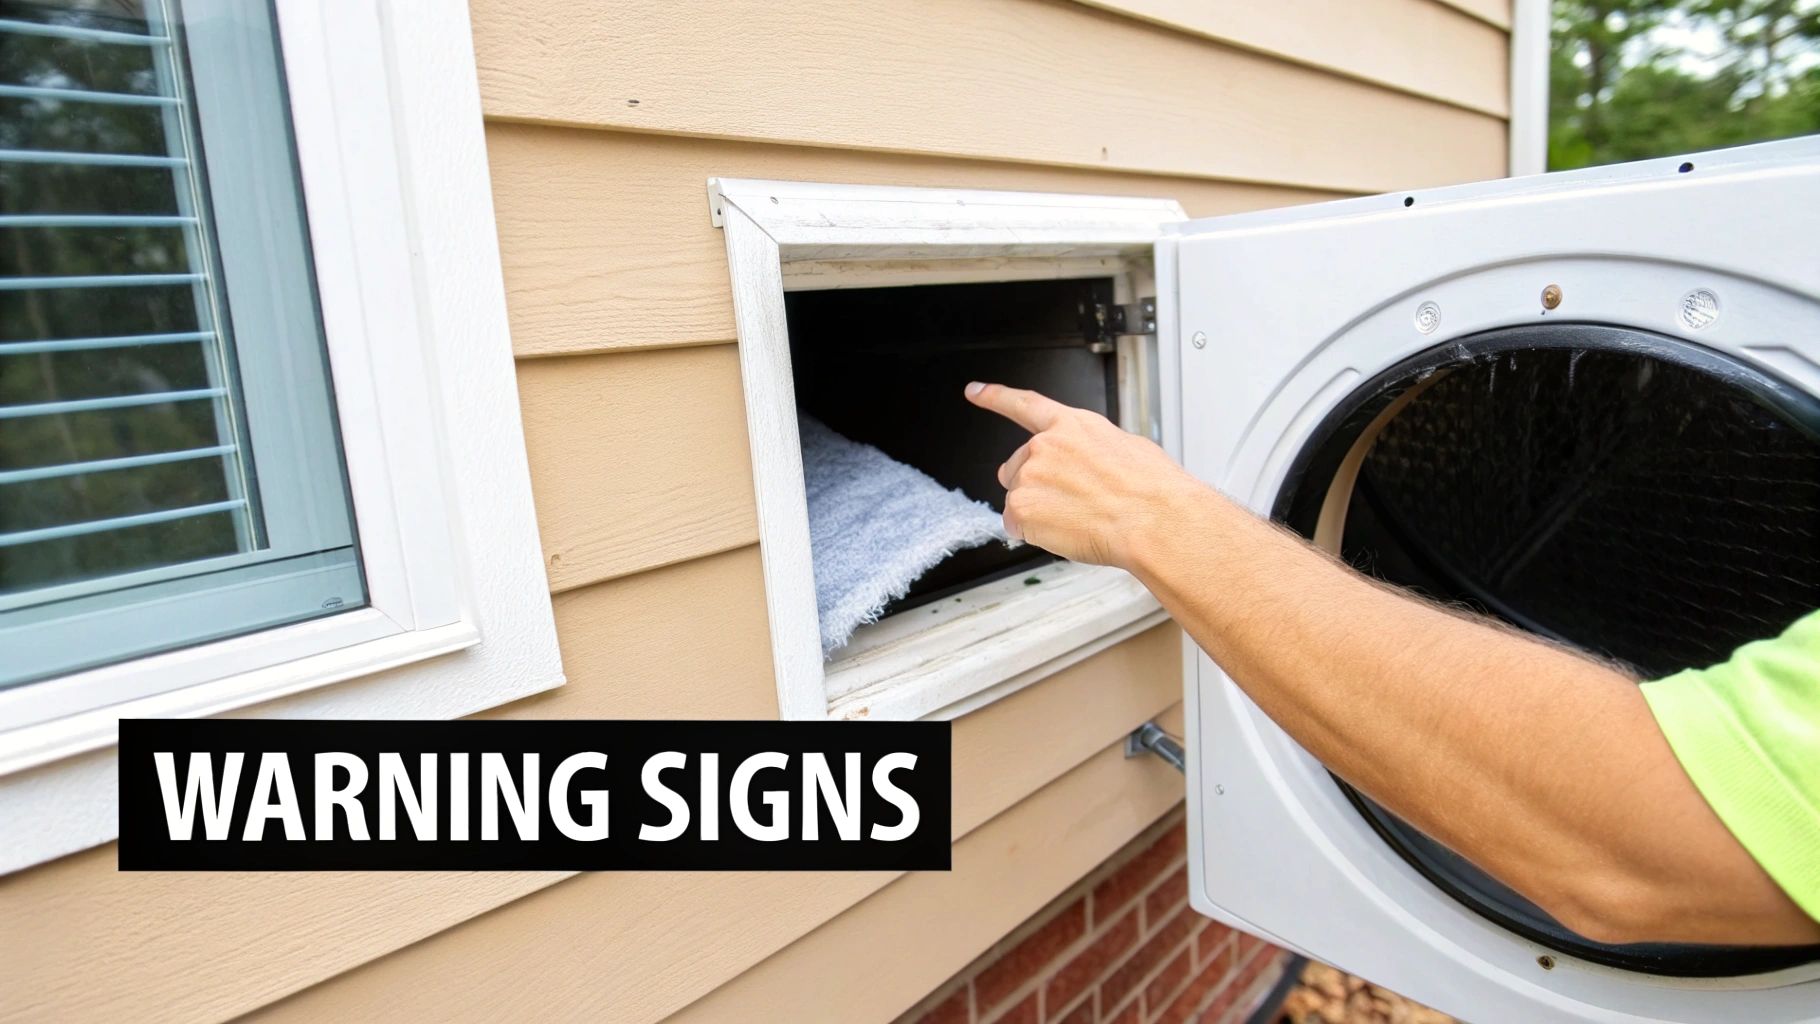
Sometimes, you can find hard evidence of a clog just by taking a quick look around your laundry area and the outside of your house. These checks only take a minute but can reveal a big problem.
You don't have to guess if your vent is clogged; a simple inspection can give you a clear answer. For a more detailed walkthrough, take a look at our guide on how to tell if your dryer vent is clogged.
Another critical spot to check is the exterior vent flap. When your dryer is running, head outside and look at the vent cover. That little flap should be open, pushing out hot, moist air. If it’s barely moving or completely shut, you’ve definitely got a blockage somewhere in the line.
Urgent Red Flags: If you smell something burning, if your gas dryer is making the house humid or creating a strange odor, or if the appliance shuts itself off mid-cycle from overheating, stop using it immediately. These are urgent signs that your vent is severely clogged and poses an immediate fire or carbon monoxide risk.
A Practical Guide to DIY Dryer Vent Cleaning
There’s a special kind of satisfaction that comes from tackling a home maintenance project yourself, and cleaning your dryer vent is one of those jobs that pays off in both safety and savings. With a little guidance, you can get it done right.
The key is having the right tools for the job before you start. Nothing is more frustrating than having to stop mid-project for a run to the hardware store. Weak brushes or flimsy rods just won't cut it against packed-in lint.
Gathering Your Cleaning Tools
Let's talk gear. Getting all your tools lined up first makes the entire process smoother and a whole lot less stressful. Here’s a quick rundown of what you’ll need to do the job like a pro.
This checklist covers the must-haves and some nice-to-haves that make the work easier.
DIY Dryer Vent Cleaning Tool Checklist
Tool or Material | Essential or Optional | Purpose |
|---|---|---|
Dryer Vent Brush Kit | Essential | The long, flexible rods are perfect for dislodging deep lint. |
Shop Vacuum with Nozzle | Essential | Provides the power needed to suck out all the loose debris. |
Safety Gloves | Essential | Protects your hands from surprisingly sharp duct edges. |
Painter’s Tape | Optional | Great for temporarily sealing connections as you work. |
Flashlight | Optional | Helps you see into those dark corners of the ductwork. |
Having these items ready to go means you can focus on the cleaning without any interruptions. Once you're set, it's time to prep the area.
Prepping the Dryer for Cleaning
Before you even think about disconnecting a hose, safety comes first. These few minutes of prep are non-negotiable and prevent any nasty surprises.
First, unplug the dryer from the wall. For an extra layer of safety, you can also flip the corresponding circuit breaker.
If you have a gas dryer, find the gas supply valve and turn it to the off position. It's usually a simple quarter-turn.
Now you can gently pull the dryer away from the wall. Go slow and be careful not to yank or kink the vent hose just yet.
This approach keeps dust contained and protects the duct from being damaged before you even start cleaning.
Cleaning the Vent From Inside
With your tools handy and the dryer prepped, you're ready to get to work. I always like to start from the inside, attacking the lint where it builds up the most: right behind the dryer.
After disconnecting the hose from the dryer, grab your brush kit. Carefully feed the brush into the ductwork, rotating it as you push it forward. You’ll feel it breaking up the lint buildup.
As you work the brush, use your shop vac to suck up the debris you're loosening. This prevents you from just pushing the clog further down the line.
If you have a flexible foil duct, be gentle with the brush rotation to avoid tearing it.
Keep going until the brush moves smoothly and isn't pulling out any more clumps of lint.
Starting from the inside clears out the biggest blockages first, making the rest of the job much easier.
Tackling the Exterior Vent
Next, head outside. Cleaning from the exterior vent ensures a clear exit path for lint and hot air. It also gives you a chance to check for any critters that might have decided to build a nest.
Remove the exterior vent cover; it usually just snaps or screws off. You’ll probably see a good bit of lint caked around the opening.
A little bit of cleaning here and there can prevent a major clog down the road. I recommend quick monthly checks to keep debris from building up.
Use your brush to sweep out any remaining lint from this end. Then, use the shop vac to clean up the area and inside the duct opening. Before you put the cover back on, make sure the flap or louvers move freely. If they’re stuck or broken, it’s a cheap and easy part to replace.
Reassembly and Airflow Confirmation
You're in the home stretch! With both ends of the vent line clean, it's time to put everything back together and confirm your hard work paid off.
Reconnect the vent hose securely to both the dryer and the wall duct. Use proper hose clamps for a tight seal; painter's tape is not a permanent solution.
Carefully slide the dryer back into its spot. The most important thing here is to avoid crushing or kinking the hose. A kinked line is just as bad as a clogged one.
Plug the dryer back in and, if you have one, turn the gas valve back on. Run the dryer on an "air dry" or "fluff" cycle for a few minutes.
Head back outside and check the exterior vent. You should see the flap open fully and feel a strong, steady stream of air. That's the feeling of success! It means your dryer can breathe again.
For situations where moving the appliance is difficult, check out our detailed walkthrough on cleaning a dryer vent without moving the dryer for a different strategy.
Real-World Tips for a Better Clean
Over the years, you pick up a few tricks that aren't in the instruction manual. These little things can make a big difference.
For instance, a bright LED flashlight is your best friend for spotting hidden clumps of lint tucked away in bends and elbows of the ductwork. Knee pads are also a lifesaver when you're working in a tight laundry closet.
A simple pro tip: use a small zip tie to "lock" the brush rod sections together so they can't unscrew inside the duct.
Place an old towel or a shallow pan under the wall connection to catch any lint that falls out when you disconnect the hose.
Grab a small inspection mirror, like the kind a mechanic uses, to see around corners inside the duct.
Giving the brush a gentle twisting motion as you push it in often helps it bite into heavily compacted lint and break it apart more effectively.
Best Practices for Future Maintenance
Now that your vent is clean, let's keep it that way. Consistent, simple checks will prevent you from ever having to deal with a major clog again. A quick monthly inspection can save you hours of work later.
Set a recurring reminder on your phone to clean the lint screen after every single load and to peek at the exterior vent once a month.
Plan on doing a deep clean with your brush kit and vacuum at least once a year, or every six months if you have a large family and do a lot of laundry.
Keep an eye on flexible foil or vinyl ducts. They can sag and tear over time. It's a good idea to replace them every five years to be safe.
With these steps, you'll not only see better dryer performance and lower energy bills, but you'll also have the peace of mind that comes with knowing you've eliminated a serious fire hazard. Stay safe out there
Common DIY Mistakes and How to Avoid Them
Tackling a dryer vent cleaning yourself can feel like a big win. But a successful DIY project means knowing the common pitfalls that can turn a productive afternoon into a frustrating mess, or worse, an ineffective clean that leaves your home at risk.
I've seen plenty of well-intentioned homeowners make small errors that completely undermine their hard work. These missteps often involve using the wrong gear or putting things back together incorrectly. Let's walk through the most frequent mistakes I see and, more importantly, how you can sidestep them.
Using the Wrong Brush for Your Duct Type
Not all dryer vents are made the same, and grabbing the wrong brush can cause some serious, irreversible damage. A classic mistake is using a stiff, aggressive brush on those flexible foil or vinyl ducts. They're delicate, and a harsh brush will tear or puncture the material in a heartbeat, creating leaks that spew lint into your walls.
The key is to match your brush to your duct. For the flexible kind, you absolutely need a brush with softer, more pliable bristles. If you're working with rigid metal ductwork, you can get away with a slightly stiffer brush to break up the really stubborn gunk. The goal is to dislodge lint, not destroy your duct.
Another common error is trying to ram the brush through a clog. Don't do it. Instead of forcing it, use a gentle rotating motion. This lets the bristles grab onto the lint and pull it out, rather than just packing it down tighter.
A torn duct is more than just an inconvenience; it's a hidden fire hazard. When lint escapes into wall cavities or your attic, it can build up around wiring and wood framing, creating a dangerous situation you can't even see.
Only Cleaning a Few Feet of the Vent
It’s easy to think the clog is right behind the dryer, but lint builds up along the entire length of the vent. One of the biggest DIY fails is cleaning the first few feet from inside and calling it a day. This leaves most of the clog untouched and the core problem unsolved.
A partial clean like this just gives you a false sense of security. To do the job right, you have to clean the vent from both the inside access point and the exterior vent cap. A good brush kit with extendable rods is a must-have, especially for vents that have a long run or snake through ceilings.
This simple diagram shows what a complete cleaning process really looks like; it's about tackling the entire system from end to end.
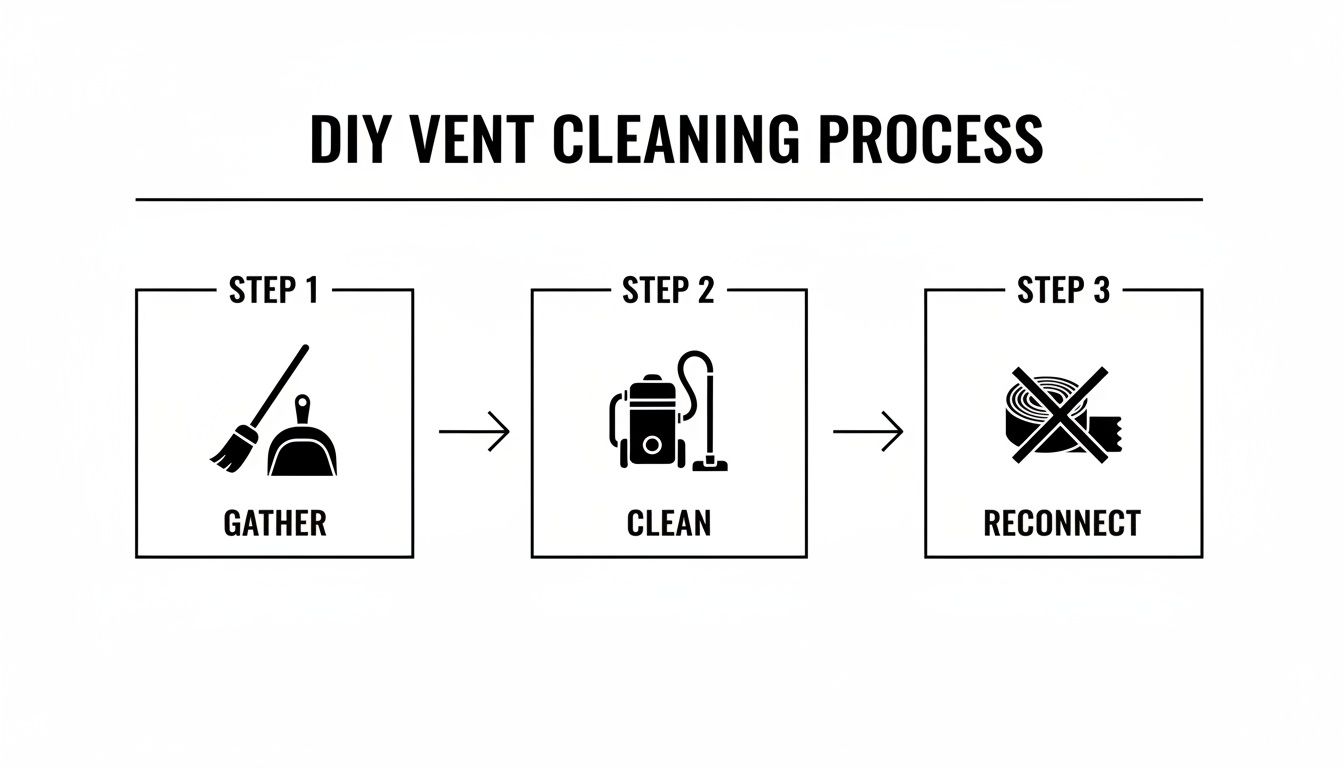
As you can see, a proper job involves getting your tools ready, cleaning the entire duct thoroughly, and reconnecting everything correctly to restore full airflow.
Forgetting the Final, Critical Steps
After all that hard work, it's tempting to rush the finish line. This is where two critical mistakes often pop up: ignoring the exterior vent cap and kinking the duct when you put the dryer back.
Neglecting the Exterior Cap: That vent cap on the outside of your house is a magnet for lint, leaves, and sometimes even bird nests. If you forget to clear this final exit point, all your effort is wasted because the blockage remains. Always pop the cover off and make sure the flap or louvers can move freely.
Kinking the Ductwork: When you push the dryer back into its spot, it's incredibly easy to accidentally crush the flexible hose or create a sharp bend. A kinked duct restricts airflow just as badly as a lint clog, completely defeating the purpose of the cleaning. Take your time. Reconnect the duct first, then carefully slide the dryer back, making sure the hose has a smooth, gentle curve with no sharp angles.
Improper venting isn't just inefficient; it's dangerous. Some people mistakenly think venting into a garage or attic is an okay shortcut, but you can learn about the serious hazards in our guide on why you should avoid venting a dryer into an attic. By steering clear of these common errors, you can be confident you’ve done the job safely and effectively.
When to Call a Professional for Your Dryer Vent
While tackling routine maintenance yourself is a great way to stay on top of home safety, it's just as important to know when a job is out of your league. Some situations can quickly turn a simple cleaning into a complex problem that needs specialized equipment and a trained eye. Recognizing these signs is the key to making the smartest and safest call for your home.
Let's face it, sometimes the best tool for the job is the phone. This is especially true when the physical layout of your vent system throws a wrench in the works that a standard DIY kit just can't handle.
Identifying Complex Vent Configurations
The biggest factors that separate an easy DIY job from a professional-level task are the length and path of your dryer vent. A short, straight shot through an exterior wall is one thing. A long, winding duct that snakes through your attic or crawlspace is a completely different beast.
You should definitely consider calling a professional in these scenarios:
Long Vent Runs: If your vent duct stretches out longer than 35 feet, the average DIY brush kit simply won't have the reach or the structural integrity to clean it effectively. We use powerful, professional-grade systems designed to clear vents of any length.
Multiple Sharp Turns: Every 90-degree elbow in your ductwork acts like a speed bump for airflow and a magnet for lint. Getting a brush through these tight corners without it getting stuck or damaging the duct requires the kind of flexible, high-powered rotary brushes that pros use.
Rooftop or Inaccessible Vents: Does your vent exit on the roof or in another hard-to-reach area? This isn't just difficult; it's a safety risk. It's a job best left to trained technicians who have the right safety gear and experience working at heights.
When You Suspect More Than Just Lint
Sometimes, the clog isn't just an accumulation of fluff from your towels. If you've noticed a sudden and drastic drop in your dryer's performance or hear strange scratching sounds coming from inside your walls, you could be dealing with a much more serious blockage.
A tell-tale sign of trouble is suspecting a bird or rodent has decided your vent line is the perfect spot for a new home. These nests are packed tight and can completely cut off airflow, creating a serious fire hazard. Professionals are equipped to safely remove the nest and deal with any biohazards left behind.
On top of that, if you spot any physical damage, like tears, crushed sections, or punctures in the ductwork, it's time for an expert. A professional technician won't just clean the vent; they can also repair or replace damaged sections, ensuring your system is both safe and efficient. For anyone weighing their options, this advice on hiring professional cleaning services can offer helpful perspective on various home maintenance tasks.
The Professional Advantage with Purified Air Duct Cleaning
This is where you can really see the value of a dedicated service like Purified Air Duct Cleaning. Our technicians show up with gear that is lightyears beyond any DIY kit you can buy at a hardware store. We use powerful, truck-mounted vacuum systems that create incredible negative pressure, literally pulling all the debris out of the line instead of just pushing it around.
Our flexible rotary brushes are engineered to navigate tricky duct systems, scrubbing the interior walls clean without causing any harm. This one-two punch of intense suction and mechanical agitation delivers a deeper, more thorough clean that brings your dryer's airflow back to its peak. Our professional dryer vent cleaning services focuses on fire prevention and safety, giving you complete peace of mind.
More and more homeowners are recognizing this as essential maintenance. The global market for these services was valued at around $1.97 billion USD in 2025 and is expected to hit $3.5 billion USD by 2035. Ultimately, hiring a pro isn't just about getting a clean vent; it's about a comprehensive inspection and a guaranteed safe result.
Common Questions About Dryer Vent Care
Even after you've got the basics down, a few specific questions always seem to come up. As someone who's seen it all when it comes to dryer vents, let me clear up the most common things homeowners ask. This will help you keep your laundry room safe and your dryer running like it should.
Knowing how often to clean, what risks to watch out for, and what to expect in terms of cost is all part of smart homeownership. Let's get you those answers.
How Often Should I Clean My Dryer Vent?
As a solid rule of thumb, you should plan on a thorough dryer vent cleaning at least once a year. But honestly, that's just a starting point. "Once a year" doesn't apply to everyone, because how you do laundry really changes the game.
You might need to bump that up to every six months if your situation looks like this:
You have a big family: More people means more clothes, which means more laundry. It all adds up to a whole lot more lint.
You run the dryer constantly: If you're doing several loads of laundry every week, that vent is going to get clogged up much faster than in a home where it's only used on weekends.
You have shedding pets: Pet hair is a real menace. It mixes with lint to create dense, heavy clogs that are much tougher than simple fabric fibers.
The single best habit you can build? Clean the lint screen inside your dryer after every single load. Seriously. It's your first and most powerful defense against a major blockage down the line.
Can a Clogged Vent Cause Carbon Monoxide Issues?
Yes, absolutely. For anyone with a gas dryer, this is a critical, potentially deadly risk that can't be ignored. A blocked vent traps the byproducts of combustion, including lethal carbon monoxide (CO), and prevents them from escaping outside.
When that vent is clogged, the colorless, odorless gas has nowhere to go. It backs up right into your laundry room and can spread throughout your home. A clogged vent with a gas dryer isn't just a maintenance issue; it's a safety emergency that demands immediate action.
Make sure you have working carbon monoxide detectors in your home. It’s smart to have one near the laundry area and others near sleeping areas. If you even suspect a clog and you have a gas dryer, stop using it immediately until you know the vent is clear.
What Is the Average Cost for Professional Cleaning?
There's no single flat rate for professional dryer vent cleaning, as the final price depends on the specifics of your home's setup.
A few key things will influence the quote you receive:
The vent's path and length: A short, straight shot out the side of the house is much simpler (and cheaper) to clean than a long, complex vent that winds its way up through an attic with several sharp turns.
How easy it is to access: Getting to a vent that exits on the roof is more difficult and carries more risk for the technician than one that's easily accessible on the ground floor. This will be reflected in the cost.
How bad the clog is: Clearing out a year's worth of lint is one thing. Removing a stubborn, compacted clog or a bird's nest that's been built inside the duct is a completely different job.
Here in the Phoenix metro area, there's a typical price range for a standard cleaning, but getting a direct quote is always your best bet. Think of it less as an expense and more as an investment: in your family's safety, the lifespan of your dryer, and lower energy bills.
For a professional cleaning that guarantees every bit of hazardous lint is gone, you can trust the certified technicians at Purified Air Duct Cleaning. We bring in the heavy-duty equipment to make sure your dryer vent is completely clear, protecting your home and family. Schedule your service with us online at https://www.purifiedairductcleaning.com.