Avoid Venting Dryer to Attic: Risks and Better Solutions
- Jul 6, 2025
- 14 min read
Updated: Jul 8, 2025
Let’s get one thing straight right from the start: venting a dryer into an attic is a serious mistake and a major safety hazard. It's a common shortcut some homeowners take, but it introduces serious risks from fire and moisture damage. Simply put, building codes across the board prohibit this for some very good reasons.
The Hidden Dangers of Venting a Dryer to Your Attic
When someone thinks about venting their dryer into the attic, it's almost always a matter of convenience. Maybe the laundry room layout is tricky, or an exterior wall isn't close by. Whatever the reason, this seemingly simple solution creates two immediate and severe threats to your home's structure and your family's safety: lint buildup and a ton of moisture.
The Fuel Source for a Fire
Even if you're diligent about cleaning your dryer's lint trap, it doesn't catch everything. Tiny, highly flammable particles will always escape and travel through the vent hose with the hot, moist exhaust air.
When that vent just ends in your attic, all that lint has to go somewhere. It settles on everything, your wood framing, insulation, and any boxes you have stored up there. Over time, this creates a thick blanket of perfect kindling just waiting for an ignition source.
The numbers here are pretty sobering. The National Fire Protection Agency reports that clothes dryers were involved in an estimated 13,775 house fires in a single recent year. These fires led to hundreds of injuries, 15 deaths, and property damage nearing $200 million. A huge chunk of these incidents are traced directly back to improper vent setups and failure to clean out lint.
Every single load of laundry deposits more of this flammable material, silently increasing the fire risk right above your head. It’s not a question of if the lint will build up, but when it will reach a dangerous level.
The Catalyst for Mold and Rot
Beyond the fire risk, there’s the equally destructive problem of moisture. It's shocking, but a single drying cycle can pump two to three gallons of water vapor into the air. When you dump all that humid, hot air directly into a contained space like your attic, you're creating the perfect environment for disaster.
This warm, moist air immediately hits the cooler surfaces of your roof sheathing and wooden trusses, causing condensation. This constant dampness leads to several expensive and dangerous problems:
Mold and Mildew Growth: Spores absolutely love damp, dark places, and a humid attic is their paradise. This will tank your indoor air quality and can lead to serious health issues.
Wood Rot: The structural bones of your roof, the trusses and sheathing, will start to rot when they're constantly wet. This weakens your entire roof structure over time.
Compromised Insulation: When insulation gets wet, it's useless. It loses its R-value, meaning your HVAC system has to work overtime just to keep your home comfortable, and your energy bills will skyrocket.
These aren't just hypotheticals; they're the real-world consequences of what seems like a minor shortcut. The best way to sidestep these issues is to understand and follow the rules for proper clothes dryer venting made simple.
Quick Risk Assessment: Venting Dryer to Attic vs. Exterior
To put it plainly, the risks of venting into an attic are severe and guaranteed, while venting outside is the only safe, code-compliant method. Here’s a quick breakdown of what you're facing with each choice.
Concern | Venting to Attic (Improper) | Venting to Exterior (Proper) |
|---|---|---|
Fire Risk | Extremely High. Flammable lint accumulates directly on wood and insulation, creating a tinderbox. | Low. Lint is expelled safely away from the home's structure. |
Moisture Damage | Guaranteed. Causes condensation, leading to mold, mildew, and wood rot. | None. All moisture is vented directly outside. |
Structural Integrity | Compromised. Rotting wood weakens the roof structure over time. | Maintained. The home's structural components remain dry and sound. |
Code Compliance | Violation. Fails all building codes and could void insurance claims. | Compliant. Meets safety standards required by building codes. |
Energy Efficiency | Poor. Wet insulation loses its R-value, increasing heating and cooling costs. | Optimal. Insulation remains dry and effective. |
Ultimately, the choice is clear. The convenience of an improper attic vent is never worth the catastrophic damage it can, and often does, cause.
Understanding Why Building Codes Forbid Attic Venting
When it comes to home projects, some rules might feel more like guidelines. This isn't one of them. The rule against venting a clothes dryer into an attic is a hard-and-fast mandate, written into law for some very serious safety reasons. These regulations aren't just arbitrary red tape; they're the direct result of learning from devastating house fires and expensive structural damage.
The primary authority on this matter is the International Residential Code (IRC), which most local municipalities adopt as their own legal standard. Specifically, IRC Section M1502 is crystal clear about dryer exhaust systems. It leaves no room for creative interpretation: dryer exhaust must be vented directly to the outdoors and terminate outside the building.
The code doesn't stop there. It explicitly forbids terminating the vent in an attic, crawl space, or any other hidden area inside the house. The logic is simple, these spaces just aren't equipped to handle what a dryer puts out, which is a potent combination of lint and moisture.
The Real-World Consequences
Ignoring these codes has serious consequences that go way beyond a simple slap on the wrist. If a fire or a major mold problem is traced back to an improperly installed dryer vent, your homeowner's insurance company could have legitimate grounds to deny your claim. Suddenly, you're on the hook for tens of thousands of dollars in repairs all by yourself.
A non-compliant dryer vent is also a massive red flag during any home inspection. If you're trying to sell your house, an inspector will spot that venting a dryer to the attic is a code violation immediately. That one issue can be enough to derail a sale or back you into a corner, forcing you to pay for expensive, last-minute repairs. Even a setup you think is just "temporary" is a major liability from day one.
The core principle of dryer vent safety is absolute: all exhaust, the heat, the moisture, and the lint particles, must be completely removed from the home's structure. There are no safe workarounds or exceptions to this fundamental rule.
A Hazard Backed by Data
These codes exist for a reason; they were written in response to documented disasters. Building codes are so strict about this because of the dual threat of fire and moisture. Fire administration reports have long emphasized that dryer vents must be made from smooth metal ducts for the specific purpose of preventing lint buildup, which is highly flammable.
In one real-world case, a house fire in Cornelius, Oregon, caused an estimated $75,000 in damage. The cause? A dryer that was improperly vented into an interior space. You can find more details about dryer termination code requirements online.
It's easy to think you can manage the lint or that the moisture isn't a big deal, but it's a dangerous gamble. The codes are there to protect your property and, more importantly, your family. They eliminate these risks before they have a chance to turn into a catastrophe. The only safe and legal path is, and always will be, to vent directly outside.
Choosing the Right Materials for a Safe Dryer Vent
Alright, we've established that venting a dryer into the attic is a definite no-go due to serious fire and moisture risks. So, what's the right way to do it? The answer starts with the materials. This isn't just a friendly suggestion; it's a critical decision guided by building codes and decades of fire safety data. The ducting you choose has a massive impact on your dryer's performance and your family's safety.
Walk down the aisle of any big-box hardware store, and you'll see a few different kinds of dryer ducting. It's tempting to grab the cheapest, most flexible option, like the white vinyl or slinky-style foil ducts. I get it; they're easy to work with. But these materials are a major hazard, especially when they're hidden from view inside walls or ceilings.
Think about the design of those flexible ducts. The accordion-like ridges are perfect little traps for lint. As lint builds up load after load, it chokes off the airflow, making your dryer work harder and get hotter. A heat source right next to a pile of highly flammable lint? That's a textbook fire hazard just waiting to happen.
The Only Safe Ducting Option
When it comes to a safe, code-compliant installation, there's only one material that fits the bill: smooth-walled rigid metal ducting. This is the gold standard, typically made from aluminum or galvanized steel, and it's what every fire safety organization recommends. No exceptions.
Its smooth interior is the key. Lint and moist air can flow right through without getting snagged, which prevents the dangerous clogs that plague flexible ducts. Yes, it takes more planning and effort to install because it's not flexible, but the safety trade-off is absolutely non-negotiable.
You'll buy this rigid ducting in sections. To connect them, you must use high-quality aluminum foil tape to seal every joint and seam. Whatever you do, don't use standard cloth-backed duct tape. That stuff will dry out, crack, and peel away under the heat and humidity, creating leaks. Foil tape is designed for this job, creating a durable, airtight seal that lasts.
Choosing the right duct material is the most important decision you'll make for this project. The differences in safety and performance are stark.
Dryer Duct Material Comparison
Duct Type | Material | Safety Rating | Lint Accumulation | Best Use Case |
|---|---|---|---|---|
Rigid Metal Duct | Aluminum or Galvanized Steel | Excellent | Very Low | The entire vent run inside walls, floors, or attics. |
Semi-Rigid Metal Duct | Flexible Aluminum | Good | Low | Transition duct between the dryer and wall connection only. |
Flexible Foil Duct | Thin, Ribbed Foil | Poor | Very High | Not recommended; often violates building codes. |
Flexible Vinyl Duct | White Plastic/Vinyl | Dangerous | High | Prohibited for dryers; extreme fire hazard. |
As you can see, rigid metal is the clear winner for the main duct run. The only place a flexible (but still all-metal) duct should be used is for the short, visible transition between the back of your dryer and the wall connection.
Planning the Vent Route
With your materials sorted, it’s time to map out the path. Your goal is simple: find the shortest, straightest route from your dryer to the great outdoors. Every extra foot and every single bend adds resistance, which makes your dryer less efficient and increases the risk of lint buildup.
You really have two main options for where the vent will exit your home:
Through a Side Wall: This is usually the best and easiest path. You just run the duct straight from the laundry area to the nearest exterior wall.
Vertically Through the Roof: If you can't get to a side wall easily, going straight up through the roof is a solid plan B. This requires a special roof vent cap made to handle dryer exhaust and keep water out.
A crucial rule of thumb is to keep the total vent length under 35 feet. But don't forget to do the math: subtract 5 feet from your total for every sharp 90-degree turn and 2.5 feet for every 45-degree bend. That gives you your real maximum length.
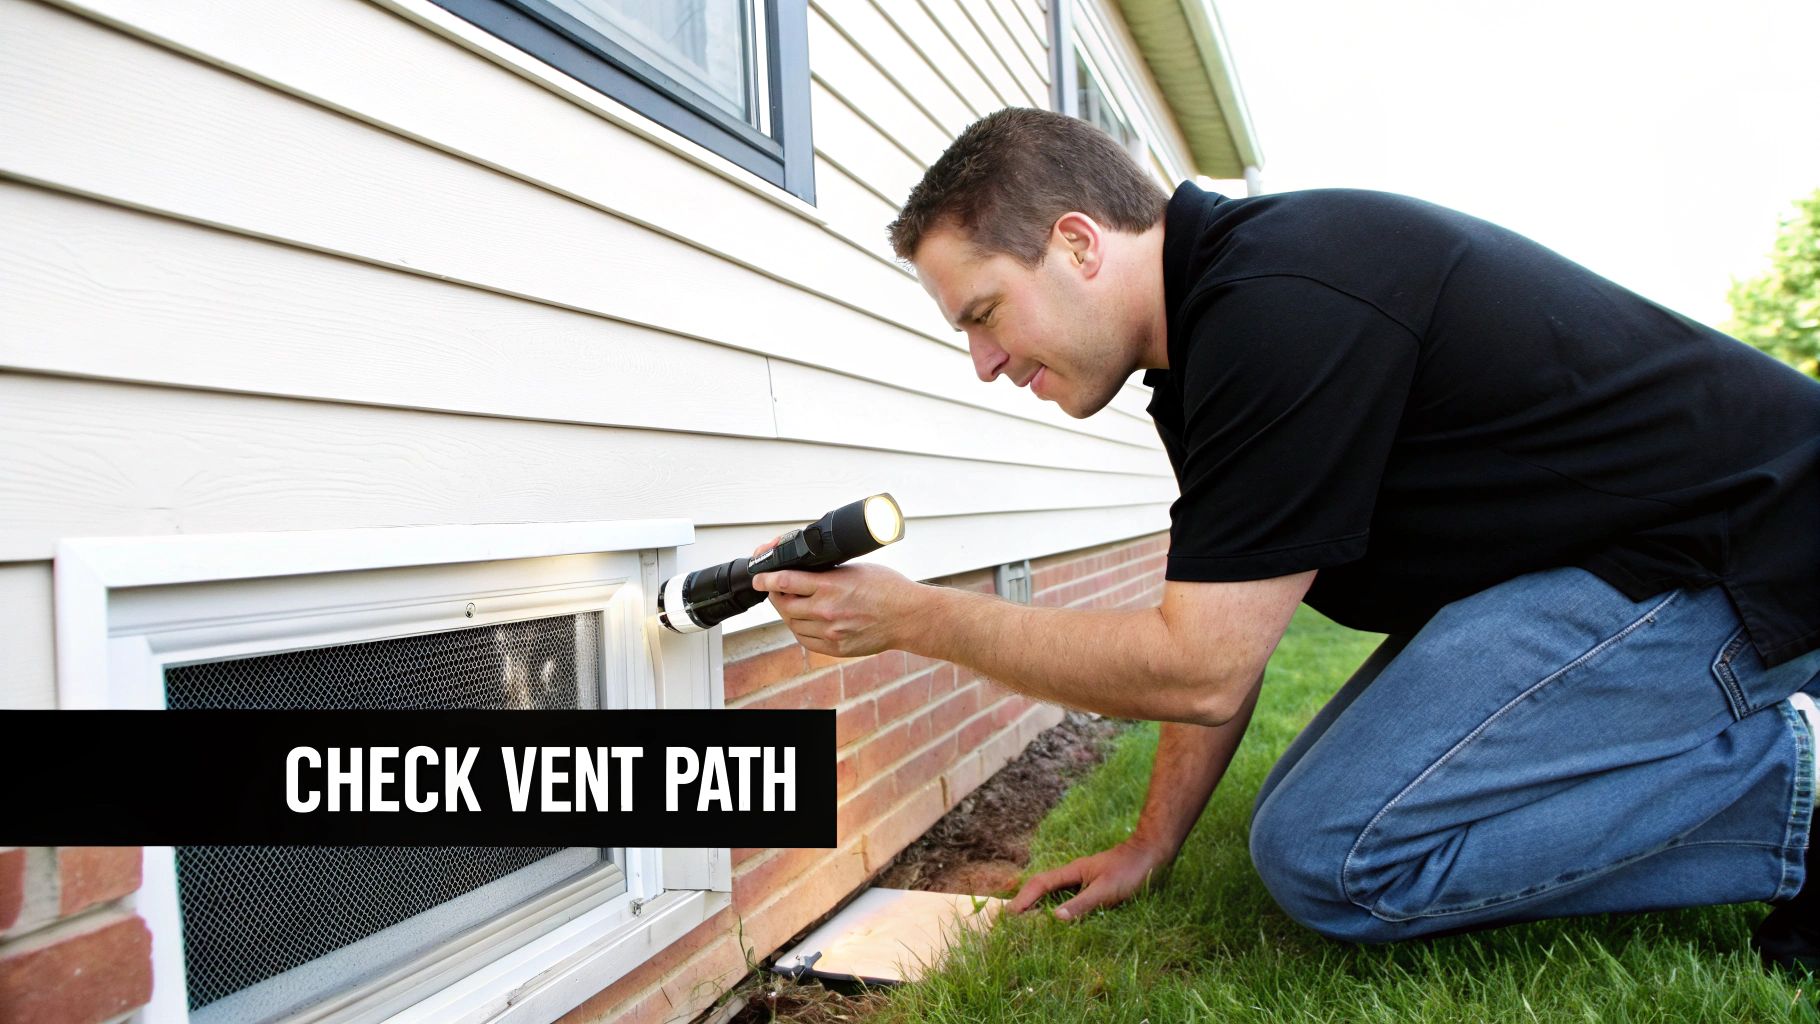
Choosing the Right Exterior Vent Cap
The last piece of this safety puzzle is the vent cap on the outside of your house. It might not look like much, but it has a vital job: let hot air and lint out while keeping pests, birds, and bad weather from getting in.
Steer clear of any vent caps that have a fine mesh or screen over the opening. Lint will clog that screen in no time, creating a blockage and a fire risk. The best choice is a louvered or flapper-style vent cap that swings open when the dryer is on and closes shut when it's off. This design gives you maximum airflow while still protecting your home from critters and rain, ensuring your system works safely for years to come.
How to Install a Code-Compliant Dryer Vent
Taking on a dryer vent installation yourself can be a really satisfying project, but it's one of those jobs where you absolutely have to get the details right. We've already gone over why venting a dryer to an attic is a major code violation and a serious safety hazard. This guide is all about the correct way to do it: venting directly outside. This isn't just about punching a hole in your wall; it's about building a safe, efficient system that will protect your home for the long haul.
Before you even think about touching a tool, the single most important thing is to plan the duct's path. Your goal here is simple: find the shortest, straightest route from your dryer to the great outdoors. Every extra foot of ducting and every single bend slows down the airflow and gives lint a place to build up. So, grab a tape measure and map it out.
Once you have a solid plan, you can get to the hands-on part. Assembling and sealing everything correctly is just as critical as the route you choose.
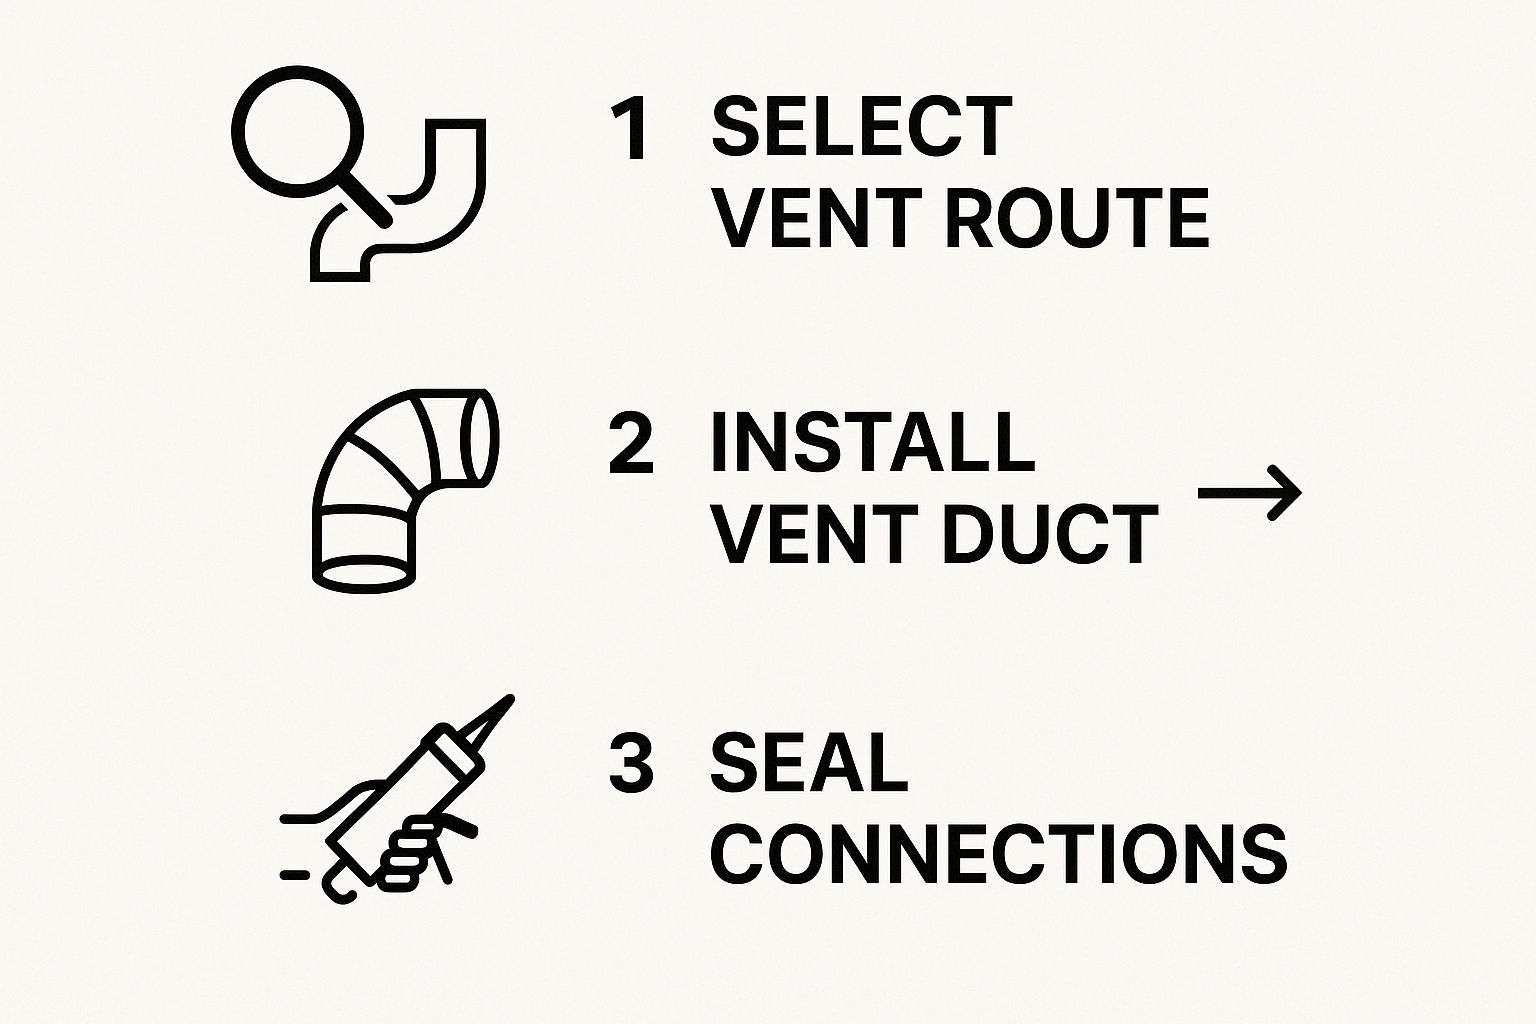
As the graphic shows, a proper installation really comes down to three phases: smart planning, precise installation, and perfect sealing. Each step sets the foundation for the next.
Mapping the Route and Cutting the Hole
After you've pinpointed the shortest route, you need to play detective and figure out what’s hiding inside the wall or ceiling you're about to cut. A stud finder is a good first step, but a more advanced wall scanner is even better. It can spot hidden electrical wires, plumbing, or other ducts you definitely don't want to hit. This quick check can save you from a very expensive and dangerous mistake.
Mark the center of your exit point on both the inside and outside walls. Then, take a long drill bit and make a small pilot hole straight through to the other side. This is your moment of truth; it confirms your measurements are spot-on before you commit to cutting a big hole.
Now, grab a 4.25-inch hole saw and cut the opening. This specific size is ideal for a standard 4-inch rigid metal duct, giving you just enough wiggle room for a snug fit. Don't forget to wear safety glasses and a dust mask for this part.
Assembling the Ductwork Correctly
With the exit hole ready, it's time to put together the rigid metal duct sections. This is where a lot of DIYers go wrong. It’s tempting to use screws to connect the pieces, but you should never use screws on the inside of the duct run. The tips of the screws stick out into the duct and act like perfect little hooks, snagging lint and creating massive clogs down the road.
Instead, assemble the duct sections by sliding the male (crimped) end of one piece into the female (uncrimped) end of the next. Make sure the smooth connection points away from the dryer, so there's no lip inside to catch lint as it flows out.
The most crucial part of this whole process is sealing every single joint and seam. You must use high-quality aluminum foil tape, not the gray stuff we all call "duct tape." The heat and moisture from your dryer will make regular duct tape peel right off, leading to leaks of hot, humid, lint-filled air inside your walls.
Wrap each connection point with foil tape at least twice. This creates a permanent, airtight seal and is absolutely mandatory for preventing the moisture and fire risks you're working so hard to avoid.
Final Connections and Safety Checks
Once you've run the ductwork from the dryer to the exterior wall, you can install the outside vent cap. Screw it securely to the wall and run a bead of exterior-grade caulk around the edges. This creates a weatherproof seal that keeps rain, snow, and pests from getting into your vent system.
Back inside, it's time for the final connection. The only place a flexible duct is ever acceptable is for the short transition from the dryer to the wall vent. For this, use a semi-rigid metal duct—it holds its shape much better than the flimsy foil-style ducts and is far more durable.
Secure it at both ends with clamps, but be very careful not to crush or kink the duct when you push the dryer back into place. A pinched transition hose is one of the most common culprits behind poor airflow.
With everything connected, run the dryer for a few minutes. Go back and check every joint and connection for any signs of leaking air. A proper, leak-free installation will give you peace of mind, knowing your home is safer and your dryer can finally run at its best.
Dryer Vent Maintenance and Common Mistakes to Avoid
A correct installation is just the first step; long-term safety really hinges on consistent maintenance and steering clear of some very common setup pitfalls. I've seen it countless times—a perfectly good vent path is immediately compromised by simple, avoidable mistakes that can choke off airflow from day one.
One of the most frequent errors I see is a crushed flexible transition hose right behind the dryer. When you push the machine back against the wall, it’s all too easy to pinch this duct, creating a major bottleneck for lint and hot air. Another classic mistake is using too many 90-degree elbows in the duct run. Each one of those sharp turns adds significant resistance, slowing down the exhaust and practically inviting lint to settle and build up.
Your Annual Maintenance Plan
Think of your dryer vent like your car's oil; it needs regular attention to prevent a catastrophic failure. The single most critical task is cleaning the entire vent line, from the back of your dryer all the way to the exterior cap, at least once per year. If you have a large family and the laundry is going almost daily, bumping that up to every six months is a smart move.
Be on the lookout for warning signs of a dangerous clog. They're hard to miss if you know what to look for:
Clothes are still damp after a full cycle.
The top of the dryer feels unusually hot to the touch while it's running.
You notice a burning smell in your laundry room.
The outside vent flap isn't opening when the dryer is on.
These symptoms mean airflow is dangerously restricted, creating a severe fire hazard. This isn't just about inefficiency; it's a serious safety issue. If you spot these signs, it's time to act immediately. You can find more details in our [guide to preventing a dryer lint fire hazard](https://www.purifiedairductcleaning.com/post/your-guide-to-preventing-a-dryer-lint-fire-hazard).
Investing in a specialized dryer vent cleaning kit, which usually has a long flexible brush that attaches to a power drill, makes this job so much easier. A few minutes of preventive cleaning can literally eliminate one of the leading causes of house fires.
The statistics on this are truly alarming. Faulty clothes dryer setups are linked to over 24,000 house fires and nearly $100 million in property damage in the U.S. each year. A huge portion of these fires comes from lint accumulation in poorly maintained vents. Using the wrong materials, like flimsy vinyl ducting in hidden spaces like an attic, just cranks that risk way up. This data really underscores why avoiding dangerous shortcuts like venting a dryer to an attic and committing to regular maintenance is so vital for your family's safety.
Answering Your Dryer Venting Questions
Even when you know the risks, it's completely normal to have a few nagging questions about your specific setup. We get it. Let's walk through some of the most common questions we hear from homeowners to clear up any confusion about doing this job right.
Are Indoor Dryer Vent Kits a Safe Alternative?
In a word: no. You’ve probably seen these indoor vent kits at the hardware store, but they are not a safe or code-compliant substitute for a proper vent that terminates outside. These kits, which typically use a small water basin to catch lint, are a disaster waiting to happen.
They don't trap all the fine, flammable particles, and more importantly, they pump all that warm, moist air directly back into your home. This is a perfect recipe for creating a mold and mildew nightmare.
For gas dryers, these kits are an absolute non-starter. They are exceptionally dangerous because they can allow deadly carbon monoxide to build up inside your living space. The only time you should even think about one is as a temporary, last-resort measure for an electric dryer where venting outside is truly impossible.
How Long Can My Dryer Vent Duct Be?
This is where a lot of DIY projects go wrong. Most building codes, including the International Residential Code (IRC), cap the total length of a dryer duct at 35 feet. But it’s not as simple as just measuring the pipe. You have to calculate the "developed length," which accounts for the resistance every bend and turn adds to the system.
Think of it this way: every turn in the ductwork chokes the airflow. A standard 90-degree elbow is like adding 5 feet of straight pipe to your total length. A softer 45-degree bend counts as 2.5 feet. Going over this calculated maximum puts a huge strain on your dryer, reduces its efficiency, and seriously increases the fire risk.
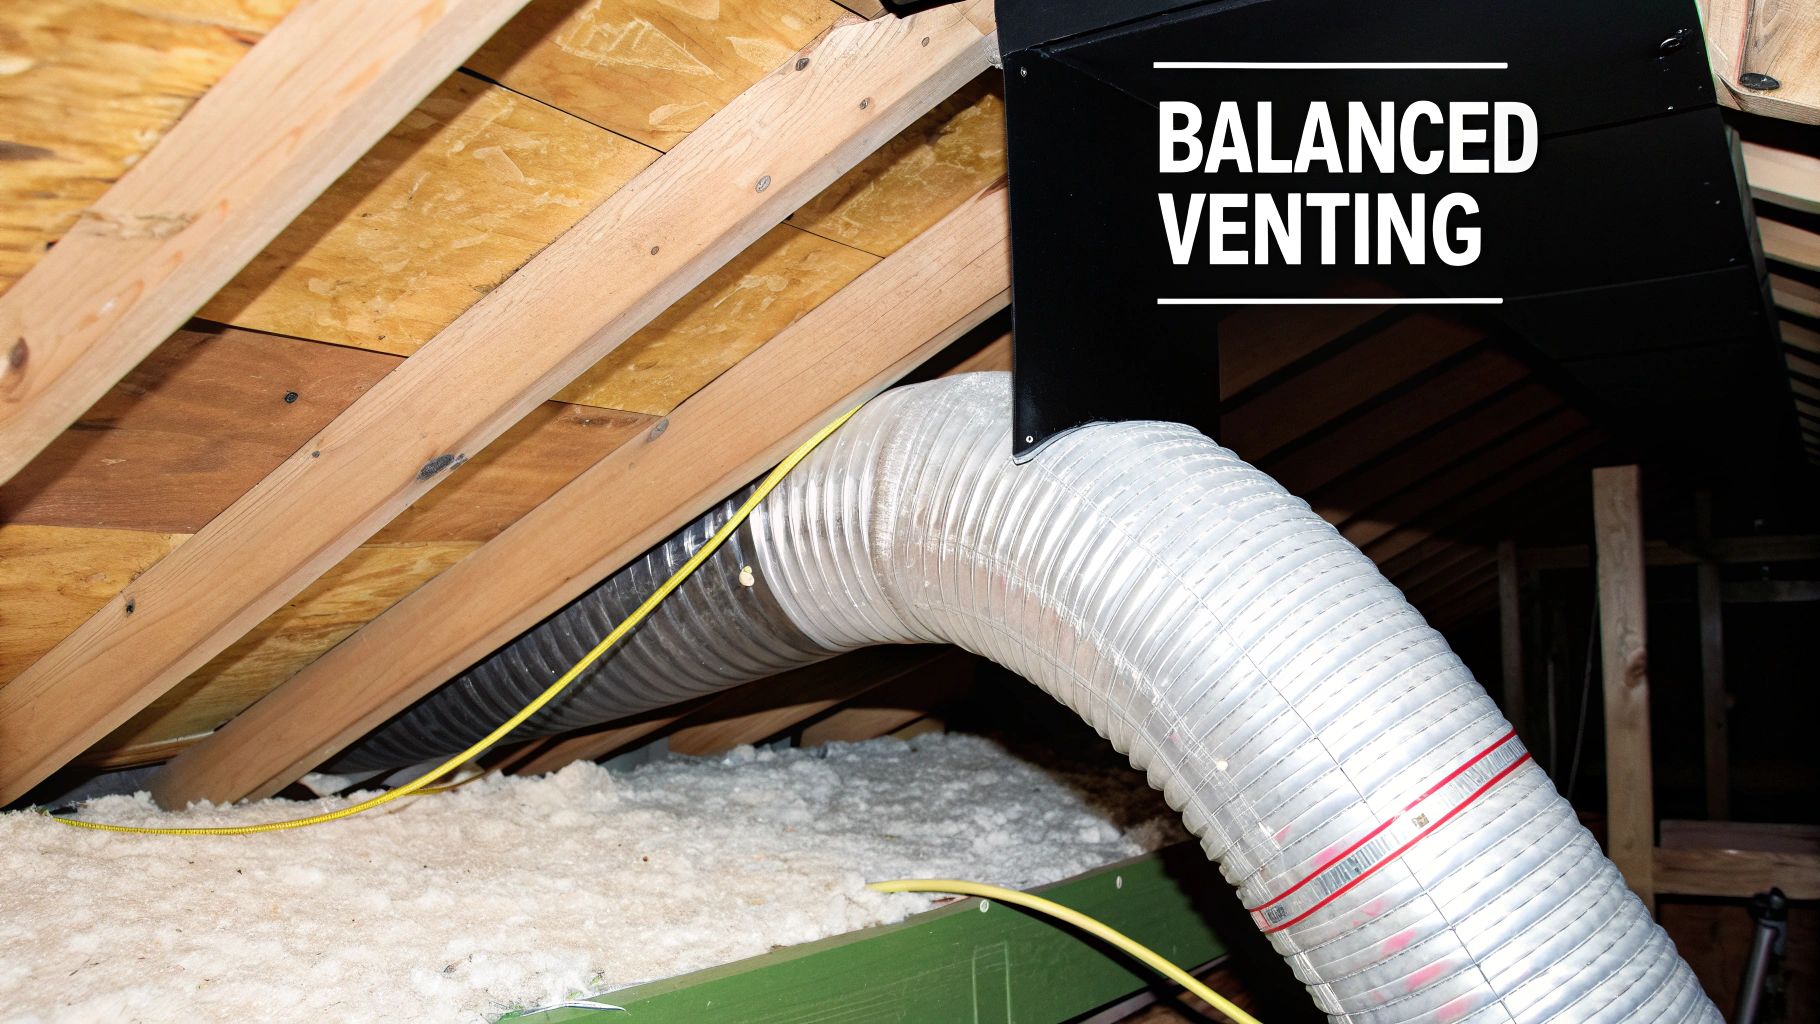
Can I Vent My Dryer Through a Soffit?
Absolutely not. This is a critical mistake we see all too often. Venting a dryer through a soffit is a major safety hazard and defeats the entire purpose of your attic's ventilation system.
Soffits are intake vents. Their job is to pull cool, fresh air into your attic to help it breathe and prevent heat and moisture buildup.
When you push hot, damp, lint-filled air out of a soffit, that same contaminated air is immediately sucked right back into the attic through the adjacent soffit vents. You've essentially just moved the problem, recreating the exact fire and moisture hazards you were trying to avoid in the first place.
Proper maintenance is also a huge piece of the puzzle, and knowing when to call in a professional for a thorough cleaning is essential for keeping your home safe. To learn more, you can check out the benefits of a professional dryer vent cleaning service.
If you're feeling unsure about your home's setup or just want an expert eye to ensure your dryer is vented safely and correctly, Purified Air Duct Cleaning is here to help. Contact us today for a free quote and the peace of mind that comes with a job done right.