How to Clean Air Ducts a DIY Homeowner's Guide
- Aug 23, 2025
- 18 min read
Updated: Aug 25, 2025
Knowing how to clean air ducts is more than just another weekend chore to check off the list; it's a real investment in your home's health and your HVAC system's efficiency. Sure, it takes a bit of hands-on work, but understanding why you're doing it makes all the difference. Clean ducts ultimately mean fewer airborne irritants floating around and a happier, more efficient HVAC system, which can save you real money over time.
Why Cleaning Your Air Ducts Actually Matters

Before you even think about unscrewing a vent cover, let's talk about the real impact of clean air ducts. This job goes way beyond just getting rid of a few visible dust bunnies. Every single time your heating or cooling system kicks on, it's pushing air through your entire home, and along with it, anything that's been hiding out in that ductwork.
When your ducts are dirty, they essentially become a reservoir for all sorts of allergens and contaminants that tank your indoor air quality.
Improve Your Home's Air Quality
The biggest win from clean ductwork? Breathing better air. It's amazing what builds up in there over time, and it can really affect your family's health, especially if anyone has allergies or respiratory issues.
You'd be surprised what we find lurking inside ductwork:
Pet Dander: A classic allergy trigger. It gets sucked into your HVAC system and then blown right back into every room.
Pollen and Dust Mites: These tiny allergens can accumulate in shocking amounts, leading to constant irritation and allergy flare-ups.
Mold Spores: If any moisture gets into your ductwork, you've got the perfect breeding ground for mold, which can then spread throughout your home.
By cleaning out the ducts, you’re removing these troublemakers right at the source instead of letting them get endlessly circulated. If you're constantly dealing with sniffles or a stuffy house, it might be time to learn more about the https://www.purifiedairductcleaning.com/post/how-to-tell-if-your-home-or-business-has-poor-indoor-air-quality.
If you're suddenly seeing more dust on your furniture or you can't seem to shake a persistent musty smell, those are two of the most common real-world signs that your air ducts are overdue for a cleaning.
Boost HVAC Efficiency and Lower Bills
Your HVAC system is built to move a certain amount of air. When your ducts are clogged with dust and debris, it's like trying to breathe through a straw. That resistance forces the system to work much harder just to push the air through. This strain isn't just inefficient; it gets expensive.
A struggling system uses more electricity to hit the temperature you set on the thermostat, which shows up as higher energy bills. On top of that, the constant extra effort can cause premature wear and tear on key parts, like the blower motor. And it's not just about dirt; structural problems can be just as bad, making it important to understand the impact of damaged ductwork on HVAC efficiency.
It's clear more homeowners are catching on. The air duct cleaning service market was valued at USD 3.87 billion in 2023 and is expected to keep growing as people focus more on indoor air quality. This trend shows a clear shift: we're all starting to pay a lot more attention to what's floating around in the air we breathe at home.
Assembling Your Duct Cleaning Toolkit
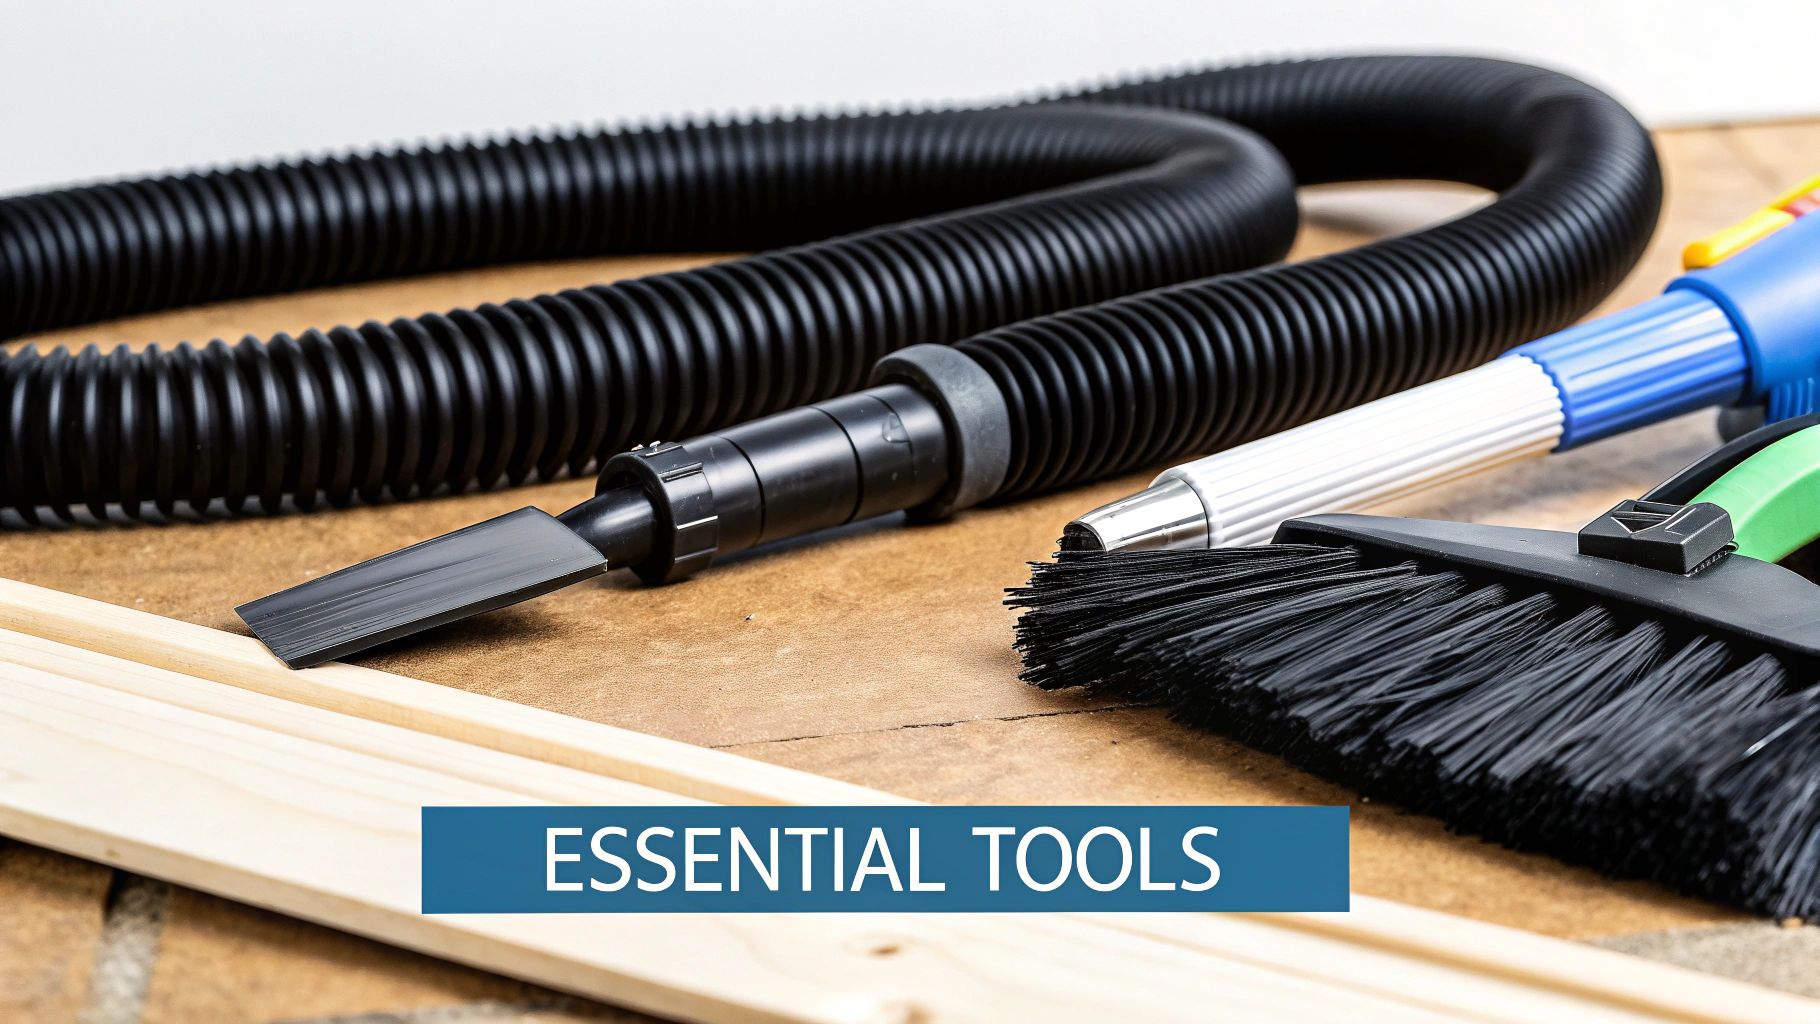
Jumping into any home project without the right gear is a recipe for frustration. When it comes to cleaning your air ducts, this is especially true. Going in unprepared can turn what should be a productive afternoon into a messy, ineffective chore. Getting your tools lined up first means you can work smoothly and safely, without those annoying last-minute runs to the hardware store.
This isn't just about grabbing any old vacuum or screwdriver. You need the right tools for the job. Each piece of equipment has a specific role, designed to break up years of packed-in grime and suck up the microscopic particles that would otherwise get blown right back into your living space.
The Heavy Lifters: Core Cleaning Gear
Let's start with the workhorses of this project: your vacuum and brushes. These tools will be doing the bulk of the cleaning, so skimping here is a bad idea. It's like trying to sweep a dusty workshop with a flimsy little hand broom versus using a powerful shop vac, one just kicks the dust around, while the other actually gets rid of it.
Your vacuum is, without a doubt, the most critical piece of equipment. You need a high-powered, shop-style vacuum, and it absolutely must have a HEPA (High Efficiency Particulate Air) filter. I can't stress this enough. A standard household vacuum filter will just spew the finest, most allergy-triggering particles like dust mites and pollen right back into the air. A true HEPA filter is engineered to capture 99.97% of particles as tiny as 0.3 microns, making sure the gunk you vacuum up stays gone for good.
Next up are the brushes. A stiff-bristled brush with a long, flexible handle is your best friend for reaching deep into the ductwork. It's what you'll use to agitate and break loose all that caked-on dust and debris. You can often find duct cleaning kits that come with several different brush heads and flexible extension rods, which are well worth the investment.
Having the right tools isn't just about efficiency; it's about doing the job correctly. An underpowered vacuum or flimsy brush won't dislodge the compacted debris that contributes most to poor air quality and system blockages.
Essential Toolkit for DIY Duct Cleaning
To make sure you're fully prepared, here's a quick checklist of everything you'll need. Gathering these items beforehand will make the entire process much smoother.
Item | Purpose | Pro Tip |
|---|---|---|
Shop-Style Vacuum | The main tool for suctioning out all the dislodged dust and debris. | A HEPA filter is a must-have to prevent fine particles from re-entering your air. |
Duct Cleaning Brush Kit | To agitate and loosen stubborn, caked-on debris deep within the ducts. | Look for a kit with multiple brush heads and flexible extension rods to fit different duct sizes. |
N95 or KN95 Mask | Protects your lungs from inhaling years of dust, dander, and potential mold spores. | A standard cloth mask won't cut it. Ensure a snug fit for proper protection. |
Safety Goggles | Shields your eyes from falling debris and dust clouds during the cleaning process. | Full-seal goggles offer the best protection against fine airborne particles. |
Durable Work Gloves | Protects your hands from sharp metal edges on vents and ductwork. | Leather or reinforced fabric gloves are ideal for this task. |
Cordless Drill/Screwdrivers | For easily removing and re-installing air vent covers (registers). | Keep both Phillips and flathead bits handy, as screw types can vary. |
Microfiber Cloths | Ideal for cleaning the vent covers and wiping down areas around the vents. | They trap dust much more effectively than paper towels, which just push it around. |
Heavy-Duty Trash Bags | For disposing of the old furnace filter and the collected debris from your vacuum. | Don't use thin kitchen bags; they can easily tear and create another mess. |
Having these items on hand will not only make the job easier but also ensure you're working safely and achieving a truly thorough clean.
Hand Tools And Final Touches
With the major cleaning gear sorted, a few smaller items are essential for finishing the job right.
Screwdrivers or a Cordless Drill: You’ll need these to take off all the supply and return air vent covers, also known as registers. It’s smart to have both Phillips and flat-head bits ready, because you never know what the last person used.
Microfiber Cloths: These are fantastic for wiping down the grimy vent covers and for a final cleanup around the vent openings once you're done. They grab onto dust way better than paper towels ever could.
Heavy-Duty Trash Bags: You'll want these for throwing out the old, clogged furnace filter and for emptying all the gunk from your vacuum canister.
Before you dive in, it’s also a good time to think about your long-term cleaning schedule. For a professional take on how often this project should be on your to-do list, check out our expert guide on how often to get air ducts cleaned.
Don't Forget Your Safety Gear
This is the most important part, so don't gloss over it. When you clean air ducts, you are purposely stirring up years of dust, pet dander, and maybe even mold spores. You absolutely must protect yourself.
Your non-negotiable safety checklist should include:
An N95 or KN95 Mask: This is to stop you from breathing in all the nasty stuff you're kicking up. A simple cloth mask is not going to do the job here.
Protective Goggles: Dust and crud will be flying. The last thing you want is that stuff in your eyes.
Durable Gloves: A solid pair of work gloves will save your hands from sharp metal edges on the ductwork and keep them clean from all the grime.
With this full toolkit ready to go, you're all set to clean your air ducts safely and effectively.
The DIY Air Duct Cleaning Process
Alright, you’ve got your tools laid out and your safety gear on; it’s time to get started. The key to cleaning your own air ducts is to be methodical, not to rush. Think of it less like a sprint and more like a careful, step-by-step project. If you break it down into manageable chunks, you can get a professional-level clean that genuinely improves the air you breathe.
The whole idea is to work systematically, one room at a time. This ensures you're actually capturing all the junk you loosen up, instead of just pushing it further down the line. This guide will walk you through everything, from the initial prep work to the final, and most important, step: changing out that old furnace filter.
Prioritizing Safety First
Before you even think about touching a screwdriver, the absolute first thing you must do is cut all power to your HVAC system. This isn't optional. It's the critical safety measure that prevents the system from kicking on while you're working, which could lead to injury or a massive dust cloud erupting in your face.
Just follow these two simple steps to power down:
Turn off the thermostat: Go to your thermostat and switch it completely to the "Off" position. This tells it not to signal the furnace or AC unit.
Shut off the breaker: Head to your home's main electrical panel. Find the circuit breaker for your HVAC system (it might be labeled "Furnace" or "Air Handler") and flip it to "Off."
Once the power is confirmed to be off, you can get to work.
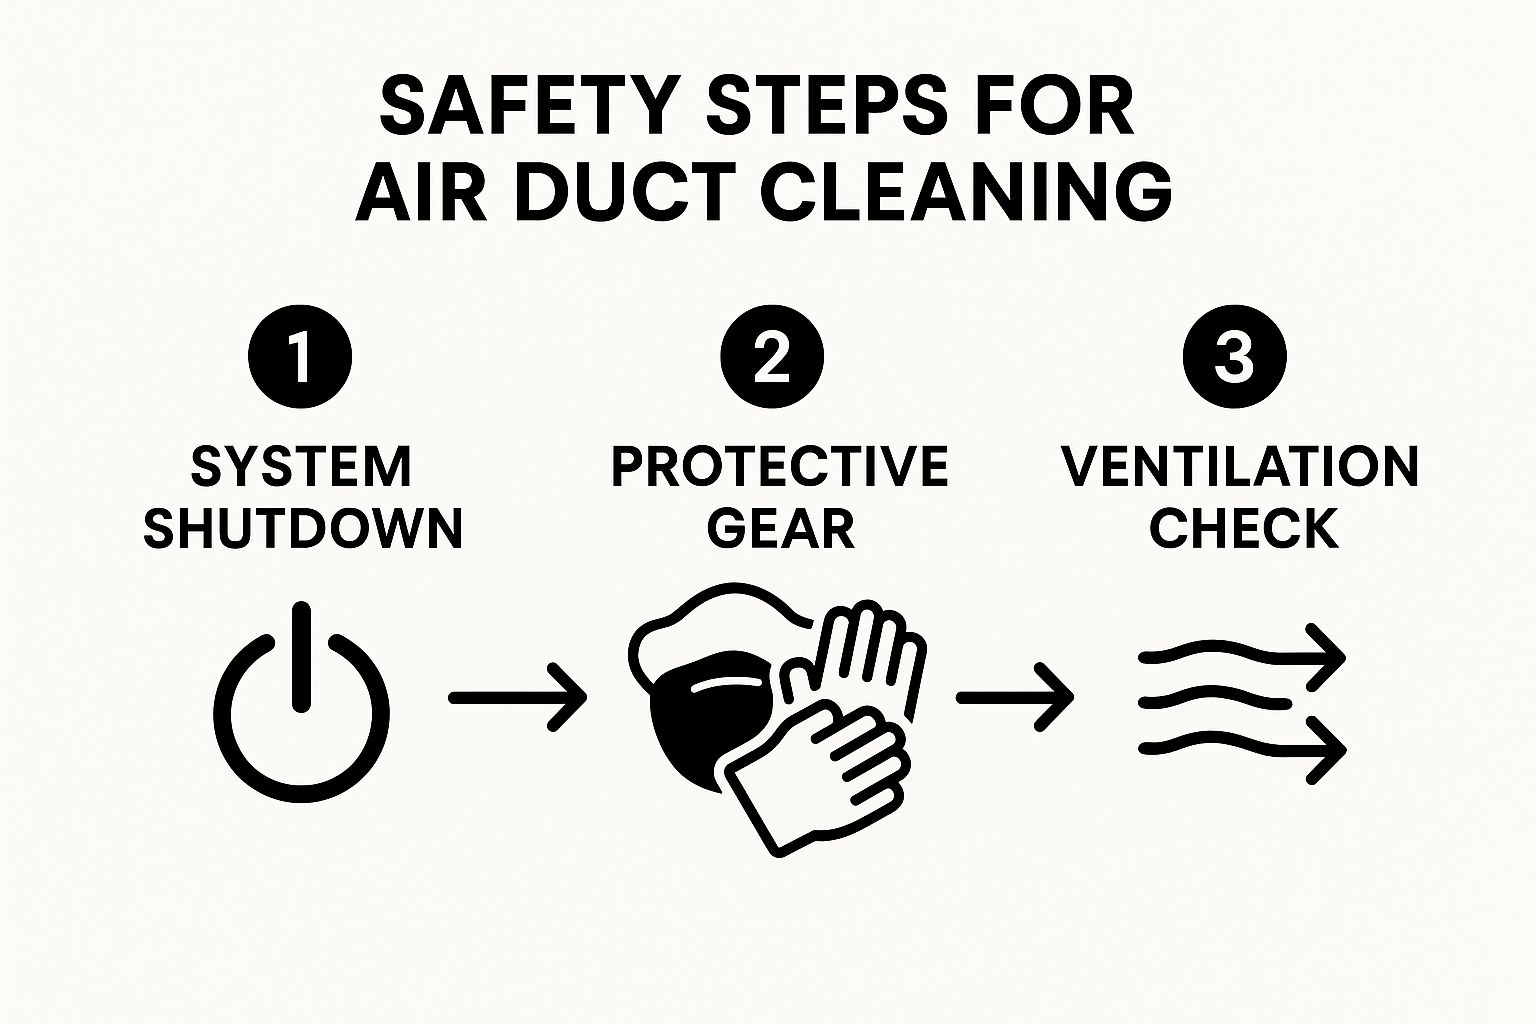
This visual just hammers home the point: a safe job starts with shutting down the system and protecting yourself.
Preparing and Cleaning the Vent Registers
Your first real task is to deal with the vent registers, the grilles that cover the duct openings. You'll probably be surprised at how grimy they are, often coated in a sticky layer of dust, kitchen oils, and who knows what else.
Grab your cordless drill or a screwdriver and carefully remove all the supply and return vent covers in your starting room. As you pull them off, lay an old towel over the open duct. Trust me on this; it'll stop debris, tools, or tiny screws from disappearing into the ductwork, saving you a massive headache.
Take the registers to a sink or bathtub and give them a good wash with warm, soapy water. An old toothbrush works perfectly for getting the gunk out of the individual slats. Once they're clean, set them somewhere to dry completely. Don't even think about putting them back on while they're damp.
Quick tip: Make sure you clean both the supply registers (where the air blows out) and the return registers (the bigger grilles that suck air in). The return side is almost always the dirtiest since it pulls in all the unfiltered air from your rooms.
The Core Cleaning Technique: Loosening and Capturing Debris
Now for the main event: getting all that built-up gunk out of the ducts. The strategy is straightforward; you'll use a brush to agitate and break loose all the dust and debris deep inside, while a powerful vacuum sucks it all up before it has a chance to escape into your home.
Pick a room to start in and cover the other vents in that same room with towels. This is a pro-tip you don't want to skip. Sealing off the other openings forces your vacuum to pull air from deep within the duct system, dramatically increasing its suction power right where you're working.
With the other vents covered, stick the hose of your HEPA-filtered shop vacuum as far into the open duct as it will go. Turn it on and let it run to create a strong, continuous suction.
While the vacuum is pulling air, feed your long, flexible duct cleaning brush into the same opening. Now, get to work. Push, pull, and twist the brush vigorously to scrub the inside walls of the duct. You are literally breaking free years of caked-on dust, pet hair, and other nasty stuff. As you dislodge it, the vacuum will immediately capture it. Work the brush as far as you can, moving it back and forth to clean the entire accessible length of that duct run.
Repeat this process for every single supply vent in your house. It's tedious, but this one-two punch of agitating and capturing is what separates a mediocre job from a truly effective one.
Cleaning the Blower Compartment and Return Ducts
Once you've tackled all the supply lines, it's time to shift your focus to the heart of the system: the furnace's blower compartment and the main return air duct. This area is usually ground zero for dust accumulation.
With the power still off at the breaker, open the access panel to the blower compartment. It's typically near the bottom of your furnace unit, close to where the filter slides in. Use your vacuum to carefully clean out all the dust that has settled in this chamber. Pay close attention to the blower fan itself (it looks like a hamster wheel, often called a "squirrel cage"), as dust buildup here kills efficiency and puts a strain on the motor. For anything your vacuum can't get, a damp microfiber cloth will do the trick.
Next, hit the main return air duct. This is the large duct that pulls air back to the furnace to be conditioned. Since it's handling all the unfiltered air from your home, it's often the filthiest part of the whole system. Use the same brush-and-vacuum combo you used on the other ducts to clean it out as thoroughly as you can.
Finishing the Job with a New Filter
You’ve put in all the hard work to get your ducts clean. The very last thing you want to do is immediately blow dust back through the system. This is why the final step is absolutely critical.
Toss out your old, clogged filter. It’s full of the exact contaminants you just spent hours removing.
Sliding a brand-new, high-quality filter into place is the final touch. It’s the gatekeeper for your newly cleaned system, trapping particles before they can get in and start the whole dirty cycle over again. Plus, a clean filter promotes better airflow, which helps your HVAC system run more efficiently and can even trim down your energy bills. Skipping this step would be like washing your car and then immediately driving it down a dirt road.
Once the new filter is in, reinstall your clean and dry vent covers, head back to the breaker box to restore power, and enjoy breathing some much fresher air.
When a DIY Approach Isn't Enough
There's a real sense of accomplishment in a DIY job done right, but knowing your limits is even more important, especially when your family's air quality is on the line. Learning how to clean air ducts yourself is a great skill to have, but some situations call for expertise and equipment that go way beyond a shop vacuum and a good brush.
In fact, trying to tackle certain complex issues on your own can accidentally make a bad situation much worse. Recognizing the red flags is the key. Sometimes, the smartest move you can make is putting down the tools and picking up the phone.
Suspected Mold Growth
This is the big one. If you see visible mold around your vents or notice a persistent musty smell whenever the HVAC kicks on, stop what you’re doing and call a professional. Do not attempt to clean it yourself.
Mold spores are microscopic and go airborne with the slightest disturbance. An amateur cleaning attempt can easily launch those spores from one contained spot throughout your entire home, turning a small problem into a massive contamination issue. Professionals use specialized gear like negative air pressure machines and HEPA filtration to completely contain the work area, ensuring spores are captured, not circulated.
If you're worried this might be happening in your home, it's worth reading up on the signs of mold in air ducts and how to remove it.
Evidence of Pest Infestations
Finding out that rodents or insects have turned your ductwork into their personal highway is another clear sign to call for backup. Droppings, nesting materials, and deceased pests aren't just gross; they're genuine biohazards that can carry bacteria and diseases.
Simply vacuuming up the mess isn't enough to make the area safe. A professional service will do more than just remove the debris; they'll thoroughly clean and sanitize the ductwork to eliminate any lingering pathogens. They can also help you pinpoint how the pests got in, so you can seal up entry points and prevent a repeat performance.
When dealing with mold or pests, the risk of cross-contamination is incredibly high. A professional service isn't just paying for cleaning; you're paying for containment, sanitation, and peace of mind.
After Major Home Renovations
Just finished a big remodel? All that fine dust from drywall, wood, and insulation is notoriously difficult to get rid of. This heavy, pervasive debris can easily overwhelm a standard consumer-grade vacuum and settle deep within your HVAC system.
This kind of buildup can clog a brand-new filter in just a few days and put serious strain on your system's blower motor. Professionals bring in truck-mounted vacuum systems with incredible suction power, capable of pulling out dense construction debris that a shop vac would leave behind.
To help you weigh your options, here’s a quick guide on when you can likely handle the job yourself versus when it’s time to bring in the pros.
DIY vs Professional Duct Cleaning Scenarios
Situation | DIY Approach (Suitable for...) | Professional Service (Required for...) |
|---|---|---|
Routine Maintenance | Removing light dust from registers and easily accessible duct openings. | Deep, whole-system cleaning for years of accumulated buildup. |
Allergy Concerns | Light seasonal pollen and dust removal for mild allergy sufferers. | Thorough removal of deep-seated allergens like pet dander and dust mites. |
Visible Contaminants | A small amount of visible dust or cobwebs near a vent. | Any sign of mold, mildew, or visible pest droppings/nests. |
Post-Renovation | Minor DIY project dust (e.g., painting one room). | Heavy dust and debris from major construction or remodeling. |
Unusual Odors | Mild, dusty smell that disappears after changing the filter. | Persistent musty, rotten, or unidentifiable odors from the vents. |
Ultimately, while a DIY cleaning can be a great for light upkeep, professionals are equipped for the jobs that pose a real risk to your home's air quality and your family's health.
The demand for these specialized services is growing for a reason. The global air duct cleaning market was valued at around USD 8.5 billion in 2023 and is expected to keep climbing as more people become aware of indoor air quality's impact on health.
When a pro is the right call, it's helpful to know what goes into the price. Getting a sense of understanding professional cleaning service costs for other home maintenance tasks can provide some perspective on how job complexity and equipment affect the final quote.
Keeping Your Air Ducts Clean Longer
You've put in the work to get your ducts clean, and the last thing you want is for them to get clogged up again right away. The good news? Keeping them clean is way easier than the initial deep clean. A few simple habits can make a huge difference, stretching the time between professional cleanings and keeping your home's air quality high all year round.
Honestly, the single most important thing you can do is pay attention to your furnace filter. Think of it as the bouncer for your entire HVAC system. Every spec of dust, dander, and pollen it traps is one less thing that settles inside your freshly cleaned ducts.
Master Your Furnace Filter Schedule
Letting your furnace filter get totally clogged is the fastest way to reverse all your hard work. Once a filter is full, it can't trap anything new. Worse yet, the air struggling to push through can actually knock loose big clumps of dust and shove them right back into your system.
A consistent replacement schedule is your best defense against this. Here’s a simple breakdown:
Basic Fiberglass Filters: These are the cheap ones. They need to be replaced every 30 days, no exceptions. They catch the big stuff but not much else.
Pleated Filters: A much better option for most homes. Plan on swapping these out at least every 90 days.
High-Efficiency (Higher MERV) Filters: These can last up to six months, but I always tell people to check them every three months. If you have pets or anyone with allergies, you'll definitely want to check more often.
Forgetting to change your filter is like letting a bouncer at a club fall asleep; soon, all sorts of undesirable elements start sneaking past the gate. A clean filter is the most crucial component for maintaining a clean HVAC system.
Upgrade Your First Line of Defense
Not all filters are created equal. If you're serious about keeping your ducts clean and improving your air quality, think about upgrading to a filter with a higher MERV (Minimum Efficiency Reporting Value) rating. That basic filter you grab at the hardware store might be a MERV 1-4, which really only stops large particles like lint and dust bunnies.
Moving up to a filter in the MERV 8-13 range makes a massive difference. These are designed to capture much smaller irritants: things like pet dander, mold spores, and even some bacteria. It’s a proactive step that really helps anyone with respiratory issues and is one of the best ways to cut down on allergens floating around your home. For a deeper dive, check out our guide on how air duct cleaning for allergies can improve your home's air quality.
Simple Habits for a Cleaner Home System
Beyond the filter, a couple of other routine tasks can go a long way in keeping your ductwork clean.
Maintain Consistent Home Dusting: The dust you see on your furniture and floors doesn't just stay there. It eventually becomes airborne and gets sucked right into your return vents. Regular dusting and vacuuming, especially with a HEPA-filtered vacuum, lowers the total amount of gunk your HVAC system has to deal with.
Keep Air Registers Unblocked: Take a quick look around. Is a couch, rug, or a pile of curtains blocking any of your vents? Blocked registers throw off the airflow in your whole system. This can create pressure buildups that cause dust to settle in the ducts instead of making it to the filter.
These small, proactive steps are part of a bigger picture. Homeowners are increasingly focused on clean air solutions, so much so that the global air duct market is expected to reach USD 7.6 billion by 2035. It shows a real shift toward creating healthier, more efficient homes. You can read more about the expanding air duct market from Future Market Insights.
Working these simple habits into your routine will protect the effort you put into cleaning your ducts. For a wider view on keeping your entire home clean, there's a great post on understanding cleaning frequency that offers some solid perspective.
Common Air Duct Cleaning Questions
Even after you've got the rundown on cleaning your air ducts, it's totally normal to have a few more questions pop up. We're talking about a major system in your home, so you want to be sure about your decisions. Let's tackle some of the most common things homeowners ask us, so you can feel confident you're making the right call.
Think of this as the final piece of the puzzle, clearing up those last few details about timing, benefits, and what to watch out for.
How Often Should I Clean My Air Ducts?
This is the big one, and the honest answer is: it depends. For an average home without any major issues, a professional cleaning every three to five years is a solid rule of thumb. That's a good maintenance schedule to keep things running smoothly.
But that's just a baseline. Life happens, and some situations mean you'll want to get them cleaned more often, maybe every two or three years. You should definitely consider a more frequent schedule if:
You've got furry family members. Pets, especially heavy shedders, are a primary source of the dander and hair that builds up inside your ductwork.
Someone in the house has allergies or asthma. For anyone with respiratory sensitivities, cleaner ducts can mean fewer airborne triggers and a whole lot more comfort.
You just finished a big renovation. That fine construction dust gets everywhere, and your HVAC system is no exception. It's a good idea to clear it all out post-project.
There are smokers in the home. Smoke residue creates a sticky film inside ducts that acts like a magnet for dust and other particles.
A quick look at your vents can tell you a lot. If you clean a supply register and it looks dusty again in just a few weeks, that's a pretty clear sign the ducts themselves are loaded.
Can Cleaning Air Ducts Improve My Health?
Absolutely. For a lot of people, the health benefits are the main reason they call us. Your ductwork can easily become a hidden reservoir for all the things you don't want to be breathing in: dust, pollen, pet dander, and other irritants. When your system kicks on, it's not just pushing air around; it's circulating everything that's settled in there.
By physically removing all that buildup, you're creating a healthier indoor environment. This can be a game-changer for anyone with sensitivities. If you want to dive deeper, our [air duct cleaning and sanitizing guide for homeowners](https://www.purifiedairductcleaning.com/post/air-duct-cleaning-sanitizing-guide-for-homeowners) breaks down exactly how this process contributes to a healthier home.
A clean HVAC system doesn't just circulate air; it circulates cleaner air. Removing years of dust, dander, and pollen from the source can make a noticeable difference in how you feel at home.
What Are the Signs I Need to Clean My Air Ducts?
Your house has ways of telling you it's time for a cleaning. You just have to know what to look for. One of the most blatant signs is seeing little puffs of dust shoot out of your vents when the heat or AC first turns on. You can't miss it.
Another huge red flag is a persistent musty or stale odor that you can't seem to track down, but it gets stronger near the vents. If you're also finding that you have to dust your furniture way more often than you used to, that’s another strong hint the source is your ductwork. And of course, if anyone's allergies are suddenly acting up for no apparent reason, it’s worth taking a look at your vents.
Will Cleaning My Ducts Lower My Energy Bills?
It certainly can. Picture your ductwork as the lungs of your home. When they're clogged with debris, your HVAC unit has to work much, much harder to push the air through. It’s like trying to breathe through a straw.
That extra strain isn't free; it shows up directly on your energy bill. When you clear out all that resistance, air can flow freely and your system can operate the way it was designed to. Not only does this increased efficiency help trim down your monthly bills, but it also reduces wear and tear, potentially extending the life of your entire HVAC system.
For professional air duct cleaning services that restore your system's efficiency and improve your home's air quality, trust the certified experts at Purified Air Duct Cleaning. We offer comprehensive solutions to ensure you and your family breathe cleaner, healthier air. Contact us today for a free quote at https://www.purifiedairductcleaning.com.