The Best way to Clean Dryer Duct A Practical DIY Guide
- Jan 6
- 12 min read
So, what's the best way to clean a dryer duct? It's a two-part answer: you need to be regularly cleaning the lint trap after every single load and also performing a deep clean of the entire duct system at least once a year. This combination is the only way to ensure you're removing both the fluff you can see and the dangerous, hidden lint that creates a serious fire risk.
Why You Absolutely Cannot Ignore Your Dryer Duct
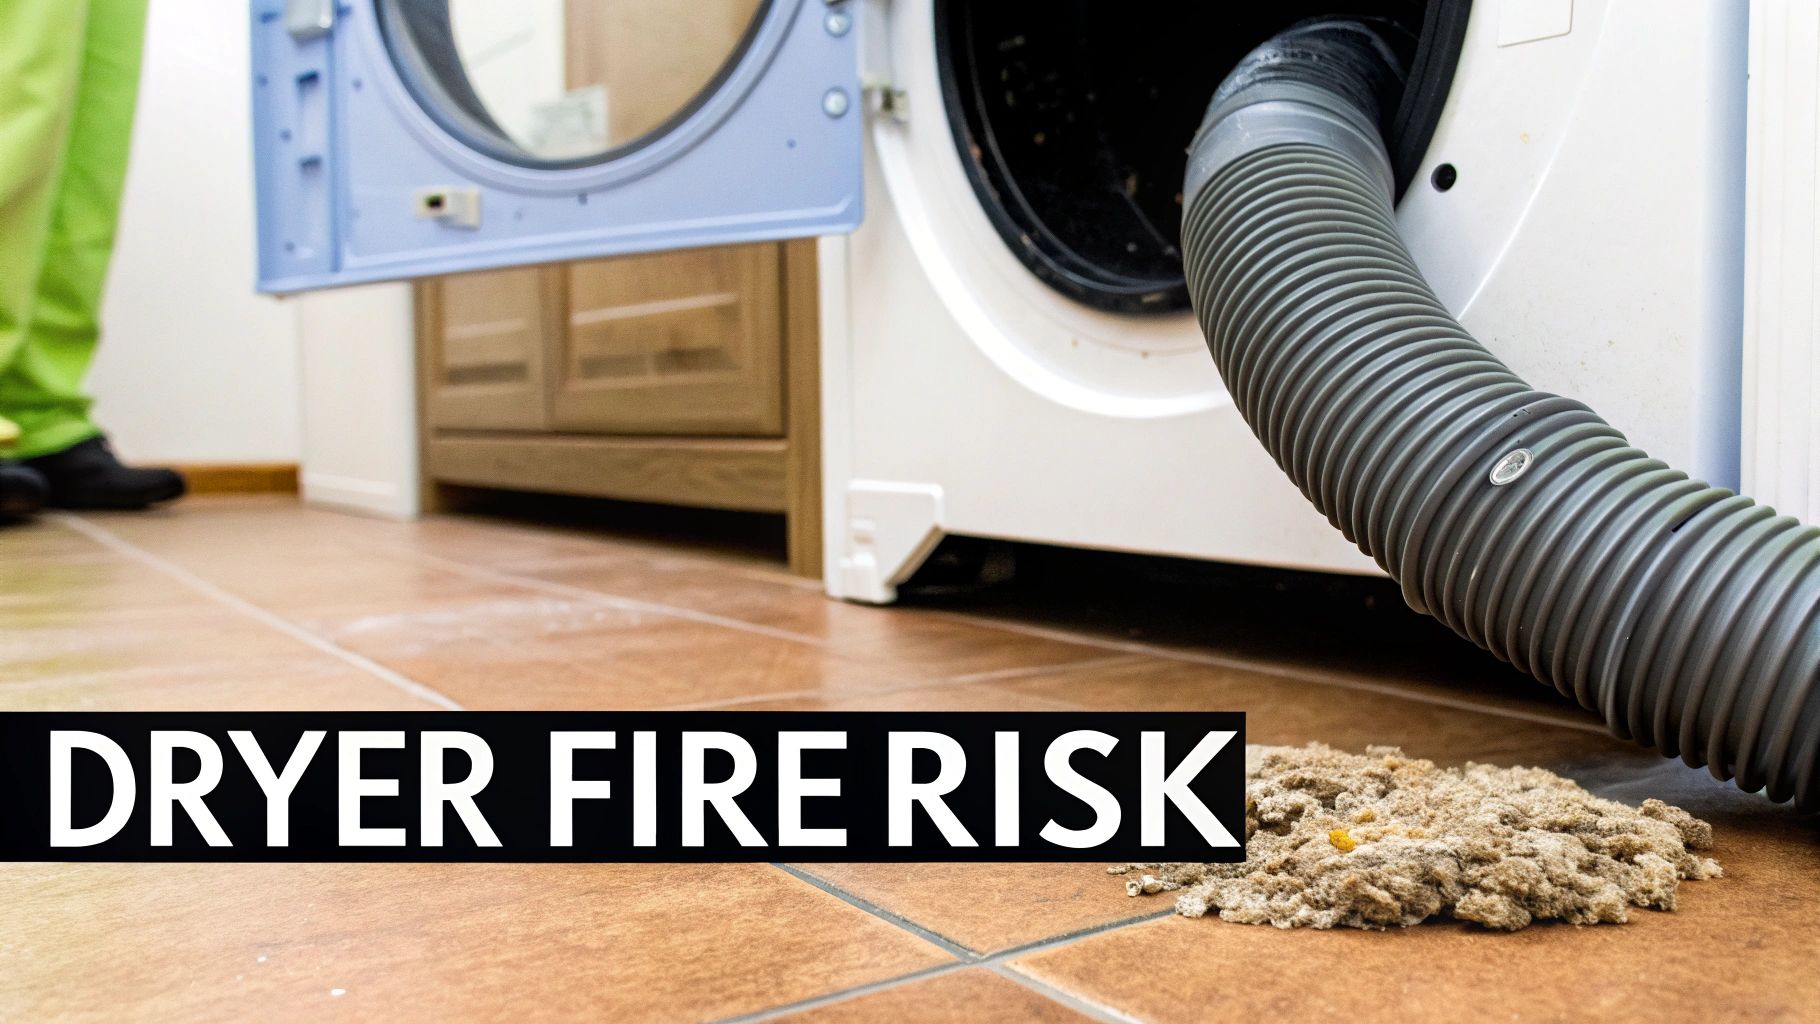
That trusty laundry machine you rely on every week is hiding a major fire hazard. It's a common, and dangerous, mistake to think that just clearing out that little lint screen is enough. It's not.
The Hidden Dangers of Lint Buildup
With every load of laundry, a surprising amount of highly flammable lint gets past the trap. This stuff travels deep into your dryer's ductwork, where it builds up over time and creates a dense, hidden blockage that chokes off airflow and traps heat. We're not just talking about a little dust here; this is a genuine safety threat that too many homeowners overlook.
The statistics are pretty sobering. Did you know clogged dryer vents are behind a shocking 34% of all dryer fires in homes across the U.S.? Data shows that roughly 2,900 home clothes dryer fires are reported each year, leading to deaths, injuries, and more than $35 million in property damage.
A clogged dryer duct doesn't just make your machine less efficient; it creates the perfect storm for a fire. That mix of intense heat and super-flammable lint is a recipe for disaster, a disaster that is completely preventable.
More Than Just a Fire Hazard
Beyond the very real risk of a fire, a neglected dryer duct forces your appliance to work much harder and longer just to get your clothes dry. This snowballs into several other problems you'll definitely notice:
Higher Energy Bills: Your dryer has to burn more electricity or gas to fight against the poor airflow, which means you're paying more on your utility bills.
Shorter Appliance Lifespan: All that extra strain on the motor and heating element can cause premature breakdowns and lead to some expensive repair calls.
Worse Indoor Air Quality: In some cases, a blocked vent can actually push moist, lint-filled air back into your home. You can learn more about keeping your home's air healthy by looking into expert air quality tests for a safer home.
Think of this guide as your complete playbook for a safer, more efficient laundry room. Getting a handle on the main causes of dryer fires and prevention tips is the most important first step you can take to protect your home.
Spotting the Telltale Signs of a Clogged Duct
Your dryer is usually pretty good at letting you know when it’s struggling, you just have to know what to look for. Before you even think about grabbing any tools, the first step is always diagnosis. Let's walk through the warning signs that trouble is brewing inside your vent system.
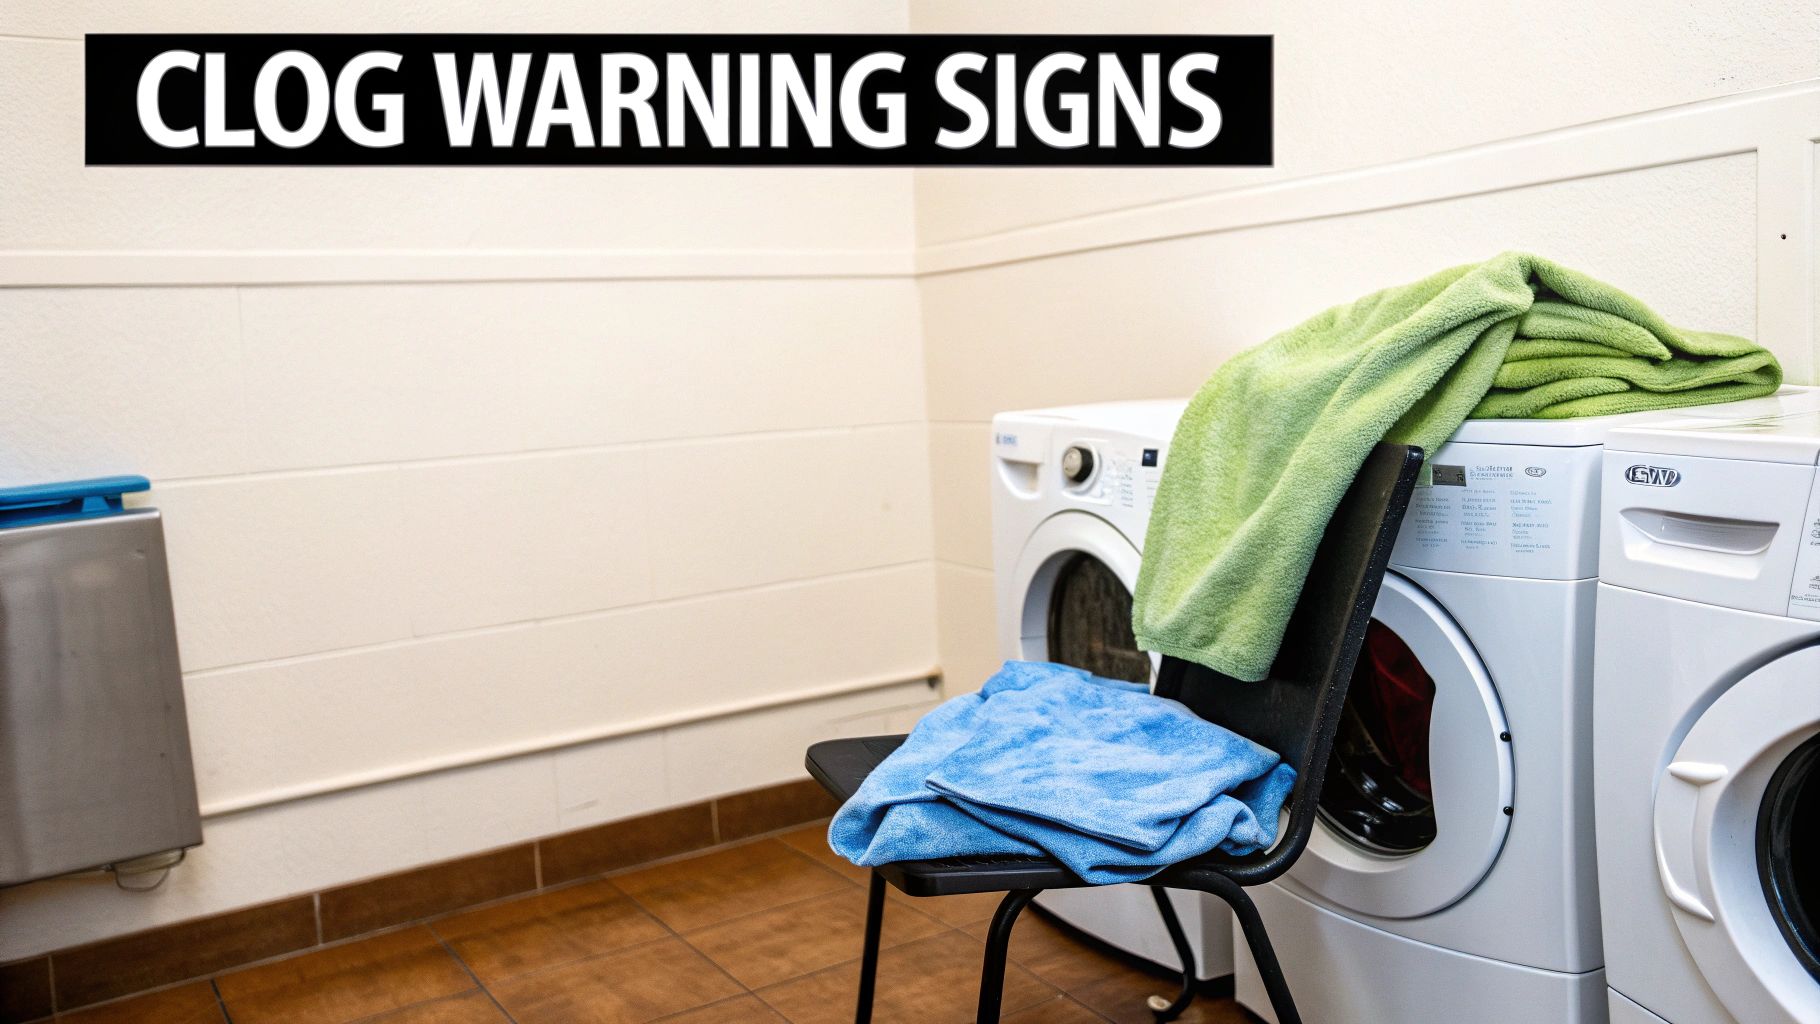
The most common red flag we hear about? Clothes that are still damp after a full cycle. This forces you to run the dryer again and again, wasting time and electricity. It’s a classic symptom that the hot, moist air has nowhere to go, so it just stays trapped in the drum with your laundry.
This trapped moisture and heat leads right to another sign: an appliance that feels unusually hot to the touch. The top and sides of your dryer shouldn't be scorching. If they are, it’s a clear signal of poor ventilation and a potential overheating hazard.
Unusual Smells and Visible Lint
Have you noticed a strange, musty odor in your laundry room that you just can't place? When all that humid air can't escape, it creates the perfect damp environment inside your ductwork for mildew to take hold. That’s likely the smell you’re noticing.
An even more alarming signal is a burning smell. This is serious. It means the lint trapped inside the duct is getting hot enough to scorch, putting you on the verge of a potential fire. In fact, dryer fires account for a shocking 92% of residential appliance blazes.
Another dead giveaway is seeing lint buildup around the exterior vent flap. Take a quick walk outside and find where your dryer vents. If you see lint, dust, or other debris clinging to the opening, the blockage inside is so significant that it's physically pushing lint out.
Expert Tip: If you're consistently running your dryer for more than one cycle to get a single load dry, don't just assume your machine is getting old. It’s almost certainly a sign of a clogged duct that's wasting energy and creating a serious safety risk.
To help you put it all together, here's a quick checklist of the most common symptoms.
Dryer Duct Clog Symptom Checklist
Symptom | What It Means | Urgency Level |
|---|---|---|
Damp Clothes After a Full Cycle | Airflow is restricted, trapping moisture in the drum. | Medium - Inefficient and costly. |
Dryer is Hot to the Touch | The machine is overheating due to poor ventilation. | High - Risk of component damage. |
Musty or Mildew Smell | Trapped moisture is allowing mold to grow in the duct. | Medium - An air quality and clog issue. |
Burning Smell | Lint inside the duct is scorching hot. | CRITICAL - Immediate fire hazard. Stop use now. |
Lint Around the Exterior Vent | The blockage is so severe it's forcing lint outside. | High - Indicates a major clog. |
If you notice even one of these signs, it's time to take action. Recognizing these symptoms early is the key to preventing a small problem from turning into a dangerous and expensive one.
For a deeper dive, you might be interested in our guide on the top seven dryer vent clogged symptoms to watch for in 2025.
Gathering the Right Tools for the Job
Nothing tanks a home maintenance project faster than getting halfway through and realizing you don't have the right gear. Before you even think about pulling your dryer away from the wall, let’s get your toolkit sorted out. Having the right equipment isn't just about convenience; it’s the key to cleaning your dryer duct safely and actually getting the job done right.
The star of the show is a dryer vent cleaning kit. You can find these at any hardware store, and they’re worth every penny. Inside, you’ll find a specialized brush head designed to break up stubborn, caked-on lint and a set of flexible rods that connect together to snake deep into your ductwork. It's basically a chimney sweep’s setup, but for your laundry room.
Next up, you'll need a powerful vacuum with a good hose attachment. Your regular household vacuum can work in a pinch, but a shop vac is the real MVP here. It has the muscle to suck up the shocking amount of lint you're about to unleash. This isn't just for cleaning up the mess afterward; you'll use it to actively pull debris out as the brush loosens it.
Essential Gear and Pro Tips
A couple of other common household tools will round out your arsenal. You'll definitely need a screwdriver or a nut driver to get the clamps off the duct hose at both the dryer and the wall connection. I also highly recommend grabbing a roll of painter’s tape and a simple dust mask.
Here’s a quick rundown of your shopping list:
Dryer Vent Cleaning Kit: This is non-negotiable. It has the brush and flexible rods you need.
Powerful Vacuum: A shop vac is your best friend for this job.
Screwdriver/Nut Driver: For loosening the duct hose clamps.
Painter's Tape: A secret weapon for preventing a common DIY disaster.
Dust Mask: Trust me, you don’t want to be breathing in years of lint dust.
Pro Tip: One of the most common mistakes I see DIYers make is having the brush rods unscrew from each other while they're deep inside the vent. Fishing them out is a nightmare. To completely avoid this, just wrap a small piece of painter's tape around each connection point as you screw the rods together. This simple trick can save you a world of frustration.
Getting all your tools lined up first turns this chore from a potential headache into a straightforward weekend win. A little prep work means no last-minute trips to the hardware store and a much smoother project from start to finish.
A Practical Walkthrough for Cleaning Your Dryer Duct
Alright, let's get our hands dirty. This is a job anyone can tackle, but doing things in the right order is key for safety and for actually getting the vent clean. I’m going to skip the jargon and walk you through it just like I would if I were there in your laundry room.
First thing’s first: safety is the absolute priority. Before you even think about touching a tool, that dryer needs to be completely disconnected from its power source. If it's electric, just yank the plug from the wall. For a gas dryer, unplug it and then shut off the gas supply line; you'll know the valve is off when the handle is perpendicular to the pipe.
With the dryer powered down, gently slide it away from the wall. You want enough room to work comfortably back there without scraping up your floor or kinking the duct.
Beginning the Cleaning Process
Your first stop is the lint trap housing, that little slot where the screen lives. Pop the screen out and set it aside. Grab your vacuum, put a narrow attachment on it, and suck out all the loose fuzz you can see and reach inside that cavity. You'd be surprised how much gunk builds up in there.
Next up, it’s time to disconnect the ductwork itself. You’ll find a clamp holding the duct to the back of the dryer and another where it meets the pipe in the wall. A simple screwdriver or nut driver will loosen them right up. Once they’re loose, you can gently pull the duct free from both ends.
Remember, the goal is always to pull lint out, not accidentally push it deeper into the system. Working methodically from both ends of the duct ensures you are removing the blockage instead of just relocating it.
This process highlights the main tools you'll be using for a good, deep clean.

This visual gives you the basic sequence: the vacuum grabs the debris, the brush kit breaks it loose, and you might use tape to make sure your tools stay connected.
Tackling the Duct and Exterior Vent
Now for the main event: cleaning the duct run inside the wall. Start by assembling one or two sections of your dryer vent cleaning kit's flexible rods and screw on the brush head. Carefully feed the brush into the duct opening in the wall.
As you slowly push the brush forward, give it a gentle rotating motion. Pro tip: have a helper hold a vacuum hose right at the duct opening to catch all the lint as you knock it loose. Keep adding rod sections one by one until you can feel the brush hit the exterior vent cover.
A common mistake people make is scrubbing back and forth aggressively. This can cause the rod sections to unscrew and get stuck deep inside the vent, a real headache. The trick is to slowly work the brush all the way through, then gently pull it back out while still rotating it in the same direction.
Head outside and find where your vent exits. Take off the cover if you can and clear out any lint the brush pushed out. Most importantly, check that the little flap or louvers can open and close freely. If your vent goes out through the roof, that’s a different ballgame with serious safety considerations. For a detailed rundown, check our guide on how to clean a rooftop dryer vent safely.
Reassembly and Final Checks
Before you put it all back together, give that flexible duct section (the one connecting the dryer to the wall) a quick cleaning with the brush and vacuum, too.
Now, carefully reattach the duct to the dryer outlet and the wall pipe. Make sure those clamps are good and snug. You want a tight, leak-free seal so you’re not blowing hot, moist air and lint all over your laundry room.
Finally, you can slide the dryer back into position. Plug it back in and, if it’s a gas model, turn the gas line back on. To finish up, run the dryer on a no-heat or air-fluff cycle for about 15 minutes. This little step blows out any leftover dust and lets you go outside to confirm you've got strong, steady airflow coming out of the vent.
When a DIY Approach Isn't Enough
While tackling a dryer duct cleaning yourself is a fantastic maintenance step, it’s just as important to recognize its limitations. Sometimes, a project is bigger than it looks, and knowing when to call for backup is the smartest move you can make for your home's safety and your peace of mind.
A standard cleaning kit you'd pick up from the hardware store is great for straight, simple duct runs. But let's be realistic, not all homes are built that way. If your vent path is exceptionally long, weaves through multiple floors, or has several sharp bends and elbows, a DIY brush simply might not have the reach or flexibility to get the job done right. These complex routes are notorious for creating hidden pockets where lint can accumulate, completely untouched by basic tools.
Red Flags That Signal It's Time for a Pro
Let's say you've done a thorough DIY cleaning, but you're still seeing the same old warning signs. If your dryer still takes multiple cycles to dry a load of towels or if that concerning burning smell lingers, it's a clear signal that the core blockage hasn't been fully removed. This persistence means the problem is likely deeper than your tools can reach.
Another serious scenario is a suspected pest infestation. Birds, rodents, and insects sometimes see an exterior vent as a perfect, sheltered spot to build a nest. Trying to clear this out yourself can be messy and even hazardous. Worse, you may not remove all the nesting material, which is often highly flammable.
A professional technician once told me, "We pulled a five-foot-long bird's nest out of a duct. The homeowner had been trying to clean it for weeks, but their brush just kept getting stuck. They had no idea what was really blocking the airflow."
This is the point where the best way to clean a dryer duct is to step aside and let a certified technician take over.
The Professional Advantage in Equipment and Expertise
The key difference really comes down to the equipment. Professional services aren't using the same kits you buy off the shelf. They bring in specialized tools, including high-powered vacuums and powerful rotary brushes, to thoroughly extract lint, debris, and even stubborn blockages like nests from the entire system. This advanced equipment ensures a much deeper and more complete clean than is possible with DIY methods.
A technician can also perform a diagnostic inspection, often using cameras to see inside the ductwork to pinpoint the exact location and nature of the clog. This level of analysis is impossible for a homeowner and guarantees the problem is fully resolved. For tasks beyond a homeowner's capabilities or comfort, a range of professional home services exist to help.
Ultimately, hiring a professional isn't an admission of defeat; it's a smart, strategic decision to protect your investment and ensure your family's safety. When you encounter a complex or persistent issue, making the call is the most responsible choice. If you need guidance on this, our article about finding the right pro to clean air ducts is a great place to start.
Frequently Asked Questions About Dryer Duct Maintenance
Even after you've tackled a cleaning, a few questions usually pop up about keeping your dryer duct in good shape. We get these all the time, so we've put together some straight-to-the-point answers to help you keep your laundry setup safe and efficient for the long haul.
How Often Should I Clean My Dryer Duct
For a typical family, a deep clean of the entire dryer duct once a year is the sweet spot. That's usually enough to keep dangerous lint from building up and helps your appliance run the way it's supposed to.
But that's just a baseline. If you've got a big family doing tons of laundry, or pets shedding fur that ends up in the dryer, you should probably bump that up to every six months. The more laundry you do, the faster that duct clogs up. You can find a more detailed guide on how often to clean your dryer vent for safety and efficiency.
Can I Just Use a Leaf Blower to Clean the Vent
We hear this one a lot, and the short answer is: please don't. Using a leaf blower is a shortcut that often backfires. While it might seem like a powerful way to blast out lint, that force can actually compact the lint into a dense plug that’s even harder to remove later.
Worse yet, that powerful blast can easily damage or even disconnect the fragile ductwork hidden inside your walls, creating a much bigger, more expensive problem. A proper cleaning kit with a brush is designed to gently dislodge and pull the lint out, which is a far safer and more effective method.
Are Plastic Flexible Ducts Safe to Use
Absolutely not. We can't stress this enough. Those flexible, white plastic or vinyl ducts are a major fire hazard and don't meet modern building codes for dryers. Lint loves to stick to their ribbed, accordion-style surfaces, causing blockages to form incredibly fast.
The real danger is the material itself; it's flammable. If a dryer fire starts, a plastic duct acts like a fuse, helping the fire spread. Always, always use rigid or semi-rigid metal ducting. Its smooth interior doesn't catch lint as easily, and most importantly, it's fire-resistant. It's the only safe choice for your home.
Is Cleaning the Lint Trap After Every Load Enough
Cleaning out the lint trap every time you run the dryer is a fantastic and necessary habit, but it's only the first step. Think of that little screen as a bouncer catching the big, obvious pieces of lint. It can't stop everything.
Tiny particles, dust, and fine fibers sneak past that trap with every single load. Over time, all that gunk settles and builds up deep inside the duct that runs to the outside of your house. This hidden accumulation is what creates the dangerous clogs and fire risk, and it’s exactly why the entire duct needs its own thorough cleaning on a regular schedule.
At Purified Air Duct Cleaning, we believe a safe home starts with clean air and properly maintained systems. If you're wrestling with a tough clog or just want the peace of mind that comes from a professional deep clean, our certified technicians are ready to help. Contact us today for a free quote, and let's get your dryer running safely and efficiently again. https://www.purifiedairductcleaning.com