

Venting Clothes Dryers Safely and Efficiently
A national fire analysis estimated an average of 15,970 home structure fires involving clothes dryers or washing machines each year from 2010 to 2014, and identified failure to clean as the leading cause. Clothes dryers accounted for most of those incidents, which is why venting clothes dryers safely requires more than emptying the lint screen. The exhaust path behind the appliance, inside the wall, and at the exterior termination deserves the same attention as the machine itself. (National Fire Protection Association fire data)
A dryer that takes longer to finish, leaves clothes unusually hot, or barely pushes air through the outside hood is giving you useful information. Those symptoms can come from lint, but they can also point to a crushed transition hose, excessive bends, a poor duct design, or a dryer that isn't matched to the installation. The practical objective is simple: keep the correct appliance on a properly designed exhaust or moisture-management system, then verify that it performs as intended.
The Hidden Fire Risks of Restricted Airflow
About 32% of dryer and washing-machine fire incidents were attributed to failure to clean, according to the national analysis cited in the NFPA analysis of home fires involving clothes dryers and washing machines. The dryer vent fire statistics post breaks down why a lint-screen habit alone cannot establish a safe exhaust system.
A lint screen is a filter, not a fire barrier. Fine lint can pass beyond it, collect in the transition duct, settle at elbows, lodge where the duct enters the wall, or restrict the exterior hood. Those locations are easy to miss during routine appliance cleaning, yet each can reduce the airflow the dryer depends on.
How a restriction creates heat
A conventional vented dryer pushes heated air through wet laundry and discharges warm, moisture-laden air outdoors. The heating system is designed around a continuous exhaust path with low resistance. Lint, a crushed hose, a poorly supported section, or a blocked termination narrows that path and prevents the appliance from moving air at the expected rate.
The sequence is predictable. Airflow drops, moisture stays in the drum, cycles run longer, and heat remains inside the appliance and duct instead of being carried outside. Combustible lint and fibers are then exposed to more heat with less cooling airflow. The same fire analysis reported 22% of incidents involving mechanical failure or malfunction and 8% involving electrical failure or malfunction. In dryer fires, dust, fiber, or lint was the first item ignited in roughly 26% of cases, with clothing representing another major first-ignited item.
A weak exterior discharge is a field warning. Check the hood while the dryer runs. Little or no airflow can indicate a restriction, even when the screen looks clean and the appliance still operates.
Practical rule: A clean screen confirms that one accessible filter has been serviced. It does not confirm that the transition duct, concealed exhaust, elbows, or exterior hood are clear.
Why property managers should care
In a single-family home, the symptoms may be a hot laundry room, unusually hot clothing, or a load that needs another cycle. Apartment systems create additional exposure because branches may be long, concealed, shared, or difficult to access. One blocked branch can affect several appliances, while a restricted common route or poor termination can limit every dryer connected to it.
The response should treat exhaust airflow as a safety function. Cleaning lint from visible surfaces matters, but so do duct geometry, pressure loss, exterior discharge, and the condition of the dryer chassis. Vented models depend on outdoor exhaust. Ventless heat-pump models avoid that exhaust route, but their filters and internal heat-transfer surfaces still require service. Each appliance needs the airflow and maintenance checks appropriate to its design.
Selecting Materials and Routing the Exhaust Path
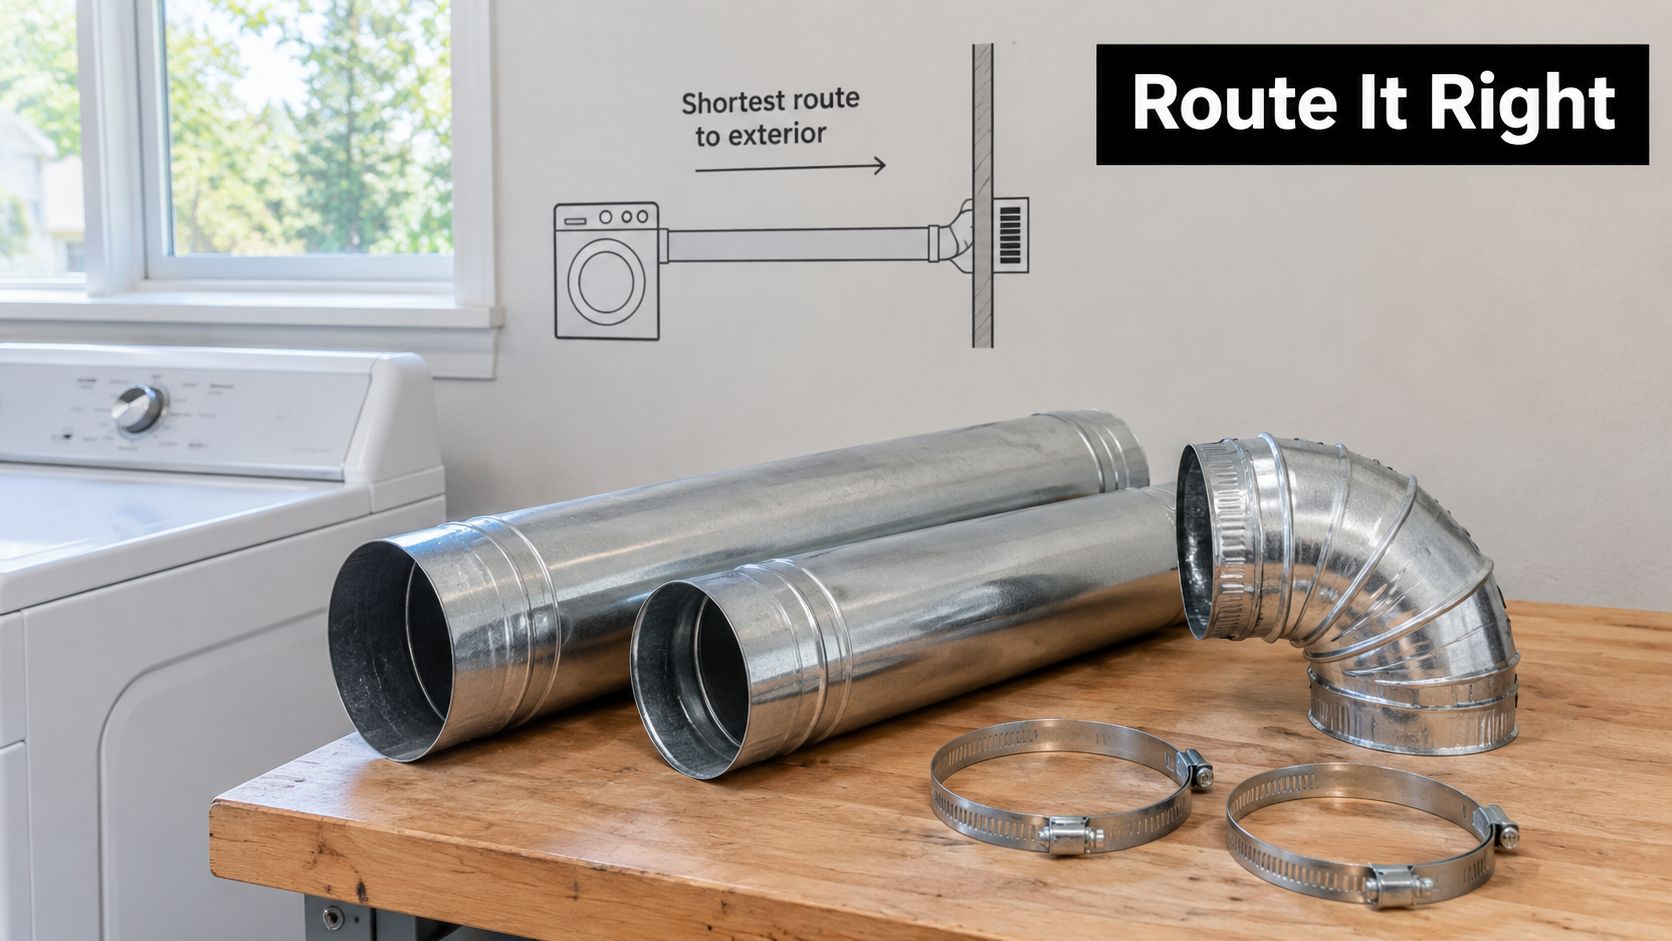
The safest dryer exhaust path is usually the shortest practical route from the appliance to the outdoors, with few direction changes and no concealed sagging. Every elbow, narrow section, rough interior, and crushed transition adds resistance. The dryer may continue to run, but it has to work harder to move air through a system that was poorly planned.
Choose the duct material first
For a conventional vented dryer, use a manufacturer-approved, smooth-interior metal exhaust path. Rigid metal generally creates the least resistance and offers fewer places for lint to catch than flexible material. Flexible metal has a limited but useful role as the accessible transition between the appliance and the wall, provided it remains intact and isn't compressed behind the dryer.
Avoid plastic ducting and non-listed foil products. They can sag, tear, deform, and collect lint in folds. Don't hide a flexible section where nobody can inspect it. A transition hose that looks acceptable before the appliance is pushed into place can become sharply kinked as soon as the dryer is installed.
The National Park Service dryer-fire guidance reflects U.S. fire-safety recommendations for rigid or flexible metal venting, regular inspection, and at least annual exhaust-system cleaning. Local building requirements and the appliance manufacturer's instructions still control the final installation.
Build a route that stays cleanable
A good installation has a visible, secure transition, smooth interior duct sections, and an exterior termination that opens freely during operation. Keep the route straight where the building allows, eliminate unnecessary elbows, and prevent the duct from being crushed by the appliance. Seal joints according to local code and manufacturer requirements, but don't drive screws or fasteners into the airstream. Protruding hardware can catch lint and create a shelf for debris.
The termination shouldn't have a screen over it. Screens trap lint and can turn a serviceable hood into a restriction. A damper or flap must move freely, close when the dryer is off, and open fully when the dryer runs. Check for abnormal heat or moisture around the termination after installation, then compare drying performance once restrictions have been corrected.
Facility operators handling laundry rooms may also need to coordinate dryer exhaust with broader outdoor air compliance solutions. That resource is relevant when a building's exhaust strategy includes multiple ventilation systems, although a dryer duct still needs its own manufacturer-compliant route and outdoor termination.
For homeowners replacing a damaged transition, the dryer vent hose installation guide can help distinguish a proper accessible connection from the improvised foil and plastic arrangements that often fail in the field.
Diagnosing Airflow Restrictions and Pressure Loss
A vent can look clean at the outside wall and still perform badly. Visual inspection may reveal a blocked hood, but it won't reliably show excessive equivalent length, hidden lint at an elbow, a crushed hose, or pressure loss caused by too many changes in direction.
Start with symptoms, not assumptions
Watch the dryer during operation and inspect the exterior discharge. The damper should open fully, and the air should leave with noticeable force. Weak discharge, a hood that barely moves, unusually warm clothing, excessive heat in the laundry area, or drying cycles that keep getting longer all justify further investigation.
Before blaming the vent, check the load and the washer's extraction performance. Laundry entering the dryer with too much retained water can extend a cycle even when the exhaust is sound. If the washer is working normally and the dryer still performs poorly, inspect the entire airflow path rather than cleaning only the screen.
A technician should look for:
A crushed transition: The hose may be pinched between the dryer and wall, especially in a tight closet.
A blocked termination: Lint, debris, or an exterior hood that doesn't open can restrict discharge.
Excessive routing resistance: Long runs and multiple elbows can create pressure loss even when the interior appears reasonably clean.
A concealed disconnection: A loose joint can release warm, moist air and lint into a wall, crawlspace, attic, or laundry room.
A shared-system problem: One obstructed branch may reduce performance for several dryers in a multifamily or commercial installation.
Use measurements when the diagnosis matters
Manufacturer guidance provides useful engineering context. One specification lists up to 230 CFM per dryer, maximum back pressure of -0.1 inches water column, and minimum duct air velocity of 1,200 feet per minute for moving lint effectively. Those values appear in the Department of Energy dryer-venting guidance.
The point isn't for a homeowner to recreate a laboratory test with household tools. The point is that airflow and pressure are measurable system conditions. A duct can be brushed clean and still fail because its route creates too much resistance. Conversely, a technician who measures performance can separate a dirty duct from a design defect or an appliance problem.
A vent that looks clean isn't necessarily a vent that works.
For commercial facilities, testing becomes even more valuable. Multiple units, shared exhaust arrangements, long concealed routes, and high laundry demand can make a simple annual cleaning schedule inadequate. The service plan should account for actual airflow, access points, branch conditions, and changes in drying performance.
Executing a Defensible Maintenance Protocol
Effective maintenance has three layers. The user removes lint after every load, the owner or manager checks visible components, and a qualified technician cleans and evaluates the concealed exhaust path. Treating the first layer as the whole program leaves the most difficult parts untouched.
Separate routine checks from duct service
After every load, clean the lint screen. Keep the area around the dryer clear, and pay attention to changes in drying time, heat, smell, and exterior discharge. Periodically inspect the visible transition duct for crushing, kinks, disconnection, or damage. While the dryer operates, confirm that the outside damper opens completely and that airflow feels strong and warm.
Annual inspection or cleaning is a useful baseline for many homes, but it isn't a universal interval. Shorten the interval for high-use laundries, long or multi-elbow routes, shared systems, commercial facilities, or any installation where drying performance has declined.
The deeper service should include more than pushing a brush into the first accessible opening. A defensible process includes:
Shut down safely: Turn the appliance off before disconnecting the duct. If the dryer is gas-fired, follow the manufacturer's safety requirements and avoid disturbing gas connections unless qualified to do so.
Inspect the transition: Remove lint from the accessible transition section without puncturing flexible metal or leaving tears that can release exhaust.
Clean the wall connection: Clear the connection at the appliance and the wall, then clean the exhaust duct with equipment suited to its length, shape, and access points.
Check the termination: Confirm that loosened lint has not been pushed into a blocked exterior hood or left inside the wall.
Reassemble correctly: Use listed metal vent components, secure the joint, and keep fasteners out of the airstream.
Test the result: Run the dryer and verify exterior discharge, damper movement, and any improvement in drying performance.
The preventive maintenance scheduling guidance is useful for property managers who need to track recurring inspections across multiple units. Good records should identify the appliance, route condition, observed restrictions, work completed, and any design correction still required.
What doesn't work
A household vacuum can remove loose lint near an opening, but it won't necessarily scrub buildup from the entire duct or reach a concealed elbow. A small brush used aggressively can also puncture flexible sections or push debris deeper into an inaccessible cavity. Finally, placing a screen over the exterior termination creates the restriction it was meant to prevent.
The U.S. Fire Administration's maintenance guidance specifically supports turning the appliance off before disconnecting the duct, cleaning the transition and wall connection, and reassembling with listed metal components. The protocol is safe only when the exhaust is fully reconnected before the appliance operates.
Navigating Vented and Ventless Appliance Options
Not every dryer needs an exterior exhaust duct. The first question during a replacement or remodel should be, “What type of dryer is being installed?” Applying conventional venting advice to a ventless heat-pump model can lead to unnecessary construction, while treating a vented dryer like a self-contained appliance can create a serious safety problem.
Vented dryers
A conventional gas or electric vented dryer pulls in room air, heats it, passes it through the tumbling laundry, and sends the humid exhaust outdoors. It needs a dedicated, compliant exhaust route with appropriate materials, clearances, termination, and airflow.
The trade-off is installation dependence. If the laundry area already has a short, accessible exterior route, a vented dryer may provide straightforward operation and quick moisture removal. If the only available route is long, concealed, sharply bent, or impossible to terminate outdoors, correcting the duct may cost more effort than the appliance replacement initially suggests.
Ventless heat-pump dryers
A ventless heat-pump dryer uses a closed-loop process rather than exhausting warm, moist air through a wall. It removes moisture through condensation and reuses heat, so the installation focus shifts from exterior exhaust to condensation drainage, filter maintenance, room clearances, and heat rejection.
That flexibility is valuable in apartments, high-rise housing, interior laundry rooms, and retrofit projects where a new wall penetration is impractical. It doesn't mean the machine can be installed without conditions. The model may need a drain connection or a reservoir that requires emptying, adequate surrounding space, and manufacturer-specified ventilation for the room or closet.
The trade-offs are also different. Heat-pump models commonly use lower-temperature operation and may take longer for some loads, while their closed-loop design can reduce dependence on an exterior duct. Owners should compare the appliance's installation manual, expected laundry habits, available drainage, service access, and energy priorities rather than assuming one technology is universally superior.
California's 2025 Energy Code expands heat-pump use in new residential construction and encourages electric-ready buildings, shifting attention toward condensation and room-ventilation management. The California Energy Commission's 2025 building standards information provides the relevant policy context.
For replacement decisions involving both appliances, a resource on washer and dryer repair can help owners assess whether poor drying comes from the dryer, the washer's water extraction, or the installation. The ductless dryer vent guide also helps clarify why ventless doesn't mean maintenance-free.
Recognizing When to Hire a Certified Professional
Basic maintenance is reasonable for a careful homeowner. Cleaning the lint screen, checking the visible hose, and observing the exterior damper don't require specialized equipment. Deep cleaning becomes a different job when the duct disappears into a wall, runs a long distance, includes multiple elbows, or serves a shared laundry system.

Stop troubleshooting yourself if you smell burning, find a damaged or disconnected duct, see lint entering the room, discover a blocked termination, or can't restore strong exterior airflow. A professional can use rotary brushing, inspection equipment, airflow measurement, and pressure testing suited to the installation. Those tools help identify whether the problem is buildup, poor routing, a crushed transition, or an appliance fault.
A technician also needs to avoid creating a new problem during cleaning. Aggressive tools can puncture flexible sections, loosen joints, or leave lint inside the wall. The duct must be reassembled securely and tested before the appliance returns to service.
Chassis cleaning and service decisions
Lint doesn't stop at the exhaust duct. It can accumulate inside the dryer's chassis around internal components, where access may require partial disassembly. The U.S. Consumer Product Safety Commission advises having a qualified service professional clean the dryer chassis periodically and ensuring that any disconnected exhaust duct is properly reconnected before operation. Its dryer safety guidance also reinforces checking exterior airflow and cleaning behind the appliance.
For commercial operators, select a contractor who can document conditions and distinguish cleaning from corrective installation work. The principles in how to pick a safety consultancy are useful when evaluating broader safety expertise, especially where laundry exhaust interacts with facility procedures and compliance responsibilities.
A competent dryer-vent specialist should explain what was found, show where restrictions occurred, identify damaged materials, and state whether the route itself needs correction. The guide to who can clean a dryer vent can help homeowners understand when routine service has moved beyond safe DIY work.
Venting clothes dryers safely is a system task, not a lint-screen task. Keep the exhaust route short, smooth, metal, and accessible where possible; confirm that the exterior damper moves and airflow remains strong; and choose a vented or ventless appliance based on the building and manufacturer's requirements.
Purified Air Duct Cleaning provides residential and commercial dryer vent cleaning that removes lint, debris, and blockages while checking for airflow problems and unsafe routing. If your dryer runs hot, takes too long, or has a weak exterior discharge, visit Purified Air Duct Cleaning to request a service assessment.