Guide to venting a dryer through the wall safely and correctly
- Jan 20
- 15 min read
Venting a dryer through the wall is one of those home maintenance tasks that’s easy to overlook, but it directly impacts your family's safety and your appliance's lifespan. When it's done right, all that hot, moist, lint-filled air gets sent straight outside where it belongs. But if it's done wrong? You're setting yourself up for some significant fire and moisture risks.
Why Proper Dryer Venting Is a Critical Home Upgrade
Let's be honest, on a long list of home projects, venting a dryer might seem pretty minor. But the truth is, getting this wrong can have some pretty serious consequences. This isn't just about how fast your clothes dry; it's about protecting your home and family from dangers that are completely preventable.
Improperly vented dryers are a leading cause of house fires. In the United States, clothes dryer fires cause over $100 million in property damage every single year. A shocking majority of these fires, nearly 80% in many reports, can be traced back to a single culprit: lint buildup in the dryer vent. This is a huge issue for systems vented through exterior walls, where every bend and kink is a potential trap for this highly flammable material.
Beyond the Fire Hazard
While fire is the most dramatic risk, poor venting quietly introduces other persistent problems into your home. A dryer pushes out a surprising amount of moisture with every load, and if that humid air doesn't have a clear path outside, it’s going to find somewhere else to go.
Think of your home as a living, breathing system. Getting a handle on understanding whole-house ventilation systems helps you see why a dedicated dryer vent is so essential. Without a proper exit, that moisture can lead to:
Mold and Mildew Growth: Damp, dark spaces inside your walls or attic are the perfect breeding ground for mold. This can threaten your home's structure and, more importantly, your family's respiratory health.
Structural Damage: Over time, trapped moisture will rot wood framing, ruin drywall, and make paint peel. These are costly and disruptive repairs you definitely want to avoid.
Poor Indoor Air Quality: Pumping lint particles and damp air back into your house can aggravate allergies and just make the air feel stuffy and unpleasant.
For anyone with a gas dryer, the stakes are even higher. A faulty vent can lead to incomplete combustion, which produces carbon monoxide, a colorless, odorless, and deadly gas. A securely sealed vent is the only way to guarantee this dangerous gas is exhausted safely outside and not back into your home.
The Efficiency and Savings Connection
Properly venting your dryer isn't just about safety; it’s also a smart move for your wallet. When your dryer can breathe freely, it works exactly the way it was designed to.
A clear, unobstructed vent path lets your dryer dry clothes faster and with less energy. This not only cuts down on wear and tear, helping your appliance last longer, but it also shows up as real savings on your monthly utility bills.
An efficient system means shorter drying cycles and less strain on the heating element. So, think of this project as more than just another DIY task. It’s a crucial upgrade that protects your investment, improves your home’s health, and saves you money in the long run. For a deeper dive into fire safety, check out our guide on https://www.purifiedairductcleaning.com/post/your-essential-guide-to-preventing-dryer-fires-at-home.
Planning Your Vent Path and Gathering the Right Supplies
Before you even think about picking up a drill, let's talk strategy. A successful dryer vent installation is all about the prep work. Getting this part right saves you from costly mistakes down the line and ensures the whole setup is safe and actually works well. This means mapping out the best route from your dryer to the great outdoors and getting a shopping list together for the right materials; no cutting corners here.
The golden rule for your vent path is simple: the shorter and straighter, the better. Every bend and turn you add to the ducting creates resistance. This slows down the airflow, which not only makes your dryer work harder and use more energy but also creates perfect little pockets for lint to build up. And lint buildup is a serious fire hazard.
Charting the Most Efficient Route
Your mission is to find the most direct shot from the back of your dryer straight through an exterior wall. Start by pulling the dryer out so you can see exactly where its exhaust port is. Now, take a good look at the wall behind it.
You're looking for a clear spot to exit, one that's free of any surprises hiding inside the wall. This is where a quality stud finder is your absolute best friend. You need to scan the area meticulously to find:
Wall Studs: You have to drill between the studs. Never, ever try to cut through one.
Electrical Wiring: Many newer stud finders have a deep-scan feature that can detect live AC wires. Use it.
Plumbing Pipes: These are tougher to spot with a stud finder, so use common sense. Avoid walls you know are shared with a bathroom or kitchen, as they likely have supply or drain lines running through them.
Once you’ve pinpointed a clear bay between two studs, it’s time to measure. Grab a tape measure and get the distance from your dryer's exhaust port to your target on the wall. Don't forget to factor in the thickness of the wall itself. This measurement is key for buying the right amount of ducting.
Pro Tip: Keep the total length of your vent run as short as humanly possible. Codes can vary, but a good rule of thumb is to stay under 35 feet. Here's the critical part: you have to subtract 5 feet from that total for every 90-degree elbow and 2.5 feet for every 45-degree elbow you use. Those bends really choke the airflow.
Essential Tools and Materials Checklist
With a solid plan in place, it's time to gear up. When it comes to dryer vents, your choice of materials is a safety issue, not a style preference. Using the wrong stuff can create a genuine hazard in your home.
Your shopping list should be all about fire-resistant, sturdy materials. Under no circumstances should you use that flimsy plastic or vinyl accordion-style ducting. It’s highly flammable and is outlawed by most building codes for exactly that reason.
Here’s a detailed checklist of what you'll need to do the job right and keep everything up to code.
Item | Type/Specification | Pro Tip for Selection |
|---|---|---|
Ducting | 4-inch rigid or semi-rigid metal duct | Go for the smooth-walled rigid metal if you can. It provides the best airflow and is a breeze to clean. Semi-rigid is flexible but its ridges trap more lint. |
Exterior Vent Hood | Louvered or dampered metal vent with a screen | Find a hood with a built-in damper flap. This keeps pests and cold drafts out. Make sure the opening is at least 12.5 square inches to meet modern codes. |
Duct Connectors | 4-inch metal elbows (90° or 45°) | Buy only what you absolutely need. Every single elbow you add puts a major strain on your dryer's performance. |
Sealing Tape | Aluminum foil tape | Don't even think about using standard cloth-backed "duct tape." The heat from the dryer will make it brittle, causing it to fail and create leaks. |
Fasteners | Metal clamps or straps | Use these to get a tight seal on all your duct connections. Never use screws that poke into the ducting, as they’re perfect lint-snags. |
Sealant | Exterior-grade waterproof caulk | This is for sealing the vent hood to your home's exterior. It’s your defense against water getting in. |
Tools | Drill, 4-inch hole saw, stud finder, tape measure | A long pilot drill bit is also incredibly helpful for drilling a guide hole from the inside to the outside, ensuring your big hole is in the right spot. |
Taking the time to map your route and buy the correct, high-quality supplies is the most important part of this whole project. A little careful preparation now ensures your dryer runs safely and efficiently for years to come.
Cutting the Openings and Installing the Vent
With your route planned and materials in hand, it's time for the main event: cutting the holes and getting that vent installed. This is where all that careful prep work really pays off, turning your plan into a safe, functional reality. We'll go through making a clean cut inside, drilling a pilot hole for perfect alignment, cutting the exterior exit, and then sealing it all up.
This quick visual guide sums up the essential planning steps you've just completed.

Following this simple "plan, locate, and gather" flow means you're ready to go before making the first cut.
Marking and Cutting the Interior Hole
Making that first cut can feel a bit daunting, but it's pretty straightforward if you take your time. You should have the perfect spot marked on your interior wall from the planning phase, centered right between two studs.
Grab your 4-inch hole saw and place the center pilot bit directly on your mark. Before you even think about pulling the trigger on the drill, make sure it's perfectly level. Start drilling slowly to score a groove in the drywall. This keeps the saw from "walking" and chewing up your wall.
Once you have a good groove, you can pick up the speed. Just apply steady, even pressure and let the saw do the work. It’s way better to go slow and stay in control than to rush and end up with a sloppy, oversized hole.
Expert Tip: To keep drywall dust from getting everywhere, hold a shop vac nozzle right below the hole saw as you drill. It will catch most of the mess before it ever hits your laundry room floor.
Drilling the Pilot Hole to the Exterior
Okay, interior hole is done. The next move is critical for making sure the inside and outside holes line up perfectly: drilling a pilot hole. Do not skip this.
Fit a long, skinny drill bit, at least 6 inches long, into your drill. Poke it through the center of the hole you just made in the drywall. Get it perfectly level and drill straight through the exterior sheathing and siding. That tiny hole is now your bullseye on the outside.
Creating the Exterior Exit Point
Time to head outside. You should see the tip of your pilot bit sticking through the siding. That's your target. Just like you did inside, center your 4-inch hole saw on that pilot hole and start cutting through the siding and sheathing.
Cutting through exterior materials like vinyl, wood, or Hardie board takes a bit more muscle than drywall.
Take it slow: Let the hole saw bite into the material gradually.
Keep it cool: If you're drilling through something thick, you might need to back the saw out a few times to clear away debris and let the blade cool off.
Safety first: Always, always wear safety glasses for this part. Siding can splinter, and you definitely don't want that stuff flying into your eyes.
Once you've punched all the way through, you'll have a clean, straight shot from your laundry room to the great outdoors. This direct path is exactly what you need for proper airflow.
Proper dryer venting isn't just about efficiency; it's a major safety issue. The USFA reports that dryer fires cause over $100 million in property losses each year, and a shocking 34% of those are traced back to failures in the vent system itself. Codes now push for these straight-shot wall exits to safely handle the 100+ cubic feet per minute of hot, moist air your dryer kicks out.
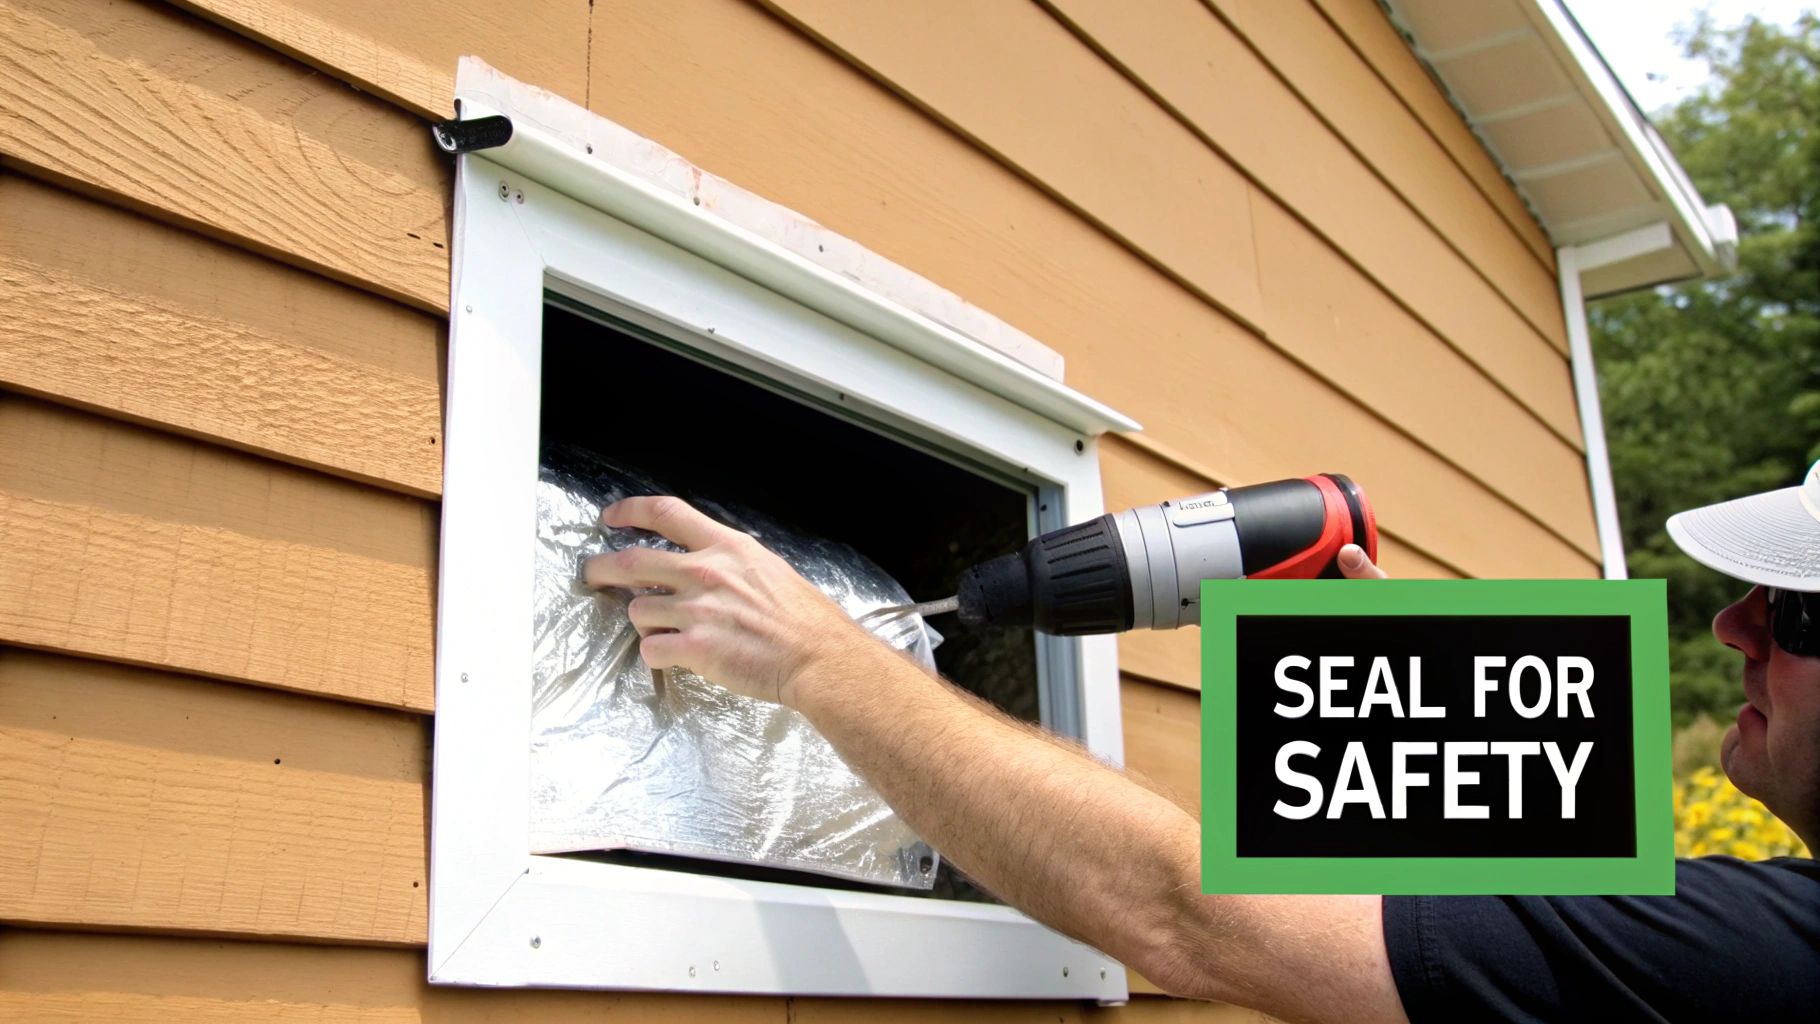
Installing the Duct and Exterior Vent Hood
Now we get to put it all together. Start by doing a test fit of your rigid metal duct, sliding it through the wall from the inside. You'll want to trim it so it sticks out about an inch past the exterior siding. Then, from the outside, slide the vent hood's pipe into the duct.
Secure the vent hood to the siding with the right kind of screws for your home's exterior. A good pro tip is to install the hood with a very slight downward angle, tilting away from the house. This tiny tilt helps the damper flap close properly and stops rain from trickling back toward your wall.
With the hood mounted, you can learn more from our DIY guide for beginners on how to install a dryer vent for more detailed steps on different setups.
Back inside, it's time to connect the last piece of ducting from the wall to your dryer's exhaust port. Use rigid metal elbows if you need to make a turn, but always remember that shorter and straighter is better. Secure every single connection point, at the wall, at the dryer, and any seams in between, with aluminum foil tape. Don't be shy with it; wrap each joint several times to guarantee no hot, humid air leaks into your wall cavity.
Sealing the Vent and Meeting Safety Codes
You've got the ductwork and exterior hood in place, which means the heavy lifting is over. But don't pack up your tools just yet. The final steps, sealing everything up and making sure it's all up to code, are what elevate this from a quick fix to a safe, professional-grade installation.
Skipping this part is not an option. A proper seal is your home's first line of defense against moisture, pests, and drafts. An unsealed gap is basically a welcome mat for rainwater, which can seep into your walls and create a perfect breeding ground for mold and rot.
Creating an Airtight Exterior Seal
Let’s start outside. You'll notice a small gap between the vent hood's flange and your home's siding. Your mission is to fill that gap with a high-quality, exterior-grade waterproof caulk.
Applying caulk is simple, but a little technique goes a long way. Run a solid, continuous bead along the top and both sides of the vent hood, making sure you completely fill the gap. Here's a pro tip: leave the bottom edge uncaulked. This creates a small escape route for any moisture that might find its way behind the hood, letting it drain out instead of getting trapped against your wall sheathing.
On the inside, your goal is to prevent your heated or cooled air from escaping and outside air from sneaking in. Grab a can of fire-rated, low-expansion spray foam or caulk to fill the space between the duct and the drywall. After it cures, you can trim any excess for a clean, flush finish.
This might feel like a minor detail, but it's part of a much bigger safety picture. This very project is part of a global market expected to hit $497.582 million by 2025. North America is driving that trend, thanks to strict building codes designed to prevent the 2,900+ residential fires caused by bad dryer venting every year.
Navigating Building Codes and Fire Safety
Speaking of codes, making sure your installation is compliant is the last piece of the puzzle. Local rules can vary, but most are built on the International Residential Code (IRC), which has some very clear guidelines for venting a dryer through the wall.
One of the biggest rules to watch is the total length of your duct run. The maximum length is usually 35 feet from your dryer to the outdoor vent hood. But it's not a simple A-to-B measurement; you have to subtract length for every bend.
For every 90-degree elbow, knock 5 feet off your total allowable length.
For every 45-degree elbow, subtract 2.5 feet.
A straight run with two 90-degree elbows suddenly has a maximum length of only 25 feet (35 - 5 - 5 = 25). That's why keeping the duct path as short and straight as humanly possible is crucial for both safety and your dryer's performance. You can dive deeper by checking out our homeowner's guide to dryer vent code requirements.
Another critical point: how you connect the duct sections. Never use screws that stick into the duct's interior. Those screws act like little hooks, grabbing lint and creating a dangerous fire hazard over time. Stick to aluminum foil tape and metal clamps for smooth, secure connections.
A correctly sealed and code-compliant dryer vent does more than just move air; it protects your home from fire, prevents moisture damage, and improves your dryer's efficiency, saving you money on energy bills over the long term.
By taking the time to seal every gap and double-check your work against safety codes, you can be confident that the job isn't just done, it's done right.
Common Mistakes and Keeping Your Vent Clean
Properly venting a dryer through the wall is a huge win for home safety, but a few common missteps can undo all your hard work. Even with the best intentions, I've seen small installation errors lead to big headaches with airflow and fire risk down the road. But the job isn’t truly finished once the vent is in place; consistent care is what keeps your system safe and efficient year after year.
Let's walk through the frequent mistakes we see out in the field and then get into a simple maintenance routine to keep that new vent clear and your home protected.
Avoiding Common Installation Pitfalls
The most critical mistake I see is simply choosing the wrong materials. That flimsy, white vinyl or foil accordion-style ducting is a major fire hazard. It gets crushed easily, which chokes off airflow, and its deep ridges are the perfect trap for lint. Even worse, it's highly flammable. Always, always use rigid or semi-rigid metal ducting, as it’s required by most building codes for a very good reason.
Another frequent error involves the duct path itself. Of course, a short, straight run is the gold standard, but sometimes bends are unavoidable. The mistake is creating too many sharp, 90-degree turns. Each hard angle acts like a speed bump for the airflow, causing lint to pile up and forcing your dryer to work much harder than it should. If you absolutely have to make a turn, use gradual 45-degree elbows whenever you can.
Finally, a surprisingly common but dangerous mistake is using screws to connect the duct sections.
The Problem: Screws poke into the duct's interior, creating little hooks that snag lint. Over time, these small catches can snowball into a massive blockage.
The Solution: Use aluminum foil tape and metal clamps for all connections. This creates a perfectly smooth, airtight seal without getting in the way of the airflow.
A clean, unobstructed vent is the whole point. Every choice you make, from the duct material to how you connect it, should support maximum airflow and leave zero places for lint to hide.
Establishing a Simple Maintenance Schedule
Getting the installation right is just step one. To keep your dryer vent safe and efficient for the long haul, regular cleaning is non-negotiable. Lint buildup is inevitable, and even a perfectly installed system needs routine checks. If you let it go, you’re slowly cranking up the fire risk and killing your dryer's efficiency. This is a crucial task, and it mirrors the broader need for understanding the importance of general ductwork maintenance for your home's overall health.
A simple, consistent schedule can make all the difference.
Quarterly Checks (Every 3 Months)
Just take a quick walk outside and look at the exterior vent hood. Make sure the damper flap moves freely and isn’t gummed up with lint or yard debris. Clear away any lint you can see on the screen or louvers to keep that exit path wide open.
Annual Deep Clean (Once a Year)
At least once a year, it's time for a more thorough clean-out. You'll need to disconnect the duct from the back of the dryer and get to work with a specialized dryer vent cleaning brush kit. These kits come with flexible rods that let you snake the brush through the entire duct, breaking up all the compacted lint inside. For many homeowners, this is a must-do to prevent a serious clog. If you're tackling this yourself, our guide on how to clear your dryer vent clog safely and effectively breaks down the entire process.
By steering clear of these common installation blunders and sticking to a simple cleaning schedule, you’ll ensure your dryer vent project provides lasting safety and efficiency for years to come.
When a DIY Project Should Become a Professional Job
Knowing your limits is the hallmark of a smart homeowner. While venting a dryer is often a perfectly manageable DIY project, some situations are just better left to a professional. Recognizing when to step back isn't failure; it's just smart. It's about getting the job done safely and correctly the first time.
Certain scenarios can quickly turn a simple project into a complex one with the potential for expensive mistakes. If your plan involves anything more than a straight shot through a standard wood-framed, vinyl-sided wall, it’s a good time to pause and really think it through.
Red Flags That Signal It's Time to Call a Pro
Sometimes the line between a straightforward job and a complicated mess can be a bit blurry. Other times, the warning signs are crystal clear. Calling for help in these cases isn't just about convenience, it's about protecting the structural integrity of your house and keeping your family safe.
You should seriously consider hiring a professional if your project involves any of these challenges:
Challenging Wall Materials: Cutting through brick, concrete, stucco, or stone isn't a job for a standard hole saw. It requires specialized tools and, more importantly, expertise. One wrong move can lead to serious structural damage or water intrusion that will cost far more to fix than a pro's fee.
Long or Complicated Duct Runs: If the path from your dryer to the outside wall is longer than 25 feet or needs more than two 90-degree elbows, you're asking for trouble with airflow. A pro knows how to design a route that maintains efficiency and meets code, sometimes even incorporating booster fans for those extra-long runs.
Working with a Gas Dryer: The venting process itself is similar, but the stakes are much, much higher with a gas dryer. An improper connection or a tiny leak in the vent can lead to dangerous carbon monoxide building up inside your home. A certified technician will ensure every single connection is perfectly sealed and safe.
Your peace of mind is invaluable. If you feel even slightly unsure about locating utilities, cutting a hole in your home's exterior, or making sure the installation is up to code, hiring a pro is the safest bet.
The Value of Professional Installation
A licensed and insured professional brings a lot more than just the right tools. They have a deep understanding of local building codes, so you won't have any nasty surprises during a future home inspection. They're trained to spot potential problems you might miss, like hidden wiring or plumbing, and can guarantee a weather-tight seal that protects your home from the elements for years to come.
Ultimately, the goal is to make your home safer and more efficient. If your specific situation introduces variables that make you uncomfortable, investing in a professional service is a wise move. Knowing who to call is key, and you can learn more about who cleans air ducts and vents to find the right pro for your project.
When the job seems too complex or the risks feel too high, don't hesitate to reach out to the experts. The certified technicians at Purified Air Duct Cleaning have the experience and equipment to handle even the most challenging dryer vent installations, ensuring a safe, efficient, and code-compliant result. Contact us today for a free quote and enjoy total peace of mind at https://www.purifiedairductcleaning.com.