

House AC Vent Cleaning: A Homeowner's How-To
You pull off a supply vent cover to repaint a room, and there it is: a gray film on the grille, a little dust sitting just inside the opening, and the immediate question every homeowner asks, do I need to clean the whole system now, or is this just normal house dust?
That's where most advice goes sideways. A lot of house AC vent cleaning articles start from the assumption that deeper cleaning is always a good idea. In real homes, it isn't. Sometimes a careful wipe and vacuum at the register is the right move. Sometimes the dirt you see is a symptom of a bigger HVAC problem. And sometimes the smartest thing you can do is stop before you push debris farther into the system or damage a coil, flex duct, or blower assembly.
The practical line is simple: clean what you can reach safely, and know when the job stops being housekeeping and starts being HVAC work.
When Vent Cleaning Actually Makes Sense
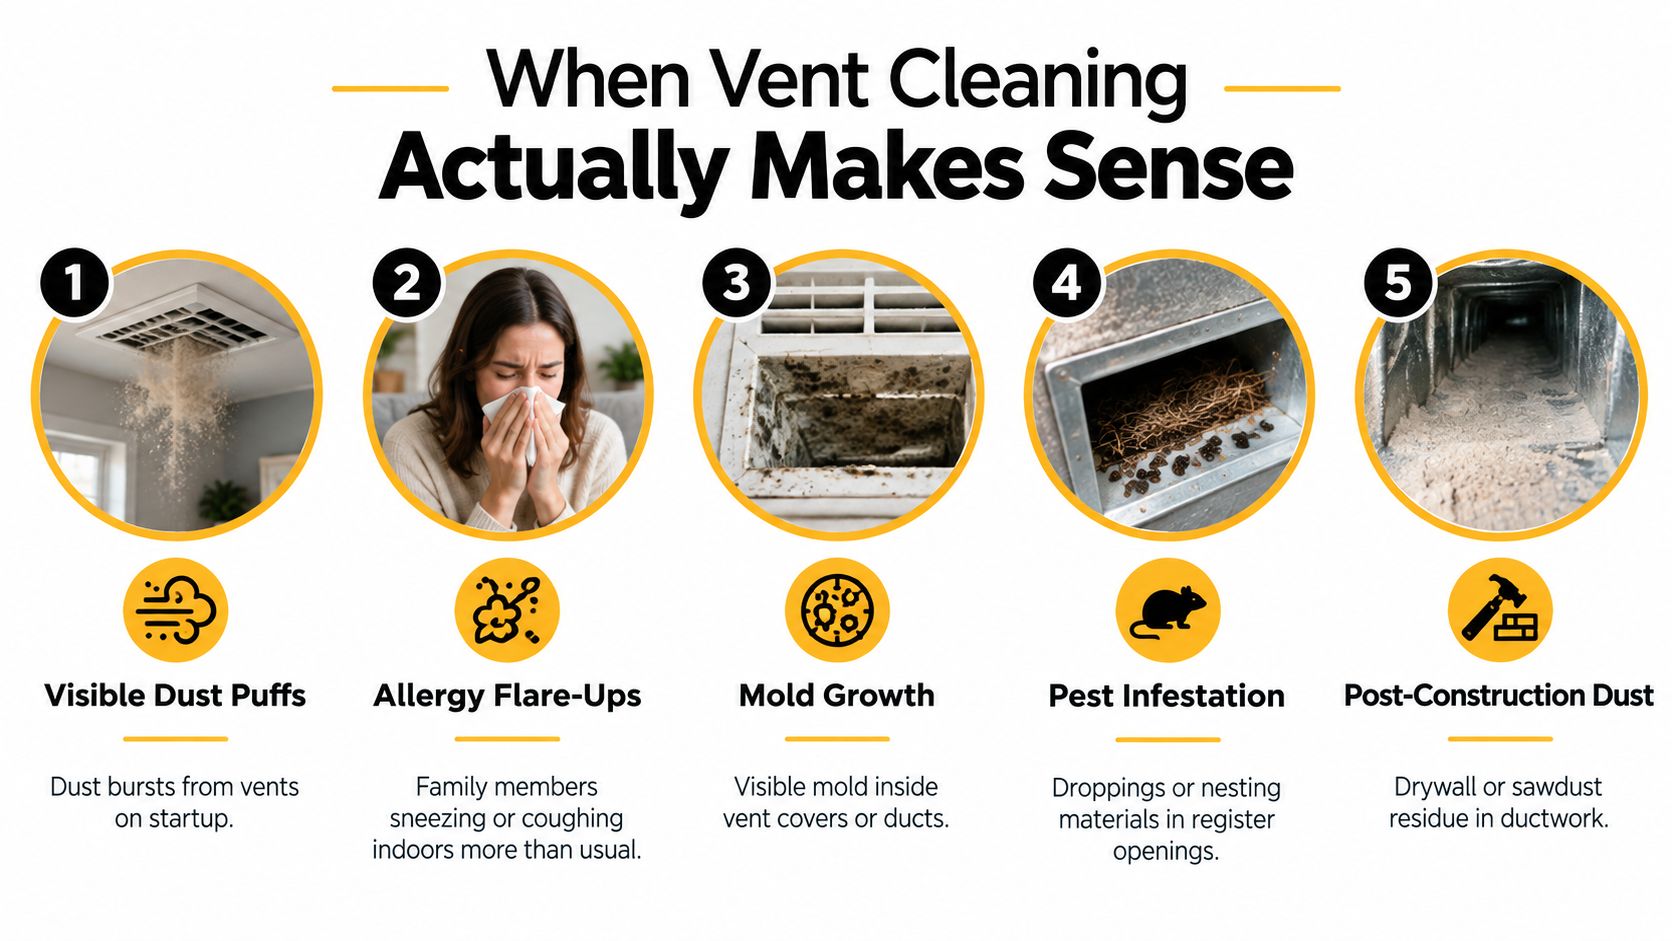
You remove a dusty vent cover and look into the boot. That alone doesn't mean your entire duct system needs cleaning. EPA guidance has held since 1997 that air ducts should be cleaned on an as-needed basis, not as routine maintenance, and the agency says duct cleaning hasn't been shown to prevent health problems. EPA points to specific triggers such as substantial visible mold growth, vermin infestation, or excessive debris being released into living spaces, as explained in its consumer guidance on duct cleaning.
Signs that justify a closer look
Some situations do move vent cleaning from optional to reasonable:
Dust puffs at startup: If the system kicks on and you see visible dust blow into the room, that deserves attention.
Recent renovation: Drywall dust, sawdust, and general remodel debris often get into open registers.
Unknown history after move-in: If you bought a house and have no idea what happened in the ducts before you arrived, a visual check at every register makes sense.
Moisture or musty odor: Water intrusion changes the equation fast.
Confirmed pest activity: Droppings, nesting material, or odor near vents usually means the issue is bigger than surface dust. If odor is part of the problem, this guide on how to safely remove dead animal smell helps homeowners understand why source removal matters before HVAC cleaning.
When cleaning isn't warranted
If the home is stable, filters are changed on schedule, vents look normal, and nothing is being released into the rooms, deeper cleaning usually isn't the first fix. In many houses, the better answer is improved filtration, tighter return sealing, or replacing a neglected filter rather than chasing a routine duct cleaning.
Practical rule: Dust on a vent cover is a cleaning issue. Debris coming out of the vent is an HVAC issue.
A lot of homeowners also confuse dirty grilles with dirty ducts. They overlap, but they aren't the same thing. Surface dust at the room opening is common. System contamination is different, and the decision point looks more like the warning signs discussed in this dirty ducts overview.
The homeowner-safe scope starts at the cover, the register opening, and the first accessible visible stretch only.
Tools and Supplies You Will Need
A clean vent job goes better when you buy once and stop improvising. The mistake I see most often is using whatever vacuum is nearby, plus a butter knife and a damp rag. That works for a quick wipe, but not for careful house AC vent cleaning.
Vent cleaning tools at a glance
Tier | Tools | Used For |
|---|---|---|
Must-have | Screwdriver or drill with matching bit, microfiber cloth, soft-bristle brush or vacuum brush attachment, shop vac with HEPA-filtered option, flashlight or headlamp, replacement HVAC filter, step stool | Removing covers, capturing loose dust, wiping grilles, inspecting openings, replacing filter safely |
Nice-to-have | Flexible crevice tool, painter's tape, nitrile gloves, coil-fin comb only if coil is directly reachable and you know what you're touching | Reaching short visible runs, labeling covers or screws, cleaner handling, light fin straightening in limited cases |
Never use | Bleach sprayed into ducts, interior duct sealants on duct board, high-pressure air aimed into the system | These can damage materials, create fumes, or push debris deeper into the air handler |
What matters most
The shop vac is strongly preferred once you're doing anything beyond the face of the cover. A regular household vacuum is acceptable for loose dust on the grille, but it usually lacks the filtration and airflow control you'd want at the register throat.
For filtration, follow CDC indoor-air guidance and use MERV 13 filters, or the highest-efficiency filters possible without harming HVAC performance, as noted in CDC's indoor air guidance. In many homes, that means checking what your system can handle before buying the densest filter on the shelf.
A stronger filter isn't automatically better if it chokes airflow on an older blower.
If you want to understand why professional jobs use very different hardware than a DIY cleanup, this breakdown of professional duct cleaning equipment is worth a look. The gap between a homeowner vacuum and a negative-air setup is large.
One product note that fits here without hype: Purified Air Duct Cleaning offers HVAC coil cleaning and duct cleaning services, which matters when inspection shows the dirt isn't stopping at the register face.
Cleaning Your Vents Safely Step by Step
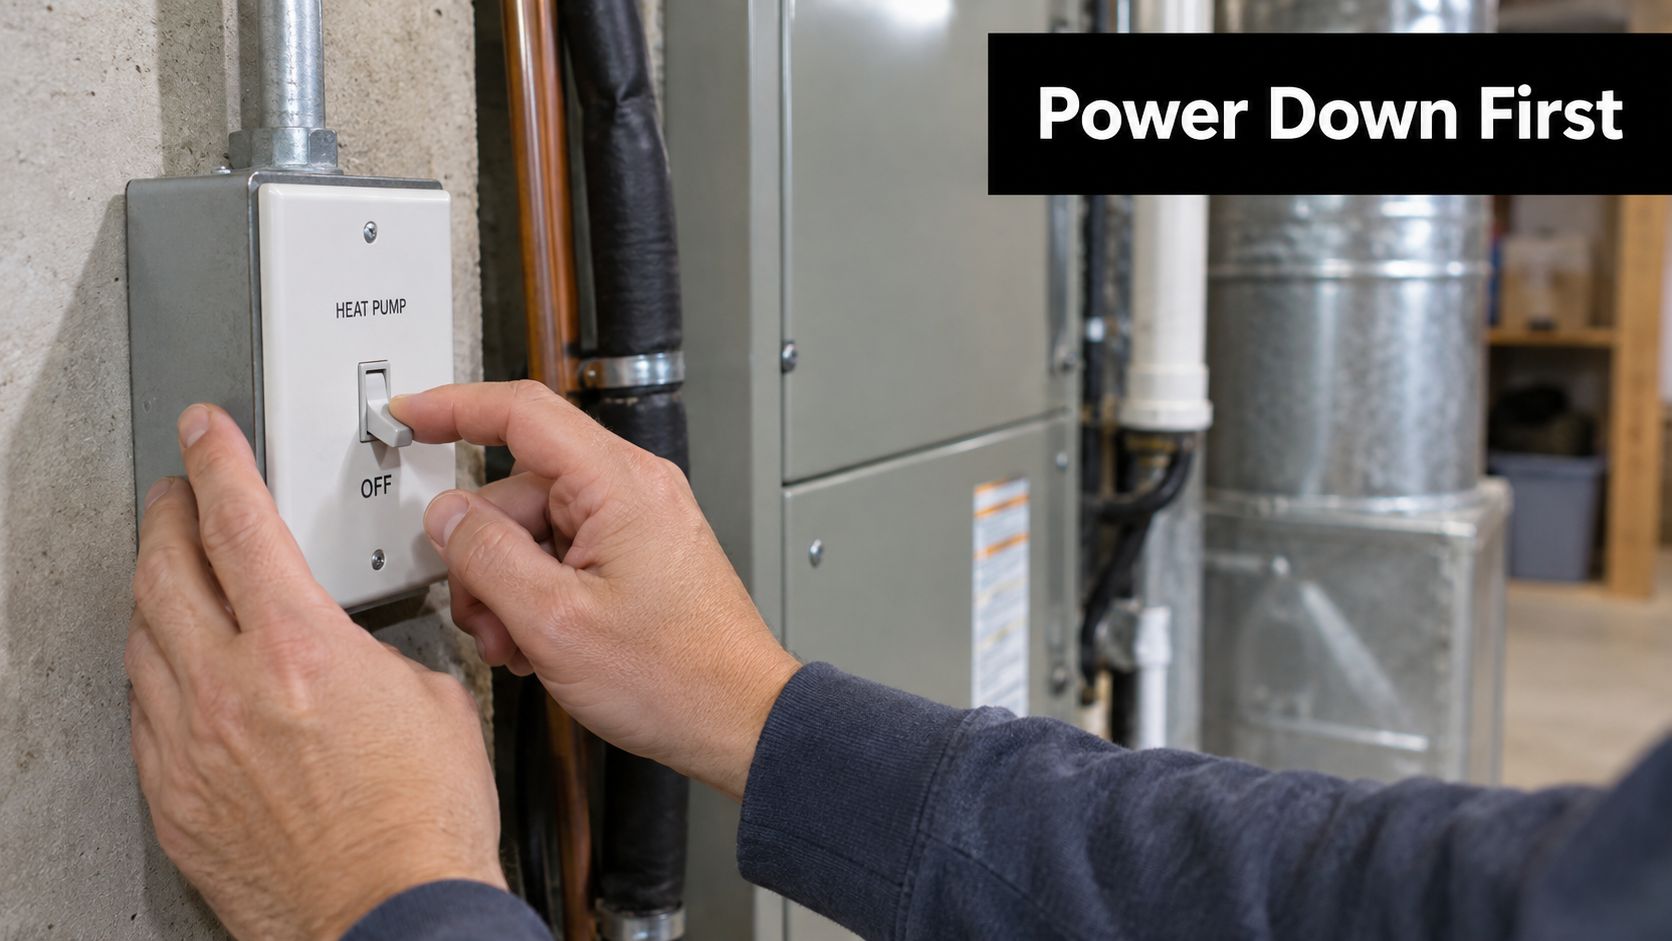
Before you touch a screw, shut the system down at the thermostat, then at the disconnect or breaker if your setup allows it. Don't assume "fan auto" is enough. You want the blower de-energized so it can't start while your hands are near the opening.
Remove and clean the covers carefully
Take off each register or grille and keep track of orientation. It sounds minor, but some covers rattle if they go back rotated differently, and some adjustable louvers throw air better in their original position.
Then do the simple part well:
Vacuum first: Use a brush attachment on the cover itself before wiping, so you don't grind grit into the paint.
Wash if needed: Metal grille-style covers can usually be washed in warm soapy water, then dried fully.
Wipe the surrounding area: Dust around the opening often falls to the wall or floor during removal.
Clean only the accessible portion
Use your flashlight to inspect the first visible stretch inside the opening. If it's rigid metal and you can safely reach loose dust near the mouth with a brush attachment or crevice tool, that's reasonable. If you see flex duct, duct liner, sharp turns, moisture, or anything beyond the first visible section, stop.
The DIY line is the duct wall. Once you're reaching into the run instead of cleaning the opening, you can do more harm than good.
Don't jam a hose deep into the duct. Don't feed a household snake, broom handle, or compressed air nozzle into the system. Those shortcuts tear flex duct, loosen internal lining, and can shove debris toward the blower or coil.
EPA-aligned practice and NADCA cleaning standards favor source-removal under continuous negative pressure with debris captured by a HEPA-filtered collector, not loose dust being stirred into the house, as described in the NADCA general specification.
Reassemble and check operation
While the covers are off, replace the HVAC filter with the correct size and rating for your system. Then reinstall each cover snugly, not over-tight. Stripped screw holes are common, especially in older drywall.
Once everything is back in place:
Restore power: Turn the system back on.
Run the fan briefly: Let it run for about ten minutes.
Listen and look: Check for rattles, whistling, or a cover that didn't seat flat.
If you want a side-by-side look at the methods pros use once a job goes beyond this scope, review these air duct cleaning methods.
Anything past the first visible elbow, plus the evaporator coil, blower wheel, plenum, and air handler interior, is off-limits for this DIY scope.
What You Can Realistically Expect
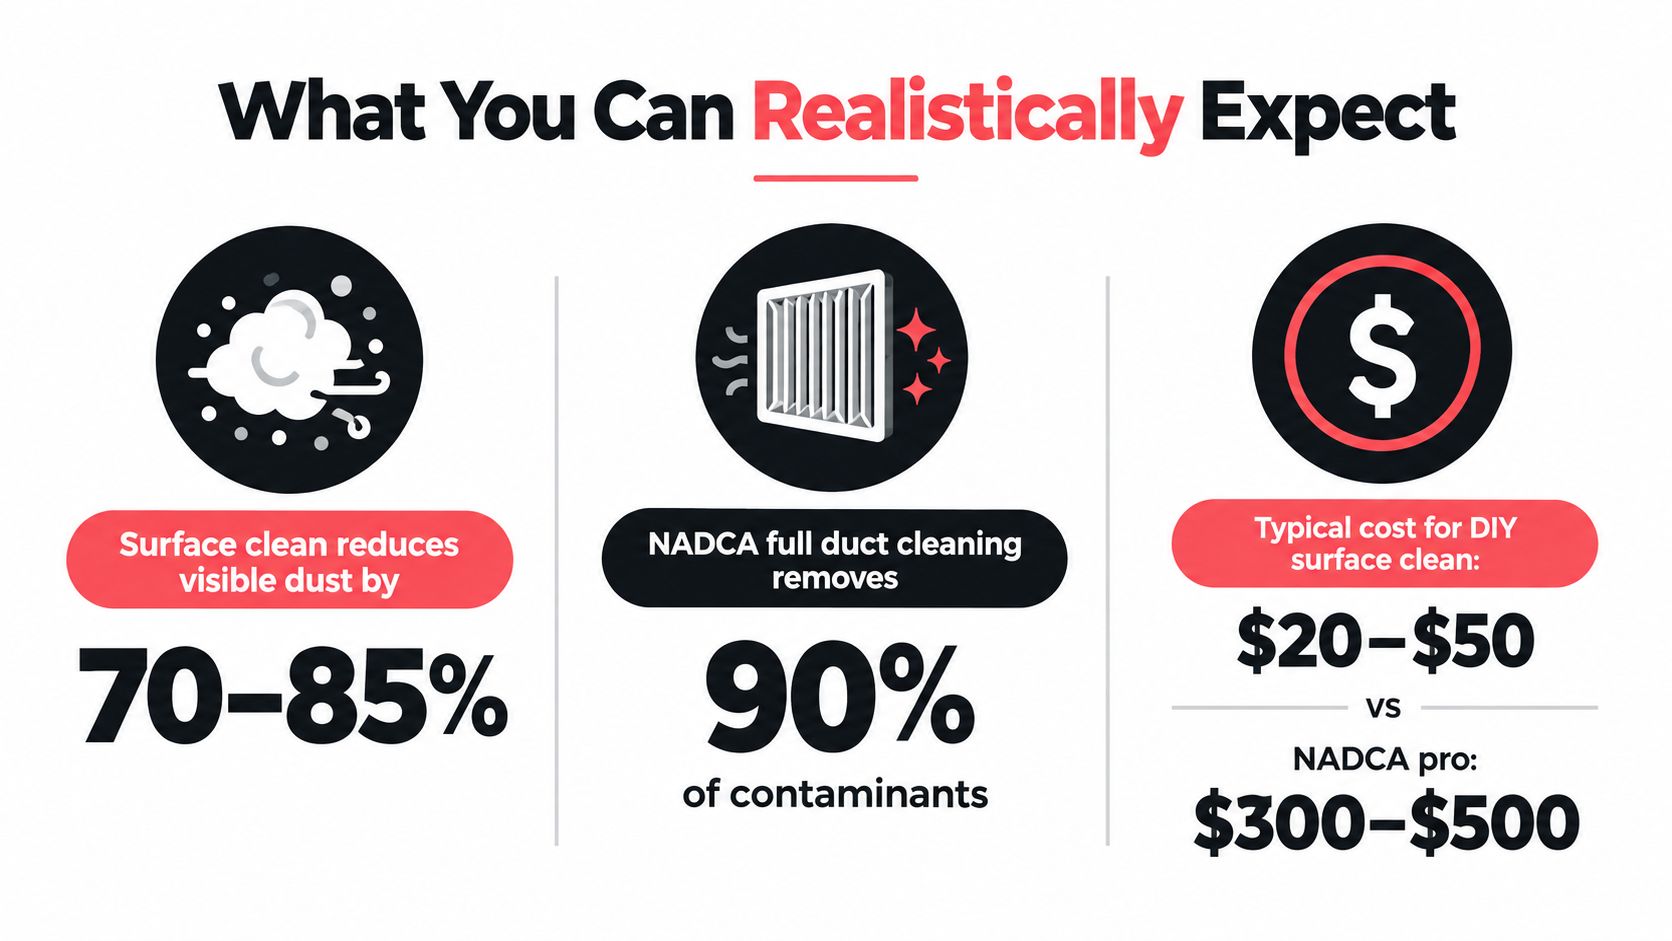
A homeowner surface clean and a full HVAC cleaning aren't the same service, so they won't produce the same result. Cleaning vent covers and the first reachable section can make the house feel cleaner at the room level. It won't correct deeper airflow restriction if the problem is on the coil, the blower wheel, or farther down the duct run.
The performance range is wide for a reason
NADCA's energy research reported energy-saving potential of up to 45% for HVAC maintenance, cleaning, and restoration, while later status reporting found that cleaning a lightly fouled system provided, on average, an 11% savings in energy used for heating and air conditioning, according to this summary of the NADCA energy research study.
That gap is large because system condition drives the outcome. A lightly dusty system has less to recover. A system with restricted air paths, loaded blower surfaces, or fouled coil surfaces has more performance to regain.
What you'll probably notice, and what you won't
After basic house AC vent cleaning at the register level, homeowners usually notice things like:
Less visible dust at startup
Cleaner-looking grilles and nearby walls
Slightly improved airflow at some registers if the opening was partially blocked
What you shouldn't expect is a dramatic indoor air quality transformation from a light surface cleanup alone. EPA field research found that mechanical air duct cleaning removed particulate and fibrous contamination from HVAC systems, but in a nine-home study, airborne particle levels before and after cleaning were not substantially different, because outdoor particles and other indoor sources also affected indoor air, as reported in EPA's field research summary.
A quick video can help you compare expectations with the actual process:
If the job removes obvious dust and stops debris from blowing into the room, that's a win. If you're hoping to solve bigger comfort, odor, or allergy issues, the source may sit deeper than the vent face.
When to Stop and Call a Professional
A lot of homeowners feel like calling a pro means the DIY attempt failed. It didn't. It means you found the point where housekeeping ends and controlled HVAC cleaning begins.
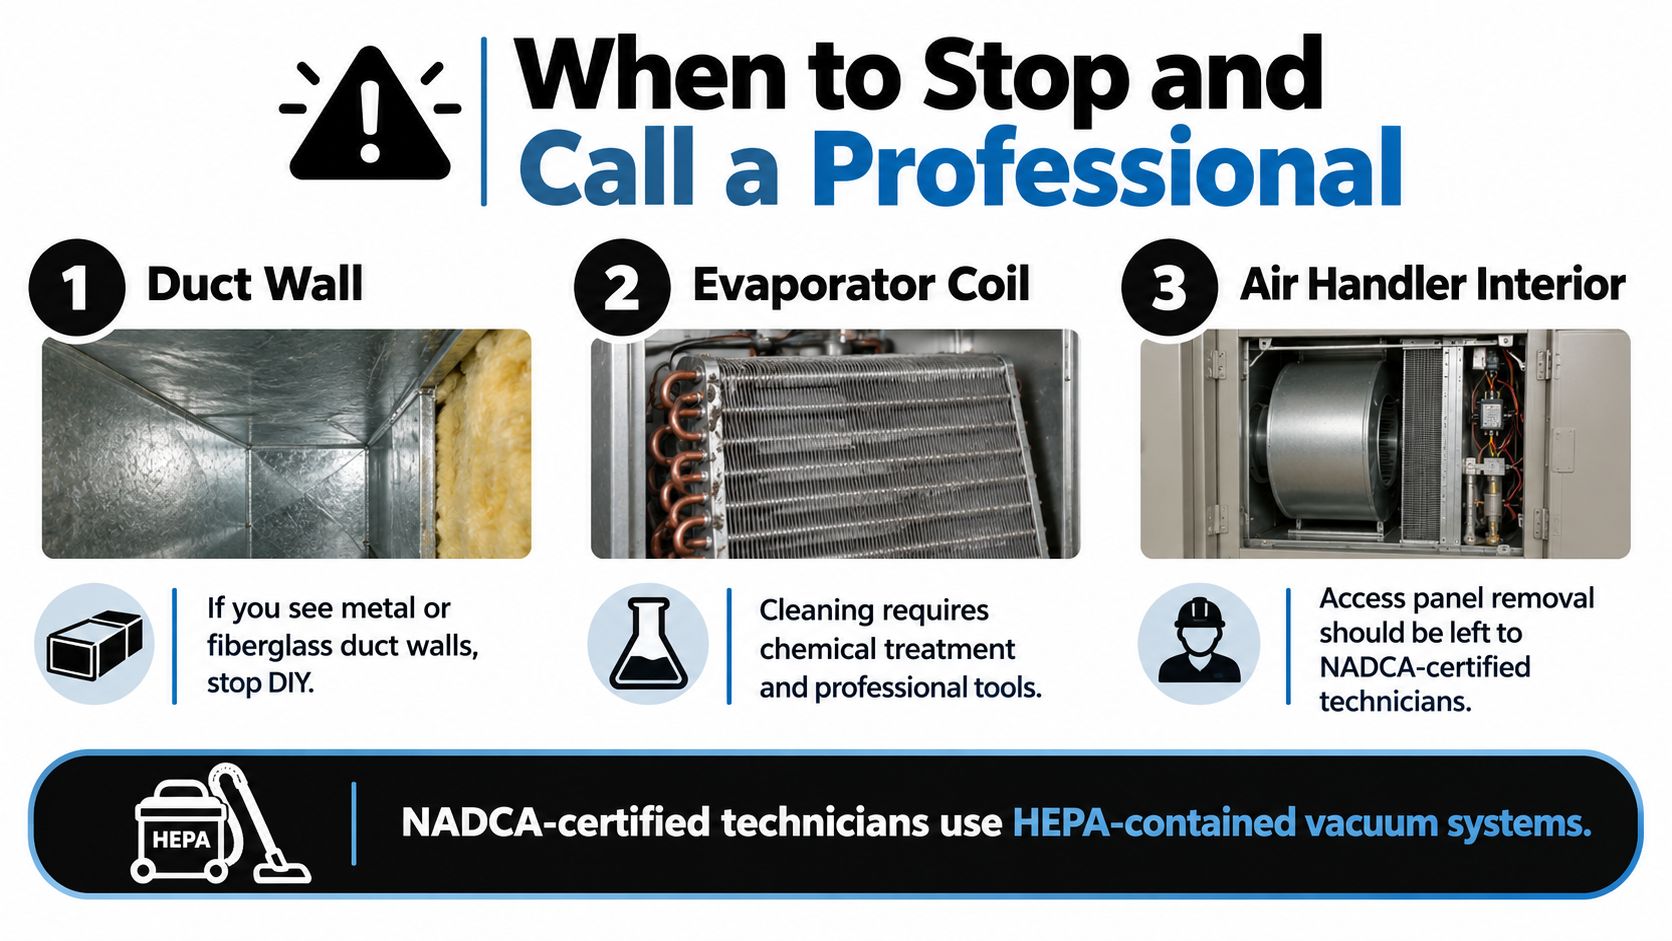
NADCA-level work relies on HEPA-contained vacuum collection, agitation tools, and negative-air setups that a homeowner can't replicate safely with a shop vac and brush. That's the right tool set when contamination is attached to duct surfaces or sitting deeper in the system.
Tripwires that should end the DIY job
If you see any of these, stop:
Visible mold inside ducts or on HVAC components: This needs proper evaluation and removal, not a spray bottle.
Droppings, nests, gnawed insulation, or pest remains: Contamination and odor control become part of the job.
Flexible or inaccessible runs behind walls or ceilings: These are easy to damage and hard to clean correctly.
A dirty evaporator coil: Coil fins bend easily, and the coil stays wet during normal operation.
A loaded blower wheel or dirty plenum: Once debris reaches those components, system cleaning has to be thorough.
What to do before the technician arrives
Don't keep poking at the problem. Do this instead:
Stop running the system if contamination is obvious
Take clear photos at the register or access point
Ask for NADCA ACR or ASCS credentials
Request full-system cleaning, not partial vent-only service if deeper components are involved
Callout: Partial cleaning is one of the costliest mistakes. If ducts are cleaned but the blower housing, drain pan, plenums, grilles, and air handler aren't addressed, the system can re-contaminate quickly.
Independent reviews also urge caution about substitutes for physical cleaning. A Canadian government report notes that reductions in heating bills and indoor air quality improvements couldn't be verified after duct cleaning, and it warns against relying on ozone, biocides, germicides, or deodorants in place of proper removal, as outlined in this government review of duct cleaning evidence and practice.
If you're screening providers, these NADCA duct cleaning standards help you ask better questions.
Even a light-looking job is often worth outsourcing after renovation dust, smoke events, or in older ducted homes where the visible dirt at the register is only the tip of it.
A Simple Maintenance Schedule for Cleaner Vents
The easiest way to keep vents cleaner is to stop treating them like a separate problem. In most homes, vent cleanliness tracks back to filter habits, airflow discipline, and whether the house had a contamination event.
Build the routine around the filter
For many households, a 1-inch filter changed every 60 to 90 days is a workable baseline. If you have pets or the system runs hard, change it more often, and in many homes that means about every 30 days during heavier use. For typical residential use, a MERV 8 to 11 filter is often a practical balance if your equipment supports it.
Then keep the vent work small and repeatable:
At each filter change: Wipe vent covers and vacuum loose dust from the face and surrounding trim.
Twice a year: Vacuum the short accessible run at the register opening.
Once a year: Visually inspect what you can see near accessible openings and note any odor, staining, debris, or moisture.
Only when warranted: Schedule deeper duct cleaning when contamination signs are present, not as an automatic calendar event.
Vent cleaning frequency by household condition
Household Condition | Filter Change | Vent Cover Wipe | Accessible Run Vacuum | Full Duct Inspection |
|---|---|---|---|---|
No pets | Every 60 to 90 days | At each filter change | Every 6 months | Once a year |
Pets | More often during shedding or heavy use | At each filter change | Every 6 months | Once a year |
Smokers | Check more often based on buildup | At each filter change | Every 6 months | Once a year |
Allergy sufferers | Check filter loading closely | At each filter change | Every 6 months | Once a year |
Post-renovation | Replace as needed after dust exposure | After project cleanup | Promptly after dust settles | Inspect after project completion |
Keep a simple service log
Write the filter size, installation date, and anything unusual you saw near the vents. That note helps later when a technician is trying to figure out whether the issue is new, seasonal, or tied to one event.
A broader scientific review from Canada concluded that evidence is insufficient to draw solid conclusions about positive effects of ventilation duct cleaning on indoor air quality, health benefits, cost savings, or HVAC performance, and described the evidence for improved indoor air quality from duct cleaning as poor, according to this Canadian scientific review. That's why the maintenance schedule works best when it stays practical: filter first, vent covers second, deeper cleaning only when the home gives you a reason.
If you want a cleaner recurring plan to follow, this guide on duct cleaning frequency helps frame service intervals around real household conditions.
Stack the small habits and the bigger jobs usually shrink. Keep records, stay inside the homeowner-safe zone, and don't let a dusty grille talk you into a full-system job unless the system needs one.
If your vents are pushing dust, your registers smell off, or inspection shows the problem goes past the opening, Purified Air Duct Cleaning can handle the parts of the job that require contained equipment and full HVAC access, including duct, vent, and coil cleaning. For homeowners who want a real inspection instead of guesswork, visit Purified Air Duct Cleaning and see whether a targeted service call makes more sense than trying to clean deeper into the system yourself.