How Do You Clean a Dryer Vent Pipe? Expert Homeowner Tips
- Oct 20, 2025
- 10 min read
Knowing how to clean a dryer vent pipe is about more than just a weekend chore; it's a critical safety measure for your home. The process is pretty straightforward: you'll disconnect the dryer, use a special brush and vacuum to clear out all the flammable lint, and then hook everything back up securely.

Why Cleaning Your Dryer Vent Is So Important
Before you even think about grabbing your tools, let's talk about the real-world risks of a clogged dryer vent. That handful of lint you pull from the filter after each load? That's just the tip of the iceberg. A massive amount of it gets trapped deep inside the vent pipe, creating a serious fire hazard that makes this maintenance task absolutely non-negotiable.
A clean vent also means an efficient dryer. When airflow is blocked, your dryer has to work much harder and run longer, which not only wastes a surprising amount of energy but also hikes up your utility bills. All that extra effort puts unnecessary wear and tear on the appliance, shortening its lifespan.
The Dangers Hiding in Your Walls
The biggest danger here is fire, plain and simple. Lint is incredibly flammable, and when it chokes the vent pipe, the dryer's intense heat has nowhere to go. The U.S. Fire Administration has some sobering statistics on this: failure to clean dryer vents is responsible for an estimated 15,500 house fires every single year in the United States. These are completely preventable fires with devastating consequences.
Warning Signs of a Clogged Vent
Thankfully, your dryer will usually give you some clear signals that it's struggling. Ignoring these can lead to much bigger, more dangerous problems down the road.
Damp Clothes: If your laundry still feels damp after a full cycle, poor airflow is almost always the culprit.
Hot Dryer: Is the top of the appliance unusually hot to the touch? That's a classic sign that heat is trapped inside instead of venting out.
Burning Smell: Any hint of a burning odor is a major red flag. It could mean lint is getting dangerously hot somewhere in the vent.
It's worth knowing what to do if you experience a burning smell in your dryer. Recognizing this specific warning sign can help you act fast and prevent a disaster before it happens.
Ultimately, keeping that vent clear is one of the smartest things you can do for your home. It extends the life of your dryer, saves you money, and, most importantly, protects your family. You can learn even more about that in our detailed guide.
Assembling Your Dryer Vent Cleaning Toolkit
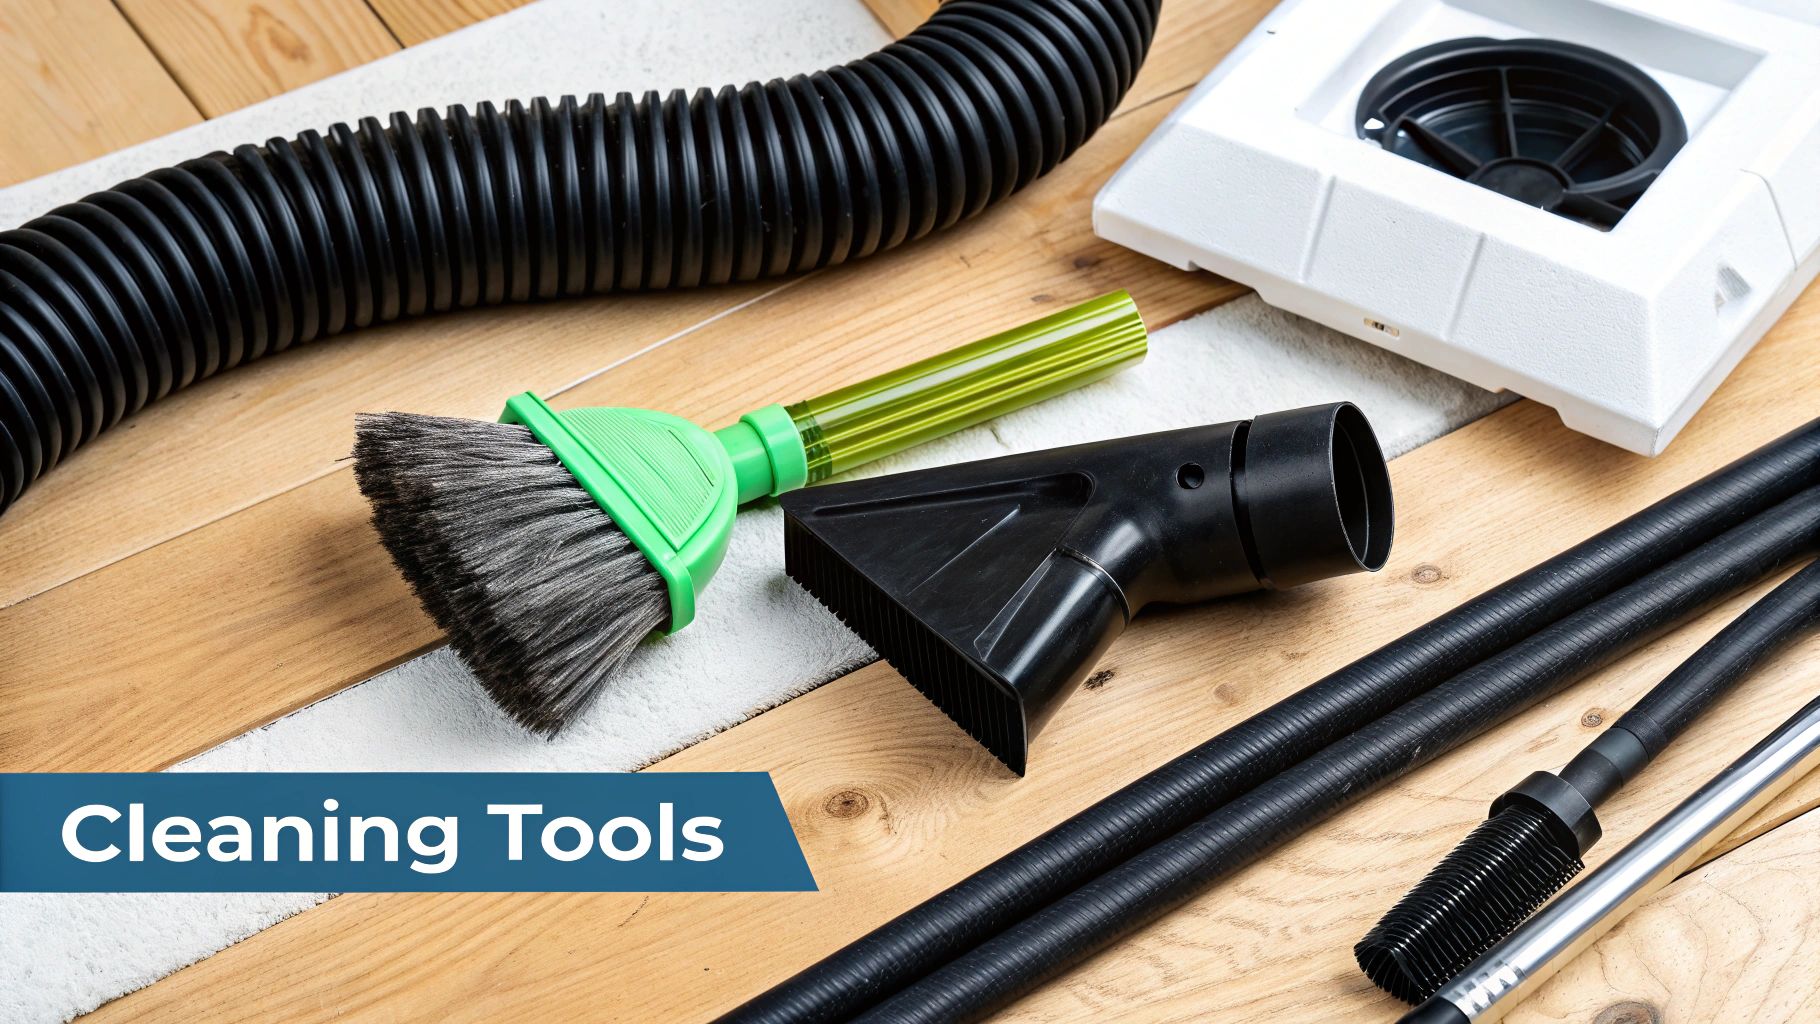
Any job is easier with the right tools, and cleaning your dryer vent is no exception. Having your gear ready to go turns a frustrating chore into a smooth, efficient project. While you probably have most of what you need already, the one specialized item you'll want is a dryer vent cleaning kit.
These kits are a real game-changer. They usually come with a brush head and several flexible rods that screw together, one after another. This design lets you snake the brush deep into the vent, scrubbing away all that stubborn, caked-on lint. More and more homeowners are tackling this job themselves, creating a global market for these kits worth over $610 million. It's a clear sign that people understand the fire risks and want to save a little money over hiring a pro.
Your Essential Cleaning Checklist
Before you start pulling things apart, it’s best to gather everything you’ll need. This simple prep step saves you from making annoying trips back to the garage mid-job.
Here’s a quick rundown of the essential tools and materials that will make this job a breeze.
Essential Toolkit for Dryer Vent Cleaning
Tool or Material | Primary Use | Pro Tip |
|---|---|---|
Dryer Vent Cleaning Kit | Scrubbing the inside walls of the vent pipe | Buy a kit with rods that extend longer than your vent run. |
Vacuum with Hose | Sucking up dislodged lint from the pipe and dryer | A shop vac is ideal for its power and capacity. |
Screwdriver or Nut Driver | Loosening the clamp that connects the vent to the dryer | A multi-bit screwdriver usually has the right size. |
Duct Tape (Foil) | Sealing connections or patching small tears in the vent | Standard cloth duct tape isn't rated for dryer heat. |
Dust Mask & Gloves | Protecting your lungs from lint and keeping hands clean | Lint dust can be surprisingly irritating, so don't skip the mask. |
Having these items on hand ensures you can handle whatever you find once you get the vent pipe disconnected. You'll be ready for a simple clean-out or a minor repair without missing a beat.
With your toolkit organized, you're all set to get started. For a step-by-step walkthrough of the cleaning process, take a look at our guide filled with easy DIY safety tips.
Your Guide to Cleaning the Dryer Vent Pipe
With your toolkit ready, it's time to get your hands dirty. Knowing how to clean a dryer vent pipe isn't just a random chore, it's a hands-on skill that directly boosts your dryer's efficiency and, more importantly, your home's safety. The process is straightforward, moving from prep and disconnection to the satisfying part: clearing out all that built-up lint.
First things first: safety. Before you even think about moving the dryer, unplug it from the wall. If you have a gas dryer, be extra careful around the gas line. If you're not comfortable with it, this is the perfect time to call a pro. Once it's unplugged, gently slide the dryer away from the wall to give yourself enough room to work comfortably.
Disconnecting the Vent for Access
Behind the dryer, you'll see the flexible duct that connects it to the vent pipe in the wall. This is usually held on by a simple metal clamp. Grab your screwdriver or nut driver, loosen the clamp, and gently wiggle the duct off the dryer's exhaust port. Do the same thing where it connects to the wall.
Don't be surprised if a puff of lint comes out. That's a good sign you’re tackling a job that needs doing. A quick once-over with your vacuum right now will keep your workspace from becoming a lint-covered mess.
This infographic breaks down the simple workflow for getting your dryer vent pipe clean.
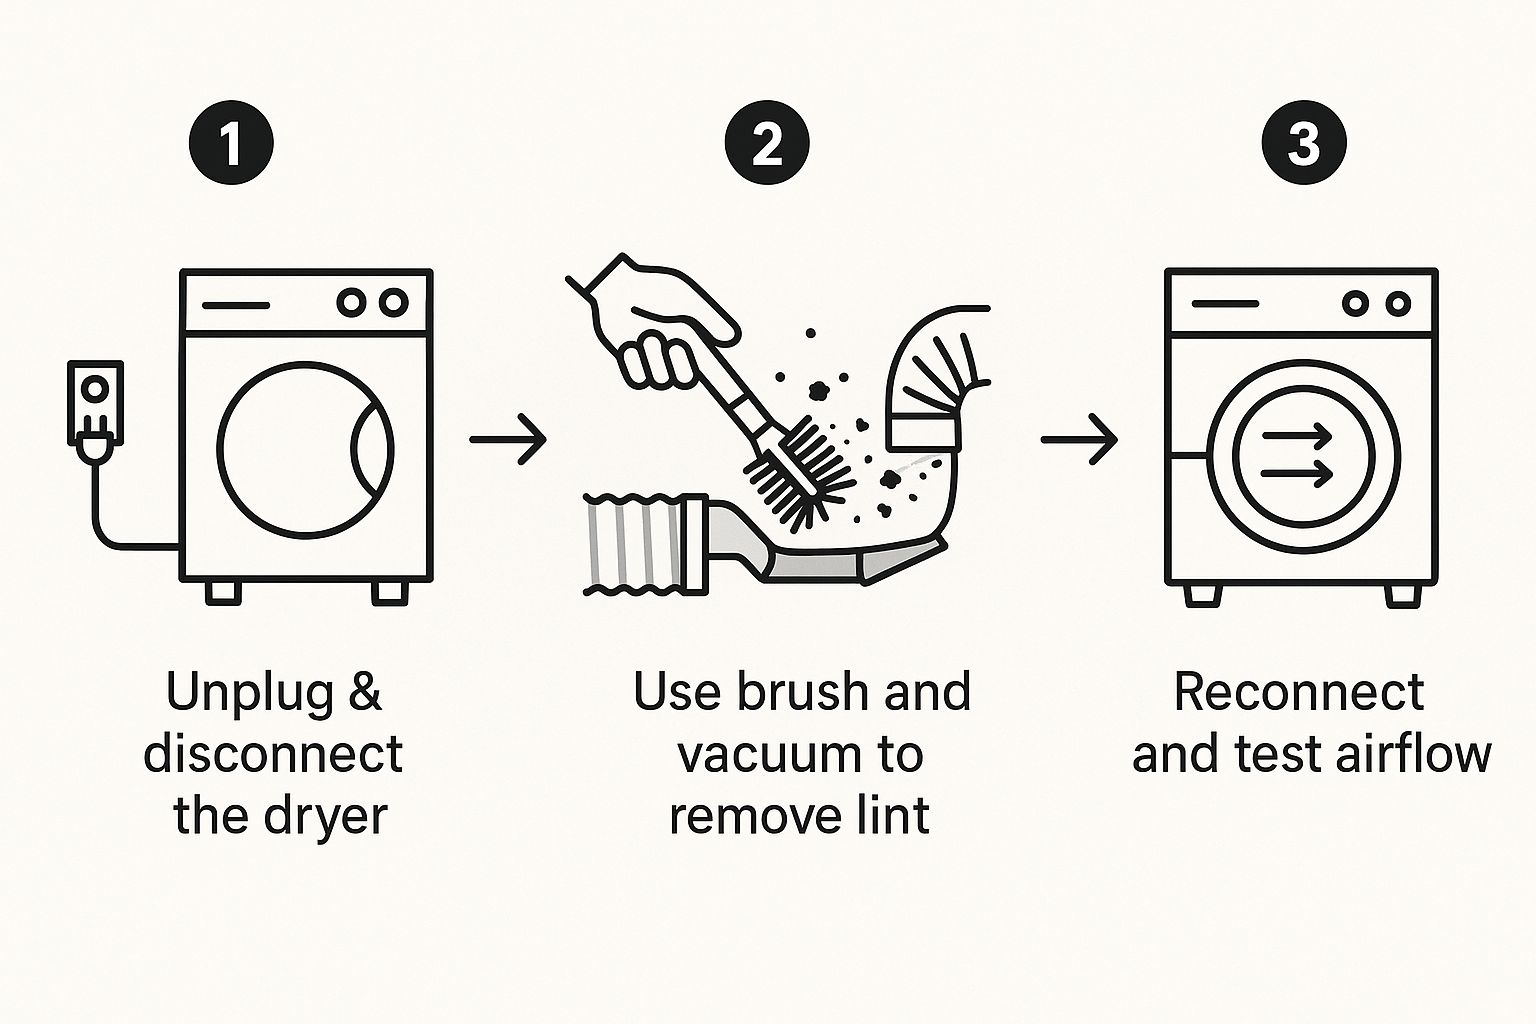
As you can see, the process flows from preparation to deep cleaning and then reassembly, making sure you don't miss a beat.
The Deep Cleaning Process
Now for the main event: clearing out the vent pipe itself. Take the brush head from your cleaning kit and screw it onto one of the flexible rods. Insert the brush into the vent pipe at the wall, and start rotating it clockwise as you push it deeper into the ductwork.
For the best results, it's smart to attack it from both ends.
Start from the Inside: Begin in your laundry room. If your kit allows, attach your drill to the end of the rod and run it at a low, steady speed. Push the brush in a few feet at a time, adding more rods as you go.
Vacuum as You Go: This is a pro tip. Have a helper hold a vacuum hose right at the vent opening to suck up the lint as you push it out. It prevents a massive mess.
Clean from the Outside: Next, head outside to the exterior vent cap. Remove any screens or flaps, as these are notorious lint traps, and clean the opening. Then, run your brush kit from the outside-in, working your way back toward the laundry room.
Don't Forget the Dryer: A surprising amount of lint gets stuck right at the source. Use your vacuum's crevice tool to clean out the exhaust port on the back of the dryer itself.
Reassembly and Final Checks
Once you're confident the vent is totally clear, it's time to put it all back together. Reconnect the duct to both the wall and the dryer, tightening the clamps so they're snug. Be careful not to overtighten, as you can easily crush the duct. Make sure the hose has a smooth path with no sharp kinks or bends that could restrict airflow. If you happened to notice any moisture during the cleaning, you might want to check out our guide on how to fix water in a dryer vent.
A straight, secure path is vital for efficiency. A crushed or kinked hose creates an immediate bottleneck, trapping lint and creating the very problem you just worked to solve.
While you're at it, understanding general ductwork and ventilation principles can give you a better appreciation for how your home’s systems work together.
Finally, plug the dryer back in, slide it carefully into place, and run a short, empty cycle on high heat. Go outside and check the exterior vent. You should feel a strong, steady stream of warm air.
Troubleshooting Common Cleaning Challenges
Even with the best intentions, a DIY project can hit a bump in the road. When you’re cleaning your dryer vent, you might run into a few curveballs that weren't part of the plan. Don't sweat it; most of these issues are pretty common and have straightforward fixes.
One of the most frequent headaches is dealing with a vent that has multiple sharp bends or is just plain long. A standard cleaning kit can have a hard time navigating tight elbows or reaching the very end of a long run. If that's your situation, the best approach is to tackle it from both ends: clean from the inside, then head outside and clean from there, meeting in the middle.
Dealing with Stubborn Blockages
Sometimes, what you hit isn’t just a big ball of lint. That exterior vent cap can look like a pretty cozy spot for critters to build a home, leaving you with a solid blockage of twigs, grass, and other nesting materials. If your brush hits a solid wall that just won’t give, chances are you've found an old bird's nest.
When this happens, you need to dislodge it carefully. Try using the brush rods without the brush head attached to gently poke and break up the mass from both directions. The key is to be firm but not aggressive; you don't want to damage the ductwork in the process.
Another thing you might spot is a small tear or hole in the vent hose itself. These little punctures are bad news, as they can leak hot, moist, lint-filled air into your laundry room or behind your walls. The fix is simple: grab some high-temperature foil tape, not the regular cloth duct tape, and use it to create a strong, heat-resistant seal over the damaged spot.
The Problem with Plastic Vents
If you pull out your dryer and find a white, plastic, or flimsy foil accordion-style vent hose, stop what you're doing. It needs to be replaced immediately. These types of ducts are a known fire hazard because they crush easily, creating traps for lint, and the plastic material itself can be flammable.
Upgrading from a flimsy plastic or foil accordion hose to a rigid or semi-rigid metal duct is not just a recommendation; it's a critical safety improvement. Metal ducts have a smooth interior that prevents lint from snagging and are far more resistant to crushing and fire.
Swapping out that old vent is a simple task that makes a huge difference in your home's safety. As you're troubleshooting, it’s also a good idea to know the early symptoms of a clogged dryer vent so you can catch issues before they turn into major problems.
Knowing When to Call a Professional
Taking on a DIY dryer vent cleaning is a great way to stay on top of home maintenance, and honestly, it can be pretty satisfying. But it's just as important to know your limits. Some situations are better, and safer, left to the experts. Knowing when to put down the tools and pick up the phone is key to protecting your home.
Certain jobs just aren't suited for a standard DIY kit. For instance, if your vent pipe is exceptionally long, snakes its way through a tight attic or crawlspace, or has a bunch of sharp, 90-degree turns, you might not have the reach or power to clear it completely. That’s when a pro becomes the smarter, safer choice.
Signs You Need an Expert
Professionals show up with specialized gear, like high-powered vacuums and flexible, rotating brushes that can navigate the trickiest ductwork with ease. This equipment ensures a much deeper and more thorough cleaning than most of us can manage on our own.
You should definitely consider hiring a professional if you run into any of these situations:
You suspect the blockage is more than just lint, like a bird’s nest or debris from a storm.
Your vent exits straight through the roof, which is a major safety and access challenge.
After your best DIY effort, the dryer is still showing signs of a clog, like leaving clothes damp.
The decision to call a pro often comes down to complexity and peace of mind. For older homes or vents with a complicated path, an expert can spot issues you might miss, like hidden damage or improper installation.
This need for expertise is why the professional dryer vent cleaning industry is growing so fast. Valued at roughly $2.5 billion, the market is expected to nearly double, which shows just how many homeowners are relying on pros to get the job done right.
You can dive deeper into the benefits of professional dryer vent cleaning services and fire prevention in our detailed article. You can also read more about the growth of the dryer vent cleaning market.
Frequently Asked Questions
Even with a step-by-step guide, it's natural to have a few more questions pop up. Let's tackle some of the most common ones I hear from homeowners so you can feel totally confident handling this project.
How Often Should I Clean My Dryer Vent?
For most families, cleaning out the dryer vent at least once a year is the sweet spot. But this isn't set in stone.
Think about your laundry habits. If you have a big family, a dog that sheds a small-to-medium-sized mammal's worth of fur every week, or you just run the laundry constantly, you should probably check the vent every six months. The most telling sign it’s time? Your clothes are taking forever to dry.
Can I Use a Leaf Blower to Clean the Vent?
I get this question all the time. While using a leaf blower sounds like a clever shortcut, it's a gamble I wouldn't take.
Sure, it might blast out some of the loose, dry lint near the ends. But it lacks the power to break up the dense, caked-on gunk that’s the real fire hazard. Worse, the intense burst of air can easily disconnect or even damage the ductwork hidden in your walls, turning a simple cleaning job into a major repair. A dedicated brush kit is a much safer, and more effective, way to go.
The goal is to scrub the interior walls of the vent, not just blow air through it. A brush physically dislodges the compacted lint that a leaf blower leaves behind, ensuring a truly clean and safe duct.
What Are the Top Signs of a Clogged Vent?
Your dryer is pretty good at telling you when something's wrong. You just have to know what to look (and smell) for. Keep an eye out for these red flags:
Clothes feel damp or unusually hot after a full drying cycle.
You notice a faint burning smell while the dryer is running.
The top of the dryer itself is hot to the touch.
You can see lint and debris building up around the exterior vent flap.
The laundry room gets incredibly humid and warm when the dryer is on.
If you're noticing any of these signs or just want the peace of mind that comes with a professional touch, Purified Air Duct Cleaning is here to help. Our certified technicians will ensure your dryer vent is cleaned thoroughly and safely, protecting your home and family. Visit us at purifiedairductcleaning.com to get your free quote today.