How to Clean Air Ducts at Home: Easy DIY Guide
- Jun 23, 2025
- 14 min read
Recognizing When Your Ducts Are Crying for Help
Your home has a way of telling you when something isn't right. That faint, musty smell when the furnace or AC first kicks on? Those dust bunnies that seem to magically reappear seconds after you’ve vacuumed? These aren't just random quirks; they're often direct signals from your ductwork. Before you can even think about how to clean air ducts at home, you need to play detective and learn to spot the signs pointing to a problem.
Your Senses Are Your Best Tools
Forget about specialized equipment for a moment; your own eyes and nose are powerful first-line detectors.
The Smell Test: A persistent dusty or mildew-like odor circulating through your home is a major red flag. This often happens because the air is passing over layers of accumulated dust, pet dander, and potentially moisture, picking up those unpleasant smells along the way.
The Visual Inspection: Grab your smartphone and turn on its flashlight. Pop off a few vent covers (both supply and return) and take a peek inside. A thin layer of light-colored dust is pretty standard. However, if you see thick, matted layers of debris, clumps of pet hair, or anything that looks like it has been wet, it’s a clear sign that a cleaning is overdue. You can even snap a photo or video to get a better look at what's hiding just beyond your reach.
Lifestyle Factors and Telltale Signs
Every home’s duct-cleaning schedule is different because every household is unique. Think about what's been going on in your home lately. Did you just finish a big kitchen remodel that sent drywall dust flying? Do you share your home with a beloved Golden Retriever who sheds enough to knit a whole new dog? These factors significantly increase the amount of debris pulled into your HVAC system.
It's clear that more homeowners are becoming aware of these issues. The professional air duct cleaning market was valued at USD 3.87 billion in 2023 and is expected to continue growing. This shows a definite trend toward prioritizing indoor air quality. You can discover more about the rising demand for cleaner indoor air and how it's shaping the market.
Sometimes, the clues are less about what you see and more about how you feel. If your family’s allergies seem to flare up more than usual indoors, or if you find yourself dusting constantly, your ducts could be the culprit. They act as your home's circulatory system, and if they’re clogged, they’re just pushing those irritants right back into your living space with every cycle.
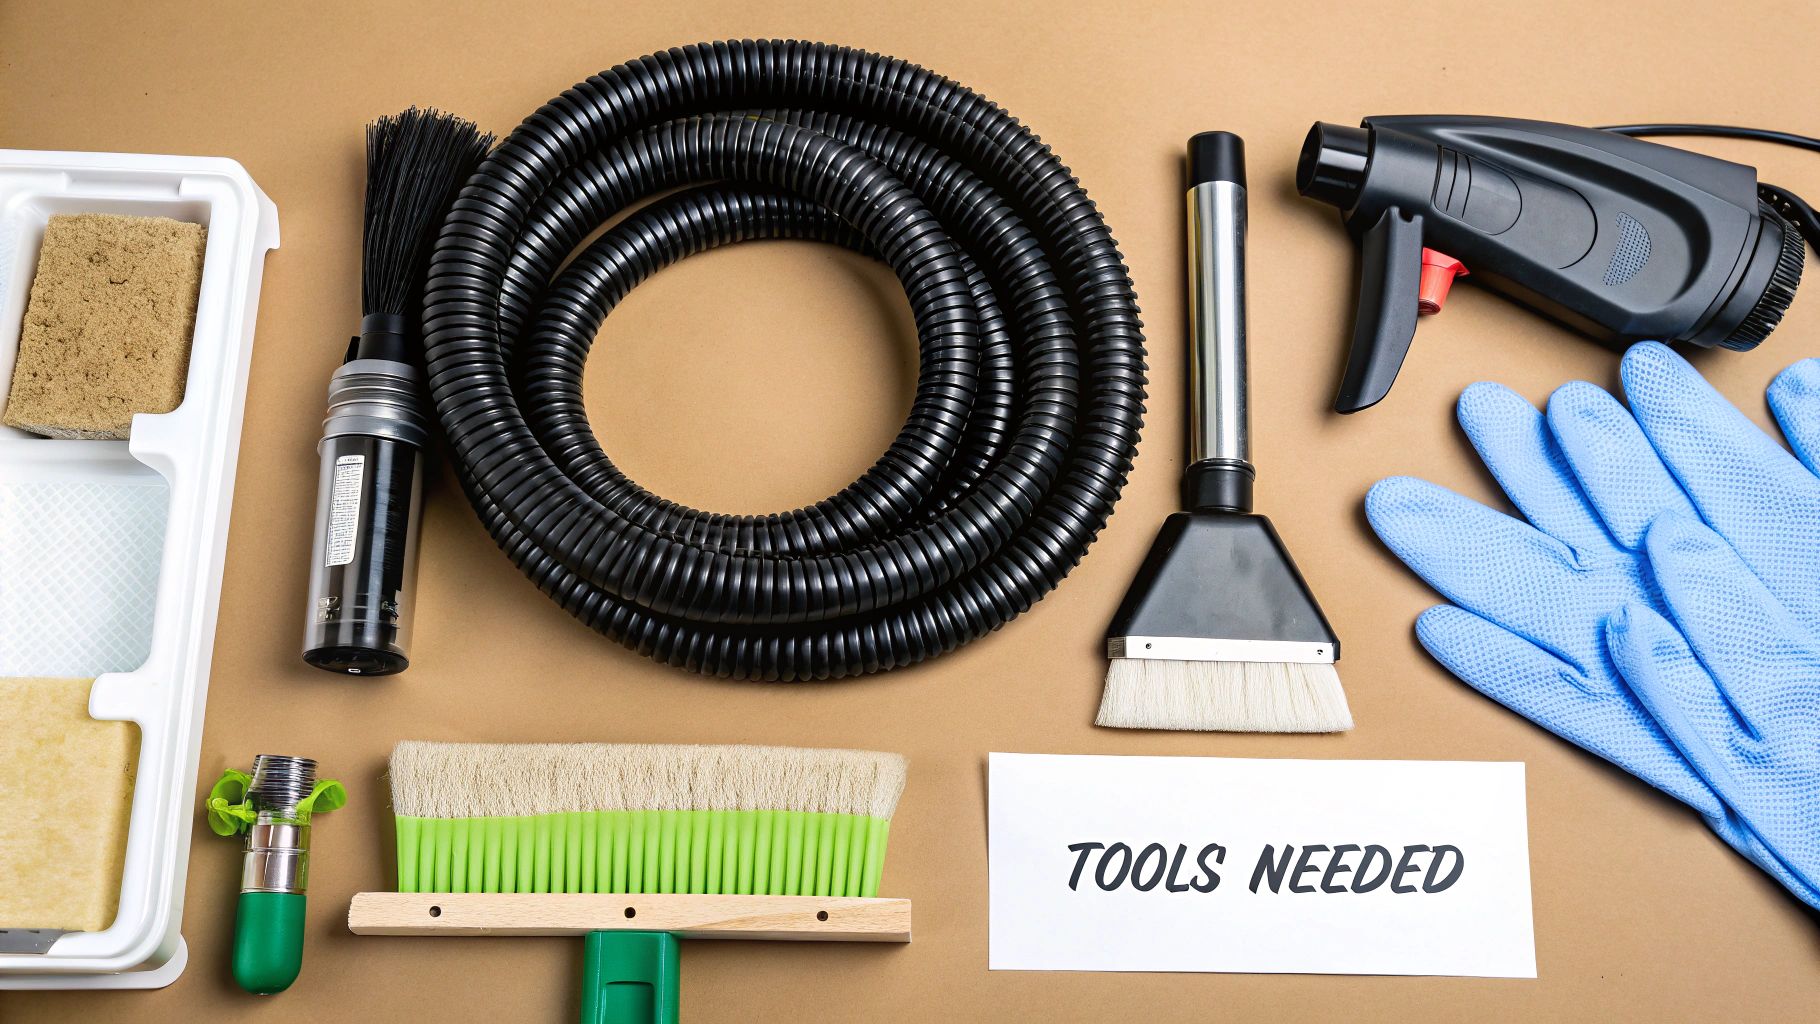
Gathering Your Duct-Cleaning Arsenal Without Breaking the Bank
Before you start picturing a major home improvement project, take a breath. You'll be happy to know that you probably already have most of the tools needed for this job hiding in your garage or utility closet. Learning how to clean air ducts at home is often more about being clever with what you have than buying a bunch of specialized equipment. The goal here isn't to perfectly match a professional service, but to make a real dent in the dust and debris clogging up your system.

The Must-Haves for Any DIYer
Your most important tool for this job is going to be a powerful vacuum. A shop vacuum with a long hose is the ideal choice because it has the serious suction power required to pull out all the gunk you're about to loosen. Besides the vacuum, you'll need a few other basic items:
A screwdriver or a drill to easily take off and put back your vent covers.
Some stiff-bristled brushes to really get in there and scrub away the stubborn, caked-on dust from the inside surfaces of the ducts. A clean, unused toilet brush or even a dryer vent cleaning kit can be surprisingly effective here.
A stack of microfiber cloths or old rags for wiping down the vent covers and the areas just inside the duct openings.
A good flashlight—or just the light on your phone—is crucial for peeking into the dark corners of your ductwork to see your progress.
Let's talk safety, because this part is non-negotiable. You are about to stir up a cloud of dust, pet dander, and who-knows-what-else that has been accumulating for years. You do not want that stuff in your lungs or eyes. Make sure you have a well-fitting dust mask or a respirator and a pair of safety glasses.
Optional Upgrades and Clever Workarounds
While the basics are enough to get the job done, a few extra tools can make the process smoother. A flexible hose attachment for your vacuum is great for navigating the sharp turns and corners inside your ducts. Some resourceful homeowners have even taped a smaller, flexible tube onto their main vacuum hose to create a custom tool for reaching tight spaces.
Here’s a real-world tip I’ve heard from seasoned DIYers: you can use a leaf blower on its lowest setting to push debris from a distant vent toward your shop vac, which you've placed at another opening in the same duct run. Just be ready for a bit of a dusty mess and have your vacuum ready to capture it.
To help you decide what you really need, here's a quick comparison of the essential tools versus the nice-to-haves.
DIY Duct Cleaning Tool Comparison
This table breaks down the essential and optional tools, giving you an idea of their effectiveness and what you might expect to spend.
Tool | Necessity Level | Effectiveness | Approximate Cost | Household Alternative |
|---|---|---|---|---|
Shop Vacuum | Essential | High | $50 - $150 | Regular household vacuum (less power) |
Stiff Brush | Essential | High | $5 - $20 | Clean toilet brush, old paint stirrer |
Safety Gear | Essential | Critical | $10 - $30 | None - Do not skip this. |
Dryer Vent Brush Kit | Nice-to-Have | Medium-High | $20 - $40 | Stiff wire with a rag taped to the end |
Microfiber Cloths | Essential | High | $5 - $15 | Old t-shirts, rags, or paper towels |
As you can see, the essential items are quite affordable, and you likely own most of them already. While a dryer vent kit is a helpful upgrade, you can get creative with household items to achieve a similar result without spending extra money.
Protecting Yourself and Your Home From Duct-Cleaning Disasters
Tackling a DIY air duct cleaning is about more than just clearing out some dust; it's about doing the job safely. Before you even think about unscrewing the first vent cover, your top priority should be protecting yourself, your home, and your expensive HVAC system. This goes beyond just wearing a dust mask—it's about understanding the messes you can make and avoiding costly blunders.
Pre-Cleaning Safety Protocols
Your very first move should be to completely shut down your HVAC system. Walk over to your thermostat and turn it off. To be absolutely certain, go to your home's breaker box, find the circuit for your furnace and air handler, and flip it to the 'off' position. This simple step prevents the system from accidentally turning on while you’re working, which could be dangerous and would instantly blow all the dust you've just loosened right back into every room.
Next, get ready for containment, because this project will get messy. Close the doors to any rooms you aren't currently working in and throw some old sheets or plastic drop cloths over any furniture nearby. A great pro tip is to stuff old towels or rags into the duct openings just past the vent you're cleaning. This little trick stops debris from falling down into the main trunk line and creating a bigger problem.
Recognizing Major Red Flags
While most ductwork is just home to everyday dust and maybe some pet dander, sometimes there are more serious issues hiding inside that a weekend warrior just can't handle. It's crucial to know when to put down the tools and call for backup.
Suspicious Growth: If you shine a light into your ducts and see fuzzy patches that are black, green, or any other odd color, stop what you're doing. This is a tell-tale sign of mold, which requires professional remediation. Trying to clean it yourself can release millions of spores into your air. If this is a concern, it’s a good idea to learn more about how to avoid mold in your home and damp buildings to appreciate the risks involved.
Pest Infestations: Seeing droppings, nesting materials like twigs and shredded paper, or chewed insulation means you have a pest problem. This requires a professional pest control service to handle the critters and a specialized company to sanitize the ductwork afterward.
Structural Damage: Be gentle as you work, especially with the flexible, accordion-style ducts. If you notice large tears, sections that have come apart, or metal ducts that are badly crushed or dented, these issues must be repaired before any cleaning will be effective.
Some homeowners might be tempted to use chemicals to sanitize their ducts. In fact, the air duct cleaning chemicals market was valued at around USD 9.6 billion in 2023, which shows how focused the industry is on deep cleaning. However, these are specialized products that can be harmful if used incorrectly. You can discover more insights about these specialized cleaning agents and see why they are a tool best left in the hands of certified technicians.
The Main Event: Transforming Your Dusty Ducts Into Clean Airways
With your prep work done and safety gear on, it’s time for the satisfying part: actually cleaning out all that built-up gunk. This is where your efforts really pay off, turning those dusty airways into clean passages for the air your family breathes. We'll work systematically from the individual rooms back toward the main system, which helps ensure you capture as much debris as possible. Knowing how to clean air ducts at home effectively is all about following a logical process.
Tackling the Vents and Branch Ducts
First, you'll want to unscrew and remove all the supply vent covers in your home. These are the grilles where the conditioned air blows out. Here's a great tip from experience: carry a bucket of warm, soapy water with you. As you take off each cover, just drop it in to soak. This simple action makes cleaning them later so much easier.
With a vent cover removed, grab your stiff-bristled brush. You'll need to agitate the inside surfaces of the duct as far as you can possibly reach. Your main goal here is to loosen all the caked-on dust and debris from the metal walls. Think of it like scrubbing a dirty pan before you rinse it—you have to break that bond first.
Immediately after you've brushed a section, stick your shop vacuum hose as deep as it will go and suck up all the loose particles you just dislodged. Be thorough here, moving the hose around to cover every surface you can reach. You'll need to repeat this process for every single supply vent in your home, one by one. After the supply vents are done, you'll do the exact same thing for the return air vents. These are usually larger and fewer in number, but they can be the dirtiest since they pull air directly from your rooms into the system.
Here's a simple visual guide that shows the core process.
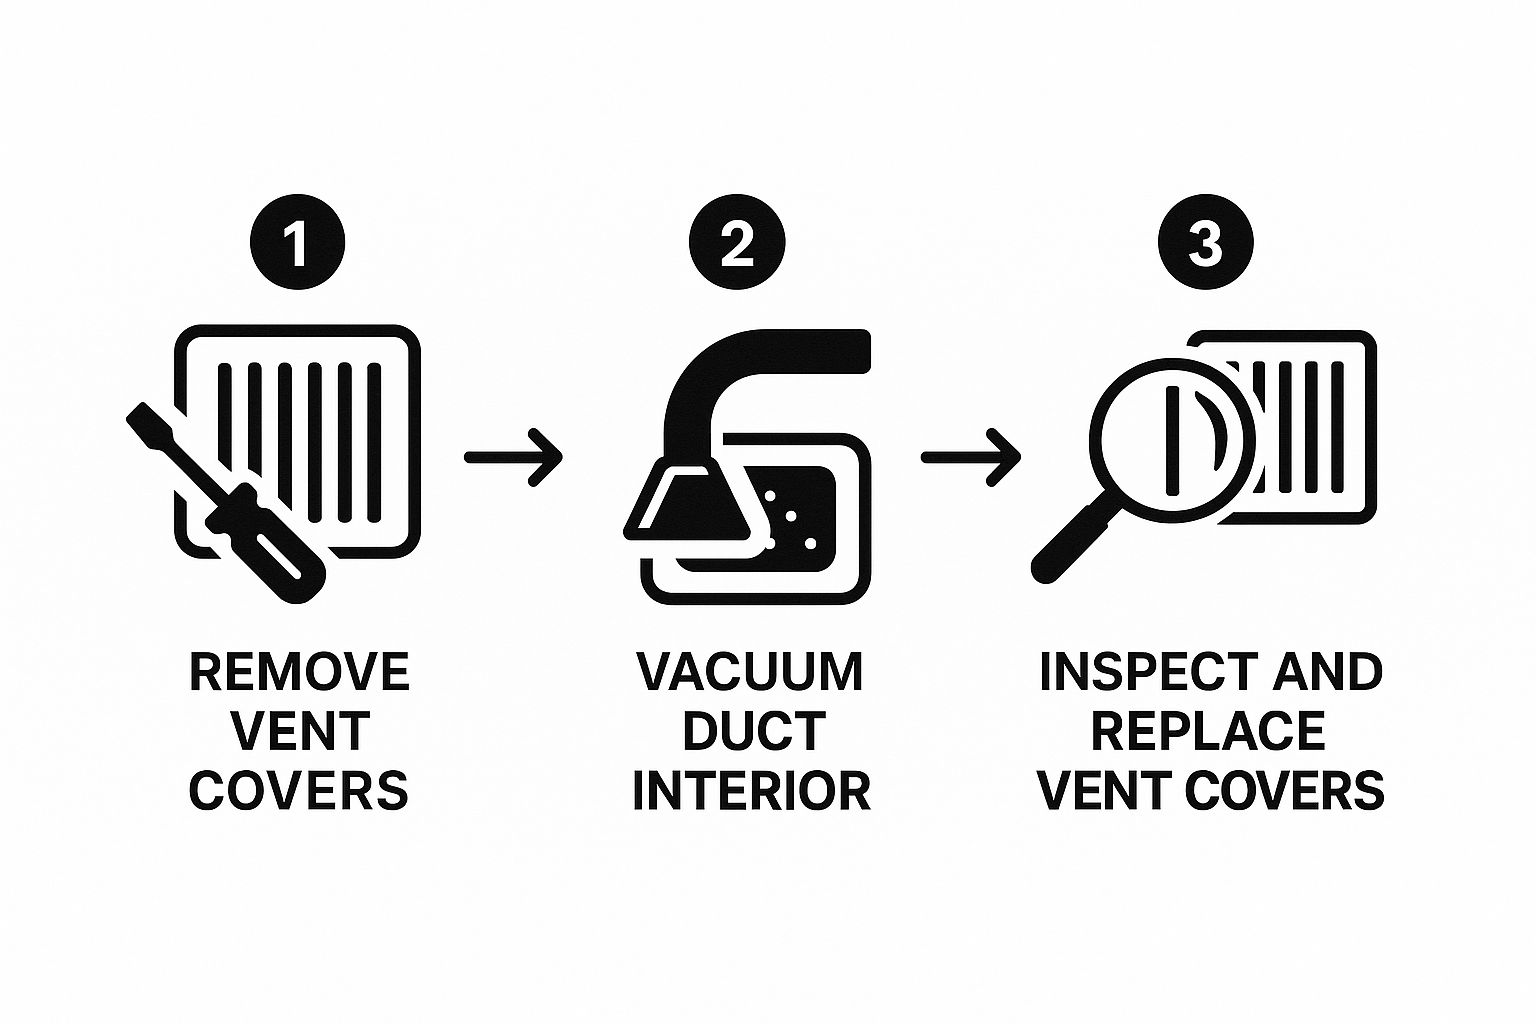
As the visualization shows, the basic steps of removing, cleaning, and replacing are straightforward and methodical.
Cleaning the Main Trunk Lines
Now it's time to address the main arteries of your ductwork, which are typically found in your basement or attic. These are the large rectangular or round ducts that all the smaller branch ducts connect to. This is where a lot of the heaviest debris tends to settle over time.
This picture gives you an idea of what a typical residential ductwork system looks like.
The image from Wikipedia helps illustrate how the smaller branch ducts feed into these larger main trunk lines.
Getting into these main lines can be a bit tricky. While professionals often cut access holes, for a DIY job, you’ll work from the ends of the trunk. If there’s an end cap, you'll need to remove it. From there, use a long-handled brush or even a dryer vent cleaning kit to reach as far into the main trunk as possible. Focus on agitating the bottom surface, where most of the debris has settled.
Immediately follow up with your shop vac. This part can be a real workout, and don't be shocked by what you find. It's common to pull out years of dust, leftover construction debris, and even a few lost kids' toys. Patience is your best tool during this phase of the project.
Finally, take your soaked vent covers, give them a good wipe-down, and let them dry completely before screwing them back into place. This is also the perfect moment to install a fresh furnace filter. The last thing you want is to send a new cloud of dust into your freshly cleaned system.
Getting to Know Your Ductwork: A Tale of Two Types
Just like you wouldn't use a pressure washer on delicate lace, you can't use the same cleaning approach for every type of ductwork. The materials and shapes that form your home's airways have their own quirks. Figuring out what you're dealing with is the first step to a successful cleaning—and avoiding a DIY disaster that ends with a pricey repair call.
Rigid Metal Ducts: The Sturdy Workhorses
If your home is a bit older, chances are you have rigid metal ductwork, usually made from galvanized steel or aluminum. This stuff is the heavyweight champion of ducting—it's durable and can handle a more assertive cleaning.
Rectangular vs. Round: Many homes have rectangular ducts, but those corners are magnets for dust and debris. You'll need a brush that can really get into those 90-degree angles. Round ducts are a bit more straightforward since grime is spread out more evenly and a spinning brush or even a rag on a flexible rod can dislodge it easily.
Cleaning Technique: Don't be shy with these. You can use a stiff brush and some elbow grease to scrub the interior surfaces. Since they're solid, the risk of puncturing them is very low. The real trick is reaching the deep, hidden sections, which is where a quality flexible brush kit becomes your best friend.
Flexible Ducts: The Delicate Connectors
Often lurking in attics or crawlspaces, flexible ducts connect the main trunk lines to your room vents. Think of them as a wire coil wrapped in a thin layer of plastic—super useful but also super fragile. A tear in one of these means your precious heated or cooled air is leaking into the attic or walls, which is a huge waste of energy and money.
Cleaning Approach: This is critical: Never use a hard-bristled or rotating brush on flexible ductwork. The chance of ripping the liner is incredibly high.
Best Practice: The safest bet here is to rely on suction alone. Attach a soft brush to your vacuum hose and gently clean the vent opening and as far into the duct as you can safely reach. The mission is to remove loose dust bunnies without putting any strain on the material. It's more like dusting a fragile antique than scrubbing a greasy pan. Knowing when to be gentle is a key part of learning how to clean air ducts at home.
Before you begin, it's a good idea to understand the different duct materials you might encounter. This table breaks down the common types and the best way to approach cleaning each one.
Duct Type | Material | Cleaning Method | Special Considerations | Difficulty Level |
|---|---|---|---|---|
Rigid Metal | Galvanized Steel, Aluminum | Aggressive brushing (stiff or rotating brushes), high-powered vacuum. | Corners in rectangular ducts trap debris. Very durable. | Moderate |
Flexible | Plastic over a wire coil | Gentle suction with a soft brush attachment. No hard brushes. | Extremely easy to puncture or tear. Leaks waste energy. | Low (but high risk of damage) |
Fiberglass Lined | Metal duct with internal fiberglass insulation | Soft-bristled brushes only. Avoid agitating fibers. | Abrasive cleaning can release fiberglass particles into the air. | High (Often best left to pros) |
Duct Board | Compressed fiberglass with a foil exterior | Very gentle suction. Brushing is highly discouraged. | Fragile and easily damaged. Can release harmful fibers. | High (Pro cleaning recommended) |
As you can see, rigid metal ducts are the most DIY-friendly, while systems with fiberglass or flexible components require a much more delicate touch. A quick peek in your attic or basement will tell you whether you have sturdy metal, fragile flex-duct, or a mix of both. Knowing your opponent is half the battle won.
Keeping Your Investment Clean for the Long Haul
You've done it! The duct cleaning is complete, and there’s nothing quite like that peace of mind knowing your home's airways are finally clear. Now, the challenge is keeping them that way without making duct maintenance a weekend-long project. The goal is to set up a simple, practical routine that stops dust and debris from building up in the first place, keeping your air fresh and your system running smoothly.
Creating a Sustainable Maintenance Routine
Think of this as you would any other part of home upkeep—a little consistent effort now prevents bigger, more expensive headaches down the road. Your number one tool in this fight is your HVAC filter. A cheap, flimsy filter is like trying to stop fine dust with a screen door; it just won't cut it. Upgrading to high-quality pleated filters and, most importantly, changing them every 30-90 days is the single best thing you can do. If you have pets or anyone with allergies in the house, making it a monthly habit is a smart move.
To make this feel less like a chore, here are a few simple habits you can work into your routine:
Monthly Visual Checks: Once a month, just grab a flashlight and take a quick look inside a few of the return vents you use most. All you're looking for is a noticeable layer of dust or pet hair starting to gather.
Seasonal Deep Wipes: When you switch from heating to cooling and vice-versa, take a few extra minutes to vacuum out the vent boots (the part you can easily reach) and wipe down the grilles. This quick clean-up prevents that surface dust from getting pulled deeper into the ductwork.
Minimize Indoor Pollutants: Simple things add up. Using a vacuum with high-quality bags, dusting with microfiber cloths that trap particles, and always running the kitchen exhaust fan when you cook will dramatically cut down on the gunk your HVAC system has to filter. For more ideas, take a look at our guide on improving indoor air quality.
Tying Maintenance to Your Wallet
This routine isn't just about being tidy; it's about making your home more efficient. When your ducts and filters are clear, your HVAC unit doesn't have to strain to circulate air. This reduced effort can translate into real savings on your monthly energy bills. This focus on system care is becoming more common. The global market for HVAC cleaning services, which includes duct cleaning, was valued at USD 12.41 billion in 2024. This figure shows just how many homeowners are catching on that proactive maintenance is a smart investment in both their air quality and the longevity of their system. You can read more about the growing HVAC maintenance market on Fact.MR. By following these straightforward maintenance habits, you're not just keeping your home clean; you're protecting a major home investment for years to come.
Knowing When You've Won (And When to Call for Backup)
You've spent the better part of your afternoon with a vacuum hose, scrubbed vent covers until they gleamed, and now you're standing back, probably covered in a fine layer of dust, wondering, "Did that actually work?" Knowing if your efforts in learning how to clean air ducts at home were successful is all about managing expectations and watching for the right signals. A DIY cleaning won't match the power of a professional service with truck-mounted vacuums, but it should still make a noticeable difference in your home.
Evaluating Your DIY Success
The first and most satisfying sign of victory is visual. Your vent covers should be spotless, and a quick peek inside the ducts with a flashlight should reveal far less dust and debris than when you started. The real proof, though, unfolds over the next few days and weeks as you live and breathe in your home.
You should start to notice a few key changes that confirm your hard work paid off:
Less Dusting on Your To-Do List: You might find that your furniture, shelves, and other surfaces stay cleaner for longer. This is because your HVAC system is no longer blowing old dust bunnies around the house.
Fresher, Cleaner Air: That faint, musty odor that used to greet you when the AC or heat kicked on should be gone. Instead, the air should smell more neutral and clean.
Improved Airflow: In some homes, especially where the buildup was significant, you might even feel a slightly stronger and more consistent stream of air coming from your vents.
If you're still on the fence about whether your home's air quality has improved, it helps to know what to look for. You can learn more about the signs of poor indoor air quality in our detailed guide to get a better sense of the common indicators.
When to Wave the White Flag
Sometimes, the smartest DIY move is recognizing when you're outmatched. Certain problems inside your ductwork are just too stubborn for household tools. It’s probably time to call in the professionals if you run into any of these roadblocks:
A persistent musty or moldy smell that just won't go away, even after a thorough cleaning.
Signs of a pest infestation, like droppings, nests, or other unwelcome debris inside the ducts.
Allergy symptoms in your household that don't get better or, in some cases, seem to get worse after your cleaning attempt.
You suspect there's damage to the ductwork, or you know there are sections you simply can't access with your equipment.
If you’ve given it your best shot but feel your system needs a more powerful touch, don’t feel defeated. For homeowners in the Phoenix area, the certified technicians at Purified Air Duct Cleaning have the professional-grade equipment and experience to get your system back to its best. Contact us today for a free quote and breathe easier knowing your air is truly clean.