How to Clean Dryer Vent: A Homeowner's Practical Guide
- Jan 19
- 17 min read
You know that fuzzy stuff you pull out of your dryer's lint trap? That's just the tip of the iceberg. The real trouble brews deep inside the vent, where lint builds up unseen. Tackling your dryer vent isn't just another chore; it's a critical safety task that prevents fires, cuts down on energy bills, and helps your dryer last longer. We've seen it all, and the consensus is clear: a thorough cleaning at least once a year is essential for keeping your home safe and running smoothly.
The Unseen Dangers in Your Dryer Vent
It’s easy to forget about the ductwork snaking from your dryer to the outside of your house, but it demands your attention. With every load of laundry, tiny, flammable fibers sneak past the lint trap and start to accumulate. This buildup does more than just make your clothes take forever to dry; it creates a genuine hazard.
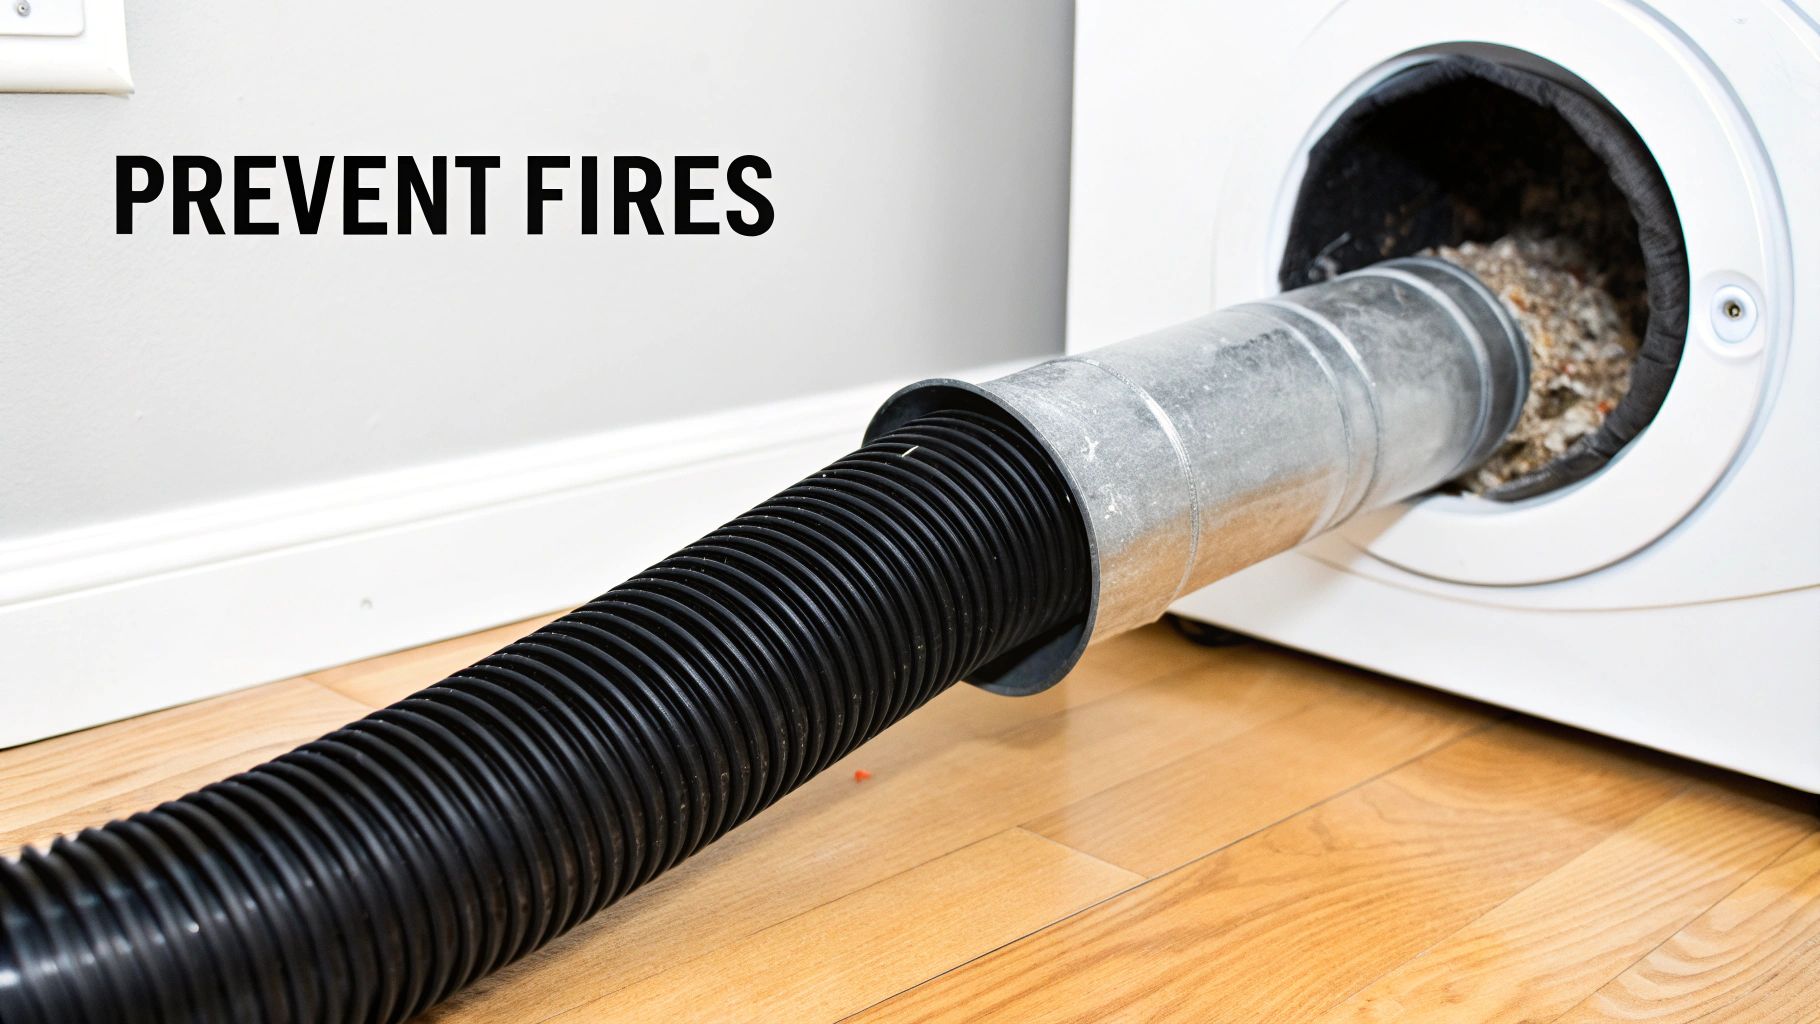
As lint piles up, it chokes off the flow of hot, moist air. When that air has nowhere to go, the dryer's internal temperature can climb dangerously high, potentially igniting the trapped lint. The numbers on this are genuinely shocking. Clogged dryer vents are a leading cause of house fires every single year. According to the U.S. Fire Administration, dryers were linked to an estimated 15,500 fires annually between 2010 and 2014, resulting in devastating property damage, injuries, and even deaths.
More Than Just a Fire Risk
While preventing a fire is obviously the number one reason to learn how to clean a dryer vent, the benefits don't stop there. A clogged vent makes your dryer work much harder and longer than it should, which kicks off a domino effect of other problems.
Skyrocketing Energy Bills: When your dryer has to run for two or three cycles just to get one load dry, it's guzzling electricity or gas. A clean vent lets it work efficiently, which you'll definitely notice on your monthly utility bills.
Appliance Wear and Tear: That extra strain from a blocked vent is tough on the dryer's motor, heating element, and other critical parts. This can seriously shorten its lifespan, leaving you with hefty repair bills or the cost of a brand-new machine.
Worse Indoor Air Quality: A clogged vent can push humid air, fine dust, and even mold back into your laundry room. This tanks your indoor air quality and can be a real problem for anyone with allergies or respiratory issues.
Think of it this way: a clear airway for your dryer means a healthier, safer, and more efficient home. Ignoring it is like driving your car with a clogged exhaust; sooner or later, something's going to give.
For a quick overview of why this maintenance is so crucial, here's a simple breakdown.
Dryer Vent Cleaning At a Glance
Key Area | Recommendation | Primary Benefit |
|---|---|---|
Frequency | Annually (or more for heavy use) | Prevents dangerous lint buildup. |
Safety | Remove all flammable lint | Dramatically reduces home fire risk. |
Efficiency | Ensure clear airflow | Lowers energy bills and shortens dry times. |
Appliance Health | Reduce strain on components | Extends the life of your dryer. |
Keeping these points in mind helps frame just how important this simple task is for the overall health of your home.
Setting the Stage for a Clean Vent
Understanding why this matters is the first step. To get a better handle on how this system works, you might find our guide on what a dryer vent is and why it's so important helpful. In the rest of this article, we'll walk you through a practical, no-nonsense guide to cleaning your dryer vent with confidence. We’ll cover everything from the tools you'll need to the final checks, making sure you have all the know-how to protect your home.
Gathering the Right Tools for the Job
Before you even think about yanking your dryer away from the wall, let's talk prep. Taking a few minutes to get your gear in order can be the difference between a quick, satisfying job and an afternoon of pure frustration. It’s like trying to cook a new recipe; you wouldn't start without getting all your ingredients on the counter first.
Having the right tools isn't just about making the job easier, it's about doing it safely. You're going to be kicking up a lot of fine dust and lint, and trust me, you don't want that stuff in your lungs. A little preparation is the secret sauce to getting this done right.
Your Essential Toolkit
The good news is, you probably have most of what you need already lying around. There’s just one special piece of equipment that's the real hero of this story, and it's easy to find and won't break the bank.
Here’s a no-nonsense checklist of what to grab:
A Vacuum with a Hose Attachment: A powerful shop vac is the MVP here, but your regular household vacuum will get the job done as long as it has a good hose. This is your cleanup crew for all the lint you’re about to set free.
A Dedicated Dryer Vent Cleaning Kit: This is the non-negotiable tool. You want a kit with flexible rods that screw together and have an auger-style brush on the end. This design is built to navigate the twists and turns of your vent and actually grab onto stubborn lint, unlike a flimsy, simple brush.
A Screwdriver or Nut Driver: You’ll need this to loosen the clamp that holds the vent hose to both the dryer and the wall outlet. It's smart to have both a Phillips head and a flathead ready to go so you're not running back to the toolbox.
Basic Protective Gear: Please don't skip this. A simple dust mask is essential for keeping lint out of your airway, and a pair of gloves will save you from getting filthy.
One of the biggest mistakes I see people make is thinking they can just stick their vacuum hose into the vent and call it a day. It won't reach far enough and can't scrape the caked-on lint off the duct walls, leaving a serious fire hazard behind.
Once you have everything laid out, you're ready to roll. For a deeper dive into the cleaning process itself, check out our guide with pro tips for quick results on cleaning dryer duct work.
Why the Right Cleaning Kit Matters
Let's circle back to that cleaning kit for a second. I can tell you from experience that there’s a night-and-day difference between a quality kit and a cheap one. A flimsy brush tends to just push clumps of lint further down the line, potentially creating a worse blockage. A good auger-style brush, however, latches onto the lint and pulls it out.
The flexible rods are just as important. They have to be rigid enough to push through thick blockages but nimble enough to handle any sharp 90-degree turns in your vent path. Even better are the kits designed to attach to a power drill. The spinning action acts like a power scrubber, pulverizing years of compacted lint for a truly thorough cleaning. Spending a few extra bucks on a decent kit is an investment in your home's safety.
A Practical Walkthrough to Cleaning Your Dryer Vent
Alright, you've got your tools, so it's time to get your hands dirty. This isn't just about checking boxes on a list; it’s about knowing the right way to do things to get a truly deep clean. We're going to cover everything from the crucial safety prep to the final checks, so you can feel confident you've done the job right.
The key here is to be methodical. If you rush, you'll miss spots or, even worse, damage the vent. Taking your time ensures every inch of that ductwork is cleared of that hazardous lint buildup.
Starting With Safety First
Before you touch a single tool, you absolutely must disconnect the dryer from its power source. This is a non-negotiable step to prevent electric shock.
If you have an electric dryer, pull the plug straight from the wall outlet. For a gas dryer, you also have to shut off the gas supply line. Look for a small valve on the line behind the dryer and give it a quarter turn to the "off" position.
It’s always a good idea to flip the breaker for the dryer, too. Once that's done, disconnect the vent pipe from the back of the machine. Expect a little puff of lint, so having a mask on is a good call. Use a shop vac to suck up any loose debris you can see in the dryer's exhaust port and the duct in the wall. You can find some broader context on the industry by reviewing these air duct cleaning service market insights.
With the power and gas off, go ahead and carefully slide the dryer away from the wall. You'll want plenty of room to work back there, so don't be afraid to pull it out a good distance. This is usually when you get your first look at how much lint has been collecting around the connections.
Disconnecting and Initial Cleanup
Now that you can get behind the dryer, you can see the flexible vent hose. It's usually held on by a circular clamp at the back of the dryer and where it meets the wall duct. Grab your screwdriver or nut driver and loosen both clamps so you can gently wiggle the hose free.
Get ready for a bit of a mess. It's amazing how much lint can fall out the second that hose comes off. This is why having your vacuum powered on and ready to go is a smart move for cleaning up the initial fallout.
A rookie mistake is to focus only on the duct in the wall while completely ignoring the dryer itself. The slot where your lint screen slides in and the exhaust port on the back of the machine are major hiding spots for packed-in lint.
Use your vacuum's hose attachment and get in there. Clean out the lint trap housing really well, and then give the circular opening on the back of the dryer a thorough vacuuming before you move on. Getting this done now prevents all that gunk from being blown right back into your clean duct later.
This process flow infographic shows the core components for an effective DIY cleaning. As you can see, it really boils down to three fundamentals: vacuuming, using a proper kit, and remembering your safety gear.
Cleaning the Ductwork Thoroughly
Time for the main event: clearing the entire length of the vent duct. This is where your dryer vent cleaning kit really shines. Start by screwing together one or two of the flexible rods and attaching the brush head to the end.
You have two ways you can tackle this:
From the Inside: Start by feeding the brush into the duct opening in your laundry room.
From the Outside: Begin at the exterior vent cover on the side of your house.
Honestly, for most homes, starting from the inside and pushing everything out is the most effective approach. Gently feed the brush into the wall duct. If your kit can be attached to a power drill, use it on a low-speed setting. That spinning action is what really breaks up the stubborn, compacted lint.
As you push the brush deeper, just keep adding more rod sections until you feel it hit the end at the exterior vent. Here's a pro tip: don't just push it through once. Work the brush back and forth, especially if you feel it hitting a bend in the ductwork. That scrubbing motion is what scrapes the caked-on stuff off the walls of the vent.
Final Steps and Reassembly
After you've worked the brush all the way through, head outside to check the exterior vent cover. You'll probably find a nice pile of lint you just pushed out. Clear that away, and also check the vent cover itself for any lint, leaves, or other junk that might be blocking the flaps. A clean exit is just as important as a clean pipe.
Now you just have to put it all back together.
Reconnect the Vent Hose: Slide the flexible hose back onto the wall duct and the dryer. Tighten the clamps until they're snug; you want a good seal, but don't crank down so hard that you crush the hose.
Restore Power and Gas: Gently push the dryer back into position. Be really careful not to kink or flatten the hose behind it. Then, plug your electric dryer back in or turn the gas valve back to the "on" position.
Run a Test Cycle: This is the moment of truth. Run the dryer for a few minutes on an air-only or low-heat setting. Go back outside and put your hand up to the exterior vent. You should feel a strong, steady flow of air.
That airflow is your proof that you’ve successfully figured out how to clean your dryer vent. Your appliance can now breathe easy, operate safely, and run a whole lot more efficiently.
When to Call a Professional for Dryer Vent Cleaning
Tackling a dryer vent cleaning yourself is a great piece of annual maintenance, but it's just as important to know when a DIY kit won't cut it. Sometimes, you’re dealing with a situation that needs more than a brush and some elbow grease. Knowing when to call in a pro isn’t admitting defeat, it’s making a smart, safe choice for your home.
The reality is that some vent systems are just too complex for a standard cleaning kit. You might not have the power or the reach to clear out a serious blockage, which could leave a hidden fire hazard festering in your walls. Recognizing these situations is the key to ensuring your dryer is truly safe and running at peak efficiency.
Red Flags in Your Vent's Design
The physical layout of your dryer duct can throw a real wrench in your DIY plans. If your home has any of these features, it's a strong sign you should leave it to a professional.
Excessively Long Vents: Most DIY kits max out at around 20 feet. If your vent run is longer than that, which is common in larger homes or apartments where the dryer isn't against an outside wall, you simply won't be able to clean the whole thing.
Multiple Sharp Turns: Every 90-degree turn is a magnet for lint. These bends create choke points where clogs love to form. A professional's high-powered equipment can navigate these tricky spots much more effectively than a flimsy manual brush.
Vents Through Attics or Crawlspaces: Ducts that snake through hard-to-reach areas like attics, tight crawlspaces, or between floors are nearly impossible to clean properly without specialized tools and the know-how to use them.
When you can’t see the entire path of the vent, you can’t be sure you've cleared it. Professionals use high-powered vacuums and cameras to verify their work, offering a level of certainty that a DIY approach can't match.
Warning Signs of a Severe Blockage
Forget the vent's design for a moment; your dryer itself will tell you when it’s in serious trouble. If you spot any of these performance issues, it's time to stop using it and call for a professional inspection immediately.
Clothes Are Still Damp: Is one cycle no longer enough to get your clothes dry? If heavy items like towels and jeans are still damp after a full run, it’s a classic sign of restricted airflow. The hot, moist air has nowhere to go.
The Dryer Is Hot to the Touch: The top of your dryer should feel warm during a cycle, but it shouldn't be excessively hot. If the appliance itself feels scorching, it means heat is building up and can't escape through the vent.
A Distinct Burning Smell: This is the most urgent warning sign of all. That acrid, burning smell is lint inside the vent getting hot enough to scorch. You are dangerously close to a fire. Turn the dryer off immediately.
A professional technician has tools and techniques that go far beyond a simple brush. They often start outside by clearing the exterior vent flap and any screens. Inside, they might use compressed air to blast through tight spots or powerful auger brushes to scour vents up to 20 feet deep, guaranteeing every last bit of hazardous lint is gone.
We know that deciding between DIY and a professional service involves weighing the costs and benefits. If you're on the fence, our guide on understanding dryer vent cleaning costs can help you make an informed decision. Remember, calling a pro isn't just about cleaning; it's about getting a comprehensive diagnosis to ensure your entire system is safe and sound.
DIY Cleaning vs Professional Service: When to Make the Call
This quick table can help you decide if your situation is right for a DIY approach or if it's time to bring in the experts.
Situation | Recommended DIY Action | When to Call a Professional |
|---|---|---|
Simple, short vent run (under 20 feet) with few bends. | A standard DIY kit is usually sufficient for annual maintenance. | If you clean it and performance doesn't improve. |
Dryer seems to be taking a little longer than usual. | Perform a thorough DIY cleaning of the vent and lint trap. | If drying times remain long after your cleaning attempt. |
Your vent is longer than 20 feet or has multiple sharp turns. | Not recommended. A DIY kit likely won't reach or navigate the bends. | This is an immediate sign to call a pro with specialized equipment. |
You smell a faint musty odor when the dryer is running. | Clean the accessible parts of the vent and check the exterior flap. | The smell persists, indicating a deeper blockage or mold issue. |
You smell a distinct burning odor. | Stop using the dryer immediately. This is a fire hazard. | Call immediately. Do not attempt to fix this yourself. |
Your home recently had construction or a pest issue. | A DIY cleaning may not be enough to clear unusual debris. | A professional can ensure all construction dust or nesting material is removed. |
Ultimately, while DIY is great for upkeep, a professional service provides the peace of mind that comes with a thorough, verified cleaning, especially when you're facing a complex or potentially dangerous situation.
Benefits of a Professional Deep Clean
While a DIY cleaning is a fantastic habit for annual upkeep, there's a world of difference between that and a professional deep clean. Hiring a certified technician elevates the process from just pulling out some lint to restoring your entire dryer vent system to its safest, most efficient condition. Think of it as an investment in your dryer's performance, its lifespan, and your family's safety.
Professionals don't show up with the same brush kit you'd buy at a hardware store. They bring in the heavy artillery: high-velocity air tools and powerful, specialized vacuums that create intense suction. This combination doesn't just nudge lint out; it aggressively extracts years of compacted debris, including things you wouldn't expect, like bird nests, construction materials, and other stubborn blockages.
Beyond Basic Lint Removal
The true value a pro brings is in their thoroughness. A technician can safely and effectively clean complex vent runs that are simply out of reach for a standard DIY kit. This is especially true for long ducts that snake through attics or crawlspaces, or systems with multiple sharp turns where lint loves to pile up.
Plus, many professionals bring diagnostic tools to verify their work.
Diagnostic Cameras: Some technicians will run a small, flexible camera through the ductwork before and after cleaning. This lets them spot hidden problems like cracks, disconnected sections, or tough clogs that a brush alone would completely miss.
Airflow Measurement: Pros can use a tool called an anemometer to measure the air speed at your exterior vent. This gives you hard data, confirming that the vent is totally clear and your dryer can finally "breathe" properly.
This attention to detail means your vent isn't just mostly clean; it's completely clear, which maximizes both safety and performance. To get a better sense of what this entails, you can see how professionals structure their services. To understand the scope and benefits of professional deep cleaning, you might want to look into Milton Cleaning's deep clean service offerings.
Tangible Long-Term Advantages
A professional deep clean delivers immediate benefits you'll actually notice. The most obvious is a huge boost in your dryer's performance. That means shorter drying times and, consequently, lower energy bills. According to Energy Star, a clean, efficient dryer can cut your utility costs by up to 30%.
Beyond the savings, a professional cleaning extends the life of your dryer. When airflow is restricted, you're putting a massive strain on the motor and heating elements. Clearing that out prevents premature wear and tear, helping you dodge expensive repair bills or, worse, having to buy a whole new appliance.
Here's something most people overlook: the impact on your home's indoor air quality. A clogged, damp vent is the perfect breeding ground for mold and mildew, which can get pushed back into your laundry room. A professional cleaning eliminates these allergens along with fine dust, creating a healthier space for your family.
Safety and Peace of Mind
Ultimately, the biggest benefit is peace of mind. Knowing that an expert has thoroughly cleaned and inspected your entire dryer vent system provides a level of confidence a DIY job just can't match. Technicians are trained to spot hidden dangers, like flimsy, flammable vinyl ducting or improper vent connections, and can recommend the right fixes.
They make sure the job is done correctly, drastically reducing the risk of a dryer fire, one of the leading causes of house fires every single year. For homeowners in the Phoenix area, exploring professional dryer vent cleaning services for fire prevention is a critical step in protecting your home. When you hire a professional, you aren't just buying a service; you're investing in a safer, more efficient home.
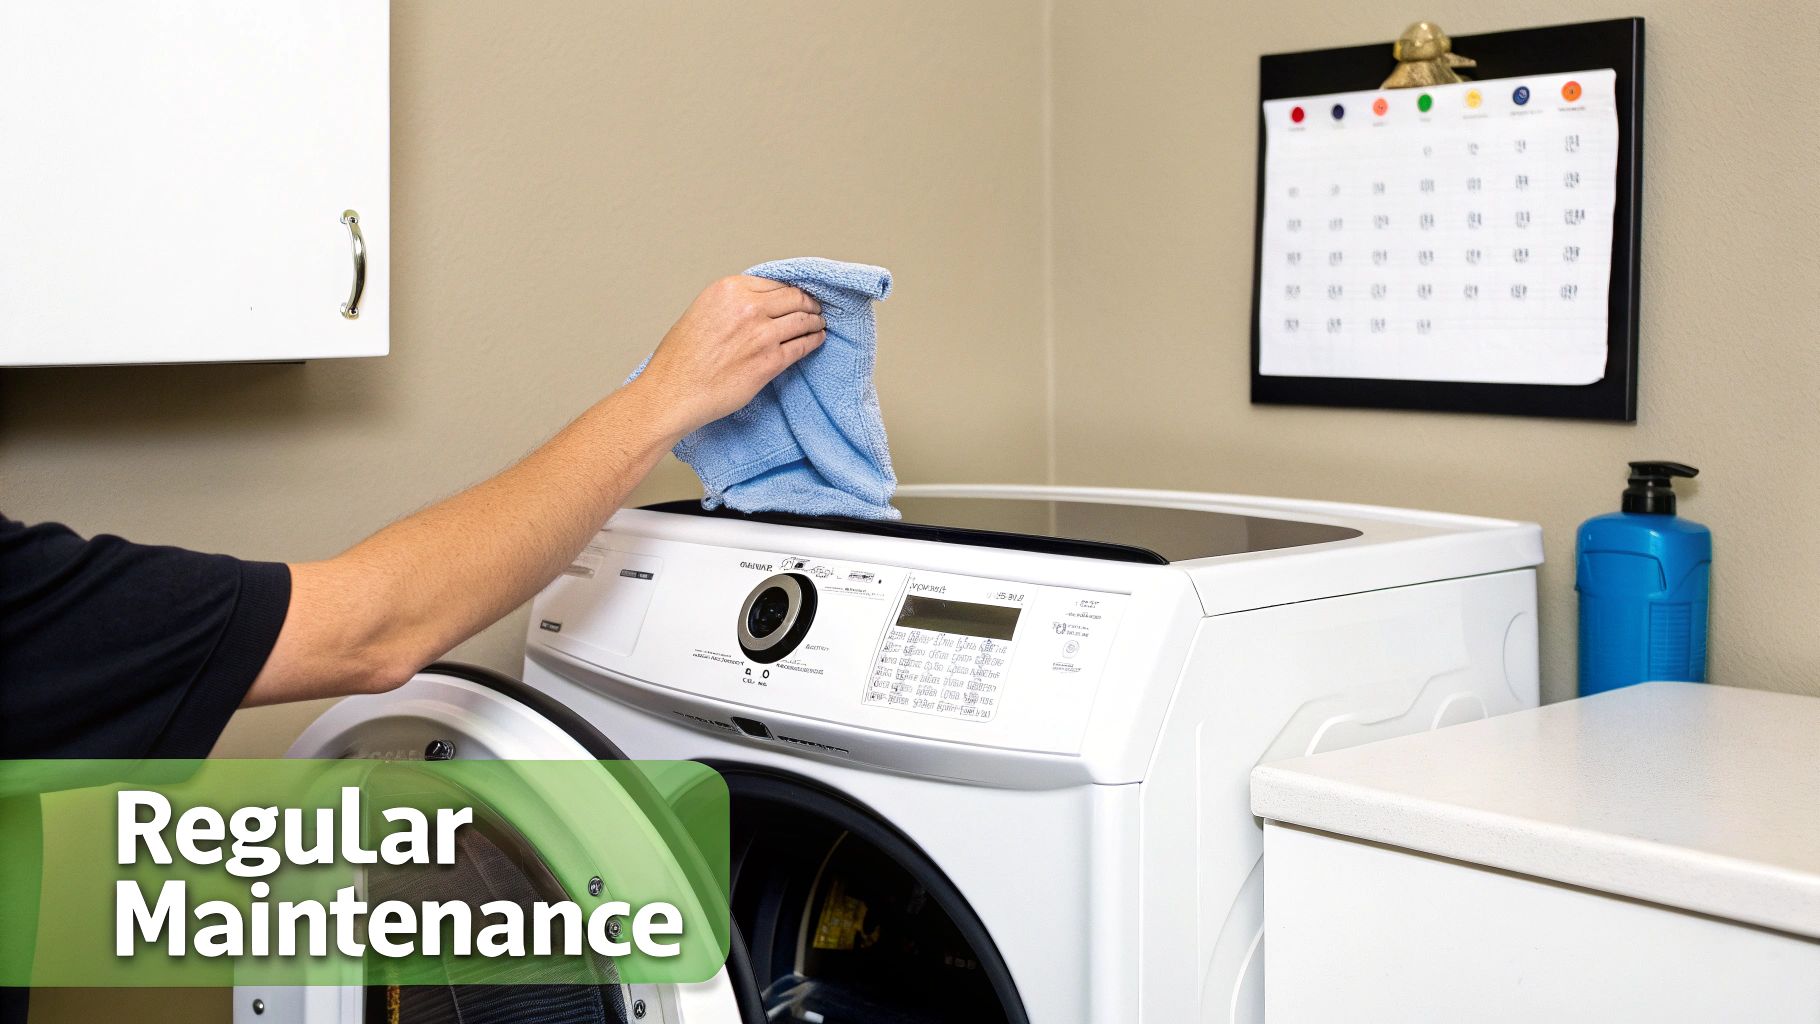
Maintaining Your Dryer for Year-Round Safety
So, you’ve put in the work and your dryer vent is finally clean. Great job! The next step is making sure it stays that way. Keeping up with your dryer isn’t a huge, time-consuming chore; it’s really about building a few small habits that make a massive difference in safety and efficiency all year long.
Consistency is everything when it comes to preventing the fire hazards we've talked about. By working a few quick checks into your normal household routine, you can stop dangerous lint from ever building up in the first place.
Your Year-Round Maintenance Schedule
Think of this as your simple game plan for keeping your dryer running safely and efficiently. Sticking to this schedule will seriously cut down on fire risk and help keep those energy bills from creeping up.
After Every Single Load: This one is non-negotiable. Clean out the lint screen. It’s your first and most important line of defense, catching the vast majority of lint before it has a chance to get into the vent.
Every Few Months: Just take a quick look behind the dryer. Make sure the hose is still securely connected and that it isn't getting crushed or kinked against the wall. A loose connection can dump lint all over your laundry room floor.
Annually: This is when you schedule a deep cleaning. Even if you're perfect about cleaning the screen, some lint is always going to slip past. An annual clean-out is the only way to get rid of that gradual, hidden buildup.
The connection between a clean vent, a safe home, and an efficient appliance cannot be overstated. These small, consistent actions directly contribute to your family's safety and help you avoid costly repairs or high utility bills.
Proactive Tips for Minimizing Lint
Beyond just cleaning, there are a few other things you can do to reduce the amount of lint your dryer has to deal with from the get-go.
For a deeper dive, check out our essential guide to dryer vent maintenance for more pro tips. An easy tweak is to go easy on the dryer sheets; the waxy film they leave can sometimes make lint stick inside the ductwork. It's also a good idea to periodically check the vent flap on the outside of your house to ensure it closes properly; this keeps pests, rain, and debris from finding their way inside.
Common Dryer Vent Cleaning Questions
Even after walking through the steps, you might still have a few questions. That's completely normal. Let's tackle some of the most common things homeowners ask when they're getting ready to clean out their dryer vent for the first time.
Is Cleaning the Lint Trap Enough?
This is a big one. You're diligent about cleaning the lint trap after every single load, so you're good, right? While that is the single most important habit for dryer safety, it doesn't catch everything. Think of it as the first line of defense, but not the only one.
Tiny particles of lint always slip past the filter and get pushed deep into the ductwork. Over months and years, this builds up into a thick, flammable blanket you can't see, creating a serious fire risk that only a full cleaning can eliminate.
Can I Use a Leaf Blower to Clear it Out?
It's a tempting thought, using a powerful leaf blower to just blast everything out. In our experience, this is a bad idea. We strongly advise against it.
A leaf blower's force can actually compact the lint into a denser, more stubborn clog. Even worse, that powerful blast of air can be too much for the flexible ductwork inside your walls, potentially disconnecting or tearing it. That small cleaning job just turned into a major, expensive wall repair.
A dedicated dryer vent brush kit is designed specifically for this job. It scrapes and pulls the lint out, which is a much safer and more effective way to make sure the entire duct is truly clear.
Do Dryer Sheets Make Lint Buildup Worse?
It's a common myth that dryer sheets somehow reduce lint. They don't. Your clothes produce the same amount of lint either way. What dryer sheets can do is leave behind a waxy, sticky residue inside the duct. This film can act like flypaper, making it even easier for lint to grab on and build up faster.
What About Vents That Exit Through the Roof?
Roof vents present a whole different set of challenges. For starters, you're working against gravity, which makes it much tougher to pull lint down and out. Then there are the obvious safety risks of climbing on a ladder and working on your roof.
Because of the difficulty and danger involved, we almost always recommend leaving roof vent systems to professionals. We have the specialized equipment, extension tools, and safety training to get the job done right without anyone getting hurt.
When in doubt, getting a professional to take a look offers the ultimate peace of mind. For homeowners in the Avondale and Phoenix area, Purified Air Duct Cleaning offers expert services to ensure your dryer operates safely and efficiently. Visit us online to get your free quote at https://www.purifiedairductcleaning.com.