How to Clean Roof Dryer Vent: A Safe Guide (how to clean roof dryer vent)
- Jan 30
- 13 min read
The quick version? Cleaning a roof dryer vent means getting up on the roof safely, taking off the vent cap, and using a special cleaning kit to scrub the duct from the top down. Once you've pushed all the gunk down, you head inside and vacuum it out from the opening near your dryer. This leaves a totally clear path for hot, moist air to escape.
Why Cleaning Your Roof Dryer Vent Is a Non-Negotiable Task
That vent sticking out of your roof is easy to forget about, but it's one of the most important safety components in your home. Over time, the duct leading up to it becomes a magnet for serious blockages. Lint, that highly flammable fluff from your laundry, mixes with moisture from wet clothes and slowly cakes onto the inside walls of the vent.
And because it's on the roof, it's open to the elements. Leaves, twigs, and other debris can fall right in. Birds also love these sheltered spots for building nests, which can create a dense, dangerous plug in no time. For homes in drier climates, lint can build up even faster, creating a major fire hazard much quicker than you'd think.

The Hidden Dangers of a Clogged Vent
The risks of a neglected dryer vent are serious and they go beyond just one problem. A blocked vent makes your dryer work harder and run hotter, which can burn out internal parts and kill the appliance years before its time. More importantly, it creates the perfect storm for a house fire.
According to the U.S. Fire Administration (USFA), about 2,900 dryer fires are reported each year, causing an estimated $35 million in property damage. These fires almost always start with lint buildup, especially in roof vents where the clog is out of sight and out of mind.
A clogged roof vent doesn't just impact your dryer. It compromises your home's safety, efficiency, and air quality. Regular cleaning is a small task with a massive return on investment in peace of mind.
Beyond the massive fire risk, a clean vent brings some immediate perks. Your clothes will actually get dry in one cycle, which saves you time and reduces wear and tear on your favorite fabrics. That improved efficiency also means lower energy bills every month. For more on this, check out our complete guide on how to prevent dryer fires.
A Holistic View on Home Ventilation
Thinking about clear airways shouldn't stop at the laundry room. The basic idea of keeping vents clean applies all over your house. For instance, a functioning kitchen exhaust system is crucial for pulling grease and cooking odors out of your home, just like your dryer vent is meant to remove lint and moisture. Both systems protect your property and help maintain healthy indoor air. Being proactive about all your home's ventilation is just part of smart, responsible homeownership.
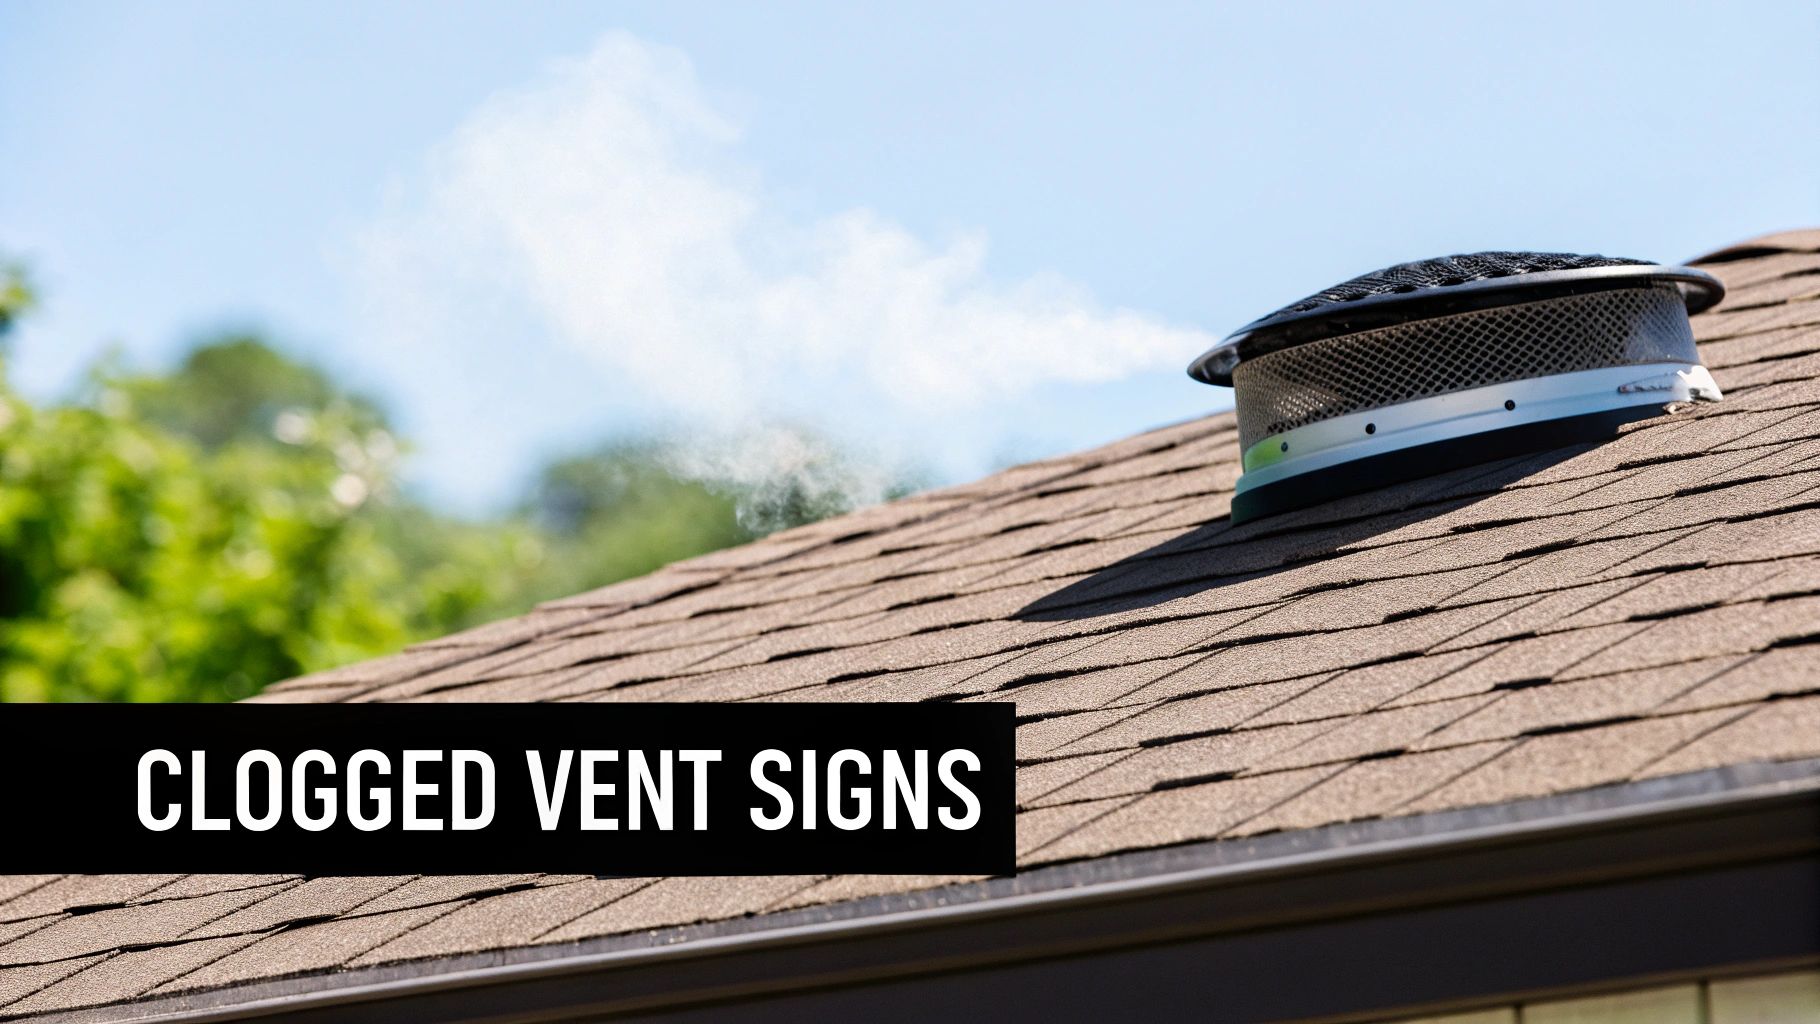
Telltale Signs Your Roof Vent Is Dangerously Clogged
Before you even think about hauling a ladder out to clean your roof dryer vent, you need to be sure that’s where the problem lies. A clogged vent sends out some pretty clear distress signals, and they often show up long before your clothes just stop drying. Learning to spot these clues means you can tackle the issue early, saving yourself a much bigger headache later on.
One of the first things people notice is the dryer itself feeling way too hot to the touch. This isn't just the normal warmth of a running appliance; it's a sign that the machine is struggling. It's working overtime because it can't push that hot, moist air out, causing a dangerous amount of heat to build up inside.
Beyond Damp Clothes
Sure, clothes that are still damp after a full cycle are a classic symptom, but there are other, more subtle signs to watch for. Pay close attention to what you see and smell in your laundry room.
A Persistent Burning Smell: If you catch a faint, scorched odor while the dryer is running, that's often the smell of lint overheating inside the duct. This is a massive red flag for a fire hazard and needs immediate attention.
Visible Lint Around the Roof Vent: Take a walk outside and look up at your roof. If you can see lint, leaves, or other debris collecting around the vent cap, it's a dead giveaway that the exit is blocked and airflow is choked off.
Excessive Humidity in the Laundry Room: A properly vented dryer pushes all that moisture outside. If your laundry room feels like a sauna or you see condensation on the windows during a cycle, it means that humid air is backing up into your house.
These are just a few of the telltale signs. You can take a closer look at all the symptoms in our detailed guide, which explains how to tell if your dryer vent is clogged.
Dryer Vent Clog Symptom Checker
Use this quick reference table to identify common symptoms of a clogged roof dryer vent and understand the risks.
Symptom | What It Means | Potential Consequence |
|---|---|---|
Longer Drying Times | Airflow is restricted, trapping moist air. | Increased energy bills, unnecessary wear on the dryer. |
Overheating Dryer | The appliance can't expel hot air efficiently. | Component failure, potential fire hazard. |
Burning Smell | Trapped lint is scorching from the heat. | Serious and immediate fire risk. |
Visible Lint on Roof | The vent opening is physically blocked. | Complete blockage, potential pest infestations. |
High Humidity | Moist air is venting back into your home. | Mold and mildew growth, poor indoor air quality. |
By cross-referencing what you're experiencing with this chart, you can get a much clearer picture of what's happening inside your vent line.
A clogged dryer vent forces your appliance to run 30-50% longer, consuming significantly more energy just to do the same job. Recognizing the warning signs early not only prevents a fire hazard but also saves money on your utility bills.
At the end of the day, your dryer is trying to tell you something. Longer drying times, weird smells, and an overheating machine are all symptoms of the same root cause: a blocked airway. By recognizing these signs, you can shift from reacting to a broken dryer to proactively maintaining a safe, efficient home.
Gathering Your Tools and Safety Gear
Before you even think about climbing up to clean your roof dryer vent, let’s talk about what you need to do the job safely and effectively. This isn’t a task you can just wing. Working up high carries real risks, and jumping in without the right prep is a recipe for disaster, not a clean vent.
Your first thought should always be safety. That starts with checking the weather. Never, ever attempt to get on your roof if it's wet, icy, or even just really windy. Those conditions drastically increase your chances of a fall. It's also smart to let someone know you'll be on the roof and have a spotter on the ground to keep your ladder stable and be there in case you need help.
Essential Safety Precautions
Think of your safety gear as non-negotiable. It's what stands between you and a trip to the emergency room, so make sure everything is in good working order before you begin.
A Sturdy Extension Ladder: Your ladder needs to be tall enough to reach at least three feet past the roofline. Just as important, make sure you set it on solid, level ground.
High-Traction Footwear: This is crucial. A good pair of work boots or shoes with a serious grip is what you need. Standard sneakers just don't offer enough traction for a shingled roof.
Work Gloves and Safety Glasses: You'll be dealing with sharp metal edges on the vent cap and lint flying everywhere. Protect your hands and eyes.
Don't forget about proper ladder angle. A good rule of thumb is the 4-to-1 ratio: for every four feet of height you need to climb, the base of the ladder should be one foot away from the wall. This gives you a stable, safe angle.
The Right Tools for the Job
With your safety plan sorted, it's time to gather your tools. Having everything you need on hand from the start saves you from making extra, risky trips up and down the ladder.
The star of the show is a specialized dryer vent cleaning kit. These kits come with flexible rods you can screw together and a brush attachment on the end. They're specifically designed to snake through the bends in your ductwork without getting hung up. Here’s a pro tip I’ve learned: wrap a small piece of electrical tape around each connection where the rods screw together. This will stop them from accidentally unscrewing and getting lost deep inside your vent.
I’ve seen people try to use the wrong tool for the job, like a plumber’s drain snake, and it almost always ends badly. Those can easily rip and damage the flexible ducting. You really need a purpose-built auger brush and flexible rods to scrub the vent walls clean without causing any harm.
To round out your toolkit, you'll need a cordless drill to spin the cleaning brush; it provides the consistent rotation you need to do a thorough job. You’ll also want a screwdriver or nut driver that fits the fasteners on your vent cap. Finally, have a powerful shop vacuum or a leaf blower ready. Once you're off the roof, you’ll use it at the ground level to clear out all the lint you’ve just knocked loose.
A Practical Guide to Cleaning Your Roof Vent
Alright, you've got your tools ready and your safety plan locked in. Now it's time for the main event: getting that roof dryer vent cleaned out. The best way to tackle this is with a top-down approach. You'll start on the roof and work your way down, finishing up in the laundry room. This method ensures you push all the debris down to one spot for an easy cleanup, restoring your dryer's efficiency and safety.
First thing's first, let's prep the dryer itself. Before you even think about climbing a ladder, unplug your dryer from the wall. If it’s a gas model, you absolutely must shut off the gas supply line. Safety isn't a suggestion; it's a requirement.
With the power and gas off, gently slide the dryer away from the wall so you have enough space to work. You’ll see the flexible vent hose (usually foil or semi-rigid metal) that connects the dryer to the wall duct. Loosen the clamp on the wall side and pull the hose off. This opening is where we'll eventually collect all the lint you're about to dislodge.
Working on the Roof
Now that everything is prepped inside, you can head up the ladder. Once you’re safely on the roof, find the dryer vent cap, it’s a small, hooded fixture that looks different from the other pipes sticking out of your roof. Go ahead and remove the screws holding the cap in place and set it aside. You'll probably see a good bit of lint caked up right at the opening. Clear that out by hand to get things started.
This visual guide breaks down the essential safety checks before you get started up there.
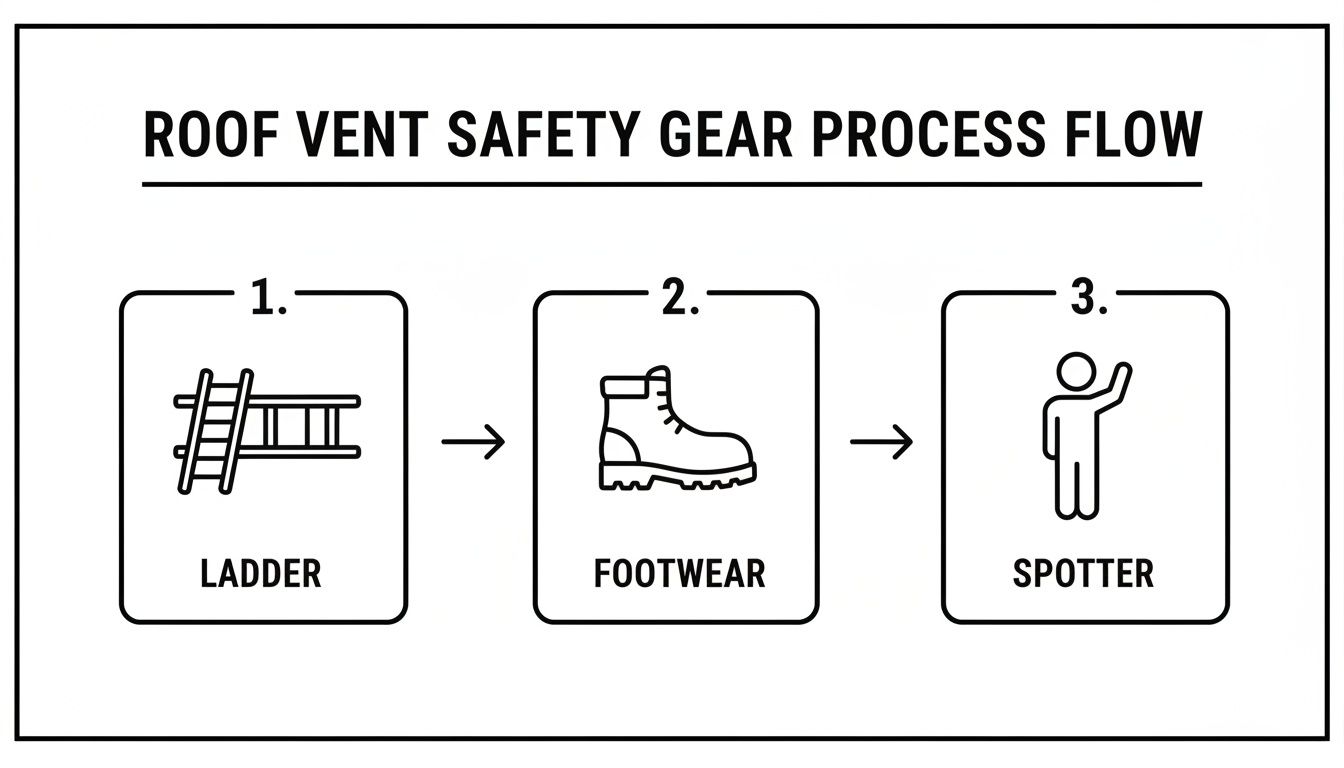
The process is simple but critical: a secure ladder, proper footwear, and a spotter on the ground.
Next, it's time to assemble your cleaning kit. Attach the brush to the first section of the flexible rod and guide it down into the vent. As you push it deeper, keep adding more rod sections.
A critical pro tip: If you're using a cordless drill to spin the brush, always keep it in the clockwise (forward) direction. Running it in reverse can unscrew the rod sections, leaving your brush stuck deep inside the vent. Trust me, that’s a headache you don’t want.
Keep feeding the rods down the pipe until you feel the brush hit the bottom elbow, right behind your laundry room wall. Work the brush up and down a few times while it spins. This scrubbing action is what breaks all that compacted, stuck-on lint free from the duct walls.
The Final Cleanup Inside
After you've given the entire vent a good scrubbing from the roof, head back down to deal with the mountain of lint you just created. All that debris has fallen to the bottom of the duct, waiting for you right at the wall opening.
Get your shop vacuum ready. Stick the nozzle into the wall opening and turn it on to suck up all the loose lint. For a really thorough clean, have your spotter turn on the vacuum while you slowly pull the cleaning brush back up from the roof, this helps pull every last bit of debris out.
Still feel like there might be some stubborn clumps? A leaf blower aimed into the duct from the roof can provide a powerful blast to force out anything left behind. Just be ready for a final puff of dust inside!
A clogged vent can increase your drying time by 30-50% and cause your dryer to use 20-30% more energy. Cleaning it out not only gets your clothes dry faster but can also extend your dryer's lifespan by 25-50%.
Once the duct is completely clear, head back up to securely reattach the vent cap on the roof. Then, it's just a matter of reconnecting the flexible hose to the dryer and the wall, pushing the appliance back, plugging it in, and turning the gas back on if you have it. That's it, a full, professional-level cleaning from top to bottom.
You can find more helpful advice in our detailed guide on how to safely and effectively clean your dryer vent pipe.
Knowing When to Skip the DIY and Call a Professional
While tackling a roof dryer vent cleaning yourself can be satisfying, it's definitely not a one-size-fits-all job. Honestly, knowing your own limits is just as crucial as knowing the right cleaning steps. Some situations just throw curveballs that are better handled by a certified pro with the right gear.
For example, if your vent system snakes its way through a large house, that standard DIY kit you bought might not even reach the end. The same goes for ductwork with a bunch of sharp, awkward turns. Trying to force a flexible rod through those can easily lead to damage, and the last thing you want is a brush head snapping off and getting lodged deep inside your walls.
Red Flags That Signal It's Time for a Pro
There are a few tell-tale signs that a DIY cleaning is probably not going to cut it. If you pop open the vent cover and find a bird's nest or evidence of pests, it's time to put the tools down and pick up the phone. A professional knows how to remove these kinds of blockages without compacting them deeper into the vent or, worse, blowing contaminants back into your home.
Here are a few other scenarios where calling in an expert is the smart play:
You suspect damage: If you have a gut feeling that the ductwork is crushed, disconnected, or has a hole somewhere behind a wall, a technician can run an inspection camera through it to see exactly what's going on.
The clog is severe: Has your dryer been taking forever to dry clothes for months? The lint buildup might be so dense and compacted that consumer-grade tools simply won't be able to break it apart.
You're uncomfortable with heights: This one is non-negotiable. Your safety always comes first. If you have any hesitation at all about getting on a ladder or working on your roof, don't even think about attempting this job.
The Advantages of Professional Service
Hiring a pro isn't just about avoiding a tough job; it's about getting a truly thorough cleaning. Certified technicians show up with high-powered vacuums and rotary brush systems that are in a completely different league from the kits you find at the hardware store. They can guarantee the removal of all the lint, debris, and other junk, making sure your vent is 100% clear.
In residential buildings, clogged dryer vents are a major hazard, accounting for about 92% of all appliance fires. The trapped moisture can also become a breeding ground for mold and allergens.
A professional cleaning brings peace of mind. A good technician will also spot underlying problems you might miss, like shoddy installation or old, deteriorating ductwork, which helps prevent bigger headaches down the road.
If you're on the fence about tackling the job yourself or if your vent system just seems too complex, looking into professional duct cleaning services is a wise move. It ensures the job gets done right and, most importantly, safely.
Common Questions About Roof Dryer Vent Cleaning
Okay, so we've walked through the why, what, and how of cleaning out that dryer vent on your roof. But I know from experience that this is where the practical, "what-if" questions start popping up. Let's tackle some of the most common ones I hear from homeowners so you can finish this job with total confidence.
Answering these questions ahead of time gives you the complete picture. It helps you stay on top of maintenance, keeping your home safe and your dryer running efficiently.
How Often Should I Really Clean My Roof Dryer Vent
For most families, a deep clean once a year is a solid rule of thumb. But that’s just a baseline. If you have a big family and the laundry is going almost every day, or you have pets shedding up a storm, checking it every six months is a much smarter move.
The design of your vent line plays a huge role, too. I've seen long, winding ducts that are packed with lint much faster than shorter, straighter runs. A quick glance at the outside vent cap from the ground now and then is an easy way to spot any serious buildup between your full cleanings.
Can I Actually Use a Leaf Blower to Clean the Vent
You bet, but there's a right way and a wrong way to do it. A leaf blower can be a fantastic tool, but it's not a one-stop solution. You absolutely have to start with a dryer vent brush kit to break up all that stubborn, caked-on lint clinging to the inside of the duct. Just blasting it with air won't do much against the really compacted stuff.
Once you’ve scrubbed the vent walls loose, then you can use the leaf blower from the roof to push all that debris down and out. Just make sure you have a partner inside with a vacuum or a bag ready to catch the lint storm. And trust me, wear a mask and safety glasses, it creates a massive cloud of dust.
What Does Professional Roof Dryer Vent Cleaning Typically Cost
Hiring a pro to handle your roof dryer vent will usually set you back between $125 and $250. The final price tag depends on a few things, like how tricky your roof is to access, the total length of the ductwork, and just how bad the clog is.
Think of it less as an expense and more as an investment. You're not just clearing a blockage; you're preventing a serious fire hazard, making your dryer run more efficiently, and probably extending the life of the appliance.
Most reputable companies will give you a free estimate so you know exactly what you’re getting into. If you want to get a better handle on the entire system, our complete safety guide on venting a dryer through the roof is a great resource.
Keeping your home's air systems clean is crucial for safety and efficiency. If you'd rather leave this task to the experts, the certified technicians at Purified Air Duct Cleaning are here to help. We provide thorough, professional dryer vent cleaning services to ensure your peace of mind. Contact us today for a free quote at https://www.purifiedairductcleaning.com.