How to Prevent Dryer Fires and Keep Your Home Safe
- Dec 16, 2025
- 15 min read
If there's one thing you take away from this guide, let it be this: routinely clean the lint trap and dryer vent system. A clogged vent is the perfect storm for a house fire. It forces your dryer to work harder and get hotter, and when that intense heat meets a buildup of highly flammable lint, you've got a serious problem on your hands.
The Hidden Fire Risk in Your Laundry Room
We use our dryers constantly, often without a second thought. But this everyday appliance is a leading cause of house fires. The danger doesn't announce itself with a bang; it's a slow, silent buildup. The main culprit? Lint: those tiny fibers that come off our clothes in every cycle.
Cleaning the lint screen after each load is a fantastic habit, but it's really just the first line of defense. A surprising amount of lint gets past that filter and starts to collect deep inside the dryer's vent ducting, creating a hidden hazard.
From Nuisance to Full-Blown Hazard
As lint accumulates in the vent, it restricts the flow of hot, moist air trying to escape. When that airflow is choked off, the dryer’s heating element has to run longer and hotter just to get the job done. This overheating can easily ignite the trapped lint, which is as flammable as kindling.
Other issues can make a bad situation even worse. For example, cheap, accordion-style plastic or foil vents are notorious for trapping lint and can melt under high heat, posing a direct fire risk. Even hidden mechanical failures, like a faulty thermostat, can contribute to dangerous overheating.
The numbers don't lie. Clothes dryers are linked to an estimated 13,800 to 16,000 home fires in the U.S. every single year, leading to devastating property damage and injuries.
In roughly one-third of these incidents, the leading cause is simply a "failure to clean." This makes lint removal the single most impactful step you can take for dryer safety. You can find more details about these fire statistics and their causes.
Your Role in Preventing a Disaster
Once you understand these risks, dryer maintenance stops feeling like a chore and becomes a critical safety protocol. It’s not just about efficiency; it's about protecting your home and family from a disaster that is entirely preventable. For a broader look at home safety, it's worth exploring general effective fire prevention tips.
The recipe for a dryer fire comes down to three key ingredients:
Lint Accumulation: This is the fuel. It builds up not just in the trap but inside the dryer chassis and throughout the entire vent line.
Restricted Airflow: This is the trigger for overheating. It's usually caused by clogged vents or ducting that's been crushed or kinked.
Heat Source: The dryer's own heating element becomes the ignition source when temperatures climb past safe limits.
By understanding how these three factors come together, you can take smart, targeted steps to break the chain and keep your home safe.
Your Practical Dryer Maintenance Schedule
Real dryer fire prevention isn't about some complicated, time-consuming ordeal. It’s all about building simple, consistent habits into your routine. Frankly, creating a practical maintenance schedule is the single most effective thing you can do to prevent dryer fires. Think of it as a small investment of time that pays off big in safety and peace of mind.
This schedule breaks down the essential tasks into manageable chunks, from quick checks you’ll do after every load to a deep clean once a year. The goal here is simple: catch lint buildup before it has a chance to become a dangerous fuel source.
After Every Single Load
This is the easiest and, without a doubt, the most critical habit you can form. Before you even think about tossing in the next load, make cleaning the lint filter a non-negotiable rule in your household.
Just pull out the screen and wipe off the layer of lint. It takes all of ten seconds, but it's your first and best line of defense against a fire. A clean screen ensures proper airflow, which not only keeps the dryer from overheating but also helps your clothes dry faster.
And a word of caution: never, ever run the dryer without the lint filter in place. It’s designed to trap the vast majority of lint. Operating without it is like opening the floodgates, allowing flammable fibers to pour directly into the dryer’s internal components and vent system, creating a serious hazard almost immediately.
Every Month: A Quick Visual Check
Once a month, take just a minute to peek behind your dryer. You're looking for two things: the condition of the vent hose and any lint that has gathered around the machine.
Make sure the vent hose isn't crushed, kinked, or sagging. Any restriction in that duct creates a bottleneck where lint can pile up fast and heat can build to dangerous levels. While you're back there, give the area a quick sweep or vacuum to clear away any stray lint or dust.
Every Few Months: Deep Clean The Lint Trap
You’re already cleaning the screen after every use, but the housing where the screen sits is another story. It collects fine, dense lint that your fingers just can't reach. Every two to three months, it's time for a deeper clean.
Start by unplugging your dryer. Remove the lint screen, then grab a long, flexible brush and a vacuum hose attachment to carefully clean out the lint trap housing. You’ll probably be shocked at how much flammable material has compacted down in that little cavity.
Pro Tip: If you use fabric softener sheets, they can leave an invisible waxy film on the lint screen itself, blocking airflow even when the screen looks clean. To fix this, scrub your screen with a soft brush, warm water, and a bit of dish soap every few months to dissolve that residue.
Annually: A Thorough System Inspection
At least once a year, the entire dryer vent system, from the back of your machine all the way to the exterior vent cap, needs a complete cleaning. This is arguably the most important task to prevent a dryer fire. While some homeowners use a DIY kit, this job often reveals issues that are best addressed by a professional. For a more detailed guide, see our post on creating a preventive maintenance schedule template.
This annual service is absolutely crucial. Why? Because lint accumulation deep inside the ducts is the number one cause of these fires. Official sources consistently report that about 33-34% of dryer fires are caused by a "failure to clean," making this the most preventable fire hazard in many homes. As experts at Rotobrush and other safety organizations point out, routine maintenance is the key.
If you start noticing your clothes are taking longer to dry or the top of the dryer feels unusually hot, don't wait for your annual cleaning. These are red flags that your vent is already significantly clogged and needs immediate attention.
Dryer Fire Prevention Maintenance Checklist
Sticking to a schedule turns fire prevention from a chore into a simple routine. This checklist breaks down what to do and when, ensuring your dryer remains a safe and efficient appliance.
Task | Frequency | Why It's Critical to Prevent Dryer Fires |
|---|---|---|
Clean Lint Screen | After Every Load | Prevents immediate airflow restriction and stops the bulk of lint from entering the vent system. |
Inspect Vent Hose | Monthly | Catches kinks or crushing that can trap lint and cause dangerous heat buildup behind the dryer. |
Deep Clean Lint Housing | Every 2-3 Months | Removes compacted lint that bypasses the screen, reducing a hidden source of flammable material. |
Full Vent System Cleaning | Annually | Clears the entire duct length of accumulated lint, addressing the leading cause of dryer fires. |
By weaving these simple tasks into your home maintenance routine, you can effectively eliminate one of the most common and dangerous household fire risks.
How to Properly Clean Your Dryer Vent System
Knowing your dryer vent needs an annual cleaning is one thing, but actually tackling the job can feel a little daunting. The good news? It’s a completely manageable DIY project that pays off big time in fire prevention. This isn't just a rehash of the instructions on a store-bought kit; this is a practical, hands-on guide to getting it done right.
The whole point is to clear out the flammable lint that’s snuck past the filter and is now clogging up your ductwork. When that stuff builds up, it traps hot air, forcing your dryer to overheat and creating a serious fire risk. A clean vent lets that hot, moist air escape, keeping your dryer running safely and efficiently.
Gearing Up for the Job
Before you start wrestling the dryer away from the wall, a little prep work makes all the difference. You’ll need a few key things to get this done properly.
Most hardware stores carry dryer vent cleaning kits. These usually come with a flexible brush and a set of connecting rods so you can adjust the length to match your vent. You’ll also want a power drill to spin the brush, a good vacuum with a hose attachment, and maybe some quality aluminum foil tape for resealing the connections when you're done.
This infographic shows how crucial annual vent cleaning is as part of a complete maintenance schedule.
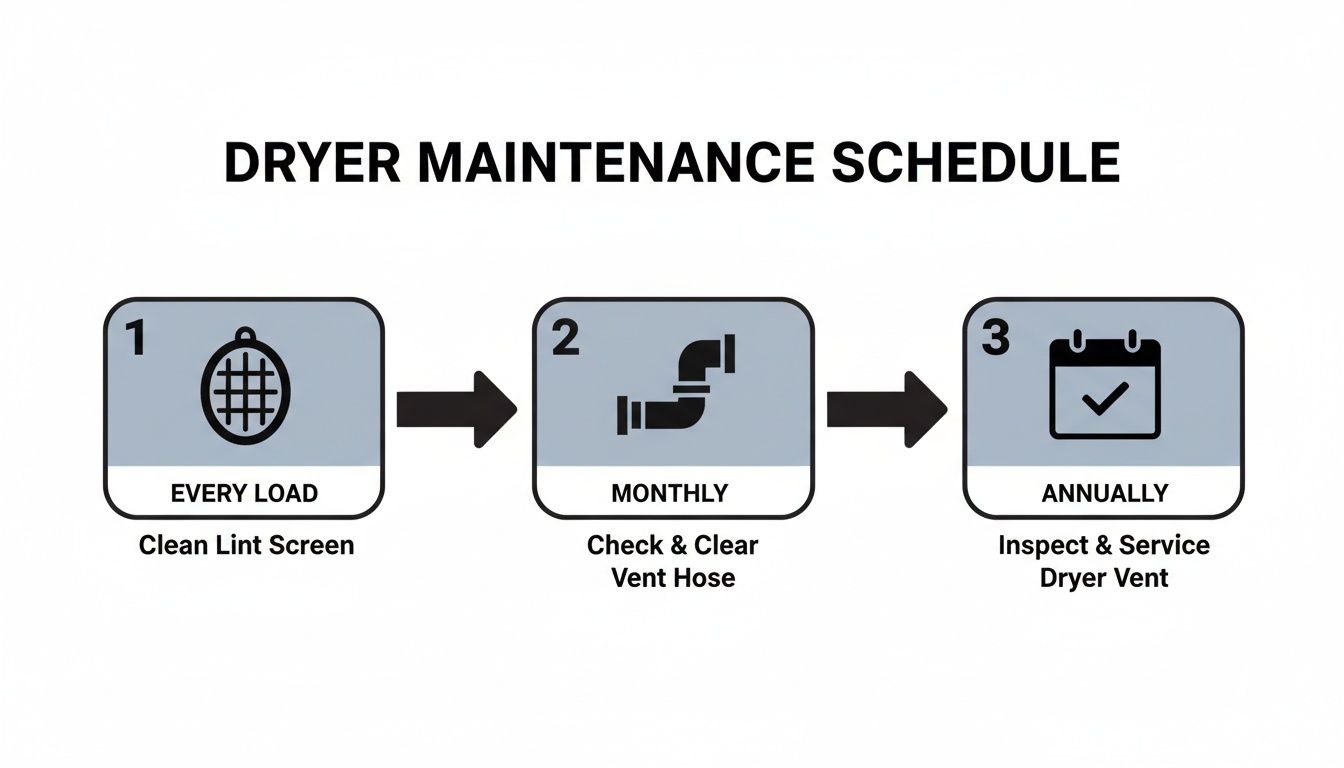
It’s a great visual reminder of the rhythm of care, from the daily habit of cleaning the lint screen to this essential yearly deep clean.
The Cleaning Process Step by Step
Okay, tools are ready. Let's get to it. Safety first, always. Unplug your dryer completely. If you have a gas dryer, you also need to shut off the gas supply valve. It’s usually on the pipe right behind the machine.
Now, carefully slide the dryer out from the wall so you have plenty of room to work. Detach the vent duct from the back of the dryer. I guarantee you’ll find a clump of lint right there, so have your vacuum handy to clean out the dryer's exhaust port and the end of the duct.
Next, go outside to where your vent exits the house. Pop off any screen or grate covering it, as these things are notorious lint traps. Clean it out well with your hands or the brush.
One critical pro tip: When using the cleaning kit with a drill, always rotate the brush in a clockwise direction. Spinning it counter-clockwise can cause the rod sections to unscrew and get stuck deep inside your vent. Trust me, that turns a simple DIY job into a massive headache.
Attach the brush head to a rod and connect it to your drill. Start feeding the brush into the duct from the outside, running the drill at a low to medium speed. As you push deeper, just keep adding more rod sections until you’ve scrubbed the entire length of the vent.
You’ll be amazed at how much lint comes flying out. Once you’ve gone all the way through, slowly pull the brush back out, keeping the drill running. To wrap up, use your vacuum to suck up all the loose lint from around the exterior vent and from inside the duct opening.
For an even more detailed walkthrough, you can find a comprehensive DIY guide on how to clean your dryer vent yourself. This resource has some extra tips that will help you tackle the job with confidence and avoid common homeowner mistakes.
Navigating Tricky Situations
Not every vent is a simple, straight shot. You might run into a few challenges that require some creative thinking.
Long Vent Runs: If your vent takes a long journey through a crawlspace or attic, you’ll probably need to clean it from both the inside and outside to make sure you get the middle sections.
Hard-to-Reach Caps: For vents that terminate on the roof or a second story, please prioritize your safety. This is one of those times when it's much smarter to call a professional than to risk a fall from a tall ladder.
Accordion-Style Ducts: If you pull out your dryer and find a flimsy, white plastic or foil accordion-style duct, replace it immediately. Those ridges are perfect for trapping lint, making them a huge fire hazard. They also tear easily during cleaning. Stick with rigid or semi-rigid metal ducting for the best safety and airflow.
Once the cleaning is done, carefully reattach the duct to your dryer and the wall, making sure the connections are snug. Use aluminum foil tape, not regular duct tape, to seal the joints. Gently push your dryer back into place, taking care not to crush or kink the hose. Finally, run a short, empty cycle to make sure air is flowing freely out of the exterior vent.
Recognizing the Warning Signs of a Clogged Vent

A dangerous dryer vent clog doesn't just appear overnight. It builds up slowly, sending out plenty of distress signals along the way, if you know what you’re looking for. Spotting these red flags is the key to preventing dryer fires and shifting from a reactive mindset to a proactive one.
Think of it like the check engine light in your car; your dryer has its own ways of telling you something's wrong. Ignoring these cues can turn a small, fixable issue into a major hazard.
Your Clothes Are Still Damp After a Full Cycle
This is usually the first thing people notice. You pull out a load that should be perfectly dry, but it’s still damp. The common reaction? Just run it again. But if a cycle that once took 50 minutes now needs 80 or more, you've got an airflow problem.
When the vent is blocked, all that hot, moist air gets trapped in the drum with your laundry. This doesn't just waste a ton of energy and spike your utility bill; it also forces the dryer's heating element to work overtime, dangerously increasing the internal temperature.
The Dryer Is Hot to the Touch
Sure, your dryer will feel warm when it’s running, but it should never be alarmingly hot. If the top or sides of the machine are too hot to comfortably touch, that’s a tell-tale sign that heat is trapped inside instead of being safely vented outdoors.
This symptom points directly to a blockage in the ventilation path. The appliance is essentially cooking itself because the heat has nowhere to escape. That extreme internal temperature is precisely what can cause the highly flammable lint packed in the ductwork to ignite.
A hot dryer exterior is a direct warning of internal overheating. When combined with flammable lint, this creates the perfect conditions for a fire. This is not a sign to monitor; it is a sign to act on immediately by unplugging the dryer and diagnosing the vent system.
It's like a car with a blocked radiator, the engine overheats. Your dryer's vent is its cooling system, and a clog can lead to a critical, fiery failure.
You Notice a Burning Smell
Never ignore a burning smell coming from your dryer. While there's a slim chance it could be a stray sock, it’s far more likely the unmistakable scent of lint getting scorched by the motor or heating element.
This smell means lint has gotten inside the dryer's cabinet, not just in the vent line. It’s getting dangerously close to components that are hot enough to make it smolder. If you ever smell something burning, stop the dryer immediately, unplug it from the wall, and figure out what's going on.
The Laundry Room Feels Humid or Musty
The whole point of a dryer vent is to push hot, moist air outside of your house. If that vent is clogged, the humid air has no choice but to back up and seep into your laundry room.
You might notice condensation on the walls and windows, or the room might feel like a sauna after you run a load. This trapped moisture isn't just a sign of a clog; it can also lead to mold and mildew growth, creating another health hazard for your home.
If these issues sound familiar, take a closer look at our guide covering all the signs of a clogged dryer vent.
When You Should Call a Professional Cleaner
Consistent DIY maintenance is a fantastic first line of defense to prevent dryer fires, but there comes a point where a store-bought brush kit just won't cut it. It’s crucial to know when you’ve reached the limits of a DIY job. Some vent systems are just too long, too complex, or too clogged for the average homeowner’s tools.
Calling in a professional isn't admitting defeat; it's making a smart, strategic decision for your family's safety. Pros show up with powerful, specialized equipment that can diagnose and fix problems you didn't even know you had. They offer a level of clean that’s nearly impossible to get on your own.
Complex Vent Configurations
The layout of your dryer vent is a huge factor. If you're dealing with a long run, say over 35 feet, your DIY kit probably isn't going to reach the middle. That leaves a perfect spot for a dangerous lint clog to form deep inside your walls.
Another classic headache is a vent that exits on the roof. Getting up there yourself means messing with ladders and heights, which is a serious safety risk. A professional has the right safety gear and experience to tackle these jobs without any drama.
Likewise, ducts with a lot of sharp turns and elbows are notorious for creating lint traps. Those tight corners are tough to navigate with a flimsy DIY brush, but a pro's high-powered vacuum and agitation tools can clear them out no problem.
Suspected Blockages or Damage
Sometimes, the issue is more serious than just lint. If you notice your dryer isn't performing well or you hear strange noises, you might have a bigger problem on your hands. That's when you pick up the phone.
For example, birds and rodents absolutely love building nests in dryer vents. It's warm, sheltered, and a perfect spot for them. This creates a dense, highly flammable blockage that your brush can't handle. A pro can not only remove the nest safely but also install a pest-proof cover to keep them from coming back.
A professional cleaning service does more than just remove lint; they perform a comprehensive system diagnostic. Using tools like video inspection cameras, they can look deep inside your ductwork to spot hidden issues like disconnected joints, crushed sections, or tears that leak carbon monoxide into your home.
This kind of thorough inspection brings invaluable peace of mind. To really get a sense of what's involved and why it's a vital part of fire prevention, it’s worth learning more about professional dryer vent cleaning services.
Beyond Lint Buildup
It's easy to focus on lint, but it's only one piece of the puzzle. While lint is the primary fuel, it's not the only cause of dryer fires. Data shows that mechanical failures, electrical faults, and shoddy installations are also major culprits. Real prevention means combining your regular cleaning with professional oversight, including annual vent cleaning and getting worn-out parts fixed promptly. You can discover more insights about these contributing factors and see how they create a perfect storm for a fire.
DIY Cleaning vs Professional Service
Knowing when to tackle a job yourself and when to bring in an expert is key. Here's a quick breakdown to help you decide.
Scenario or Task | DIY Approach | When to Call a Professional |
|---|---|---|
Simple, Short Vents | A standard cleaning kit can be effective for straight runs under 15-20 feet. | Even with simple vents, a pro offers a deeper clean and inspection. |
Long or Complex Vents | DIY kits may not reach the middle, leaving dangerous clogs behind. | Essential. Professionals use longer tools and powerful vacuums to clear the entire line. |
Roof or High Vents | Involves significant personal safety risks from falls. | Strongly recommended. Pros have the proper safety equipment and insurance. |
Suspected Nests/Damage | A DIY brush may not dislodge nests and cannot diagnose internal damage. | Crucial. Professionals can remove blockages and use cameras to inspect for damage. |
Ultimately, hiring a professional gives you access to a level of power and precision that guarantees your dryer vent system is truly clean, safe, and efficient.
Common Questions About Dryer Fire Safety
Even when you've got a good maintenance routine down, specific questions always seem to pop up. It's easy to wonder if you’re really doing enough to prevent a dryer fire. Getting straight answers to these common concerns is the last piece of the puzzle for feeling confident about your home's safety. Let's tackle some of the most practical questions I hear from homeowners.
How Often Should My Dryer Vent Be Professionally Cleaned?
While "once a year" is the standard advice, the real answer depends entirely on how much you use your dryer. If you're in a small household doing just a couple of loads a week, you might be fine with a professional cleaning every 18 months or so.
However, a large family with pets running the dryer every single day should absolutely stick to a strict 12-month schedule. Your vent's design also matters. If it's a particularly long run, anything over 25 feet, or has a lot of sharp turns and bends, an annual cleaning becomes non-negotiable. These types of systems are notorious for trapping lint much faster, which directly increases your fire risk.
Is It Safe to Use Flexible Foil or Plastic Vents?
Definitely not. I can't stress this enough: fire safety experts and modern building codes are universally against using those flimsy, accordion-style foil or plastic dryer vents. The ridges inside are a perfect trap for lint, creating an ideal fuel source for a fire.
Worse yet, they get crushed easily behind the dryer, which chokes off the airflow and causes the machine to overheat. The plastic versions are combustible themselves, adding even more danger. For true safety, you should always insist on rigid or semi-rigid metal ducting.
Modern dryers come with all sorts of bells and whistles, but don't be fooled into a false sense of security. A moisture sensor, for instance, is there to save energy by stopping the cycle when clothes are dry. It is not a fire-prevention device and has no way of detecting or dealing with a lint-clogged vent, which is still the number one cause of these fires.
It's critical to understand what your appliance's features can and can't do. For a deeper dive, you can read a complete guide to preventing a dryer lint fire hazard that covers these details.
Can I Use Fabric Softener Sheets Safely?
Yes, but with a small catch. They’re fine to use, but they require one extra little step in your maintenance routine to keep things safe. Fabric softener sheets leave behind a thin, waxy film on the lint screen that you often can't even see.
Over time, this invisible residue clogs the mesh, blocking airflow even after you've pulled off all the lint. The fix is simple: just wash your lint screen every few months. Use a soft brush, warm water, and a little dish soap. A good rule of thumb? If you run water over the screen and it beads up instead of flowing through, it’s time for a scrub.
What About Other Home Safety Measures?
Dryer fire prevention is just one part of a bigger home safety picture. Having a working smoke detector in or near your laundry room is an absolute must. That early warning is what gives you the precious time needed to get out safely before a fire can spread.
To take your home’s protection to the next level, think about installing an interconnectable wireless smoke alarm system. With these systems, when one alarm detects smoke, every alarm in the house goes off at the same time. This ensures everyone is alerted, no matter where they are, creating a much stronger safety net for your family.
Your dryer is a workhorse appliance, but it demands consistent attention to operate safely. If you're even a little unsure about the state of your vent or if it's been more than a year since its last cleaning, don't wait for a warning sign to appear. The expert technicians at Purified Air Duct Cleaning have the professional tools and hands-on experience to thoroughly clean your entire dryer vent system, removing dangerous lint buildup and restoring your peace of mind. Visit us at https://www.purifiedairductcleaning.com to schedule your service today.