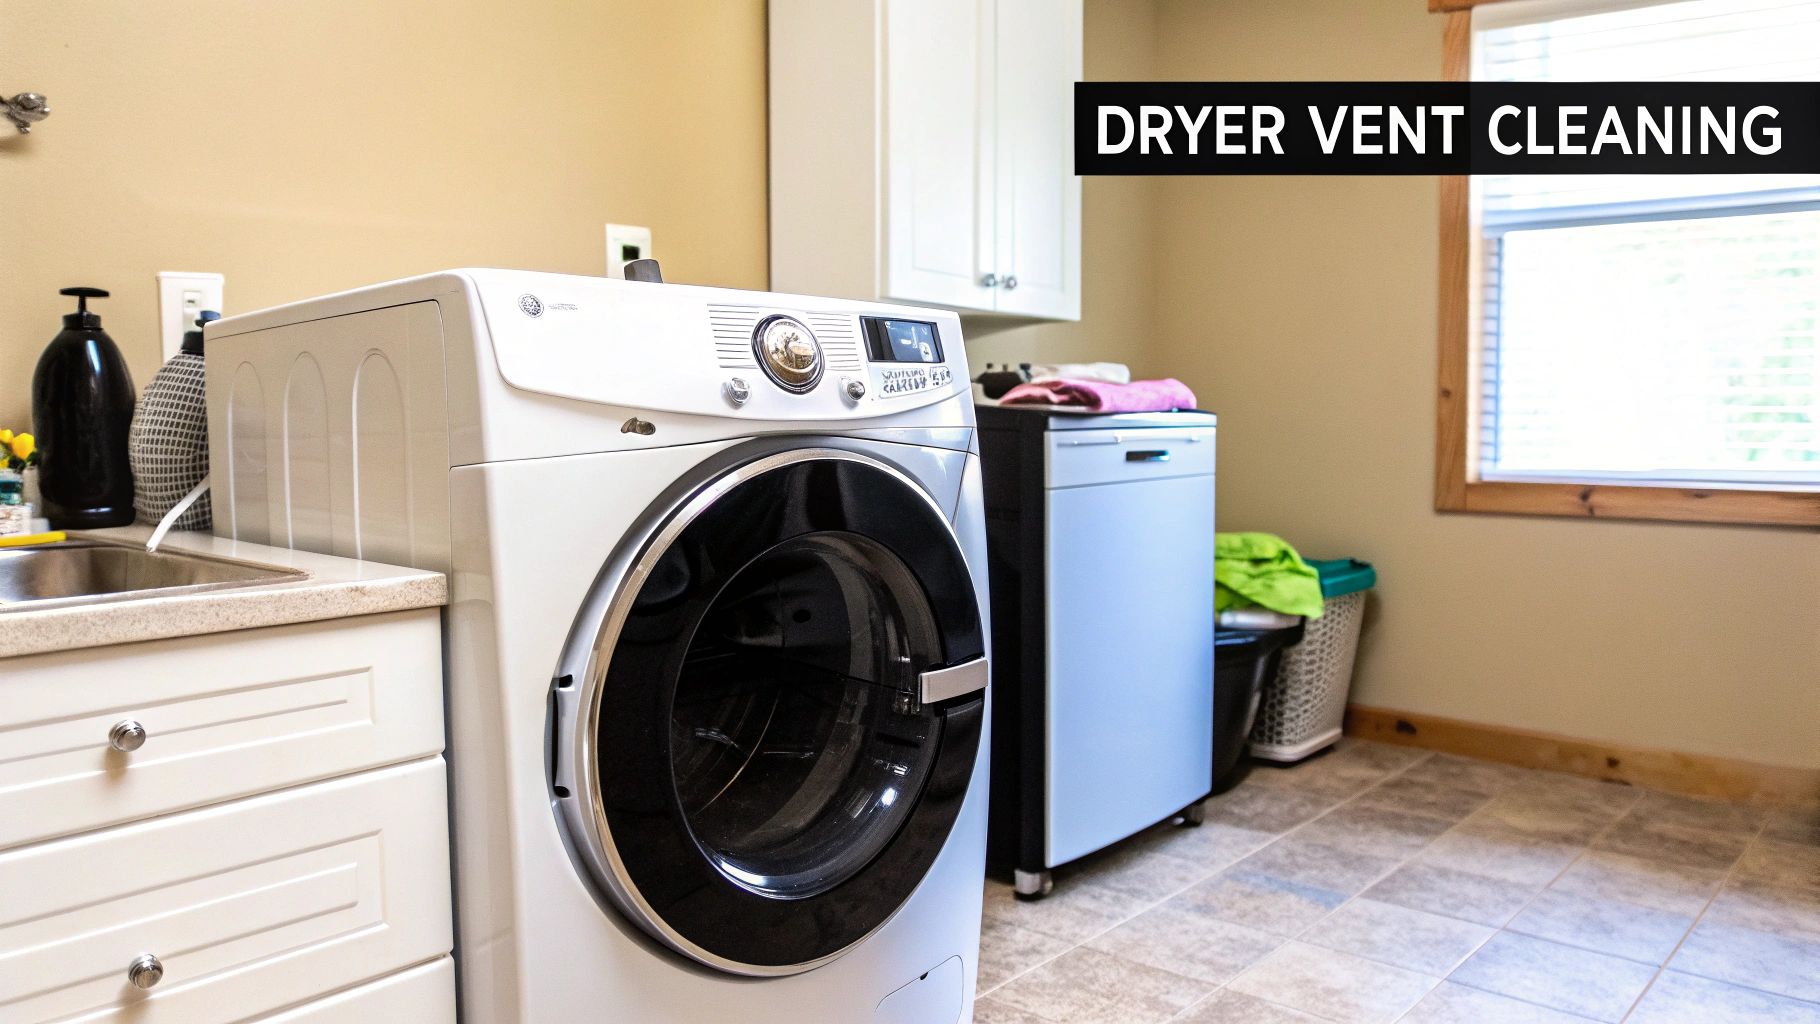
How to Safely & Effectively Clean Your Dryer Vent Pipe
- Aug 20, 2025
- 10 min read
That fuzzy stuff you pull from your dryer's lint trap? That's only a fraction of it. The real problem is the lint you can't see, building up deep inside the vent pipe. Putting off cleaning your dryer vent isn't just about efficiency; it's a serious gamble with your home, your health, and your wallet. Honestly, this simple task is one of the smartest investments you can make in protecting your property.
Why a Clean Dryer Vent Is Not Just Another Chore
It's a common mistake for homeowners to think the lint screen catches everything. The truth is, a surprising amount of flammable lint gets past that filter and starts packing itself deep inside your vent system. This creates a hidden danger that goes way beyond just a fire risk.
This built-up lint is basically tinder. When hot, moist air gets trapped and can't escape, the dryer starts to overheat, and it's shockingly easy for that lint to catch fire. The risk is so real that the global market for professional cleaning services has exploded, valued at USD 1.5 billion in 2023, largely because people are waking up to the fire hazards.
To put it in perspective, the U.S. Fire Administration recently reported nearly 2,900 dryer fires in a single year, with "failure to clean" as a leading cause. This isn't just about regular tidying; it's about understanding the scope of a home's deep cleaning needs and tackling the critical areas we often forget.
The Hidden Dangers of a Clogged Vent
A blocked vent pipe does more than just make your clothes damp. The fallout can be severe and expensive, hitting both your safety and your bank account hard.
A clogged vent doesn't just make your dryer work harder; it introduces preventable dangers into your home. From degraded air quality to serious fire risks, the stakes are higher than most people realize.
Here’s a breakdown of why this task is so critical:
Carbon Monoxide Risk: If you have a gas dryer, this is a big one. A clogged vent can trap harmful combustion gases, including deadly carbon monoxide, and force them back into your home. You can't see it or smell it, which makes it particularly dangerous.
Reduced Appliance Lifespan: When your dryer is forced to run hotter and longer just to do its job, it puts a ton of strain on parts like the heating element and motor. This kind of wear and tear can kill your dryer years before its time, leaving you with a hefty bill for repairs or a replacement.
Higher Energy Bills: A clogged vent is an efficiency killer. Your dryer might need two or three cycles to dry one load of laundry, and all that wasted runtime shows up directly on your monthly utility bill. You can learn more in our complete guide to preventing a dryer lint fire hazard.
Assembling Your Dryer Vent Cleaning Toolkit
Before you start pulling your dryer away from the wall, let's talk gear. Going into this job without the right tools is a recipe for frustration and, frankly, a half-done job. A little prep now saves you a frantic trip to the hardware store later.
Having the right equipment on hand not only makes the process smoother but also ensures you can do a thorough, safe cleaning. Below is a quick rundown of what I recommend having within arm's reach.
Essential Toolkit for Cleaning Your Dryer Vent
Tool/Item | Primary Purpose | Pro Tip |
|---|---|---|
Dryer Vent Cleaning Kit | The main tool for dislodging lint from inside the vent pipe. | A rotary kit that attaches to a drill is worth the extra few bucks, especially for long vents or those with tricky bends. |
Powerful Vacuum | Cleaning up the lint you pull out and clearing debris from the dryer's lint trap housing. | A shop vac is the MVP here, but your home vacuum with a hose attachment will work in a pinch. |
Screwdriver | Loosening the metal clamps that secure the vent to the dryer and the wall. | A multi-bit screwdriver is great, but a simple Phillips head usually does the trick. Check your clamps first. |
Duct Tape (Foil) | Temporarily sealing connections or patching small tears in the vent pipe. | Don't use standard grey duct tape. High-quality foil tape is made for this and will hold up against the heat. |
Dust Mask & Gloves | Personal safety: preventing lint inhalation and protecting hands from sharp metal edges. | This is non-negotiable. A simple N95 mask and a pair of work gloves are all you need. |
With these tools gathered, you’re setting yourself up for a clean, efficient, and safe project. You'll be amazed at what a difference having the right gear makes.
Choosing Your Main Cleaning Tool
The star of the show is your dryer vent cleaning kit. These usually come with flexible rods that you screw together to reach the full length of your vent and a brush that attaches to the end. The big decision is whether to go with a manual brush or a rotary kit that hooks up to your power drill.
For a short, straight vent run, you can probably get by with a basic manual kit. But if your vent is long or has a few elbows and bends, which most do, the rotary kit is a total game-changer. The spinning action of the drill helps the brush navigate those corners and obliterate stubborn, compacted lint that a manual brush would just push around.
Here's a critical tip I've learned the hard way: the goal is to pull lint out, not cram it deeper into the pipe. Always spin the brush in the direction the manufacturer recommends (usually clockwise). Keep it spinning as you push it in and as you pull it out. Reversing the spin inside the vent can cause the rods to unscrew, leaving the brush head stuck deep inside. Trust me, that's a headache you don't want.
A Practical Walkthrough for Cleaning Your Vent Pipe
Alright, you've got your tools, and you're ready to get this done. Let's walk through the hands-on process of cleaning out that dryer vent pipe. I'll break it down into simple, manageable actions to make sure you can work safely and get a fantastic result, even if it's your first time doing this.
First things first: safety. This is the one step you can't skip. Before you even think about moving your dryer, unplug it from the wall. If you've got a gas dryer, you also need to shut off the gas supply. Look for the valve behind the unit; a quick turn until it's perpendicular to the pipe will do the trick.
Once you're sure the power and gas are off, gently slide the dryer away from the wall. You'll want to give yourself enough space to comfortably work back there.
This simple guide breaks the job into three core actions for a successful clean.
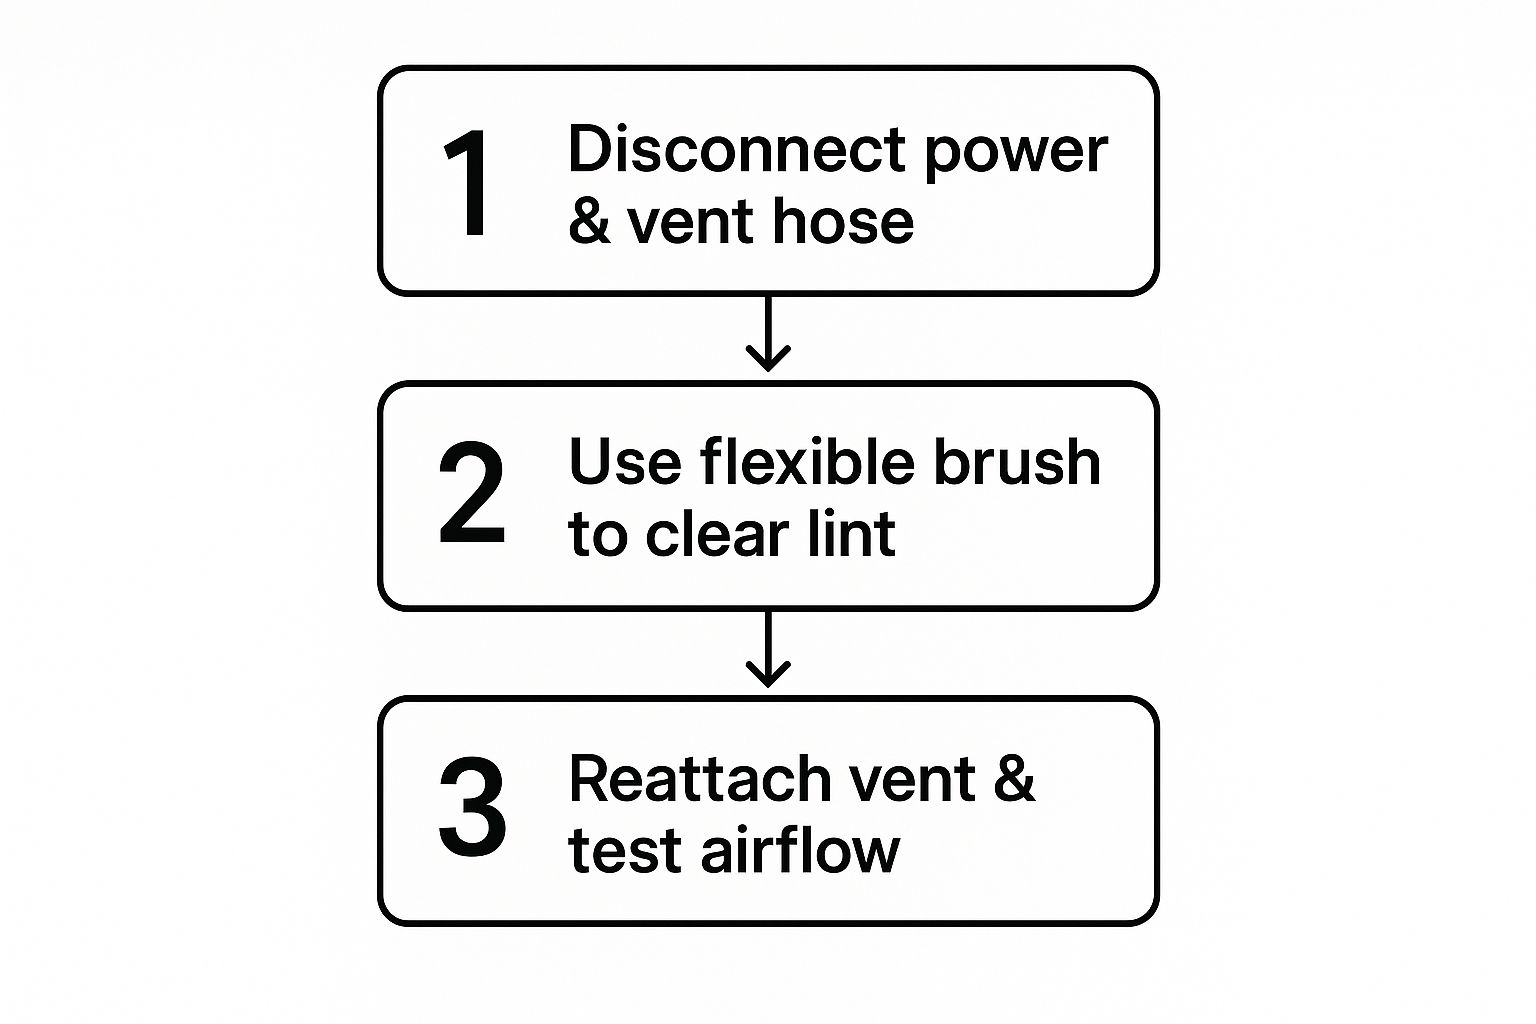
As you can see, the job isn't truly over until everything is reconnected and you've run a test to check for good airflow.
Disconnecting and Initial Cleaning
Take a look behind the dryer and find the flexible duct that connects it to the wall pipe. It's usually held on with a simple metal clamp. Grab a screwdriver to loosen it, and then you can pull the duct off. This is where you'll get your first real look at the lint buildup.
Now, use your vacuum's hose attachment to suck up all the loose lint you can see. Clear it out from the dryer's exhaust port and right inside the wall pipe opening. This quick pass removes the easy stuff and clears the way for your brush.
Here's a pro tip I always share: use your smartphone. Just stick it a few inches into the wall pipe, turn on the flash, and snap a quick photo or video. It gives you a great inside look at how severe the clog is and can help you spot surprises like a bird's nest or a crushed section of the pipe.
Using the Vent Brush Effectively
This is where your rotary brush kit really shines. Start by attaching the brush head to one of the flexible rods and then connecting that rod to your drill.
Carefully insert the brush into the pipe opening in the wall. You'll want to set your drill to a low, clockwise speed. As the brush spins, gently push it deeper into the vent, adding more rod sections as you go to reach the full length. The trick is to keep the drill spinning clockwise both when you're pushing it in and when you're pulling it out. This action scrubs the pipe's inner walls and pulls the dislodged lint back towards you.
Here’s how the process breaks down:
Start from the inside. Push the rotating brush all the way through the vent pipe. Keep going until you can feel it hit the exterior vent cap outside.
Pull the debris out. Now, slowly pull the spinning brush back toward you. It will drag huge clumps of lint with it. Keep your vacuum handy to clean up the mess as it comes out.
Clean from the outside in. Head outside and take off the exterior vent cover. Clear any lint you see in the opening, then use your brush to clean the last few feet of the pipe from this end.
Don't forget the transition duct. The last step is to run the brush through that flexible hose you disconnected from the dryer before you put everything back together.
For more detailed DIY safety guidelines, feel free to check out our guide on how to clean dryer vents with easy tips.
Common Mistakes and How to Avoid Them
Knowing what not to do when cleaning a dryer vent is just as important as knowing the right steps. I've seen plenty of well-intentioned DIY efforts go sideways, leading to costly damage or, worse, creating hidden safety hazards. Let's walk through the common pitfalls so you can make sure your hard work actually pays off.
One of the most frequent mistakes I see is a simple tool mismatch. Using a stiff, aggressive brush inside a flexible foil or vinyl duct is a recipe for disaster. Those ducts are fragile, and a forceful cleaning can easily rip them open. When that happens, you’re suddenly blowing hot, moist, lint-filled air right into your wall cavity.
The goal is to remove lint safely, not to create a new, hidden fire hazard. Always match your cleaning brush to your duct type; a softer brush is non-negotiable for flexible vents.
Damaging Practices to Steer Clear Of
Another common but misguided tactic is grabbing a leaf blower. It seems like a powerful solution, right? But it often does more harm than good. That intense blast of air can disconnect vent sections hidden within your ceilings or walls. It can also compact loose lint into a dense, solid blockage that’s nearly impossible to remove without professional help.
To avoid these headaches, just stick to the tools and methods designed for the job.
Avoid Pushing Debris Inward: Always use a brush that pulls lint out toward you. Shoving it deeper can create a compacted clog right at the exterior vent flap, blocking it from opening.
Don't Forget the Exterior Vent Cap: Neglecting to clean the outside vent cap is a classic mistake. It's a prime spot for birds' nests, leaves, and lint to build up and completely seal the exit point.
Never Reverse Your Drill: This is a big one. If you're using a rotary brush kit, spinning the drill counter-clockwise can unscrew the rod sections. You'll end up with a brush head lost deep inside the pipe, which is a real pain to retrieve.
Steering clear of these errors ensures your cleaning is both safe and effective. For more insights on keeping up with this chore, our guide explains how often you should clean the dryer vent based on your family's laundry habits.
When to Skip the DIY and Call a Professional

While I'm a big fan of a good DIY project, there are times when it’s best to call in the cavalry. Knowing when to put down the tools and pick up the phone is the key to getting the job done safely and correctly, especially when the problem is more complex than a simple lint clog.
If you’ve already tried to clean your dryer vent pipe and your clothes are still taking multiple cycles to dry, that's a huge red flag. Another tell-tale sign is an excessively hot dryer cabinet. This usually means a deep, stubborn blockage exists far beyond the reach of standard DIY kits.
Signs You Need an Expert
Some situations just scream "call a professional." For example, vent systems that are extremely long or have a complicated run with multiple sharp turns are notoriously difficult to clean properly without specialized equipment.
Sometimes, the most important part of a DIY project is recognizing its limits. Calling a professional for a complex vent issue isn't giving up; it's making a smart decision to protect your home and investment.
It's definitely time to call in a pro if you run into any of these issues:
Signs of Pests: If you discover a bird's nest or evidence of other critters living in your vent, a professional can remove it safely and help you prevent it from happening again.
Persistent Issues: If your dryer's performance drops again quickly after you've cleaned the vent, there might be a bigger problem. A pro can use inspection cameras to look for crushed ductwork or disconnected sections hidden inside your walls.
If you decide that calling a professional is the best move, you might find it useful to explore available local cleaning services. And if you're wondering about what to budget for the job, our detailed guide on the https://www.purifiedairductcleaning.com/post/average-cost-dryer-vent-cleaning-what-to-expect can give you a clear idea.
Common Questions About Dryer Vent Cleaning
To wrap things up, let's tackle some of the most common questions homeowners ask when it's time to clean a dryer vent pipe.
How Often Should I Clean My Dryer Vent Pipe?
An annual cleaning is a great rule of thumb for the average household. Think of it as yearly maintenance. But honestly, this isn't a one-size-fits-all situation.
If you have a big family, pets that shed like it's their job, or a long, winding vent path, you really should be checking it every six months. All that extra lint from pet hair and constant laundry loads builds up fast. Ignoring it doesn't just hurt your dryer's efficiency; you also miss out on the key benefits of dryer vent cleaning for your home.
A proactive cleaning schedule is your best defense against common dryer problems. An annual cleaning for most homes, and a semi-annual check for high-use households, can prevent fire risks and keep your appliance running smoothly.
Can I Use a Leaf Blower to Clean My Dryer Vent?
Please don't. Using a leaf blower might seem like a clever shortcut, but it's a recipe for a costly mistake. That blast of air is powerful enough to knock vent sections apart inside your walls or ceiling.
When that happens, you're blowing flammable lint directly into your home's hidden spaces, creating a serious fire hazard. It can also cram the lint together into a solid plug that's nearly impossible to get out with normal tools. A proper vent brush kit is designed to scrub the vent walls safely without causing this kind of damage.
My Dryer Still Isn't Drying After I Cleaned the Vent. Now What?
So you've done a thorough cleaning, but your clothes are still coming out damp. What's the next step? First, double-check all your connections. Make sure there are no surprise kinks or loose fittings you might have missed.
If you're confident the entire vent path is clear, the problem is likely inside the dryer itself. The usual suspects are a failing heating element or a bad moisture sensor. At this point, your best move is to call a professional appliance repair service for an accurate diagnosis.
Ready to make sure your dryer vent is professionally cleaned for total safety and peak efficiency? The certified technicians at Purified Air Duct Cleaning use specialized equipment for a deep clean that protects your home and boosts your dryer's performance. Schedule your service today at https://www.purifiedairductcleaning.com.