How to Install Dryer Vents Your Ultimate DIY Safety Guide
- Dec 19, 2025
- 16 min read
Knowing how to install a dryer vent means more than just connecting a tube. It's about mapping the shortest, straightest route possible, cutting clean holes, joining rigid metal ducts with foil tape (never screws!), and properly sealing the exterior vent cap.
This isn't just another weekend home improvement project; this project is a critical safety measure. Getting it right directly impacts your home's fire safety and how well your dryer actually works.
Why Proper Dryer Venting Is a Home Safety Essential
Before you even think about picking up a drill, it’s crucial to understand why this job matters so much. A correctly installed dryer vent is one of the most important safety features in your laundry room. Taking the time to do it by the book saves you from some truly scary possibilities down the road.
The main job of a dryer vent is simple: get the hot, moist air and all that flammable lint out of your house. When that pathway gets blocked, kinked, or was just installed poorly from the start, lint starts to build up. With every load of laundry, you're adding more fuel to a potential fire trap.
The Link Between Venting and Fire Risk
There's a reason fire departments are so vocal about this: clogged or improperly routed dryer vents are a major, well-documented fire hazard. In fact, dryers and their vents are consistently cited as leading causes of home appliance fires. This is the very reason building codes are so strict about how they're installed and recommend cleaning them at least once a year.
A blocked vent doesn't just trap lint; it forces your dryer to work harder and run much hotter. That extra heat is often all it takes to ignite the trapped lint. This isn't some rare, freak accident, it's a preventable disaster that proper installation solves.
This is why knowing how to prevent dryer fires is a non-negotiable part of this project. You're not just connecting a pipe; you're actively managing a significant fire risk in your home.
More Than Just Safety
Beyond the critical fire safety aspect, a well-designed vent system pays you back in ways you'll notice right away. An efficient, clear vent path makes a world of difference in your dryer's performance.
Here’s what you stand to gain from doing it right:
Faster Drying Times: When hot, damp air has an easy escape route, your clothes get dry way faster. No more running the same load twice.
Lower Energy Bills: An efficient dryer doesn't have to run as long, which means it uses less electricity or gas. That's real money back in your pocket every month.
Longer Appliance Life: You're also reducing the strain on your dryer's motor and heating element, which can add years to its lifespan and save you from a costly replacement.
While installing a dryer vent is a totally manageable DIY task for many homeowners, success hinges on paying close attention to the details. If your planned route involves a lot of turns, a really long run, or punching through tough materials like brick, it might be time to call in a pro.
In those more complex scenarios, having a certified technician from a company like Purified Air Duct Cleaning handle it ensures the job is done safely and up to code. It's the best way to get total peace of mind.
Choosing the Right Tools and Materials for the Job
Any seasoned pro will tell you that a successful project often starts at the hardware store, not in the laundry room. Getting all your gear lined up beforehand saves you from those frustrating mid-job runs and, more importantly, ensures the final install is safe, efficient, and built to last. It's not just about a checklist; understanding the "why" behind each item helps you make the best choice for your specific setup.
The single most important decision here is your ducting material. You'll see flimsy, flexible foil or vinyl ducts on the shelf, walk right past them. For a safe and efficient dryer vent that meets code, rigid metal ducting is the non-negotiable choice. Its smooth interior is the key; lint glides right through instead of snagging and building up, which is what drastically cuts down on fire risk and keeps your dryer running at peak performance.
Essential Power and Hand Tools
You don't need a massive workshop for this, but a few core tools are non-negotiable for cutting clean holes and making secure, airtight connections. Having these on hand will make the entire process go infinitely smoother.
To get started, let's break down exactly what you'll need versus what's simply nice to have. The essentials are just that, you can't do the job properly without them. The recommended items will make your life easier and give you a more polished, professional result.
Your Dryer Vent Installation Toolkit
Tool | Category (Essential/Recommended) | Why You Need It |
|---|---|---|
Drill with 4.25-inch Hole Saw | Essential | The standard dryer duct is 4 inches. This slightly larger saw gives you just enough wiggle room to fit the pipe without creating a huge gap to seal later. |
Tin Snips | Essential | Provides clean, straight cuts on rigid metal ducting. A hacksaw will leave jagged edges that are notorious for catching lint. |
Caulking Gun & Exterior Silicone | Essential | Your best defense against water and pests. A good gun gives you control for a neat, weatherproof seal around the exterior vent cap. |
Tape Measure & Level | Essential | Precision is everything. A tape measure ensures your path is right, and a level helps maintain the proper slope for drainage and airflow. |
Safety Glasses & Gloves | Recommended | Cutting metal creates sharp edges and small fragments. This is a simple but critical step to protect yourself. |
Screwdriver or Nut Driver | Recommended | Makes tightening clamps and securing the vent cap much easier and more secure than using pliers. |
Once you have your tools sorted, you can focus on the materials that will form the venting system itself.
Selecting Your Venting Materials
Beyond the ducting, a few other components are vital for a complete, secure, and code-compliant installation. These pieces all work together to create a durable system that safely channels heat and moisture outside.
First up is the exterior vent cap. You'll mainly see two types: louvered (flaps that open with airflow) and hooded (a single flap under a cover). Both work well, but the critical feature is a damper that closes when the dryer is off. This is what keeps pests, drafts, and cold air from getting into your house.
Next, let's talk tape. Standard grey duct tape has no business on this project. The heat from the dryer will cause it to dry out, become brittle, and fail, creating a dangerous leak. The only acceptable choice here is high-quality aluminum foil tape. It’s specifically designed to handle high temperatures and creates a permanent, airtight seal at every joint.
Finally, you have the short transition hose that connects the back of the dryer to the rigid ducting in the wall. A semi-rigid metal hose is the best option for durability and airflow. Sometimes you need a bit more flexibility, but this is a common spot for problems. For a deeper dive into creating the perfect setup, our guide on how to vent a clothes dryer offers more detailed tips. Whatever you choose, make sure it isn't crushed or sharply kinked behind the machine, that's a recipe for a blocked vent.
Key Takeaway: The goal is a seamless, airtight path for hot, moist, lint-filled air to escape. The right tools and materials are your first line of defense against leaks, inefficiency, and serious safety hazards.
Mapping Your Vent Path for Peak Performance
Honestly, the most important part of installing a dryer vent happens before you even pick up a drill. How you plan the route from your dryer to the outside will determine how safe, efficient, and long-lasting your setup is. The concept is simple: find the shortest, straightest path you can.
Every extra foot of ducting, and especially every bend, adds resistance. This makes your dryer work harder, hikes up your energy bill, and creates more places for flammable lint to get trapped. Your goal is to give that hot, damp air a clear shot to the outside with as little resistance as possible.
Calculating Your Total Vent Length
Most dryer manufacturers will tell you the maximum vent length is 35 feet. But here’s the catch, that's not just the physical length of the duct. You have to factor in the resistance from every turn, which we call "equivalent length."
Think of it this way: a straight duct is like an open highway for air. A 90-degree elbow is a sharp turn that slows everything down. To account for this, we add a "penalty" for each component:
A 90-degree elbow adds 5 feet to your total length.
A 45-degree elbow adds about 2.5 feet.
Let's walk through a real-world example. Say your dryer is on an inside wall. The vent needs to go up 8 feet, make a hard right turn, run 12 feet across the ceiling, then make another right turn to exit the wall.
Here’s the math: 8 ft (vertical) + 12 ft (horizontal) + 5 ft (first elbow) + 5 ft (second elbow) = 30 feet total equivalent length. That’s well under the 35-foot maximum, so you're in the clear.
Key Takeaway: Don't just pull out a tape measure and call it a day. You have to calculate the equivalent length by adding the penalty for each elbow. This ensures your dryer can actually push the air out effectively and safely.
Any pro will tell you to use smooth, rigid metal ducts. They drastically cut down on friction and prevent lint from building up, unlike those flimsy foil ducts. In fact, many building codes and manufacturer specs cap the practical maximum at around 25 feet of straight duct. Every 90-degree turn eats into that budget, effectively costing you 5 feet of length. Pushing these limits isn't worth it, a poorly routed vent can increase drying times by 10–30% and spike your energy use.
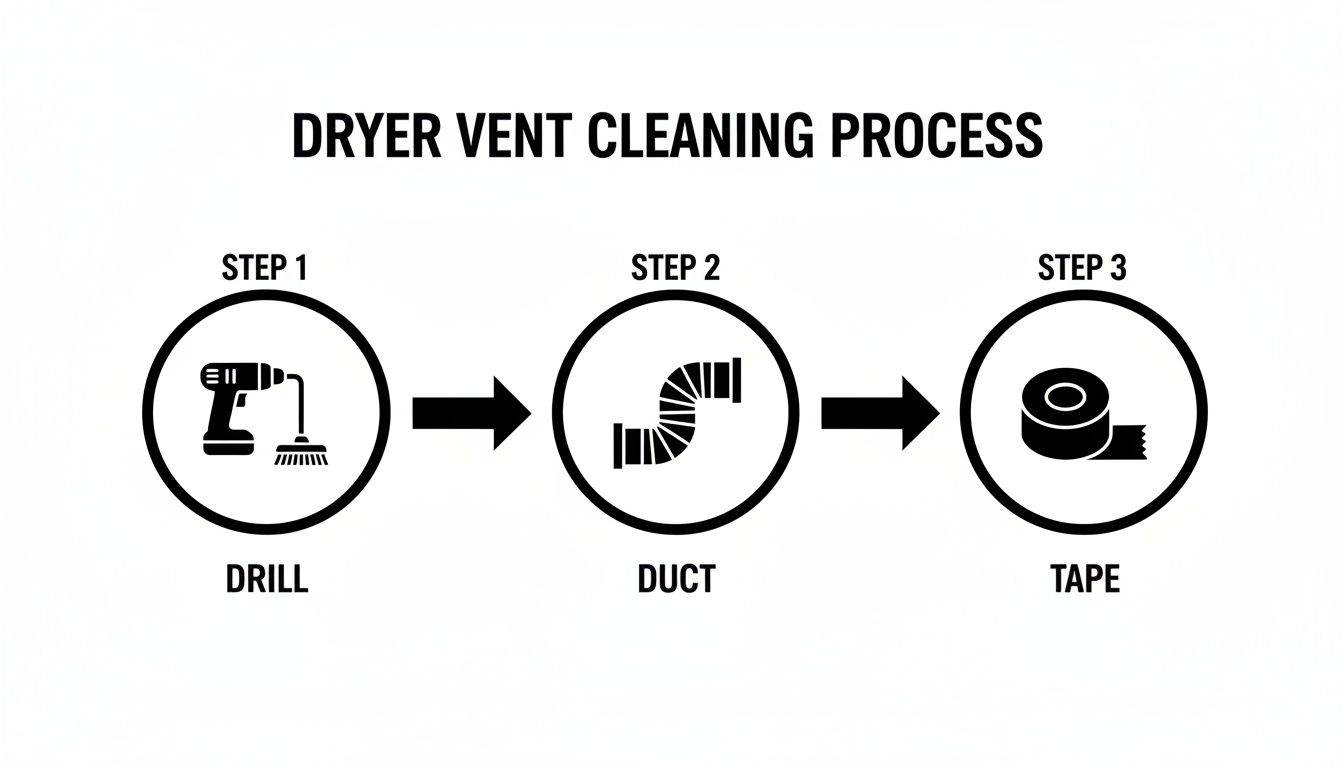
This image shows the basic toolkit for the job: a drill, the ducting itself, and the proper tape to seal every connection. It’s a great reminder that success comes from using the right tool for each step of the process.
Scouting for Hidden Obstacles
Once you have a path in mind, it's time to play detective. The space inside your walls isn't empty, it's full of studs, plumbing, and electrical wires. Accidentally drilling into one of these can turn a weekend project into a five-alarm emergency.
Grab a good quality electronic stud finder. This tool is your new best friend. Scan the wall where you plan to exit and mark the location of each stud with a pencil. Your 4.25-inch vent hole needs to fit cleanly between two studs, which are usually spaced 16 inches apart from center to center.
Be extra paranoid if you think plumbing or wiring might be lurking. Are there outlets, light switches, or a bathroom on the other side of the wall? If you have any doubt at all, it's always smarter to map out a slightly longer (but safer) vent path than to risk a major mistake. In some cases, venting through the roof is an option, though it comes with its own set of rules. For more on that, check out our complete safety guide on venting a dryer through the roof.
Optimizing Space with a Recessed Dryer Box
If your laundry room is more of a laundry closet, you know that every inch matters. You can't just shove a dryer flat against the wall because that bulky transition hose needs room to breathe.
This is where a recessed dryer box is a game-changer. It's a simple metal or plastic box that you install into the wall cavity between two studs. This gives you a recessed hookup point for the vent hose, letting you push the dryer back several inches. Not only does it save precious floor space and look much cleaner, but it also prevents the hose from getting crushed, a major cause of poor airflow and a serious fire hazard.
The Hands-On Guide to Cutting and Connecting

Alright, with your plan mapped out, it's time to grab your tools and make this happen. This is where the real work begins, turning that route you planned into a safe, functional dryer vent system. Precision is your best friend here, every clean cut and airtight connection counts.
We'll start with the most nerve-wracking part: drilling the exit hole. A mistake here is a headache you don't want, so we'll take it slow. After that, we’ll piece together the rigid ducting, seal it up right, install the exterior vent cap, and finally, hook everything up to the dryer.
Making the Cut with Confidence
The first real moment of truth is drilling a 4.25-inch hole clean through your house. Always start from the inside. Once you've triple-checked that your spot is free of studs, pipes, or wiring, you're ready to go.
Grab a long, skinny pilot bit and drill a small guide hole all the way through to the outside. This little hole is your secret weapon; it tells you exactly where the center of your big hole needs to be on the exterior, preventing any costly misalignments.
Now, switch to your 4.25-inch hole saw. Guide the saw's pilot bit into the hole you just made and start drilling. Use steady, even pressure, don't force it.
Drywall will give way pretty quickly.
Wood sheathing will put up more of a fight.
Siding will vary. You'll need a different touch for vinyl versus wood or fiber cement.
Once you're through the interior wall, head outside. Use that same pilot hole to line up the hole saw and cut through from the exterior. This two-sided approach guarantees your holes line up perfectly for a straight shot.
Assembling the Rigid Duct System
With the path cleared, it's time to build the duct run. We're using straight, rigid metal ducting from your laundry room to the great outdoors. The assembly is simple, but how you seal it is what really matters.
Measure and cut your first piece of duct with tin snips. You know the old saying: measure twice, cut once. The goal is to use the longest possible sections to keep the number of seams to a minimum, as every joint is a potential leak point.
When fitting the sections together, make sure the crimped end of one piece slides inside the uncrimped end of the next. This creates a smooth interior surface that won't snag lint. For a deep dive into local regulations, it’s a good idea to check out our homeowner's guide to dryer vent code requirements.
Crucial Tip: Whatever you do, never use screws to connect dryer duct sections. Screws poke into the duct and create the perfect little hooks for lint to build up. That buildup is a major fire hazard.
Instead of screws, every single seam needs to be sealed with high-temperature aluminum foil tape. Wrap it tightly around each joint, smoothing it down to create a completely airtight seal. This is the only professional, code-compliant way to ensure your system is safe and efficient.
Installing the Exterior Vent Cap
The vent cap on the outside of your house is the final gatekeeper, keeping weather and pests out of your vent line. A solid installation here prevents drafts, water damage, and critters from moving in.
Start by sliding the vent cap's pipe through the hole from the outside. You're looking for a snug fit. If the cap has a mounting plate, press it against the siding and mark your screw holes.
Before you screw it in, lay down a thick bead of exterior-grade silicone caulk around the back of the cap's flange. This acts as a waterproof gasket between the vent and your house.
Press the cap firmly against the siding until a little caulk squeezes out, then drive in the appropriate screws for your siding material.
To finish it off, run another clean bead of caulk along the top and sides of the flange where it meets the house. Leave the bottom edge uncaulked. This is important, it allows any condensation to drain out instead of getting trapped inside your wall.
Making the Final Dryer Connection
The last piece of the puzzle is connecting the whole system to your dryer. This is where a flexible or semi-rigid transition hose comes in handy, giving you room to maneuver the dryer.
Attach one end of the hose to the ductwork in the wall and the other to the exhaust port on your dryer. Use hose clamps to secure both ends, and make sure they are good and tight to stop hot, moist air from leaking into your laundry room.
Now, gently slide the dryer back into its spot. Be incredibly careful not to crush or kink the transition hose behind it. A flattened hose chokes off airflow, making your dryer work harder and creating the very fire risk you've been working to eliminate. You want smooth, gentle curves, not sharp bends.
Avoiding Common Installation Mistakes
Even the most careful DIYer can make a small mistake that tanks the safety and efficiency of their entire dryer vent system. A proper installation isn't just about connecting pipes; it's about knowing which common pitfalls to sidestep so your hard work pays off with a truly safe and functional setup.
Many of these slip-ups seem minor at first, but they create huge problems down the line. We're talking about everything from choked airflow to dangerous lint traps. The good news? They're all easy to avoid once you know what to look for.
The Problem with Screws and Sags
One of the most frequent, and dangerous, mistakes I see is using screws to join sections of rigid ducting. It feels secure, right? The problem is that the tip of every screw pokes into the airway, creating a perfect hook for passing lint. Over a few months, those tiny snags can snowball into a massive blockage, creating a serious fire hazard.
The only correct way to seal these joints is with high-temperature aluminum foil tape. This tape creates a perfectly smooth, airtight seal that doesn't obstruct airflow one bit, letting lint pass right through to the outside where it belongs.
Another classic error is letting the duct run sag between supports. Any low spot, or "belly," in the ductwork becomes a collection point for condensation. That moisture mixes with lint to form a thick, heavy sludge that not only blocks the vent but can also cause the metal to corrode over time.
The Fix: Support the duct run every 4 to 6 feet with strapping. You want to maintain a slight, consistent upward slope toward the exterior wall, which ensures any moisture drains right out.
Crushing the Transition Hose
That short, flexible hose connecting your dryer to the wall is almost always the system's weakest link. Everyone wants to push their dryer as far back against the wall as possible, but this often leads to the hose getting crushed, kinked, or bent into a sharp 90-degree angle. This one simple mistake can choke off almost all the airflow.
A crushed transition hose forces your dryer to work way harder, which means longer drying times and a real risk of overheating. It's a leading cause of lint buildup right behind the appliance.
When you push your dryer back into place, take a peek behind it. Make sure you leave enough room for the transition hose to have gentle, sweeping curves. If you're really tight on space, installing a recessed dryer box is a fantastic solution that protects the connection without eating up precious floor space.
The need for proper installation isn't just a safety tip; it's a key factor in a growing market. The global dryer vents market is valued in the hundreds of millions of US dollars and is projected to grow steadily. This is driven by new construction, home retrofits, and a sharper focus on safety standards. You can discover more insights about this trend and how North America leads the market at FactMr.com.
Troubleshooting On-the-Fly Problems
No project goes exactly as planned. Here’s how to handle a couple of real-world roadblocks you might hit while installing your dryer vent.
Scenario 1: You Hit a StudYou start drilling your main exit hole and hit that unmistakable, solid resistance of a wall stud. Stop what you're doing immediately.
The Solution: Whatever you do, don't try to notch or cut the stud, as this can weaken your home's structure. Your best bet is to shift the exit point a few inches to the left or right to find the open bay between the studs. If you need to adjust your path slightly, you can use a 45-degree elbow inside the wall.
Scenario 2: The Exterior Vent Cap Won't CloseYou've finished the installation, but you notice the little damper on your exterior vent cap is stuck partly open.
The Solution: This is almost always caused by the duct pipe extending too far and physically blocking the damper. Just pull the vent cap back out, trim about a half-inch off the end of the duct pipe with your tin snips, and pop it back in. That should give the damper all the clearance it needs to close properly.
Frequently Asked
Questions About Dryer Vent Installation
Even the most detailed guide can't cover every single question that pops up in the middle of a project. When it comes to installing a dryer vent, knowing how to handle these one-off situations is what really gets the job done right. Here are some quick, no-nonsense answers to the questions we hear all the time.
Can I Vent My Dryer Into a Garage or Attic?
Let's be crystal clear on this one: absolutely not. It might look like an easy way out, but venting your dryer into any enclosed space, be it a garage, attic, or crawl space, is a recipe for disaster. You're essentially pumping massive amounts of moisture and highly flammable lint into an unventilated area.
This creates the perfect breeding ground for mold, mildew, and even structural rot in your home's framing. More importantly, it’s a serious fire hazard and flies in the face of just about every building code out there. The rule is simple and has no exceptions: your dryer vent must always terminate outside your home.
How Often Should I Clean My New Vent?
Just because you have a brand-new, perfectly installed vent doesn't mean you're off the hook for maintenance. Lint is an unavoidable byproduct of drying clothes, and keeping that vent clear is critical for safety and efficiency.
For the average household, giving the entire vent a thorough cleaning once a year is the gold standard. However, your own laundry habits might mean you need to do it more often.
Big families with daily laundry loads should probably check and clean the vent every six months.
Homes with pets, especially the long-haired variety, will find lint builds up much faster.
Longer vent runs and those with multiple elbows are natural traps for lint compared to short, straight paths.
Staying on top of this is non-negotiable. For a more detailed breakdown, check out our guide on how often to clean your dryer vent to set up the right schedule for your home.
An annual inspection and cleaning is your best defense against the slow, silent buildup of flammable lint. It's a small investment of time that offers significant peace of mind.
When Is It Better to Hire a Professional?
Look, while many dryer vent installations are well within the grasp of a determined DIYer, there are definitely times when calling a pro is the smarter, and safer, move. Knowing your limits is key.
You should seriously consider handing the job over to a professional technician if your installation involves:
A total vent length that exceeds 35 feet (after calculating for elbows).
A path requiring more than two 90-degree elbows.
Cutting through tough materials like a concrete foundation, brick wall, or the roof.
Trying to navigate a path through a crowded or complex wall cavity.
A professional comes equipped with specialized tools, like core drills for getting through masonry, and knows exactly what local codes require. A botched job in one of these complex situations isn't just a headache; it can be a genuine hazard.
If your project feels like it's getting too complicated or the route is tricky, don't hesitate to call for backup. The certified technicians at Purified Air Duct Cleaning have the experience and the right gear to ensure your dryer vent is installed safely, efficiently, and up to code the first time. Contact us for a free quote and professional service you can trust. Learn more at https://www.purifiedairductcleaning.com.