How to Vent Clothes Dryer: Safe, Efficient Venting Guide
- Nov 7, 2025
- 14 min read
Properly venting a clothes dryer is more than just a home improvement task; it’s a critical safety measure. It involves creating a clear path with ductwork for all that hot, moist air to escape from your appliance to the outside. Get this right, and your dryer runs efficiently; get it wrong, and you're looking at serious risks.
Why Your Dryer Vent Is a Serious Safety Issue
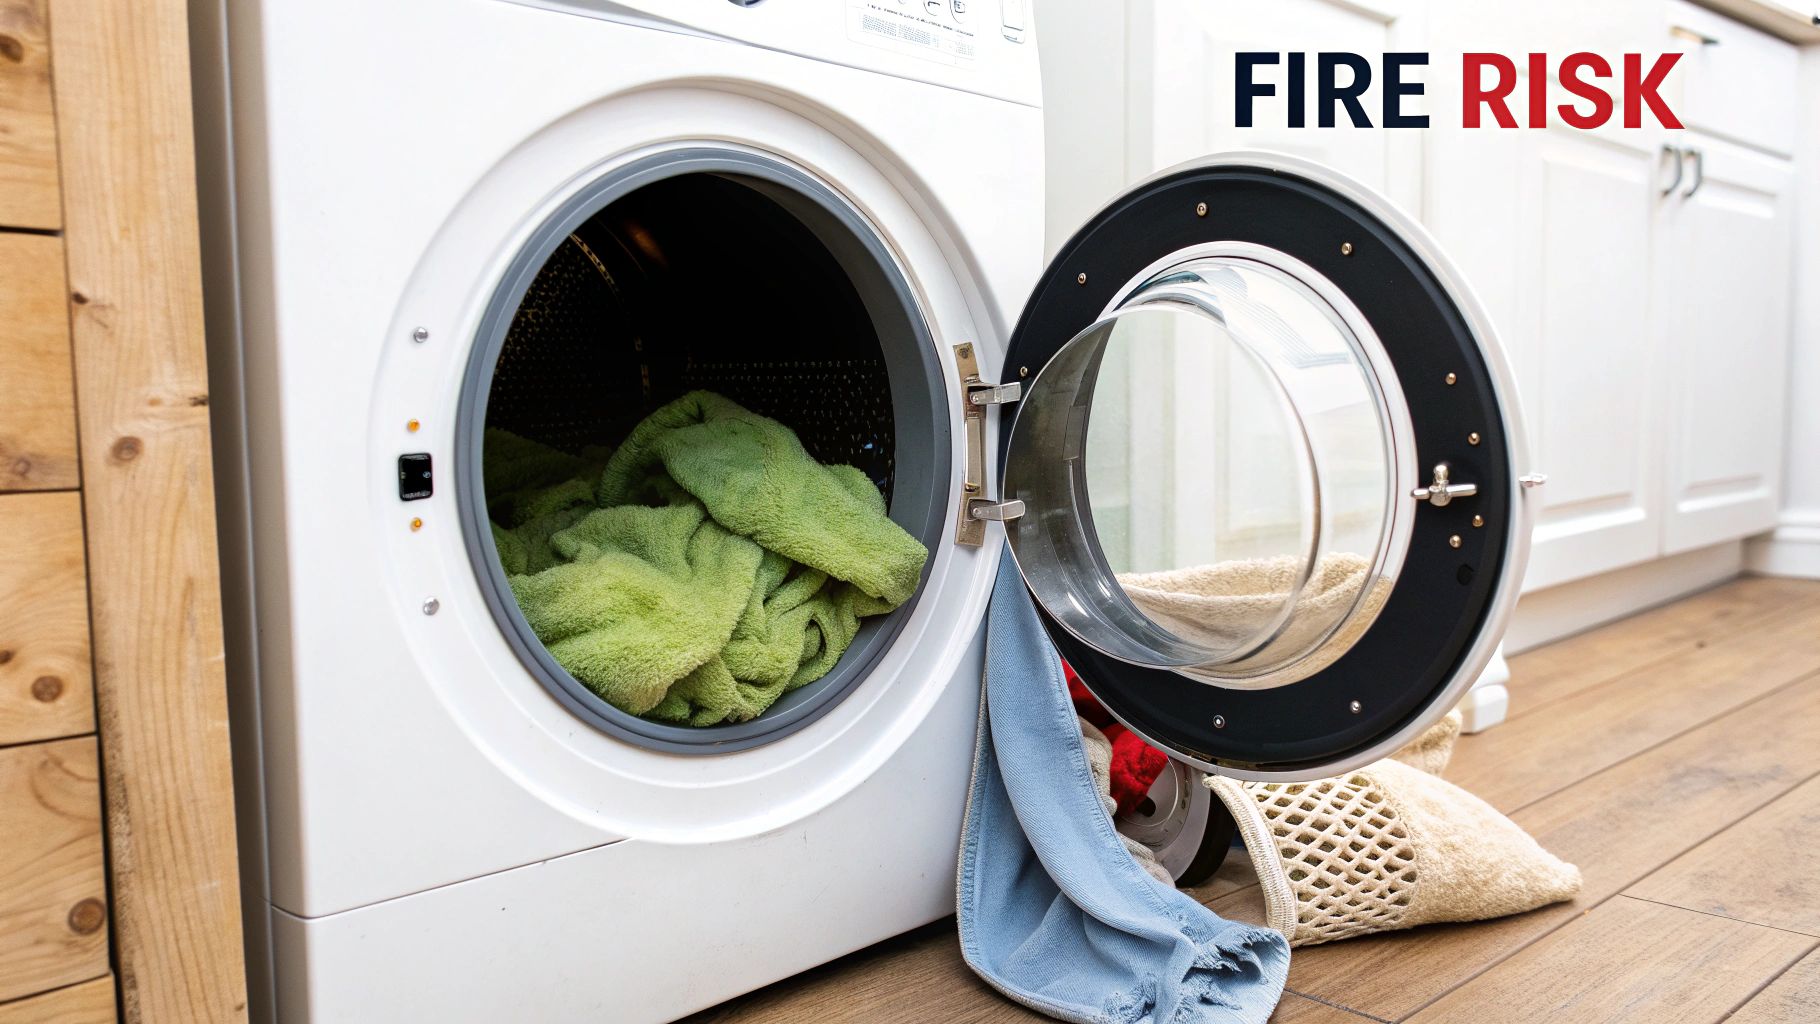
Many homeowners underestimate just how important proper dryer venting is. It's easy to see it as just another part of a laundry room upgrade, but this is one area where cutting corners can have devastating consequences. An incorrectly installed or clogged vent pipe isn't just an inconvenience that leaves you with damp clothes; it’s a genuine threat to your home and family.
The biggest danger, by far, is fire. Your dryer's lint screen is your first line of defense, but it doesn't catch everything. Fine, fibrous particles get pushed into the vent duct with every single load. Over time, that lint builds up, creating a dense, highly flammable blockage just waiting for a spark.
The Dangers Hiding in Your Walls
This buildup chokes off the airflow, forcing your dryer to work harder and get hotter. That's a dangerous combination. A single spark from the heating element can ignite all that trapped lint, and the result can be a catastrophic house fire.
Even with stricter building codes and better fire-resistant materials, this remains a huge problem. In the U.S. alone, dryer fires are responsible for over 15,000 residential fires every year. That's a sobering number that highlights just how serious this is.
But a fire isn't the only thing you need to worry about. A poorly functioning vent system can cause other major headaches:
Moisture Damage: All that hot, steamy air from your dryer has to go somewhere. If it can't get outside, it will condense inside your walls, crawlspace, or attic. Before you know it, you're dealing with rotting wood, peeling paint, and ruined drywall.
Mold Growth: Trapped moisture is a welcome mat for mold and mildew. Once it takes hold, it can trigger serious respiratory problems and allergies, tanking your home's indoor air quality.
Carbon Monoxide Poisoning: This is a life-or-death issue for anyone with a gas dryer. A blocked vent can cause carbon monoxide, a silent, odorless gas, to back up into your home. The results can be lethal.
Remember, a clogged vent also hits you in the wallet. It forces your dryer to run longer and harder, which means higher energy bills. A clean, efficient vent is not just safer, it saves you money.
Understanding these risks makes it clear why this isn't a project to take lightly. Learning how to properly vent your dryer is a crucial step in protecting your home and everyone in it. For more detailed safety advice, check out our comprehensive guide on preventing a dryer lint fire hazard.
Mapping Out the Perfect Dryer Vent Route
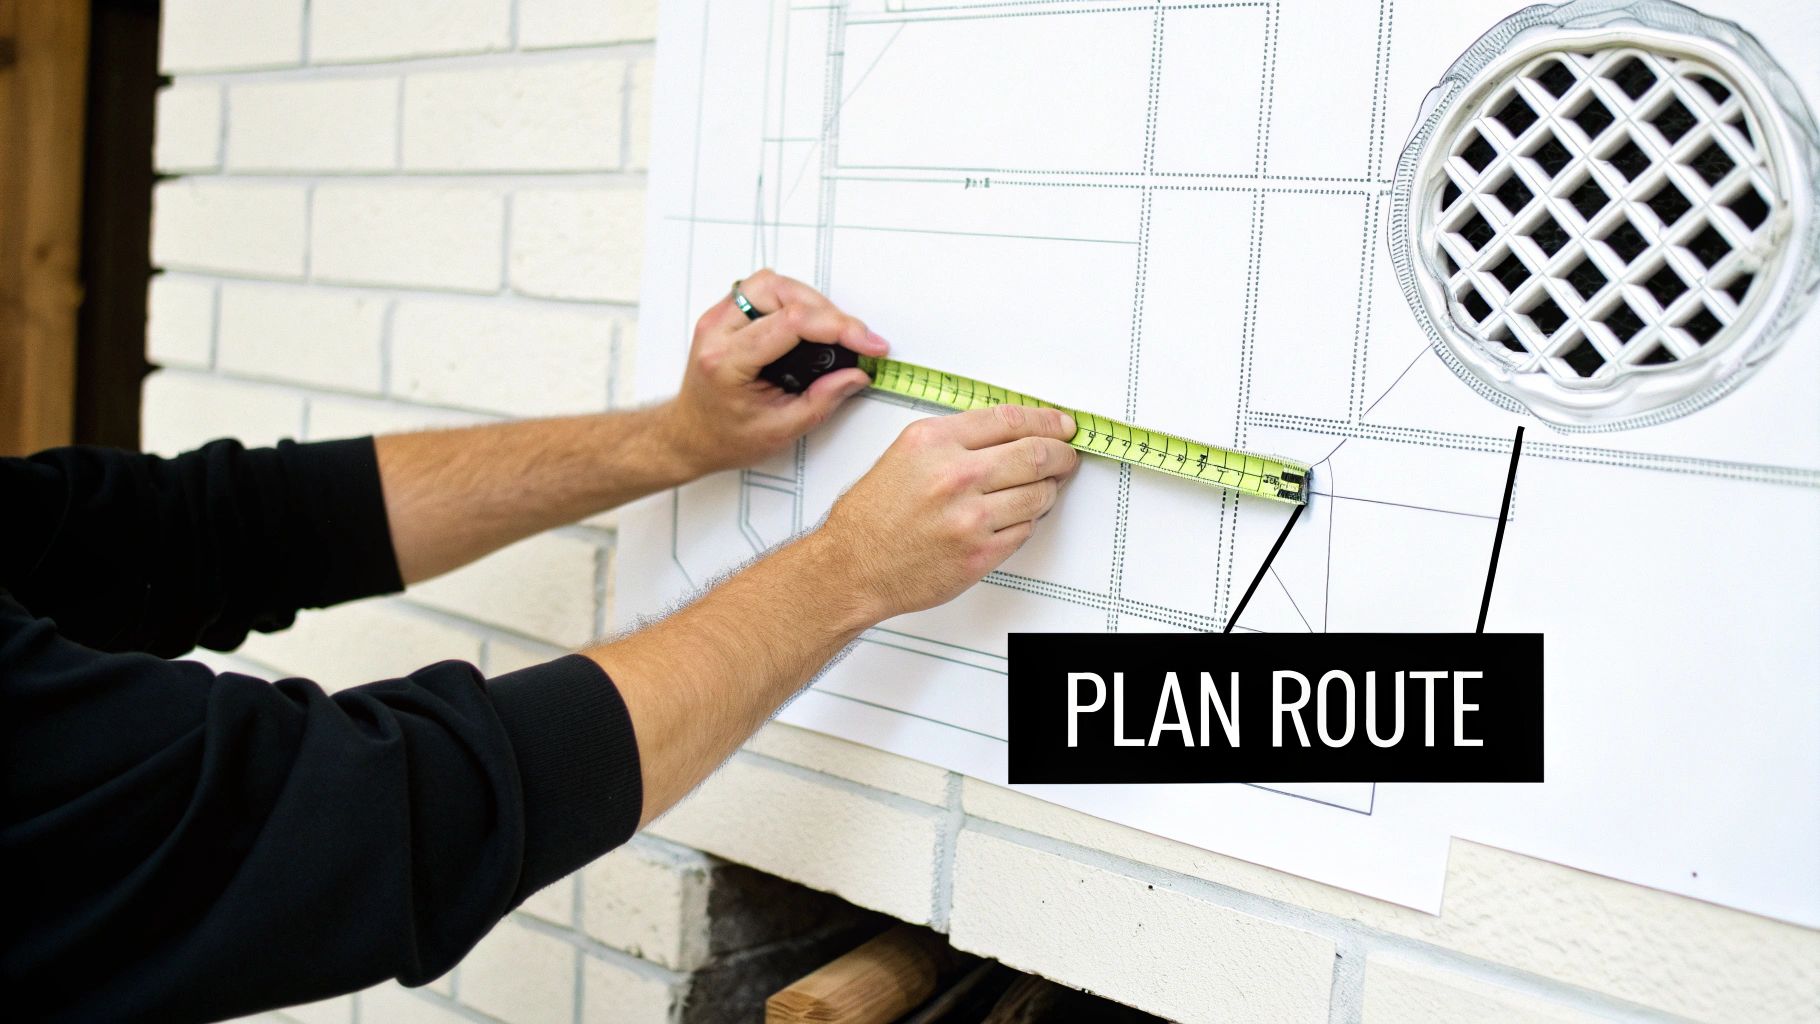
Before you even think about picking up a drill, let’s talk about the most valuable tool you have: a good plan. When you're figuring out how to vent a clothes dryer, the mission is always the same, find the shortest, straightest path from your dryer to the great outdoors. A direct route is a happy route because it gives lint and moist air an easy escape.
Think of it this way: every bend and every extra foot of ducting is like a roadblock for airflow. These obstacles force your dryer to work overtime, tanking its efficiency and creating perfect little pockets for dangerous lint to build up. Your first job is to pinpoint the best possible exit on an exterior wall.
Choosing Your Exit Point
The sweet spot for an exit is a straight shot through the rim joist of your foundation or directly through an exterior wall. These spots give you a stable, direct path outside. What you absolutely want to avoid is routing the vent into a garage, crawlspace, or soffit. That doesn't solve the problem; it just moves the moisture and fire hazard to a different part of your house.
And here's a non-negotiable rule: never, ever terminate a dryer vent in an attic. It’s a surprisingly common mistake that becomes a breeding ground for moisture damage and mold. To get the full picture on why this is such a bad idea, check out the risks of venting a dryer into an attic. It’s right up there with the importance of proper bathroom ventilation, managing moist air is simply critical for a healthy home.
A critical rule to follow: the total length of your duct run should not exceed 35 feet, according to most building codes and manufacturer recommendations. This maximum length is your total budget, and every bend you add "spends" some of it.
Calculating Your Vent Run Length
To make sure your plan is up to code and actually works, you'll need to do some quick math. That 35-foot maximum isn't just for straight pipe. Elbows and bends eat into that total because they add a lot of resistance to the airflow.
Here’s the breakdown:
For every 90-degree elbow: Subtract 5 feet from your 35-foot maximum.
For every 45-degree elbow: Subtract 2.5 feet from your 35-foot maximum.
Let's walk through a real-world example. Say your laundry room is in the basement. The path needs a 10-foot straight run plus two 90-degree elbows to get outside. Your calculation looks like this: 10 feet (pipe) + 5 feet (first elbow) + 5 feet (second elbow) = 20 total feet. Nice and easy, well within the 35-foot limit.
But a second-floor laundry closet can be a different story. A 20-foot run with three 90-degree elbows would be calculated as: 20 feet (pipe) + 5 feet (elbow 1) + 5 feet (elbow 2) + 5 feet (elbow 3) = 35 total feet. This route is pushing the absolute limit. If you see a number like this, it's a huge red flag to try and find a shorter, straighter path.
Spending a little extra time on the planning stage will save you major headaches during installation and give you a safer, more efficient system for years.
Choosing the Right Tools and Materials
Once you’ve figured out the best path for your vent, it's time to gear up. Getting the materials right is every bit as important as the route you planned, this is really where safety comes into play. Grabbing the wrong supplies isn't just a simple DIY mistake; it’s a decision that can create a genuine fire hazard inside your walls.
The biggest, most common, and most dangerous mistake is using that flimsy, white plastic or vinyl flexible ducting. You’ve probably seen it in stores. It's cheap and easy to find, but it has absolutely no business being used for a dryer vent. Its accordion-style interior is a lint trap waiting to happen, causing blockages that choke off airflow and crank up the heat. Even worse, it's not fire-resistant and can melt in a heartbeat, giving a fire a clear path to spread.
The Only Safe Ducting Choice
When it comes to ducting, your only safe options are rigid or semi-rigid metal ducts. Period. Both are made from aluminum or steel, which means they have a smooth interior that lint can easily pass through and a fire-resistant build that meets modern safety codes.
For long, straight shots, rigid metal ducting is the undisputed champion. If you need to navigate around a tight corner or make the final connection from the wall to the dryer, semi-rigid ducting gives you that little bit of flex you need.
It's clear that homeowners are becoming more aware of these safety issues. The global market for dryer vent ducts, currently valued at around USD 1.5 billion, is projected to nearly double by 2033. This growth is fueled by people wanting safer, more efficient homes. If you're interested in the data behind these safety trends, you can find more details over at datahorizzonresearch.com.
Your choice of ducting material is a direct investment in your home's safety. Always choose metal over plastic; there is no substitute for fire-resistant materials when it comes to venting a high-heat appliance like a clothes dryer.
Before you make any final decisions, it helps to see the options laid out side-by-side.
Dryer Ducting Material Comparison
This table breaks down the common materials you'll encounter. As you'll see, the choice for safety and efficiency is pretty clear.
Material Type | Pros | Cons | Safety Recommendation |
|---|---|---|---|
Rigid Metal Duct | Smooth interior, excellent airflow, highly fire-resistant, very durable. | Requires precise measurements and cutting; not flexible. | Highly Recommended. The gold standard for safety and performance. |
Semi-Rigid Metal Duct | Flexible for tight turns, smooth interior, fire-resistant. | Can be crushed or kinked if not handled carefully, slightly more airflow resistance than rigid. | Recommended. Ideal for transitions from the dryer to the wall or for navigating obstacles. |
Flexible Foil Duct | Very flexible and easy to bend. | Prone to kinking, traps lint easily, not as durable as semi-rigid. | Use with Caution. Only for very short, straight transition runs. Check local codes. |
Plastic/Vinyl Duct | Cheap and extremely flexible. | Highly flammable, ribbed interior is a major lint trap, prohibited by most building codes for dryers. | Never Use. A serious fire hazard that should be avoided at all costs. |
Ultimately, sticking with rigid or semi-rigid metal is the only way to ensure your installation is both safe and effective for the long haul.
Your Essential Toolkit
Showing up with the right tools will make this job go from a frustrating headache to a smooth weekend project. Take a few minutes to gather these items before you start cutting into walls. Each one has a specific job to do.
Here's your checklist:
Drill with a Hole Saw Attachment: This is for making that perfect, clean exit hole in your wall. A 4.25-inch hole saw is the standard size for a typical 4-inch vent.
Caulking Gun and Exterior-Grade Caulk: Absolutely essential for creating a weatherproof seal around the outside vent cap. This keeps rain, snow, and pests out of your house.
Metal Foil Tape: This is not your average cloth duct tape. You need proper metal foil tape designed to handle high heat. It's the only way to properly seal the seams between duct sections to prevent hot, moist, lint-filled air from leaking out.
Adjustable Metal Worm Clamps: You’ll need at least two of these sturdy clamps to get a rock-solid connection from the duct to the back of the dryer and to the exterior vent cap.
Tape Measure and Pencil: For obvious reasons! Measure twice, cut once.
Safety Gear: Don't skip this. At a minimum, you need safety glasses, a good pair of work gloves, and a dust mask for when you're drilling.
Having this specific gear ready to go, along with the correct metal ducting, is the foundation for a successful and, most importantly, safe installation.
Your Dryer Vent Installation Walkthrough
Alright, you've got your route planned and your materials are ready to go. Now for the fun part: putting it all together. This is where your careful planning pays off, turning a pile of parts into a safe, efficient system that protects your home. We'll start with the trickiest part, creating the exit hole, before moving inside to connect the ductwork.
First things first, you need to cut the hole through your exterior wall. Grab your drill and a 4.25-inch hole saw. You'll want to start drilling from the inside at the spot you marked earlier. This little trick prevents the drywall from "blowing out" and leaving a ragged, ugly mess on your interior wall.
Once you feel the pilot bit pop through to the outside, stop. Head outdoors and finish drilling the rest of the way from the exterior. This two-step process gives you a clean, professional-looking cut on both your siding and your drywall.
Securing the Exterior Vent Cap
With the hole cut, it's time to install the exterior vent cap. This piece is more important than it looks; it keeps pests and cold drafts out while letting all that hot, moist air escape. From the outside, slide the cap's duct pipe into the hole you just made until its flange sits flat against your siding.
But before you screw it down, run a thick bead of exterior-grade caulk around the back of the flange. This is your weather seal, and it's critical for preventing moisture from getting into your wall cavity. Once it's caulked, press the cap firmly against the wall and secure it with screws.
Here's a pro tip for a truly weatherproof seal: after screwing the cap in place, caulk along the top and sides of the flange where it meets the siding. But, and this is important, leave the bottom edge open. This allows any water that might sneak behind the siding to drain out instead of getting trapped.
Assembling the Duct Run
Now you can start building the duct run, working from the outside in. Start at the exterior vent cap and connect your first piece of rigid metal ducting. As you connect each new section, make sure the crimped (male) end always points in the direction of the airflow, that is, away from the dryer. This simple step ensures lint flows smoothly past the seams instead of getting snagged.
Every single joint, seam, and connection needs to be sealed with metal foil tape. Don't even think about using that gray cloth duct tape. The heat from the dryer will bake it brittle in no time, causing it to fail and leak dangerous lint and hot air into your home. Overlap the foil tape generously to create a completely airtight seal. For a more comprehensive look at the entire installation from start to finish, check out this excellent DIY guide for installing a dryer vent.
If you have any horizontal stretches in your vent path, give them a slight downward slope toward the outside, about a quarter-inch of drop for every foot of pipe. This subtle angle helps any condensation drain away naturally instead of pooling inside the duct.
The principles of creating a clean opening and sealing it properly are key to many home ventilation projects. For example, anyone looking at other improvements can find that a good bathroom exhaust fan installation guide shares many of the same core techniques for a professional result.
Making the Final Connections
The last piece of the puzzle is connecting the assembled ductwork to the dryer itself. This is the perfect spot to use a short length of semi-rigid metal duct. It gives you just enough flex to push the dryer into place without kinking or crushing the vent line.
Use adjustable metal worm clamps to attach the duct to the dryer's exhaust port and the connection point on the wall. Get them good and snug. You want a solid, airtight connection that won't vibrate loose over time. With everything tightened down, you're all set. Your new dryer vent is installed, safe, and ready to go.
Maintaining a Safe and Clean Dryer Vent
Getting your dryer vent installed correctly is a huge win, but the work doesn't stop there. Just like any other important system in your home, your vent needs regular attention to keep it running safely and efficiently. If you let maintenance slide, you could undo all your hard work and bring back the very fire hazards you tried to eliminate.
The key to long-term safety is a simple, consistent cleaning routine. Lint is incredibly flammable, and no matter how perfect your installation is, it will slowly build up inside the ductwork. An annual inspection and cleaning are non-negotiable if you want your dryer to perform at its best.
Fortunately, your dryer usually gives you hints when it needs help. If you start seeing any of these red flags, it's a clear sign your vent is clogged and needs immediate attention.
Spotting the Warning Signs
Knowing the symptoms of a blocked vent is your first line of defense against a potential fire. Be on the lookout for these common issues:
Clothes take forever to dry: If one cycle isn't cutting it anymore, poor airflow from a clog is almost always the reason.
The dryer feels unusually hot: When hot, moist air can't get out, it builds up. This can make the outside of the dryer feel much hotter than it should.
You smell something burning: This is a major warning. That burning odor often means the dryer is overheating, which could easily ignite the trapped lint.
The outside vent flap stays shut: Take a peek outside while the dryer is running. You should see the vent flap open. If it's not moving, air isn't escaping.
This infographic breaks down the essential steps of a proper installation, from making the initial cut to sealing everything up tight.
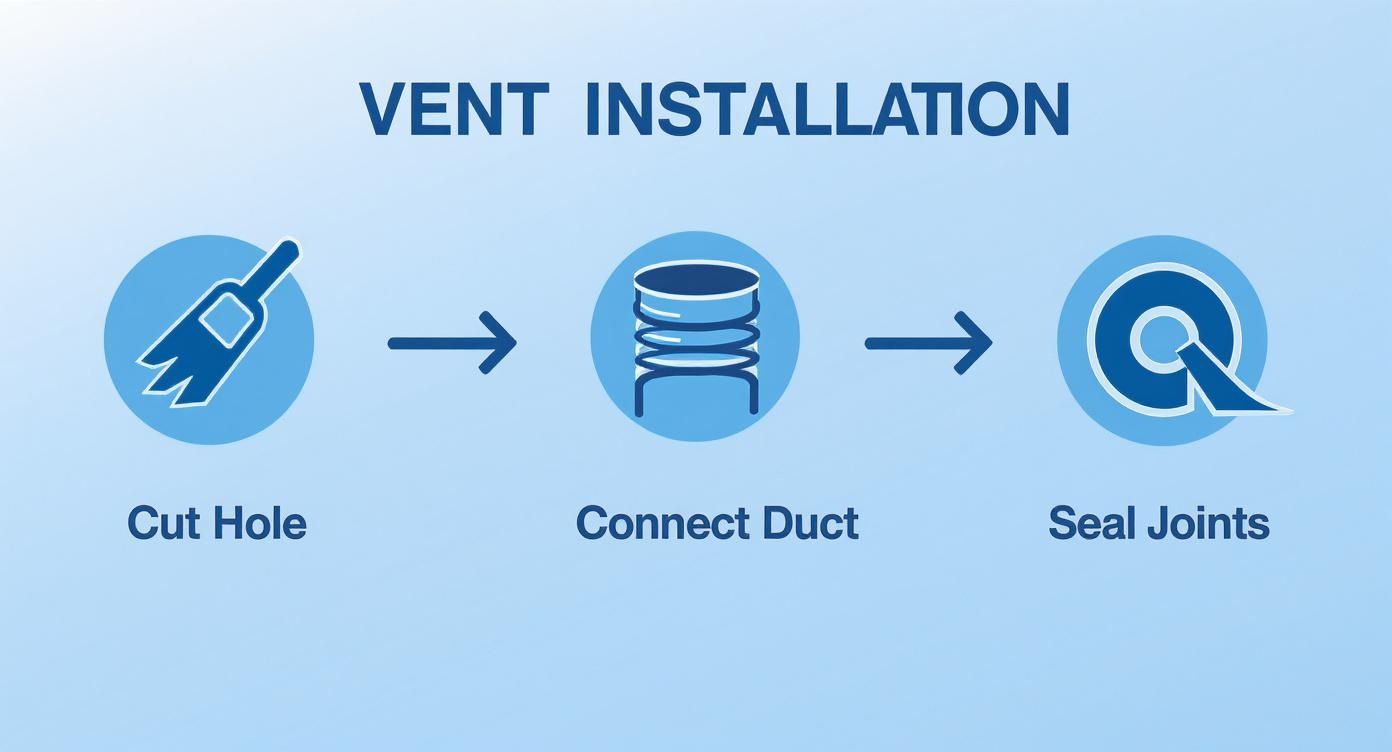
This visual reinforces the three core stages: a clean cut, a secure connection, and an airtight seal for maximum safety and efficiency.
Your Annual Cleaning Checklist
You should plan to clean the entire vent system from end to end at least once a year. A dryer vent cleaning kit, which usually comes with a long, flexible brush that attaches to a drill, makes this job much more manageable. First, unplug the dryer and disconnect the duct from the back.
Work the brush through the entire length of the vent pipe, cleaning from both inside the house and outside. You'll probably be amazed (and a little horrified) by how much lint comes out. This kind of maintenance is so important that it's shaping the entire industry. The global laundry dryer market is projected to hit USD 16.82 billion by 2032, with a huge emphasis on safety and efficiency features that rely on proper venting. You can read more about laundry appliance market trends on fortunebusinessinsights.com.
A clean dryer vent isn't just about safety, it's about efficiency, too. A clogged vent can drive up your energy use by as much as 30% because the appliance has to run longer to get your clothes dry. Think of regular cleaning as an investment that pays you back on your utility bills.
Don't forget to clean the space behind your dryer and the exterior vent cap. Scrape off any caked-on lint or debris you find. This simple yearly task dramatically lowers your fire risk and helps your dryer run like it's brand new. For a more detailed walkthrough, check out our guide on how to safely and effectively clean your dryer vent pipe.
Common Dryer Venting Questions Answered
Even when you have a solid plan, a few questions always seem to pop up during a project like venting a clothes dryer. Getting the right answers is crucial for making sure your installation is safe, efficient, and up to code. Let's walk through some of the most common things homeowners ask about.
One of the biggest questions is about venting indoors. I'll be direct: you should never vent a standard clothes dryer indoors. It's a tempting shortcut, but the consequences are serious. Electric dryers pump out a massive amount of moisture, creating a perfect breeding ground for mold and mildew that can rot your home's structure and destroy your air quality.
If you have a gas dryer, the danger is even more immediate. They also emit carbon monoxide, a deadly, odorless gas. Venting indoors is simply not an option.
Vent Length and Material Safety
Another point of confusion is just how long a vent run can be. Most manufacturers and local building codes set the maximum length at 35 feet. But that number isn't just for the straight sections of pipe; every single bend in the line subtracts from that total.
Here's the quick math you need to do:
A sharp 90-degree elbow is the same as adding 5 feet of straight duct.
A gentler 45-degree elbow counts as 2.5 feet.
Your goal should always be the shortest, most direct path to the outside. When in doubt, always pull out your dryer's manual for its specific recommendations.
The materials you pick are just as critical as the route you plan. Under no circumstances should you use those flexible plastic or vinyl ducts. They are a massive fire hazard because the ribbed design is a magnet for lint, and the material itself isn't fire-resistant. If a fire ever starts, that plastic will just melt and help spread the flames. Stick to rigid or semi-rigid metal ducting only.
Finally, let's talk about maintenance. You have to be proactive. A good rule of thumb is to clean your dryer vent thoroughly at least once a year. However, if you have a big family, pets that shed a lot, or just do laundry constantly, bumping that up to every six months is a much safer bet.
The classic warning sign that you have a problem is when your clothes start taking more than one cycle to get completely dry. Don't ignore it. Ignoring a clog can lead to some really serious problems, so it's worth understanding exactly what happens when a dryer vent is blocked.
A clean and properly installed dryer vent isn't just about efficiency, it's essential for your family's safety. If you're worried about lint buildup or just want a professional to inspect your system, the certified technicians at Purified Air Duct Cleaning are here to help make sure everything is working perfectly. Get your free quote today!