Water in dryer vent duct: Fix it fast
- Nov 10, 2025
- 14 min read
Updated: Nov 17, 2025
Finding water pooled in your dryer vent duct can be alarming, but it rarely means your dryer is broken. More often than not, the culprit is a simple process: condensation.
The core problem is that the hot, steamy air from your dryer is cooling down too fast inside the vent, turning from vapor back into liquid water. This is a clear sign that something is hindering the venting process, but the good news is that the causes are usually straightforward to identify and fix.
Understanding Why Water Collects in Your Dryer Vent
Your clothes dryer has one main job: to pump hot, humid air out of the appliance and away from your home. The dryer vent is basically an exhaust pipe for moisture. When everything is working as it should, all that water vapor makes a clean getaway.
But when that process gets blocked or slowed down, problems start.
Think about what happens when you set a glass of ice water on a table during a humid summer day. Droplets of water form on the outside of the glass, right? That’s condensation. The same thing is happening inside your dryer vent. If the warm, moisture-heavy air from your dryer hits a cold section of the duct, the water vapor condenses, and you end up with a puddle.
The Role of Condensation and Airflow
It's pretty amazing when you think about it; a single load of laundry can release up to one gallon of water in the form of vapor. All of that moisture needs a clear path to get outside. If the airflow is weak or the vent itself is cold, that vapor won't make it to the exit before it cools down and turns back into water.
This moisture buildup isn't just an efficiency issue; it's a major safety concern tied to dryer fire prevention. When things get damp inside the vent, lint sticks to the sides, creating a dangerous blockage.
Several common issues can trigger this condensation problem:
Lint Buildup: As lint accumulates, it acts like a sponge and a dam. It traps the moist air, giving it plenty of time to cool and condense inside the duct.
Long Vent Runs: The farther the air has to travel, the more heat it loses along the way. A very long vent run gives the warm air more chances to cool down before it can escape.
Uninsulated Ducts: If your dryer vent runs through a chilly space like a crawlspace, basement, or attic, the cold metal ductwork is a prime spot for condensation to form.
To help you quickly pinpoint the issue, here’s a breakdown of the common culprits and the risks they pose.
Quick Guide to Common Dryer Vent Water Issues
Common Cause | How It Happens | Primary Risk |
|---|---|---|
Lint Buildup | A clogged vent traps hot, moist air, slowing it down so it cools and condenses before exiting. | High risk of fire; reduced dryer efficiency; potential for mold growth. |
Long or Sagging Vents | The longer the duct, the more heat is lost. Sags create low points where water can pool. | Poor drying performance; water damage to ceilings/walls; mold and mildew. |
Uninsulated Ductwork | Vents in cold spaces (attics, crawlspaces) cause rapid cooling of the warm air, leading to condensation. | Water damage; mold growth in hidden areas; reduced energy efficiency. |
These issues are thankfully preventable. With the right setup and regular maintenance, you can keep your dryer vent dry and functioning safely.
A properly functioning dryer vent is essential for both efficiency and safety. Any obstruction or flaw that allows moisture to accumulate can lead to bigger problems, including reduced appliance lifespan and potential hazards.
Getting the setup right from the start is key. To ensure your system is built for success, it’s important to follow established best practices. You can learn more about this in our safe and efficient venting guide. By understanding these core principles, you can effectively diagnose and address any water you find in your dryer vent.
Pinpointing the Cause of a Wet Dryer Vent
To fix the problem, you first have to play detective. Finding water in a dryer vent means it's time for a systematic inspection to figure out exactly why that moisture is collecting in the first place. The culprits are usually pretty straightforward, from simple clogs to installation mistakes that create the perfect storm for condensation.
By checking a few key spots, you can confidently get to the root of the problem. You don't need any specialized tools for this, just a careful eye and a basic understanding of how the system is supposed to work. Most issues boil down to a handful of common problems that are stopping the warm, moist air from getting outside.
This decision tree infographic is a great visual guide for the diagnostic process, walking you from that initial discovery of water to the most likely causes.
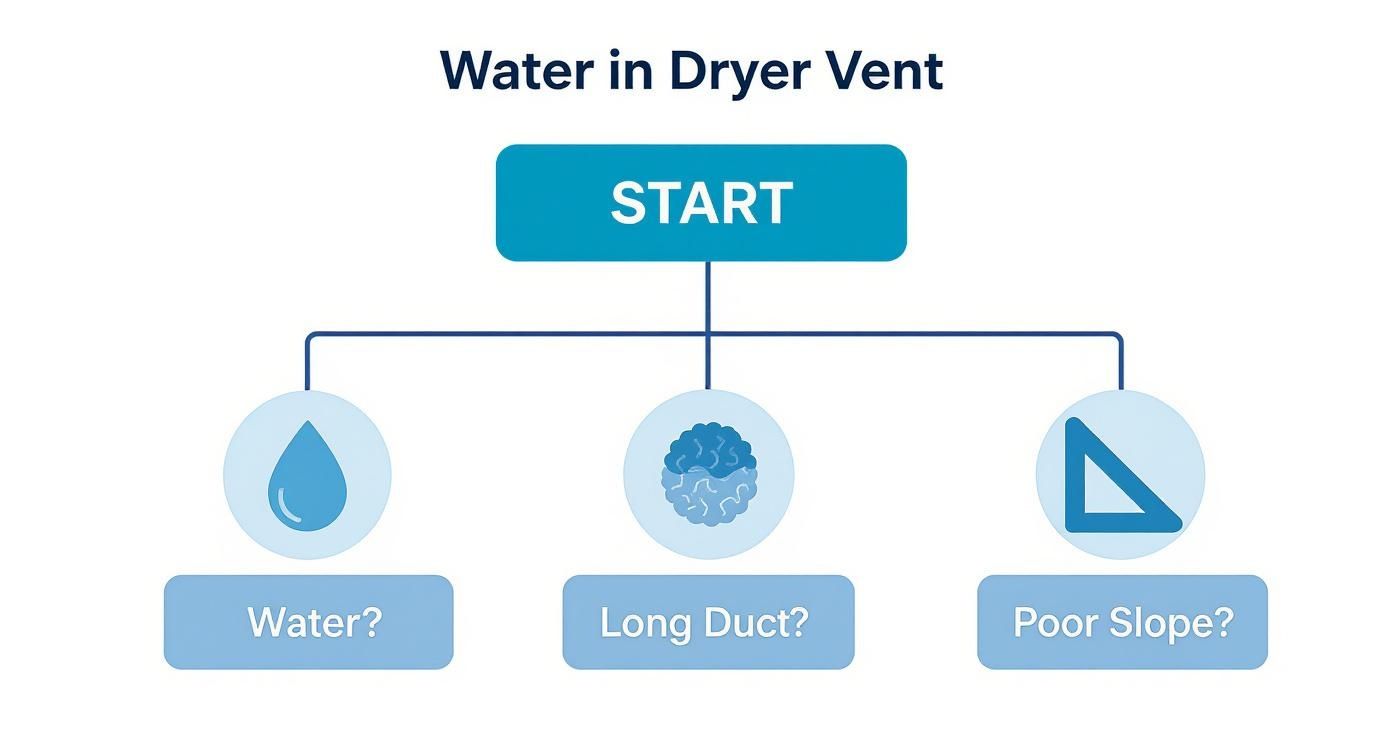
As the graphic shows, things like lint clogs, a duct that's too long, or an improper slope are the main places to start when troubleshooting a wet dryer vent.
Dense Lint Blockages
The single most common reason for water in a dryer vent is a major lint blockage. When lint mixes with the moisture from your clothes, it creates a thick, heavy sludge that basically forms a dam inside the duct. This obstruction kills your airflow, trapping hot, humid air right inside the vent.
As this trapped air sits and cools, all that water vapor turns back into liquid. It’s a vicious cycle: the more water that collects, the more lint it snags, making the clog even worse. To check for this, disconnect the duct from the back of the dryer and take a look at the vent opening and inside the tube for buildup. Knowing the early warning signs is crucial; you can learn the seven most common dryer vent clogged symptoms to get ahead of this.
Improper Duct Slope and Length
For a dryer vent to work properly, it needs a little help from gravity. Your duct should always have a slight, continuous downward slope from the dryer to the outside wall. This simple tilt ensures any condensation that naturally forms can just drain outside instead of creating puddles in low spots.
Take a look at your ductwork for any sags or dips where water could be pooling. A duct that's perfectly level, or worse, slopes upward, is a guaranteed moisture trap. On top of that, an excessively long vent run, especially one with a bunch of sharp turns, forces the air to travel too far. It loses heat and momentum along the way, which encourages condensation long before it ever makes it outdoors.
Issues with the Exterior Vent
Your investigation isn't complete until you check the termination point outside your house. Here are a few things to look for:
Stuck Vent Flap: The exterior vent cover has a flap or louvers that should open when the dryer is on and close when it's off. If that flap gets stuck open, it's an open invitation for rain, snow, and cold air to get inside the duct.
Damaged Vent Cover: A cracked or broken cover is another easy entry point for rainwater, which can then run back down into your ductwork.
Obstructions: You'd be surprised what can block a vent. Bird or insect nests are common culprits, as are overgrown bushes and plants, all of which can trap moist air inside.
While you’re trying to track down the source of the wet vent, it’s a good idea to keep an eye out for other critical signs of water damage around your home that might point to a bigger issue.
The Hidden Dangers of a Waterlogged Dryer Duct
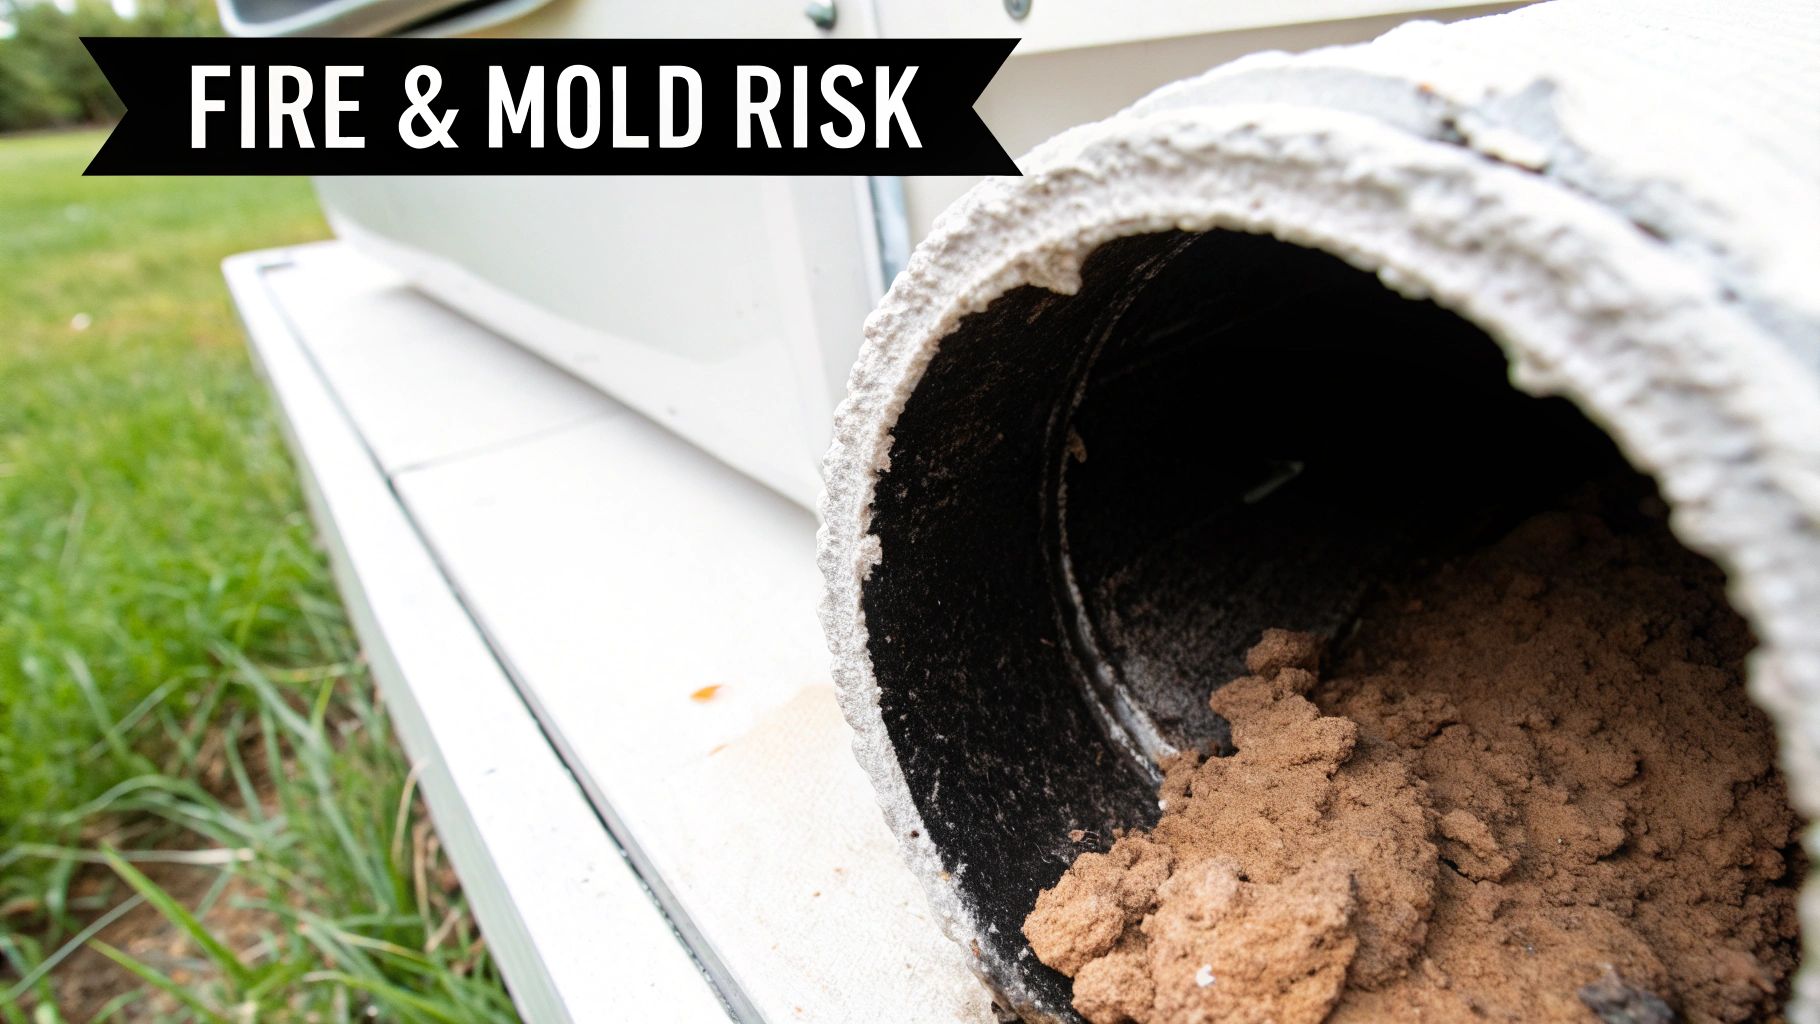
Finding a bit of water in your dryer vent might not seem like a five-alarm emergency, but it's the start of a seriously hazardous situation brewing inside your walls. The real trouble begins when that moisture meets the lint from your laundry.
It's a recipe for disaster. When water soaks into the highly flammable lint that comes off every load of clothes, it stops being dry and fluffy. Instead, it morphs into a thick, gunky paste that clings to the inside of your ductwork, forming a stubborn and dangerous blockage.
The Overheating and Fire Risk
Think of that sludgy lint buildup as a dam. It completely chokes off the flow of hot, moist air that your dryer is trying to push outside. With its escape route blocked, all that intense heat gets forced back into the dryer itself.
Suddenly, your appliance is working against a wall of heat, causing it to seriously overheat. This is where things get really dangerous. The dryer's internal parts can get hot enough to ignite the very lint causing the clog in the first place.
The mixture of lint and moisture creates a combustible sludge that not only obstructs airflow but also acts as a fuel source, significantly elevating the danger of a dryer fire.
This isn't just a theoretical problem. According to the National Fire Protection Association (NFPA), clothes dryers are behind roughly 15,600 structure fires in the United States every single year, with lint accumulation being a primary cause. You can dive deeper into the data and preventative measures by checking out the causes of dryer fires from UL Solutions.
Mold Growth and Structural Damage
Beyond the immediate fire hazard, trapped moisture turns your dryer vent into a perfect incubator for mold and mildew. Tucked away inside a dark, damp wall, it's an ideal spot for mold spores to take root and flourish, creating a whole new set of problems for your home and your health.
Once moisture takes hold, you're looking at a cascade of potential issues:
Poor Indoor Air Quality: Mold pumps spores into the air, and your HVAC system can easily spread them throughout the house. This can lead to respiratory problems, allergies, and other nagging health issues.
Structural Rot: That constant dampness isn't just staying in the vent. It will eventually seep into the surrounding drywall, wood framing, and insulation, causing them to rot, crumble, and fail over time.
These problems often lead to expensive, messy repairs. Knowing what to look for is half the battle. To get ahead of any potential mold issues, take a look at our guide to mold in air vents and a healthier home. Dealing with water in your dryer vent isn't just about keeping an appliance running; it's about protecting the health and safety of your entire home.
Your Guide to Fixing Water in a Dryer Vent
So, you've pinpointed why there’s water pooling in your dryer vent. Now it's time to roll up your sleeves and fix it. Putting this off is a bad idea; it’s a recipe for fire hazards, mold growth, and a dryer that just doesn't work right.
The good news? Most of the common culprits behind a wet vent are things you can tackle yourself. This guide is your playbook for getting things back to normal, covering everything from cleaning and insulating to making simple repairs. We'll even list the tools you’ll need for each job.
Removing Lint Buildup
First things first: clear out any lint blockages with dryer vent cleaning. A clogged duct is the number one reason moisture gets trapped, so a deep clean is non-negotiable for restoring proper airflow.
You'll want to grab a specialized dryer vent cleaning kit. These usually come with a flexible rotary brush and extension rods that you can attach to a power drill. This setup is the only way to really navigate the bends in your ductwork and scrub out the dense, damp lint that a vacuum or leaf blower will miss. For a full breakdown of the process, check out our guide on how to safely and effectively clean your dryer vent pipe.
Tools for Lint Removal:
Dryer vent brush kit: A rotary brush with flexible rods is your best friend here.
Power drill: Needed to spin the brush and break up stubborn lint.
Screwdriver or nut driver: For loosening the duct clamps.
Shop vacuum: Perfect for cleaning up the mess at both ends of the vent.
Correcting Duct Slope and Insulating Pipes
Did your inspection turn up a sagging duct or one running through a cold attic or crawlspace? These installation issues are prime suspects for condensation, and fixing them is crucial. A common reason for water in a dryer vent duct is simply an improper slope.
If the vent is sagging, add support hangers or brackets every few feet to maintain a steady downward slope toward the outside. This lets gravity do its job and drain away any condensation that forms. For ducts in unheated spaces, insulation is your best defense. Wrap the entire length of the metal duct with foil-faced fiberglass duct insulation to keep the air inside warmer, all the way to the exit.
A well-supported and insulated duct is less likely to become a condensation trap. Think of it as giving the moist air a clear, warm runway to the outside, preventing it from cooling down and turning back into water prematurely.
Repairing the Exterior Vent Cover
A busted or stuck exterior vent cover is basically an open invitation for rain, snow, and cold drafts. A quick look should tell you if the flap is broken, jammed open, or clogged with leaves and debris.
If the cover is damaged, your best bet is to replace it. New vent covers have better designs for airflow and often include guards to keep pests out. If the flap is just stuck, a good cleaning around the hinge should get it moving freely again. It’s a small fix that makes a massive difference in keeping weather-related moisture out.
Tools for Vent and Insulation Work:
Duct insulation wrap: Make sure it's rated for HVAC ductwork.
Foil tape: To seal the insulation seams up tight.
Pipe straps or hangers: For supporting droopy ducts.
Caulk or sealant: To create a weatherproof seal around the new exterior vent cover.
Deciding Between a DIY Fix or a Professional
Knowing when to tackle a job yourself and when to call in a pro is key. Some issues are simple, while others require specialized tools and expertise to avoid causing more damage.
This table should help you figure out your next move.
Problem | DIY Action | When to Call a Professional |
|---|---|---|
Minor Lint Clog | Clean with a brush kit from both ends of the duct. | The duct is very long, has many turns, or is hidden inside a wall or ceiling. |
Sagging Duct | Add hangers or supports to create a proper downward slope. | The duct needs to be rerouted or is inaccessible without cutting into drywall. |
Broken Vent Cover | Replace the exterior vent cover with a new one. | The vent is on a high roof or in another hard-to-reach spot. |
In-Wall Condensation | Insulate accessible portions of the duct in attics or crawlspaces. | You suspect moisture damage inside the walls or see signs of mold. |
When in doubt, especially if you see signs of water damage inside your walls or think the job is just too big, getting a professional opinion is always the safest bet.
How to Prevent Future Water Buildup
Okay, so you've dealt with the immediate mess of water in your dryer vent. That's a huge first step. But the real win is making sure you never have to deal with it again. This is where we shift from a reactive fix to a proactive maintenance mindset, keeping your dryer system running safely and efficiently for the long haul.
Putting a simple, forward-thinking plan in place can head off future clogs, water problems, and even serious safety risks. It’s all about stopping problems before they even have a chance to start, which saves you a ton of time, money, and headaches down the road.
Establish a Regular Cleaning Schedule
This is the absolute cornerstone of preventing dryer vent issues. Lint is a fact of life with a dryer, and no matter how perfect your setup is, it's going to build up over time and choke off the airflow. A consistent cleaning routine is your number one defense.
Clean the Lint Trap: This one's a no-brainer. Make it a habit to clean the screen after every single load. It takes five seconds and is critical for maintaining basic airflow.
Deep Clean the Duct: At least once a year, you need to give the entire duct a thorough cleanout, from the back of your dryer all the way to the outside vent cap. If you have a big family or pets, bumping that up to every six months is a much safer bet.
Adopting a wider maintenance view is smart for any homeowner. You can get a good overview by checking out these essential home maintenance tips to proactively protect your entire home.
Upgrade Your Ducting and Venting Components
Not all dryer vent materials are created equal. Far from it. The type of ductwork you have plays a massive role in preventing future problems with water in a dryer vent duct. If you have flimsy, outdated components, upgrading them is one of the smartest investments you can make in your home's safety.
Ditch the flexible foil or vinyl ducts and replace them with smooth-walled metal ducting. The rigid, slick interior of metal ducts gives lint very little to grab onto, promoting much better airflow and making it incredibly difficult for clogs to form. And whatever you do, avoid bad venting shortcuts; our article dives into the serious dangers of venting a dryer into an attic and shows you the right way to do it.
Finding water in your dryer vent duct isn't just about the fire risk. It has much bigger implications for your home's health, from hidden mold growth to structural damage. This moisture can come from condensation inside a poorly designed vent system or leak in from the outside through things like a cracked vent cap.
Optimize Your Dryer Vent System
Finally, a few smart tweaks can make all the difference, especially for homes with tricky vent configurations. If your duct run is extra long or has a bunch of twists and turns, your dryer might not have enough oomph to push all that moist air outside effectively.
For these situations, look into installing a dryer vent booster fan. This device gets installed partway through the duct run and automatically turns on with your dryer, giving the air an extra push to make sure it gets all the way out. Another great upgrade is a secondary lint trap, which catches lint before it even gets into the main ductwork, drastically cutting down on how often you'll need to do those deep cleans.
Frequently Asked Questions About Dryer Vents
Even after you've pinpointed a problem, it's totally normal to have a few questions still floating around. To clear up some common confusion and drive home a few best practices, we’ve put together answers to the questions we hear all the time about dryer vent care and safety.
Getting a handle on these details is the key to stopping future problems in their tracks, especially when it comes to finding unwanted water in dryer vent duct systems.
How Often Should I Clean My Dryer Vent Duct?
For the average household, a deep clean once a year is the rule of thumb. This annual service is usually all it takes to prevent a dangerous amount of lint from building up and to keep your dryer working as it should.
However, some homes need a little more attention. If you've got a large family, pets that shed like it's their job, or a vent that’s especially long with a lot of twists and turns, you’ll want to clean it more often. In those cases, bumping it up to every six months is a smart move.
Can I Use a Leaf Blower to Clean My Dryer Vent?
Please don't. While it sounds like a quick and powerful fix, we strongly advise against it. Using a leaf blower can cause much bigger headaches than the one you're trying to solve.
The sheer force of a leaf blower can easily blow apart the duct sections hidden away in your walls, crawlspace, or ceiling. If that happens, you'll be pumping hot, damp, lint-filled air straight into your home’s structure, a recipe for a serious fire hazard and a major mold problem. Plus, it just doesn't work that well; it can't scrape off the caked-on lint that causes the worst clogs.
A leaf blower just pushes air. It can’t scrub the inside of the duct. A real rotary brush kit is designed to scrape away that stubborn, sludgy lint that moisture creates, giving you a truly clean and safe vent.
Is Seeing Steam From My Outdoor Vent Normal?
Yes, seeing some steam puffing out of your outdoor vent is completely normal, particularly on a cool day. It’s actually a good sign! It means your dryer is doing its job perfectly by pushing hot, moist air outside.
The time to get concerned is when you see more than just a little vapor. If you notice water actively dripping out of the vent or see a puddle forming on the ground beneath it, that’s a red flag. It’s a clear signal that there's either a clog causing condensation to pool up or a low spot in the duct where water is collecting before being pushed out.
What Type of Dryer Duct Is Best?
Hands down, rigid or semi-rigid metal ducting is the best you can get. The reason is incredibly simple: the inside is smooth.
That smooth surface allows air to flow freely and makes it tough for lint to grab on and build up. On the other hand, those flexible foil or vinyl ducts have a ribbed, accordion-like interior that acts like a thousand tiny ledges, snagging lint and causing clogs to form much faster. Swapping out that flimsy stuff for smooth metal ducting is one of the single best upgrades you can make for safety and efficiency.
If you've found water or a nasty clog in your dryer vent, don't gamble with your home's safety. The certified pros at Purified Air Duct Cleaning have the professional tools and know-how to meticulously clean your entire system, leaving it safe, dry, and efficient. Protect your home and family by scheduling a professional cleaning today.