

Whole House Air Purifier Installation: A Practical Guide
If you're in the Phoenix area and your house still smells smoky a day after the windows stayed shut, you're not imagining it. A lot of homeowners run a decent filter, keep the thermostat fan on Auto, and still deal with dust on furniture, hot-room stuffiness, and that stale layer of air that seems to sit in bedrooms. That's usually the point where portable purifiers start showing up in the cart.
A real whole house air purifier installation is a different decision. You're not just buying an appliance. You're changing what happens inside the return plenum, what the blower has to push, where power gets picked up, and whether the duct system can support another component without choking airflow. In Arizona homes, that's where good intentions turn into noisy returns, high static pressure, and rooms that feel worse instead of better.
Why Whole House Air Purifier Installation Is Worth Considering
A house can have a good filter, clean-looking vents, and still feel dirty by the end of the day. I see this a lot in Phoenix after dust events or wildfire smoke days. The homeowner already stepped up to a better filter, but bedrooms still smell stale, fine dust keeps settling, and one portable unit in the hallway is not changing much.
A whole house air purifier starts making sense when the problem shows up across the system, not in one corner of the house. The EPA notes that some air-cleaning devices are installed in residential ductwork to treat air through the home, while portable units are intended for a single room or localized area, as explained in the EPA guidance on residential air cleaning devices. That matches what happens in real homes. Closed bedroom doors, long hallways, and split-floor plans limit what a single floor unit can do.
The first question is not brand. It is whether the air handler has enough blower capacity and enough static-pressure headroom to take on another in-duct component without hurting comfort. A purifier that looks great on paper can turn into weak airflow, noisy returns, and longer run times if the system is already close to its limit. That feasibility check gets skipped in a lot of whole-house guides, but it should come first.
That matters even more with ActivePure-style in-duct units, because the job is not a simple filter upgrade. The unit has to be mounted where the air stream passes the active cell, with enough clearance for service, solid sheet metal support, and tight sealing so air does not bypass the treatment area. Placement inside or near the return plenum usually gives the cleanest access and the most predictable exposure to moving air, but the right spot depends on the cabinet layout and available straight duct.
Filtration still matters. The EPA's MERV rating guide explains that higher-rated filters can capture smaller particles, but the filter slot and blower have to be able to handle that added resistance. In practice, a better filter helps with particulates, while an in-duct purifier can address the broader complaint pattern that homeowners describe as dusty air, lingering odors, or smoke that seems to hang around the house. If you are already seeing signs of poor indoor air quality, it makes sense to evaluate the central system before buying multiple portables.
Portable units still have a place.
If the issue is one office, one nursery, or one bedroom with the door closed most of the day, a portable may be the smarter and cheaper move. But when the complaint follows the duct system from room to room, a properly placed in-duct purifier is usually the option that fits the problem.
Comparing In-Duct and Standalone Whole-House Options
Homeowners usually end up choosing between two practical paths. One is a purifier mounted into the HVAC system. The other is a large standalone unit meant to influence more than one room. Both can help. They don't solve the same problem.
The biggest misunderstanding is coverage. Consumer FAQs still have to explain that one purifier generally covers one room, and full-home coverage takes multiple units or moving one from space to space, as clarified in this whole-home coverage FAQ. That lines up with what shows up in real houses, especially split-bedroom layouts where closed doors kill cross-room airflow.
How in-duct units behave in real homes
An in-duct purifier rides on the airflow your system already creates. It has no floor footprint, one electrical tie-in, and no hallway noise. If the blower is moving air, the purifier is participating in the same circulation path that serves the rooms.
That works especially well in homes where the central system conditions most of the occupied space. It also pairs well with variable-speed equipment because those systems tend to run longer at lower fan speeds, which increases air movement through the cabinet over the day.
Where standalone units still make sense
A standalone whole-house style tower depends on its own fan and whatever the house layout allows. Open floor plans give these units a fighting chance. Narrow hallways, shut bedroom doors, and separate wings don't.
If you like collecting practical clean air tips for your home, pay attention to how your family lives in the space. A purifier spec sheet can't tell you whether the kids sleep with doors closed or whether the back bedrooms barely share air with the great room.
Factor | In-Duct Purifier | Standalone Whole-House Unit |
|---|---|---|
Coverage | Follows the HVAC air path through connected rooms | Depends on open doors, layout, and fan throw |
Noise | Usually limited to normal HVAC operation | Adds its own room noise |
Maintenance access | Service happens at the air handler or duct cabinet | Service happens in living space |
Install complexity | Requires duct, wiring, sealing, and fit checks | Usually plug-in setup |
Best-fit home type | Homes with central ducted HVAC and broad conditioned coverage | Open layouts, rentals, or homes where duct changes aren't practical |
The trade-off most buyers miss
Portable and standalone machines are often the smarter call when the HVAC system is marginal. If the return is undersized or the blower is already near its limit, adding anything in the duct path can create new problems. If the mechanical side is healthy, in-duct usually feels cleaner and less intrusive day to day.
For a broader look at central options versus room machines, this overview of home air purifier choices is a useful companion.
Checking If Your HVAC System Can Handle the Upgrade
This is the part most glossy guides skip. Before anyone cuts sheet metal, check whether the system can physically support the purifier. If the blower is already working too hard, adding an in-duct device can push the system into poor airflow, noisy operation, or high-limit issues.
Start with static pressure
Take a manometer reading at the return side and compare it to the blower's allowable static pressure. A whole-house unit should be selected to fit the system's airflow and pressure limits, not the other way around. One HVAC sizing reference recommends checking the blower's maximum static pressure rating first, then making sure the combined pressure drop of the filter and ducts stays below that limit. That same reference notes that a 3-ton system commonly moves about 1,200 CFM, and the purifier should fit that airflow, as discussed in this HVAC airflow sizing reference.
ASHRAE also reminds us that air-cleaner performance is based on test airflow at the manufacturer's specified rate, not a generic label, in ASHRAE Standard 52.2-2017. In plain language, if your system doesn't move the air the device expects, the label doesn't tell the whole story.
A strong product on a weak duct system is still a weak installation.
Check the blower, slot, and cabinet
PSC blowers are less forgiving than ECM variable-speed motors. That doesn't automatically rule out an upgrade, but it does mean you need to be realistic about added resistance and run characteristics. Then check the filter slot depth, return-plenum dimensions, and whether there's enough flat cabinet area for the mounting template without interfering with coil access or wiring paths.
ASHRAE residential guidance recommends at least MERV 13 filtration, but also says the filter must be installed so all supply air passes through it. EPA guidance adds that the filter arrow needs to point in the direction of airflow. The same guidance emphasizes checking blower capability, sealing the slot to avoid bypass, and comparing pressure resistance at design airflow before upgrading, as covered in this ASHRAE Journal residential air cleaner guidance.
Look for deal-breakers before the install
A few conditions should slow the job down:
Saturated evaporator coil: Airflow is already compromised.
Undersized return: The purifier won't fix a return bottleneck.
Badly sagging flex duct: Added pressure exposes weak duct design fast.
Aging furnace or air handler: It may not make sense to cut in a new accessory on failing equipment.
Poor service clearance: If nobody can maintain the cell safely, the install is wrong.
Independent HVAC guidance makes the same point from a field perspective. Proper installation should include checking filter rack size and depth, available static pressure, blower capacity, and safe maintenance access, which is why this system performance optimization conversation belongs before product selection, not after.
Tools, Safety Gear, and Pre-Installation Preparation
A lot of in-duct purifier jobs go wrong before the first cut. The crew shows up with snips and screws, but no manometer, no decent sealant, and no plan for where the ActivePure cell will sit in the air path. If the earlier static-pressure check was marginal, sloppy prep is how a workable install turns into a noisy return, low airflow, and a callback.
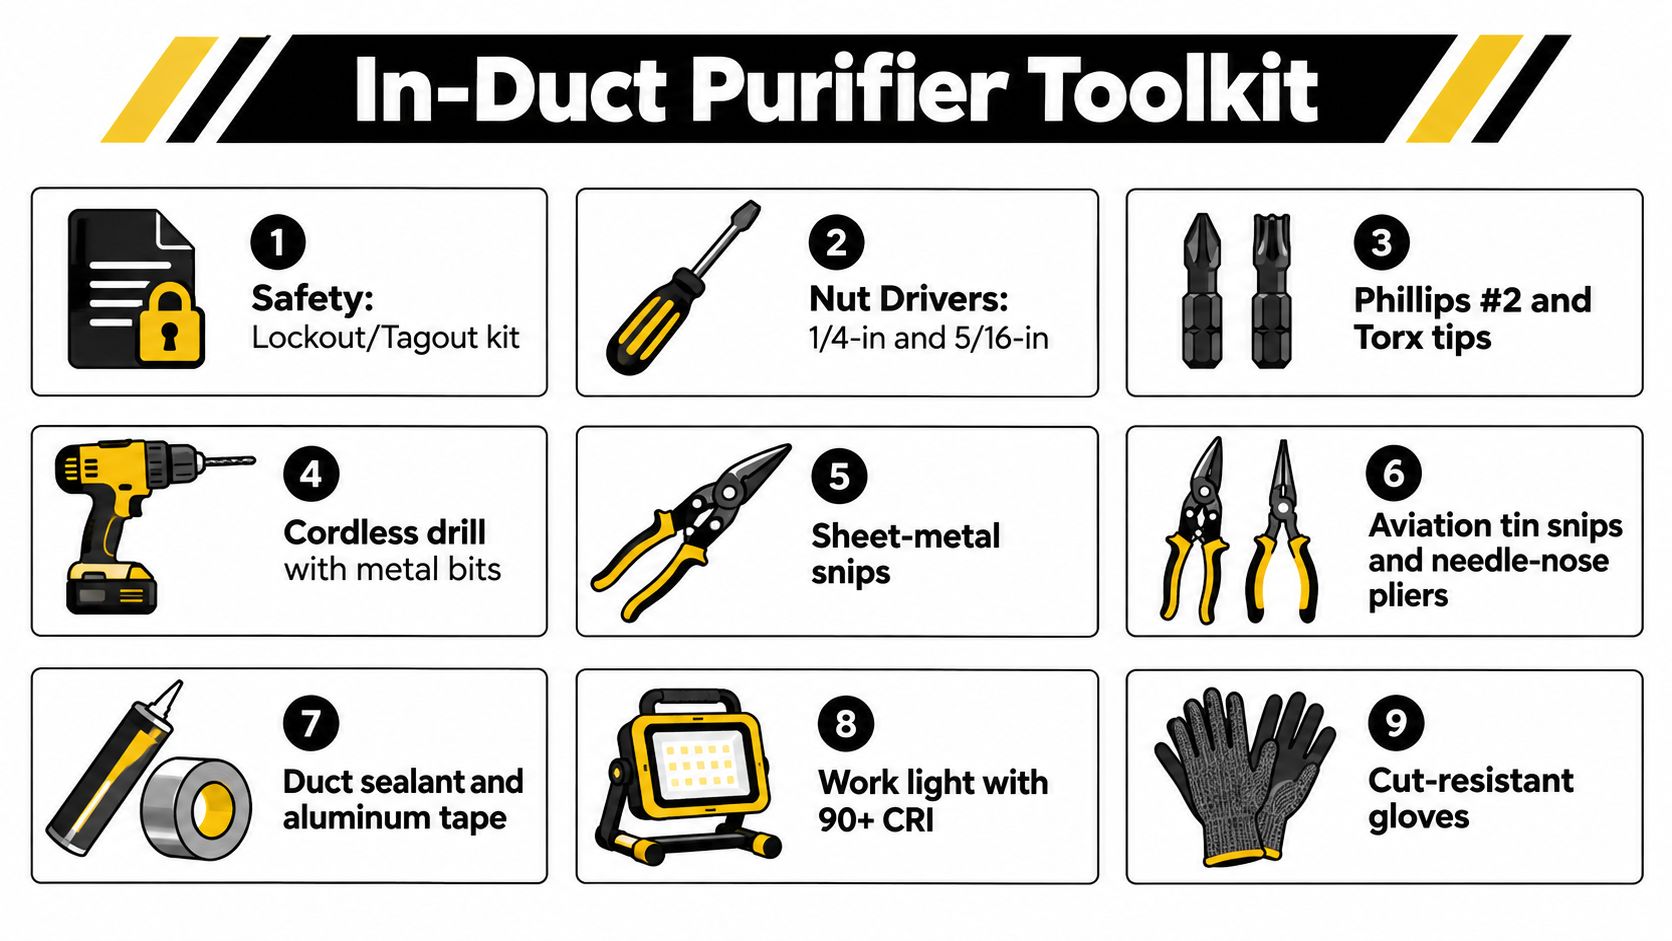
A better tool loadout is simple and specific. Bring 1/4-inch and 5/16-inch nut drivers, a magnetic Phillips #2, a cordless drill with metal bits, sheet-metal and aviation snips, a utility knife, a headlamp, a manometer, painter's tape or a label maker for airflow marks, mastic sealant, foil-backed butyl gasket tape, self-tapping screws, and a multimeter. For ActivePure-style installs, add the factory template and confirm the mounting depth before you open the cabinet. Some return plenums look roomy until you account for coil clearance, insulation liner, and the service door swing.
Safety gear that matters in Arizona attics
Arizona attic work adds heat stress to the usual sheet-metal hazards. Wear cut-resistant gloves, ANSI-rated safety glasses, and an N95 or P100 respirator if the return side has heavy dust, fiberglass debris, or suspect growth. Closed-toe shoes are the minimum. A stable work light matters too, because rushed cuts in a dark attic are how cabinets get butchered and hands get sliced.
Sealant choice tells you a lot about install quality. I carry mastic and butyl because they hold up on cabinet seams and purifier flanges. Cloth duct tape dries out, lifts, and leaves bypass paths around the housing.
Prep work before the cabinet gets opened
Start with the layout, not the drill. Take photos of the filter rack, service panels, wire routing, and the side of the cabinet where the purifier is likely to mount. Mark airflow direction clearly. On an ActivePure install, that mark keeps the cell from ending up in the wrong position relative to the pre-filter or maintenance access.
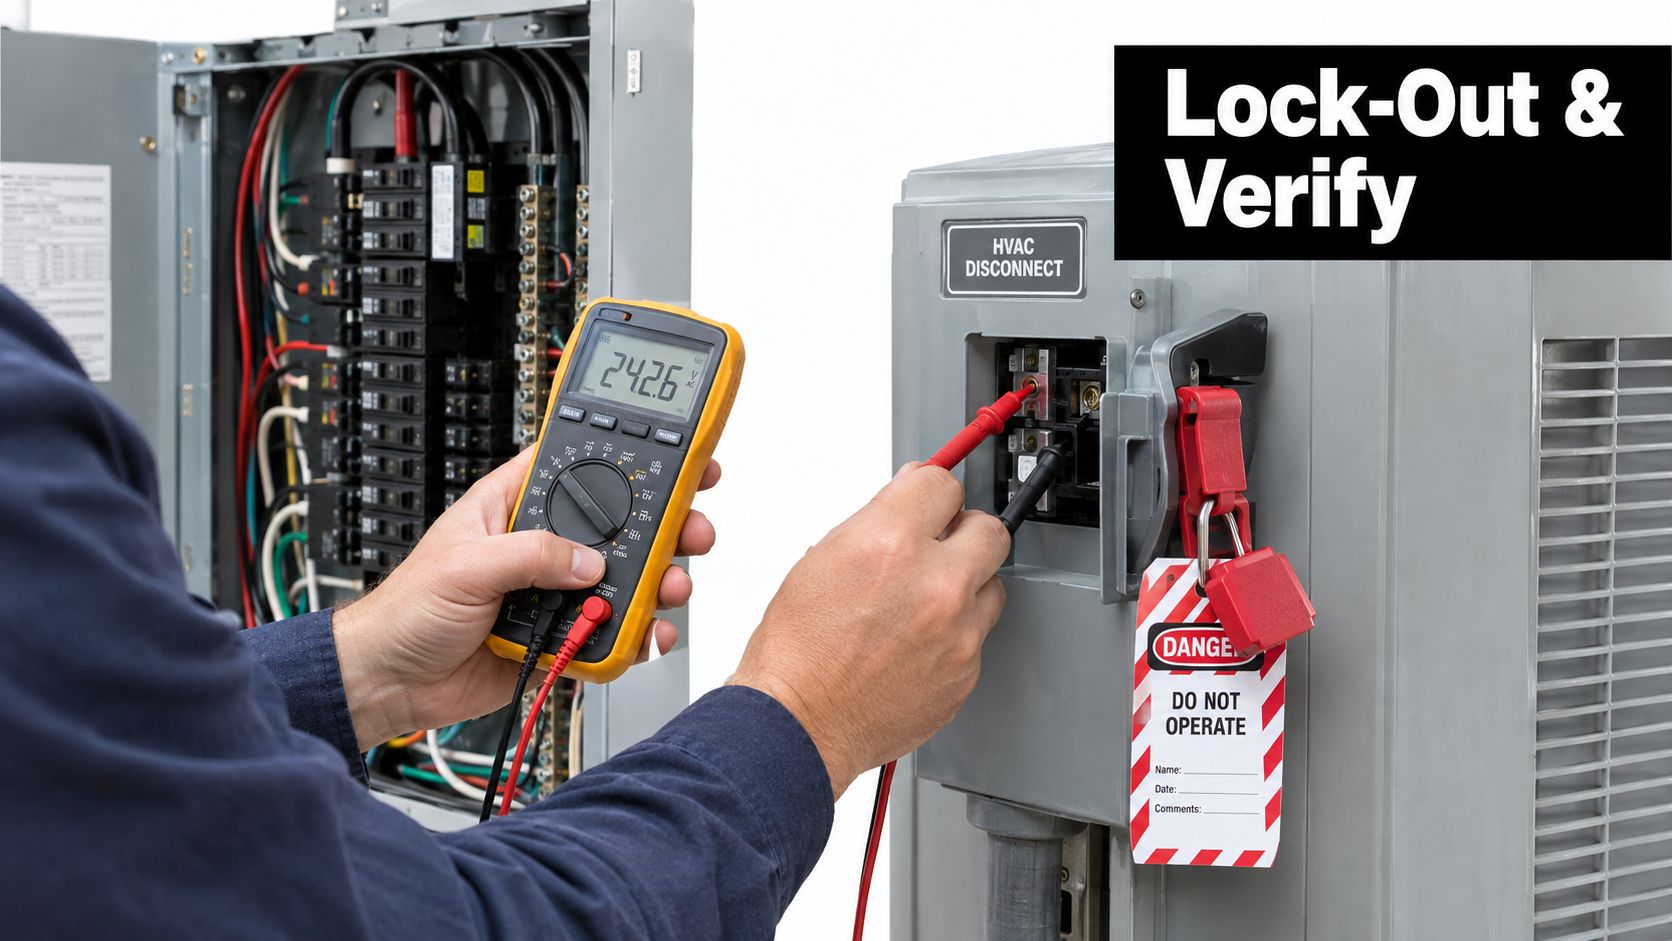
Verify the breaker label, shut power off, and confirm the circuit is dead with a multimeter before a panel comes off. Then clear enough space to work the template, drill, and snips without fighting framing, shelving, or a water heater. Tight quarters are more than an annoyance. They lead to crooked cuts, stripped screws, and housings that never seal flat.
The EPA's residential air cleaner guidance points out that any duct-mounted device still has to be serviceable after installation, including routine access for replacement or cleaning, as explained in the EPA technical summary for residential air cleaners. That detail gets missed all the time. A purifier tucked into the only open panel space may look clean on day one and turn into a maintenance problem on the first service visit.
Purified Air Duct Cleaning is one example of a contractor that works on duct-mounted ActivePure systems in Phoenix. The name on the truck matters less than the prep standard. The crew should confirm placement, protect service access, use proper sealants, and avoid forcing an in-duct purifier into a system that would be better served by a portable unit.
Mounting and Sealing an In-Duct Air Purifier
The install starts at the breaker, not at the duct. Kill power, lock it out, and confirm zero voltage at the air handler with a multimeter before the access panel comes off.
Placement inside the air path
On an ActivePure-style install, placement matters more than most homeowners realize. Remove the filter slot cover or service panel and verify the airflow direction. If the system uses a pre-filter, the active cell or bulb array should sit downstream of that stage so the purifier isn't taking the first hit from heavier debris.
The housing gets set against the return plenum or, in some layouts, the supply trunk according to the manufacturer's template. Keep it level and plumb. That helps indicator components line up correctly and keeps the finished install from looking hacked into the cabinet.
Field note: A crooked housing usually means rushed layout, and rushed layout often means bad sealing around the cutout.
Securing the cabinet without causing damage
Use self-tapping screws through the duct wall into stable cabinet metal. Watch your screw length. You don't want to find the evaporator coil, refrigerant lines, or internal wiring the hard way. On thin sheet metal, pre-drilling keeps the opening cleaner and reduces cabinet distortion around the flange.
The biggest leak point is usually the perimeter of the mounting flange. That's why I prefer mastic sealant under or around the mating edge, then a continuous wrap of foil-backed butyl tape pressed tight over the joint. The goal is zero bypass. The EPA's long-standing guidance on duct-mounted cleaners stresses minimizing leakage around filters and air-cleaning components because installation quality controls real-world performance, as noted in this duct leakage and air cleaning guidance.
A visual walkthrough helps if you're trying to picture the sequence inside the cabinet:
Wiring and final closure
Most of these units pick up power through a dedicated 24V pigtail or the included transformer, depending on the model. Route the low-voltage leads cleanly, secure them with tie-wraps, and keep them well clear of the blower wheel and service panels. Sloppy wire routing causes nuisance problems later.
Before restoring power, reinstall the access panel with a fresh gasket if the old one is flattened or torn. That's not cosmetic. A tired gasket can whistle, leak, and undermine the whole point of careful placement.
Testing, Commissioning, and Verifying Performance
Good installs get tested. Great installs get documented. Once power is back on, run the system through a full heating or cooling call and watch the purifier's status light from startup into normal operation. You want a steady operating state, not flashing faults, intermittent resets, or relay chatter inside the cabinet.
Read the system before you trust the install
Take static pressure readings before and after so you're not guessing. One comparative test in whole-house air cleaning found that a MERV 13 filter stayed in an acceptable pressure-drop range for the tested HVAC systems, while an electronic air cleaner showed a pressure drop of 1.9, which was considered unacceptable. That comparison is a good reminder that aggressive air-cleaning hardware can backfire if the fan and duct system aren't checked first, according to this whole-house clean-air delivery study.
Then walk the house. Put a hand at each supply register. You're not chasing perfect lab balance. You're checking whether one room suddenly lost throw or a back bedroom went weak after the cabinet change.
Measurement | Before Install | After Install (Target) | After Install (Problem) |
|---|---|---|---|
Return static pressure | Baseline reading recorded | Similar to baseline, without a sharp jump | Noticeably elevated and accompanied by noise or weak airflow |
Supply airflow at registers | Existing room-to-room pattern | Consistent with prior delivery | One or more rooms lose obvious airflow |
Purifier status indicator | Not applicable | Normal operating indication after startup | Error light, repeated flashing, or intermittent shutdown |
Cabinet noise | Existing blower sound | No new whistle or buzz | Whistling at panel edges or clicking from wiring/relay area |
Use your ears and nose for the first day
Sit near the return for a few minutes while the blower runs. Whistling usually means a gasket issue or a panel that's not seated flat. A sharp new electrical smell, repeated clicking, or a stale odor that intensifies instead of clearing deserves a second look.
If you suspect the return side has contamination beyond ordinary dust, especially after a roof leak or long humidity event, it helps to understand what actual inspection involves. This PostDamage mold remediation info is useful for separating normal dust concerns from conditions that need a mold-specific response.
Give the system a full day of normal cycling before you call the job quiet. Some problems only show up after multiple starts and stops.
A simple way to stay organized is to keep the install date, baseline pressure notes, and status-light behavior in the same place you store filter reminders. If you want a better handle on what you're sensing in the house, an indoor air quality meter guide can help you decide what to monitor and what to ignore.
Maintenance Habits and Long-Term Cost Considerations
The install is only half the job. The houses that stay trouble-free are the ones where someone checks the purifier the same way they check filters, drains, and capacitors. In Arizona, dust load and long cooling runtimes will expose a sloppy maintenance routine fast.
A maintenance cycle that actually works
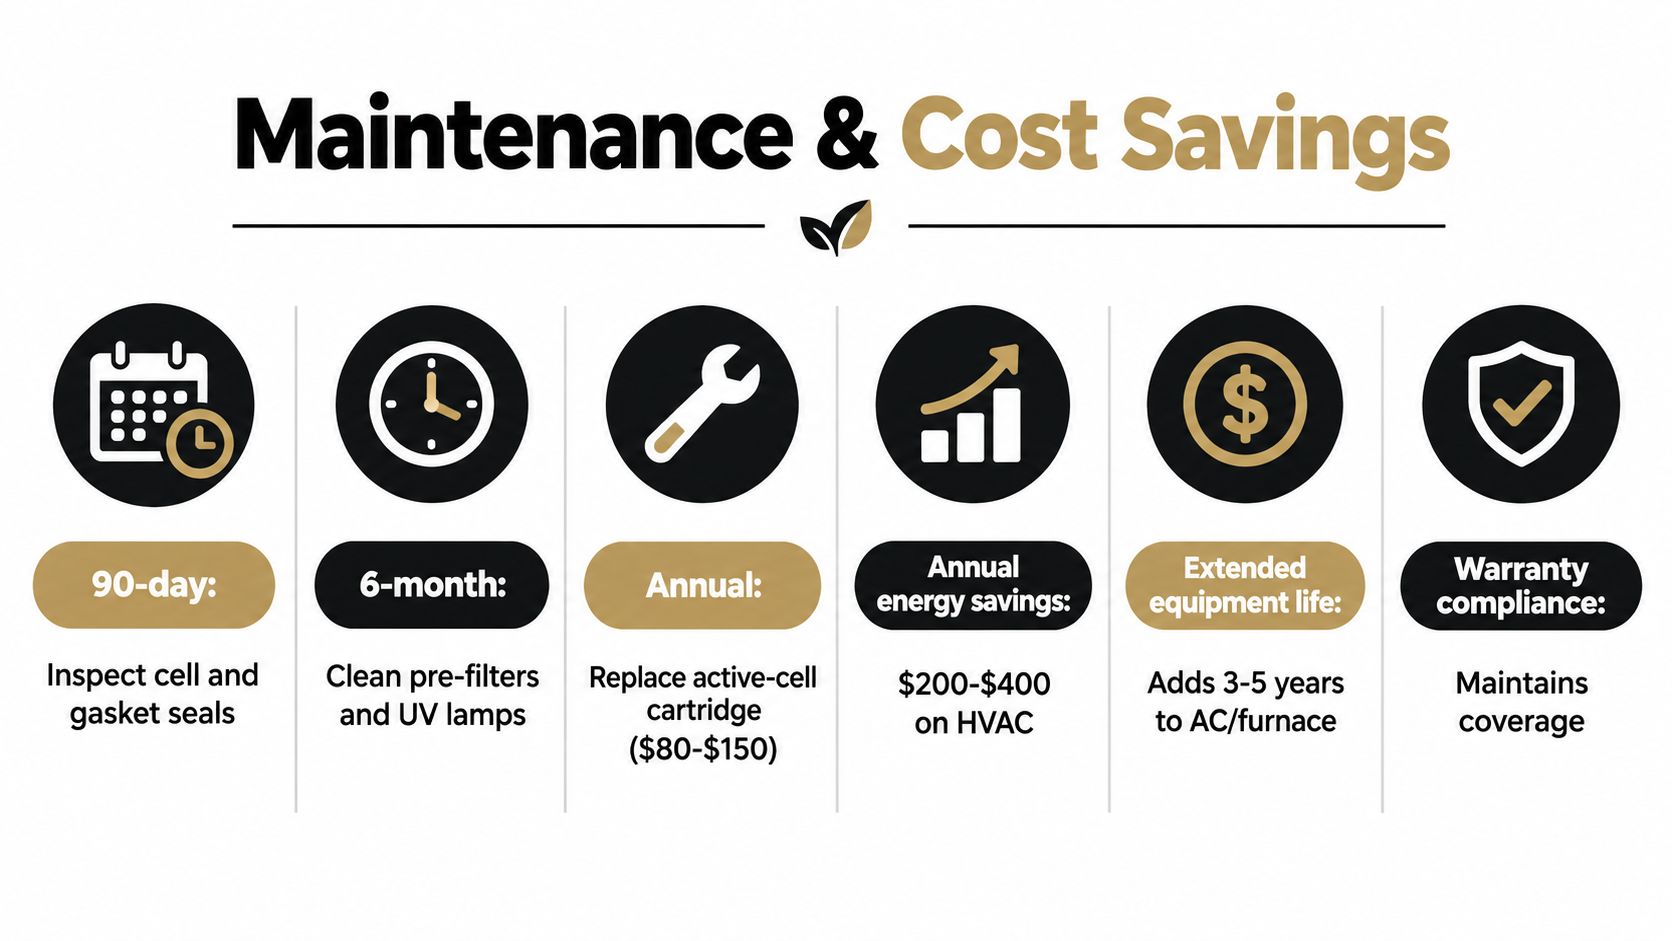
Start with a visual check every 90 days. Open the access panel and inspect the active cell, wiring connections, mounting screws, and gasket contact all the way around the cabinet cut-in. On ActivePure-style in-duct units, I pay close attention to the sealing surface and the cell condition, because a unit can still power on while airflow bypasses around it or dust coats the active components.
Every 6 months, compare total external static pressure to the baseline you recorded at startup. This is the habit a lot of guides skip, and it matters more than the purifier indicator light. If pressure is creeping up, the blower sounds strained, or supply airflow feels weaker in the far rooms, treat that as an HVAC system problem first. A loaded filter, a dirty coil, a slipping blower wheel set screw, or a return restriction is more common than a purifier failure.
Then replace annual components by runtime condition, not by a blind date on the calendar. A house with pets, daily fan circulation, and a long cooling season will wear parts faster than a house that sits empty half the week.
What the operating cost conversation should sound like
Long-term cost is a mix of replacement parts, service time, and fan energy. If adding the purifier pushed a marginal system into higher static pressure, the expense is not the purifier module. It is the extra strain on the blower motor and the comfort complaints that follow. That is why the feasibility check up front matters so much.
Portable units create a different cost pattern. ENERGY STAR says a standard room air cleaner running continuously uses about 394 kWh per year, and ENERGY STAR certified models are more than 50% more energy-efficient, saving about 211 kWh per year, or roughly $18 to $40 annually depending on size, according to ENERGY STAR air cleaner data. That does not give a direct operating cost for an in-duct purifier, but it does explain why some homeowners get tired of running several room units at once.
Whole-house add-ons make the most financial sense when the air handler, filter cabinet, and duct layout were already capable of taking the accessory without pushing pressure too high. If the system was undersized or restricted before the cut-in, the purifier can expose that weakness.
When a portable unit is the smarter call
A portable unit is often the better choice in a smaller house, a rental, or a home where the complaint is limited to one bedroom, nursery, or office. It is also the safer call when the blower is already near its limit and there is no room to improve the return, filter cabinet, or cabinet layout. I would rather recommend one good portable unit than force an in-duct install onto a system that cannot carry it.
In-duct placement usually pays off in larger homes, homes with multiple regularly occupied rooms, and houses where the family wants one treatment point tied to normal HVAC operation. That only holds if the purifier was mounted in the right section of duct, sealed well, and added to a system with enough blower capacity to absorb it.
A one-page checklist taped inside the air handler door is enough:
Every 90 days: Inspect the purifier cell, flange seal, and wiring
Twice a year: Compare static pressure to your baseline notes
At replacement time: Change cells, bulbs, or catalyst components based on runtime condition
After any duct or blower repair: Recheck cabinet seal and operating status
If one room changes suddenly: Treat it as an airflow problem first, not a purifier failure
If you want someone to look at the duct system before an accessory gets cut in, Purified Air Duct Cleaning handles duct-mounted air purification, duct cleaning, and airflow-related IAQ work across the Phoenix area. For a practical evaluation of whether your system can support an in-duct unit, and whether an ActivePure-style install makes sense in your house, visit Purified Air Duct Cleaning.