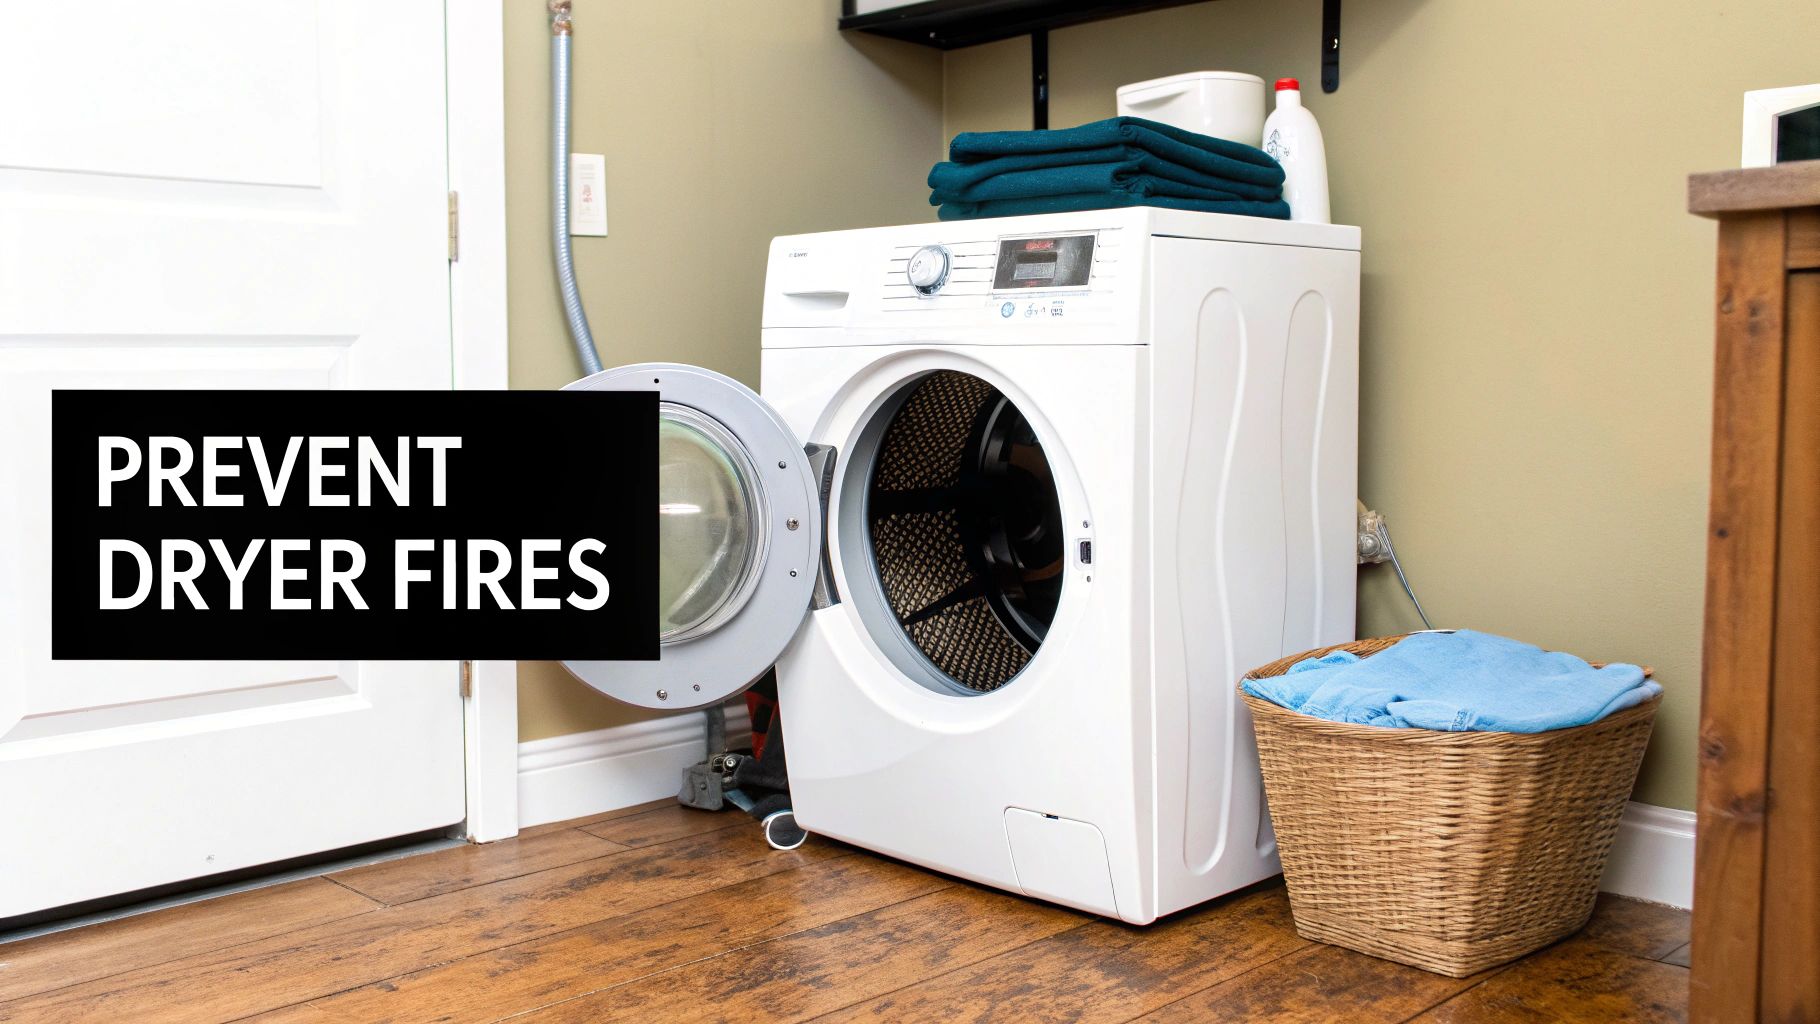
A DIY Guide: Cleaning Clothes Dryer Vent Pipe for Safety
- Nov 19, 2025
- 11 min read
Regularly cleaning out your clothes dryer vent isn't just another chore to add to the list; it's a critical piece of home maintenance that keeps your family safe and your appliances running smoothly. This simple task is all about removing the flammable lint that builds up over time, which not only prevents a major fire hazard but also helps your dryer work the way it was designed to. A little bit of cleaning saves energy, money, and could even save your home.
Why Cleaning Your Dryer Vent Is So Important
Many of us are diligent about clearing the lint trap after every load, but that's only catching part of the problem. A surprising amount of lint makes its way past that filter, getting trapped deep inside the vent pipe where you can't see it. This is where the real danger lies.
As this lint accumulates, it starts to choke off the airflow. This forces your dryer to work much harder and run hotter than it should, putting a strain on its internal parts and dramatically increasing the risk of the lint igniting.
The warning signs of a clogged vent can be subtle at first, but they're things you absolutely shouldn't ignore. If you start noticing any of these issues, it’s a clear signal that your vent needs attention.
Signs Your Dryer Vent Needs Immediate Attention
Catching a clogged dryer vent early can save you from costly repairs or a potential fire. Keep an eye out for these common red flags that tell you it's time to clean the vent.
Symptom | What It Means | Level of Urgency |
|---|---|---|
Longer Drying Times | Airflow is restricted, so moist air can't escape. Your clothes stay damp. | Medium |
Overheating Appliance | The dryer feels very hot to the touch because trapped heat can't vent outside. | High |
A Burning Smell | Lint buildup is getting hot enough to scorch or ignite. Stop using immediately. | Critical |
Excessive Laundry Room Heat | Hot, humid air is being pushed back into the room instead of outdoors. | Medium |
If you notice your dryer is overheating or you detect a burning smell, it's crucial to stop using the appliance until the vent has been thoroughly cleaned and inspected. These are serious warning signs.
Beyond Fire Prevention
The peace of mind that comes with fire safety is huge, but the benefits of a clean dryer vent don't stop there.
When your appliance can breathe properly, it runs more efficiently. That means it uses less energy, which you'll see reflected in lower utility bills. Your clothes will thank you, too; they won't be exposed to the excessive heat from needlessly long drying cycles, helping them last longer. You can dig deeper into these perks by exploring the key dryer vent cleaning benefits for your home.
A clean vent pipe ensures your dryer functions at peak performance. This not only protects your investment in the appliance but also saves you money on energy and potential repair costs over time.
Think of this task as a smart investment in your home's overall health. It's just as important as knowing how to prevent clogged drains to avoid a plumbing nightmare. The industry has grown specifically because thousands of house fires in the U.S. each year are traced back to clothes dryers, with clogged vents being the number one culprit. This fact alone makes routine cleaning an essential part of responsible homeownership, not just another item on the to-do list.
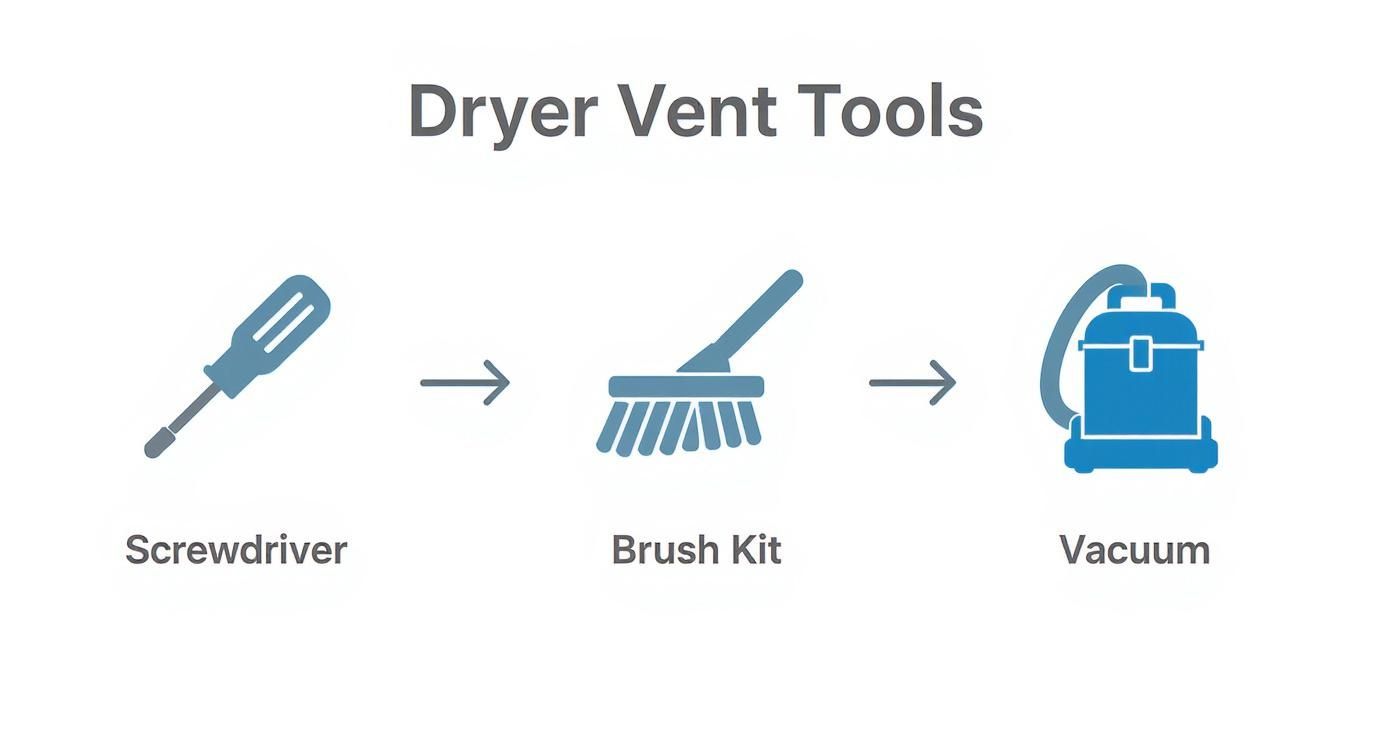
Gathering the Right Tools for the Job
Nothing derails a weekend project faster than realizing mid-clean you’re missing a key tool. Before you dive into your dryer vent pipe, spread everything out. A basic screwdriver and a pair of gloves are handy, but the real game-changer is a quality dryer vent cleaning kit.
Not all kits are built the same. You’ll generally choose between two styles, each one shines in different setups.
Choosing Your Cleaning Kit
An auger-style kit brings flexible rods that snap together and spin with a drill. At its tip sits a brush that scrubs lint right off the duct walls. If your vent run is under 15 feet or has gentle bends, this direct mechanical action can be a life-saver.
An air-powered kit taps into a shop vacuum or leaf blower to blast lint forward or suck it out. Special nozzles whip up an air vortex that knocks stubborn buildup loose. Long runs or systems with tight 90-degree turns often respond better to air power, since brushes can jam in sharp corners.
Pro Tip: When vents stretch past 15 feet or snake through multiple sharp turns, an auger brush can sometimes break free inside the duct. In those tricky layouts, an air-powered system usually wins.
Essential And Helpful Extras
A few extra tools keep dust and lint from taking over your laundry room:
A Powerful Shop Vacuum: Captures lint from both ends of the pipe as you work.
A Screwdriver Or Nut Driver: Loosen the clamp securing the flexible duct to the dryer’s exhaust outlet.
Painter’s Tape Or Foil Tape: Seal off connections or cover the exterior vent to avoid a lint shower.
Protective Gear: A dust mask and safety glasses will spare you throat tickles and eye irritation.
The rising focus on dryer-related fire hazards has fueled a boom in cleaning-kit sales. The global market for dryer vent cleaning kits was valued at $650 million, and it’s projected to hit $1.12 billion by 2033. North America alone accounts for about 41% of that, thanks to a strong DIY maintenance culture. You can discover more insights about this growing trend on marketintelo.com.
For hands-on tips and step-by-step instructions, check out our guide on cleaning dryer duct work for quick results.
The Complete Dryer Vent Cleaning Process
Alright, you've got your tools ready, so it's time to get to the main event: cleaning out that dryer vent pipe. The process itself isn't rocket science, but following a good workflow is key to doing a thorough, safe job. And speaking of safety, that’s always where we start, before you even think about touching a tool.
Beginning with Safety First
For an electric dryer, your first move is to unplug the appliance completely from the wall. Simple as that. If you've got a gas dryer, you have an extra step: shutting off the gas supply. Look for a small valve on the gas line behind the dryer and give it a quarter-turn so it's perpendicular to the pipe.
Don't rush or skip this. An unplugged dryer can't shock you, and a closed gas line is the only way to work safely. Taking a minute to do this sets you up for a hazard-free workspace.
Now, let's get into the cleaning. You'll mainly be using a screwdriver, a specialized brush kit, and a good shop vacuum.
This graphic gives you a nice visual of how the job progresses, from taking things apart to the final cleanup.
Detaching and Cleaning the Ductwork
Start by gently pulling your dryer away from the wall. You just need enough space to comfortably work behind it. You’ll see the flexible duct that connects the back of the dryer to the wall outlet, usually held on by a simple circular clamp.
Grab your screwdriver or nut driver, loosen that clamp, and ease the duct off the dryer's exhaust port. Then, repeat the process on the wall side. Once the duct is free, the real cleaning can begin.
A classic mistake I see is people only cleaning the first foot or two of the pipe. Lint builds up along the entire length of the vent, and it gets especially thick in any bends or elbows where the airflow gets turbulent.
For the best results, you want to attack the clog from both directions.
From the Inside: Take your dryer vent cleaning brush and insert it into the pipe in the wall. If you're using a drill-powered kit, connect the first rod, attach your drill, and run it at a low speed, always in a clockwise direction. As the brush spins, gently push it deeper into the vent, adding more extension rods as you go.
From the Outside: Now, head outside to your exterior vent cap. Pop off any screens or covers and clear out all the visible gunk. This is also the perfect time to fire up your shop vac and use it to suck out the lint your brush is pushing through from the inside.
Tackling Stubborn Clogs and Finishing Up
Every now and then, you'll hit a section of lint that's packed in so tight it feels like a brick wall. Whatever you do, don't just try to ram the brush through it. You could damage the ductwork.
Instead, pull the brush back just a little, let it spin for a few seconds, and then slowly advance it again. This gentle back-and-forth motion will break up that blockage. If you're still hitting a wall, our guide on how to clear your dryer vent clog safely and effectively has some more advanced tricks you can try.
Once your brush can move freely all the way through the vent pipe, you're on the home stretch. Use your vacuum to suck up any leftover lint inside the duct, on the floor, and around the dryer. Make sure to get the dryer's exhaust port, too; lint loves to hang out right at that opening.
Finally, put it all back together. Reattach the ductwork securely at both ends, making sure those clamps are good and tight to prevent any leaks of hot air (or carbon monoxide, for gas dryers). Slide the dryer back into place, turn the gas back on if you turned it off, and plug it in.
To finish, run a quick, empty cycle. This confirms everything is working right and lets you feel that strong, steady airflow coming out of the exterior vent. Job done.
Common Mistakes And How To Avoid Them
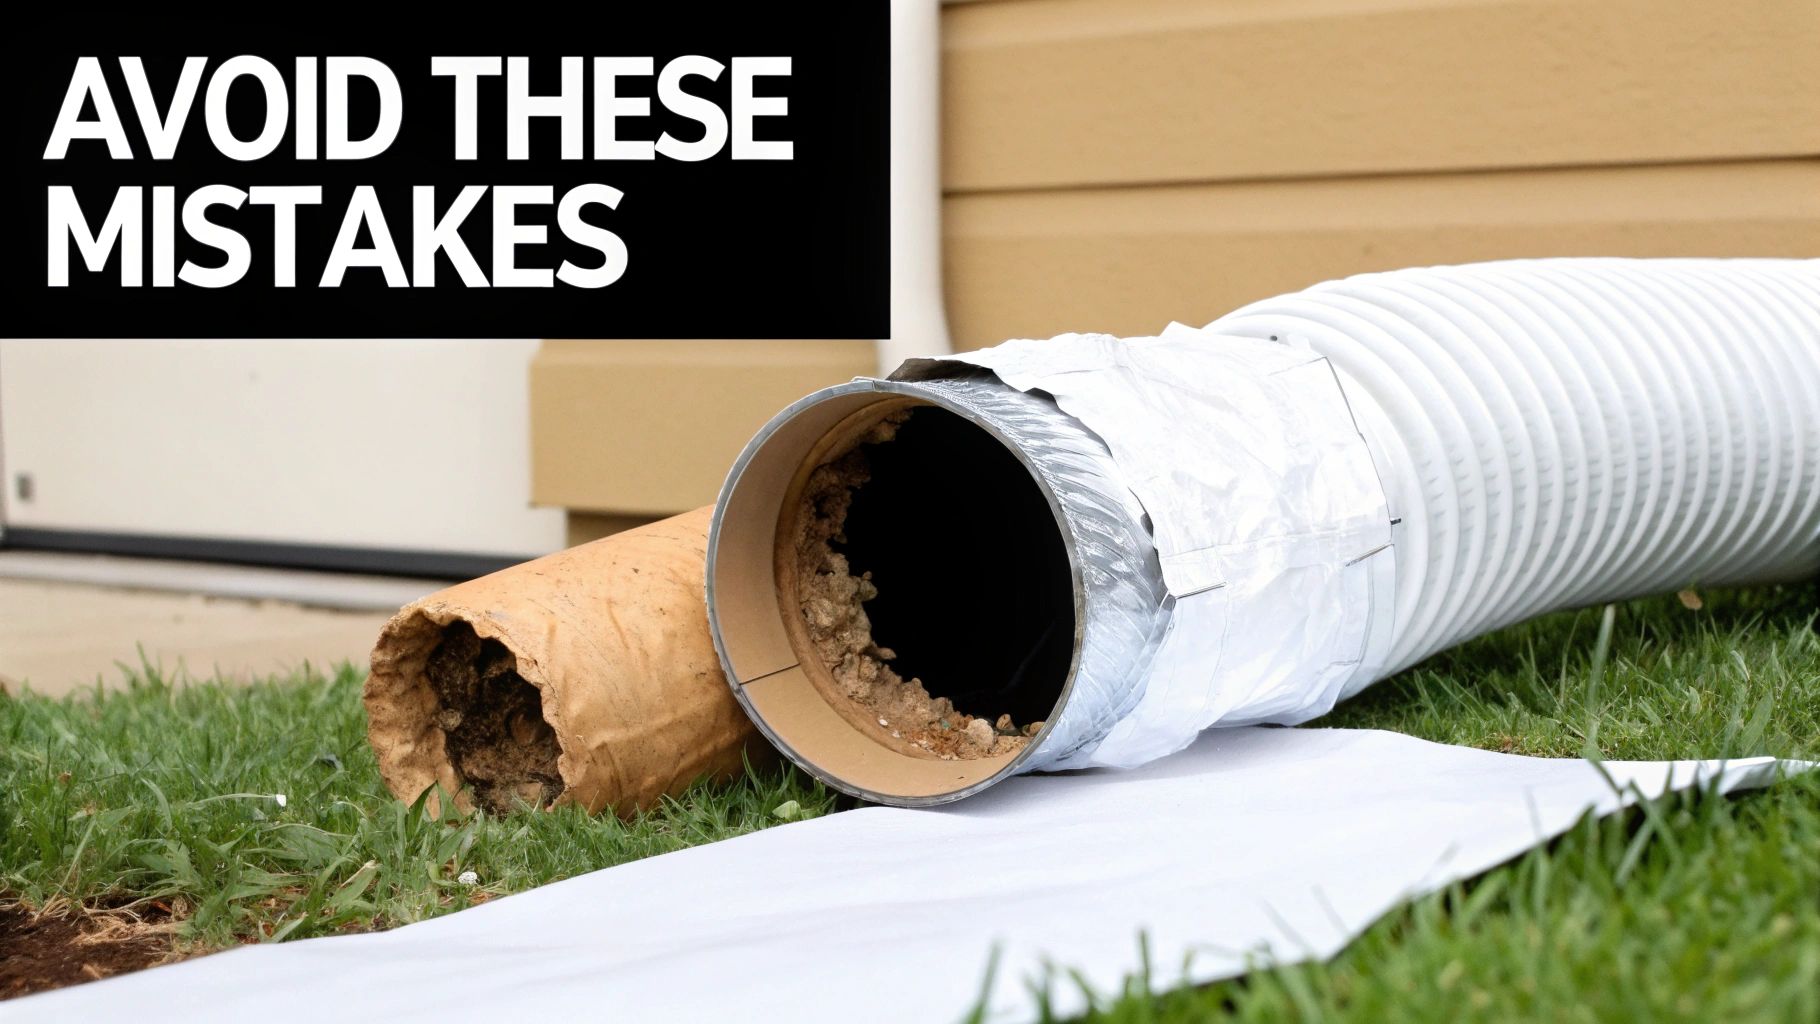
Cleaning your dryer vent often seems straightforward, until it isn’t. Imagine pulling back the hose only to find it crushed flat against the wall. Not only does this trap lint, it turns into an instant fire hazard.
Another rookie error? Underestimating how far that duct really runs. In one of my recent projects, what looked like a short connection actually stretched more than 20 feet through attic joists, well beyond the reach of a basic brush.
Critical Errors To Steer Clear Of
These two blunders show up most often and carry real risks:
Using The Wrong Ducting It’s tempting to grab white vinyl or plastic flex hose at the hardware store. Don’t. It’s highly flammable and violates code. Switch to rigid or semi-rigid metal ducting for safer, more efficient airflow.
Forgetting To Reconnect Securely A loose clamp on a gas dryer isn’t just messy; it can leak carbon monoxide into your home. After every cleaning, give the vent connection a good tug. If it moves, tighten those clamps until they hold fast.
The Pitfall Of An Incomplete Cleaning
Stopping after brushing the first few feet feels like progress, but most clogs lurk in the bends or long horizontal stretches. Half-done work often pushes lint deeper, creating an even tougher blockage.
The goal isn’t just to remove some lint; it’s to clear the entire airway from dryer to exterior vent.
Always feed your brush all the way through until you feel airflow at the outside vent. If your tools fall short, it’s time to call in professionals with power equipment. And don’t forget to test the exterior flap or louvers: if they stick, lint’s going to pile up all over again.
Knowing When to Call a Professional
Look, I'm all for rolling up your sleeves and tackling a home project. A basic, short, straight-run dryer vent is often a perfectly manageable DIY job. But the goal here is safety and efficiency, and sometimes a simple cleaning kit from the hardware store just won't cut it.
Recognizing when you're out of your depth is key. Have you already tried cleaning the vent, but your dryer is still taking two or three cycles to dry a load of towels? Is the top of the machine getting alarmingly hot to the touch? These aren't minor inconveniences; they're giant red flags that a serious blockage is still lurking somewhere deep inside the ductwork. That’s your cue to put the tools down and call in a pro.
Scenarios That Demand a Pro
Some homes have vent systems that are inherently tricky and immediately elevate the job beyond a simple Saturday afternoon task. If your setup includes any of the following, your safest and most effective bet is to hire a certified technician.
Long Vent Runs: If your dryer vent ducting stretches out more than 35 feet, consumer-grade cleaning kits will struggle. They just don't have the rigidity or power to effectively clear out that entire distance, often leaving dangerous lint clogs behind.
Inaccessible Routes: Does your vent pipe disappear into an attic, wind through a tight crawlspace, or snake its way up to the roof? These routes are incredibly difficult to access and clean properly without specialized equipment.
Multiple Sharp Bends: Every 90-degree turn in that pipe is a natural chokepoint where lint loves to build up. Pros use flexible, high-powered tools and vacuums to snake through these corners and ensure they're completely clear.
A professional service doesn’t just clean; it inspects. Technicians can use video inspection cameras to spot crushed sections, improper materials like vinyl ducting, or disconnected joints you would never see from the outside.
This kind of detailed inspection is absolutely critical. It’s a lot like other home maintenance tasks; identifying situations requiring professional assistance is half the battle. This isn't just about sucking out lint; it's about making sure the entire exhaust system is structurally sound and safe.
We go into more detail on this topic in our guide to professional dryer vent cleaning services for fire prevention and safety.
The Professional Advantage
It’s no surprise that as awareness of dryer fire risks has grown, so has the demand for expert services. The global dryer vent cleaning market was valued at $2.5 billion and is projected to hit $4.8 billion by 2033.
The United States actually holds over 60% of the North American market, largely driven by strong safety regulations and homeowner awareness. You can read the full research about this market expansion if you're curious. This growth really underscores the value people place on having an expert guarantee their system is safe and efficient, a level of peace of mind a DIY job can't always provide.
Frequently Asked Dryer Vent Cleaning Questions
Tackling a dryer vent might seem straightforward, yet homeowners often hit the same roadblocks. Below, I’ve distilled the top queries into clear, experience-driven answers that will boost your confidence and keep your housekeeping on point.
How Often Should I Clean My Dryer Vent Pipe
Most homes do best with a deep clean once a year, but that timetable isn’t set in stone. Think about how often you run your dryer, and what you’re drying.
If any of these sound familiar, pull out your cleaning kit every six months instead:
Busy Households: A full load of laundry daily means more lint than a couple’s setup.
Furry Friends at Home: Pet hair mingles with lint, packing the pipe tighter and faster.
Hefty Loads: Towels, bedding and blankets generate extra lint that demands more frequent attention.
On the flip side, a solo dweller who runs just a few loads weekly might stretch it to 18 months. The real indicator? Watch for longer drying cycles or unusually hot dryer exteriors; they’re the smoke signals for a clogged vent.
Key Takeaway: Cleaning frequency hinges on lint volume. More laundry or pets = more checks.
For a deeper dive into whether annual vent cleaning is right for you, refer to this essential guide: Is Dryer Vent Cleaning Necessary? An Essential Guide
Is Cleaning The Lint Trap Enough
Emptying the lint trap after every cycle is smart, but it’s only part of the equation. That screen captures most fibers, but not all of them.
Over weeks, tiny particles slip past the filter and settle deep inside the ductwork. Left unchecked, they choke airflow and morph into a serious fire hazard.
Insight: Treat the lint trap like a pre-filter. It does bulk work, but the fine dust still needs a deeper sweep.
Can I Use Dryer Sheets In My Dryer
Absolutely. Dryer sheets soften fabrics and tame static by depositing a thin waxy coating. Yet that same layer can glaze over your lint screen, reducing its catch rate.
Here’s what I do after weeks of using sheets:
Rinse the lint trap under warm soapy water to strip away residue.
Let it fully dry before reinstalling to avoid mold.
Keep an eye on the trap’s mesh; if it starts looking loose or damaged, replace it.
A clean screen won’t eliminate vent buildup entirely, but it ensures the trap keeps doing its job.
If you’ve cleared the vent yourself but still spot performance hiccups, or if your duct layout is particularly convoluted, bring in the pros. The team at Purified Air Duct Cleaning has the right gear and know-how to get your dryer vent flowing freely, and safely. Reach out for a free quote at Purified Air Duct Cleaning.