

Air Duct Inspection Camera: What It Finds and What to Buy
Does a dusty frame on a screen mean the heating and cooling system is failing? Sales visits often treat that video as the whole diagnosis. Comfort, bills, and dryer safety each need their own instruments, and a lens cannot run those checks.
Homeowners want a clear answer on cleaning. Facility managers want a file they can compare next year. The useful habit is to separate what the picture shows from the measurements that prove a diagnosis.
What an Air Duct Inspection Camera Is and How It Works
Say the supply register in a back bedroom keeps shedding fine dust after every filter change. You cannot see past the grille. An air duct inspection camera is a thin, flexible probe with a small lens and built-in lights. A technician uses it the way a doctor uses an endoscope, looking inside without opening the whole system.
The kit is straightforward. The probe carries a camera head whose lights can be dimmed or brightened. A screen or recorder saves stills and video while the probe moves. The National Air Duct Cleaners Association lists direct-view periscopes, closed-circuit television systems, and still cameras as equipment for evaluating debris buildup, monitoring cleaning, and verifying results. Its ACR standard, including the 2021 edition, is a worldwide benchmark for assessing new and existing HVAC systems, judging cleanliness, and checking restoration afterward.
Older inspectors held a flashlight at a register or looked through a periscope. Those glances left no file an owner, a facility manager, or a second contractor could review. Recorded footage changed the job. It documents blockages, growth that looks microbial, damaged insulation, and structural defects without dismantling the ducts, and it can be compared after service.
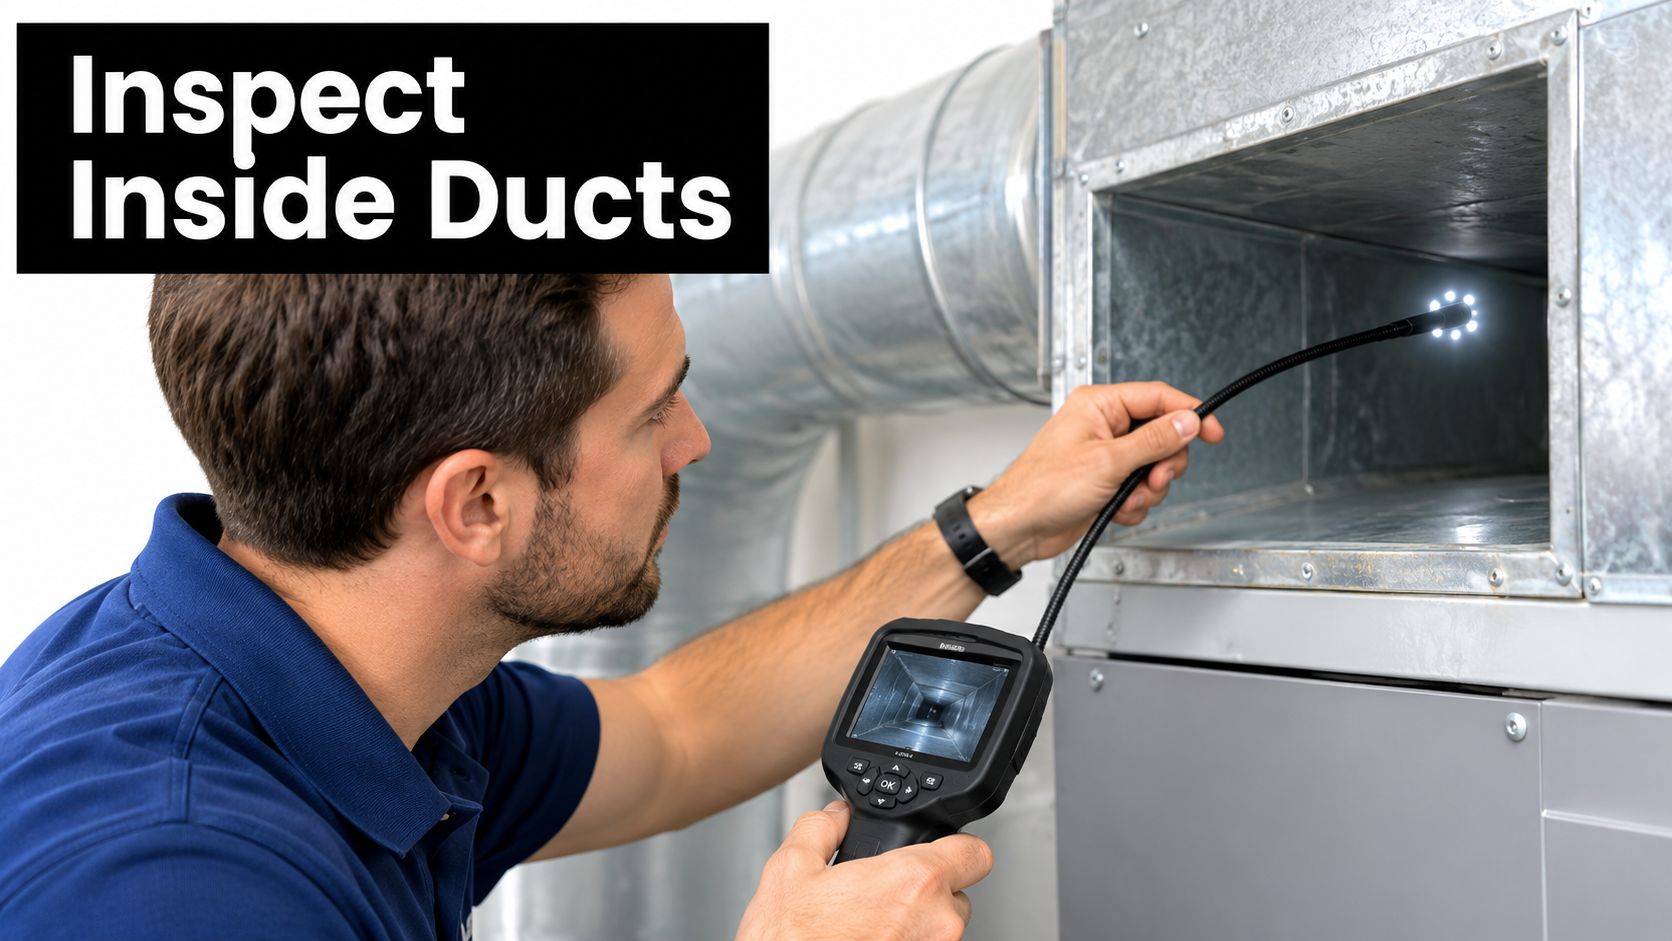
Practical rule: If nobody can point to the duct in the frame, the picture is a curiosity, not a finding.
Trunk lines and branches run behind walls, above ceilings, and under floors, so a register shows only the last few inches. Keep this principle: the camera records the surfaces it can reach. That record is evidence. It is not a verdict on the whole system.
What a Duct Camera Finds and What It Cannot Prove
Footage earns its keep when each condition is paired with the check it cannot replace.
Condition | What the camera shows | What it cannot prove | Next check |
|---|---|---|---|
Dust or debris buildup | Layers, clumps, or loose material on interior walls | How much dust is in the air | Airflow and filter check |
Biological growth | Dark, fuzzy, or staining patches on surfaces | Species identity or confirmed mold | Lab sample and moisture check |
Damaged insulation or liner | Torn liner, displaced or wet insulation | Insulation performance or energy loss | Repair assessment of the affected section |
Disconnected joints | Gaps or separated sections at seams | Exact leakage rate | Leakage test with pressure equipment |
Blockage or foreign object | Object, nest, or rodent debris in the run | Effect on delivered airflow | Airflow or pressure-drop measurement |
Lint in dryer exhaust | Lint buildup or a crushed exhaust duct | Airflow restriction or true fire risk level | Airflow test and duct replacement check |
The limits that get misread
A striking clip still cannot measure airflow, static pressure, leakage, duct sizing, air balance, or coil performance. Those questions need a differential-pressure meter, an airflow hood or traverse, and a look at the coil face. Visible dust may sit in one branch while the comfort problem starts at a leaky trunk, a starved return, or a fouled coil.
Dark patches are the finding people rush to name. Treat them as a reason to study signs of mold in air ducts, then confirm with a sample and a moisture check. A picture does not identify a species.
Gaps at seams are real defects, and they are not a leakage number. For qualifying one- and two-family homes, EPA Indoor airPLUS verification sets a total duct leakage limit of no more than 4 CFM25 per 100 square feet of conditioned floor area, or no more than 40 CFM25, whichever criterion applies. A camera can show tears and disconnected sections. Only pressure equipment can show whether the system meets that limit. The same verification also expects duct interiors to be dry and substantially free of dust after dusty construction, which is a visual check, not a flow test.
A clean-looking section does not prove the system is healthy, and a dramatic video does not by itself justify cleaning.
Lint in a dryer exhaust is a safety target because it can choke the path that should carry hot air outdoors. The image shows buildup or a crushed section. It does not grade how restricted the airflow is.
How a Camera Inspection Runs, Step by Step
A careful pass is slow on purpose. The NADCA equipment guidance treats visual inspection as the first step in assessing, cleaning, or restoring an HVAC system, and it notes that the look can show whether particulate buildup is significant or whether contamination has compromised performance. Closed-circuit television and similar cameras document debris, watch the cleaning, and check the result without taking the system apart.
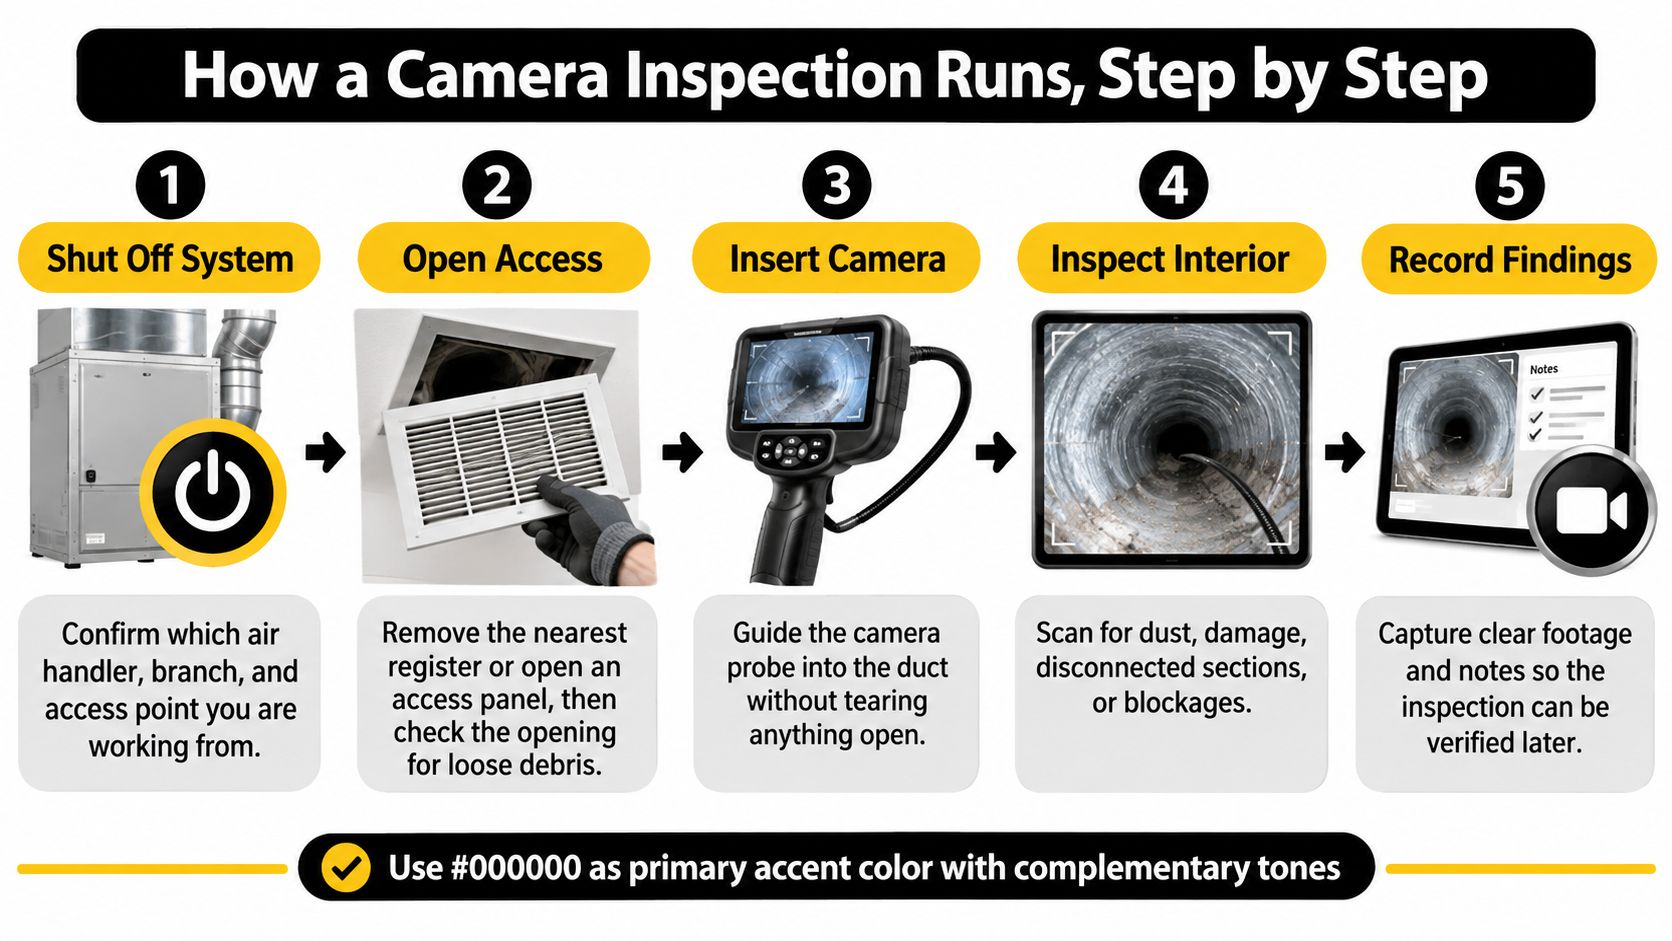
Shut the system off and name the air handler, the branch, and the access point before the probe moves. Mixing up two similar trunks is how a repair gets scheduled on the wrong run.
Remove the nearest register or open an access panel, then look at the opening for loose debris. Knocking that material deeper creates a false "blockage" a few feet in.
Feed the probe slowly and keep the lens near the center of the duct. A head dragged along the floor films only the bottom and misses liner on the sides.
Change the lights at every reflective galvanized section. Glare washes out dust on bright metal, and a dim head hides dark growth or torn liner in a shadowed run.
Record video and stills at each junction, with time stamps. Junctions are where flex meets metal and where a later comparison has a landmark.
Continue to turns, low points, pressure-drop spots, transitions between metal and flexible duct, wet areas near cooling coils and drain pans, insulation, the blower area, and the filter area. Those are the places debris settles and ordinary eyes never reach.
Play the footage against a simple sketch and mark every section the probe could not enter. Unseen duct is not clean duct.
Why the slow spots matter
Turns and low points collect what the airstream drops. Wet metal near a coil or drain pan is where staining starts. A crushed flex transition can look fine from the register and still starve a room. Crews who also clean usually bring brushes, vacuums, and access tools described in guides to professional duct cleaning equipment. The camera comes first so those tools are aimed at a known condition.
Finish with one check. You should be able to say where each image was taken, and which sections were never seen.
Recording Footage So the Findings Hold Up
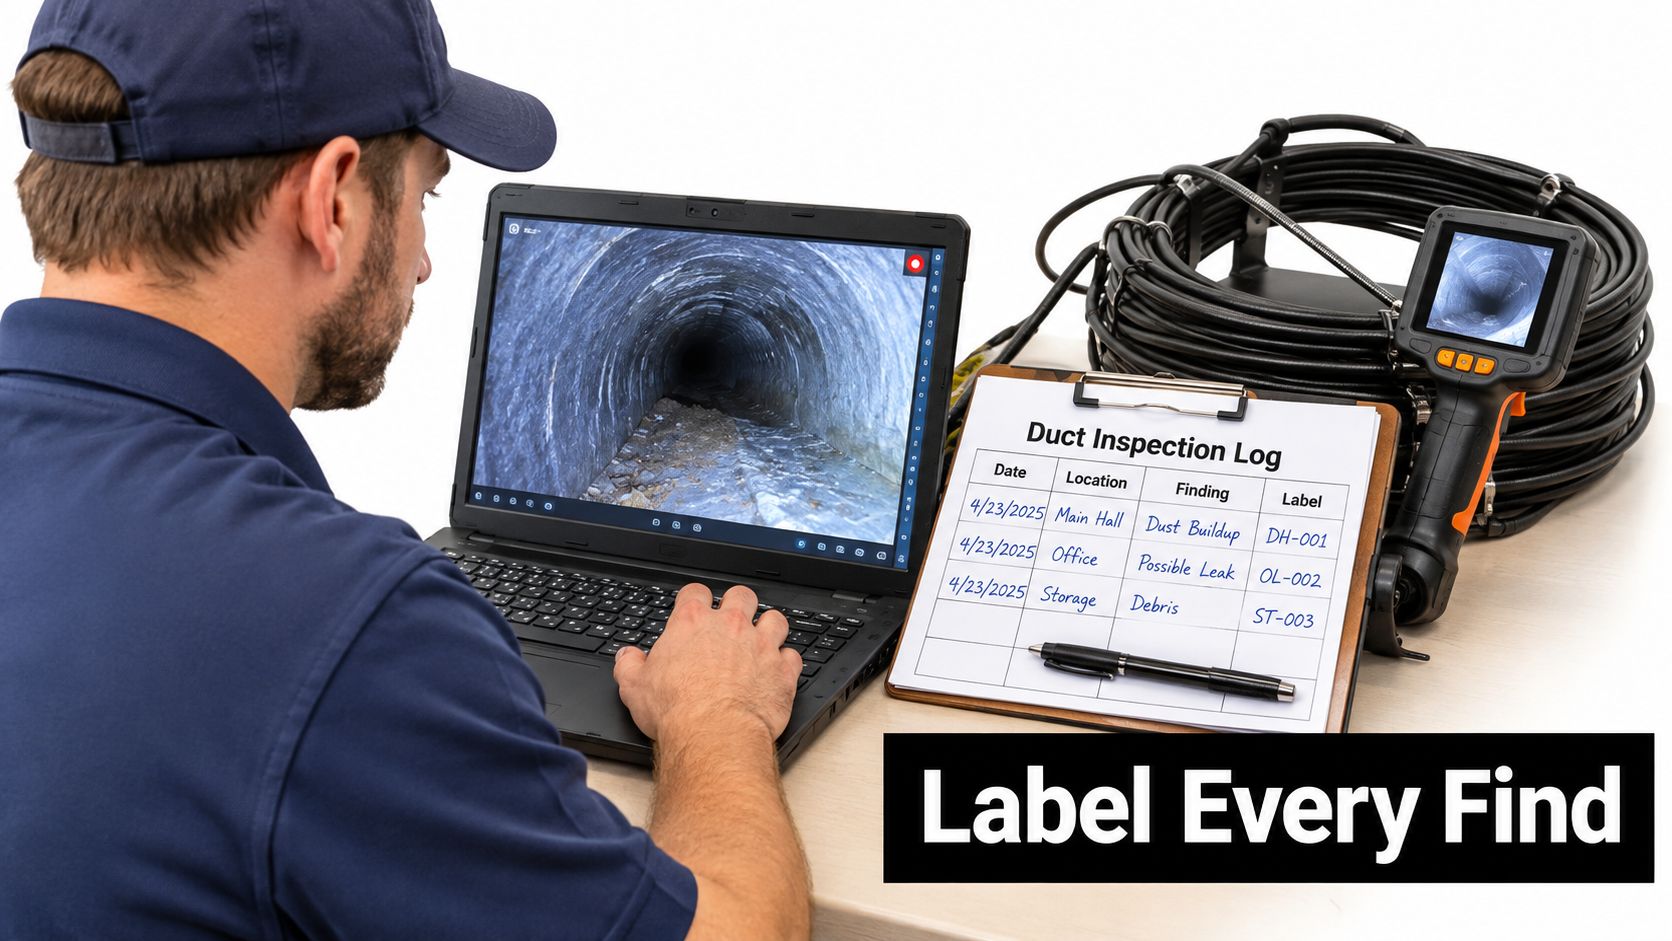
An unlabeled clip has almost no repair value. If nobody can find the defect again, it cannot be fixed, compared, or verified.
Picture one still from a two-story house. The note reads: air handler in the garage closet, south supply branch, access at the hallway register, traveling away from the unit, about six feet in, time stamp 10:14. The label says obstruction, a plastic bag caught at a takeoff, with the limitation that the camera stopped there and did not see the rest of that branch. The next step is an airflow check at the bedroom served by that takeoff, then removal of the bag.
What belongs on every frame
Place: Air handler, branch, access opening, and direction of travel.
Distance: Approximate feet from the access point, using a cable mark or a counted elbow.
Time: A time stamp so before-and-after clips can be matched.
Label: Debris, growth, damaged component, obstruction, or unknown. Visible notes stay separate from lab-confirmed findings.
Coverage: Which runs were inspected, whether supply and return branches were included, and which areas were not reachable.
A 4K sensor helps you read a torn edge. It does not make the report authoritative. A 2025 engineering review found that image-based estimates of dust coverage need calibration, and that accuracy changes with lighting and the algorithm. Representative coverage, stated limits, and repeatable before-and-after views matter more than pixel count. Side-by-side air duct cleaning pictures only help when both shots name the same access point and direction.
Copy this line for each defect: location, time, observation, limitation, next step.
DIY Camera Checks Versus Professional Inspections
Criterion | DIY camera check | Professional inspection |
|---|---|---|
Reach | Accessible registers and the first runs | Full system access through approved openings and branches |
Equipment | Consumer borescope or basic camera | Professional camera with lighting control and cleaning-verification tools |
Measurement | Visual only | Airflow and pressure checks paired with camera footage |
Mold identification | Describes visible material only | Laboratory identification when growth is suspected |
Documentation | Phone photos and notes | Location-mapped report with defect classification and follow-up |
A homeowner with a consumer borescope can check the first few feet past a register, photograph loose debris, and look down a dryer exhaust if the head fits. Those photos are worth bringing to a service call. They are not a system survey.
The U.S. Environmental Protection Agency states that many HVAC sections are inaccessible to ordinary visual inspection, so a provider should show occupants the material identified as mold. A substance may look like mold while only an expert and laboratory analysis can confirm it. The agency also separates hard-surface contamination from insulated ductwork: insulated ducts that become wet or moldy cannot be effectively cleaned and should be removed and replaced. Wet liner on camera is a replacement question, not a brushing question.
When a visual check is enough
Use a DIY camera to gather evidence and questions. Call a professional when the decision depends on measurement or on naming a material. If you are buying a house, fold the ducts into what to check before buying from Royal LePage Brookside Realty, next to equipment age and filter access.
We generally recommend cleaning ducts every 3 to 5 years, depending on ductwork age and condition, the type of heating and cooling system, and any allergies or respiratory problems in the home. Cleaning can release dust and debris, trigger allergic reactions, or disturb mold, and those risks are rare when a qualified company does the work. Training is part of that qualification, which is why it helps to ask about air duct cleaning certification before you book.
Camera Specs to Check Before You Buy
Megapixels are the number most buyers read first. Coverage and lighting decide whether the footage is usable.
Specification | Why it matters | What to look for |
|---|---|---|
Articulation | Reaches branch take-offs and turns | Head that angles, not a fixed straight view |
Probe length | Reaches the far end of your longest run | Length measured against your own duct layout before purchase |
Lighting | Glare hides dust, dim light hides dark growth | Adjustable brightness on the camera head |
Image capture | Supports before-and-after comparison | Time-stamped photos and video |
Recording and mapping | Ties each image to its location | Space to log access point, branch, and direction |
Resolution | Helps read labels and small detail | Sharp enough to read detail, but secondary to coverage |
The two specs people overrank
Resolution and the megapixel count make small tears and printed labels easier to read. They do not light a galvanized trunk, bend into a takeoff, or tell you which room the frame belongs to. A sharp, glare-washed image of the wrong branch is still a bad record.
Articulation comes first. A fixed straight view films the tunnel ahead and misses the branch serving the cold room. The head should angle into takeoffs and around turns.
Probe length is next, and it is personal. Measure the longest run from the access you will use, including elbows, before you compare cables. A long cable that cannot pass your smallest opening does not help. A short articulating borescope is the better tool for a coil, a damper, or a nearby plenum port. A push camera suits an enclosed horizontal run. A dropdown camera suits a vertical shaft. Match the motion to the route.
Lighting has to be adjustable on the head. Reflective galvanized steel throws glare that hides surface film. Too little light makes dark growth and torn liner blend into the shadow. Save a clip and watch it on the laptop you will use for the report, not only on the live screen.
Capture and mapping turn pictures into a decision. Time-stamped photos and video support a later comparison. Notes that name the access point, branch, and direction make the file usable for a repair. Choose a camera that reaches your ducts, lights them evenly, and records where each image came from. Treat resolution as a reading aid. The notes you attach are what make the footage authoritative.
Decide Whether a Duct Camera Inspection Is Worth Booking
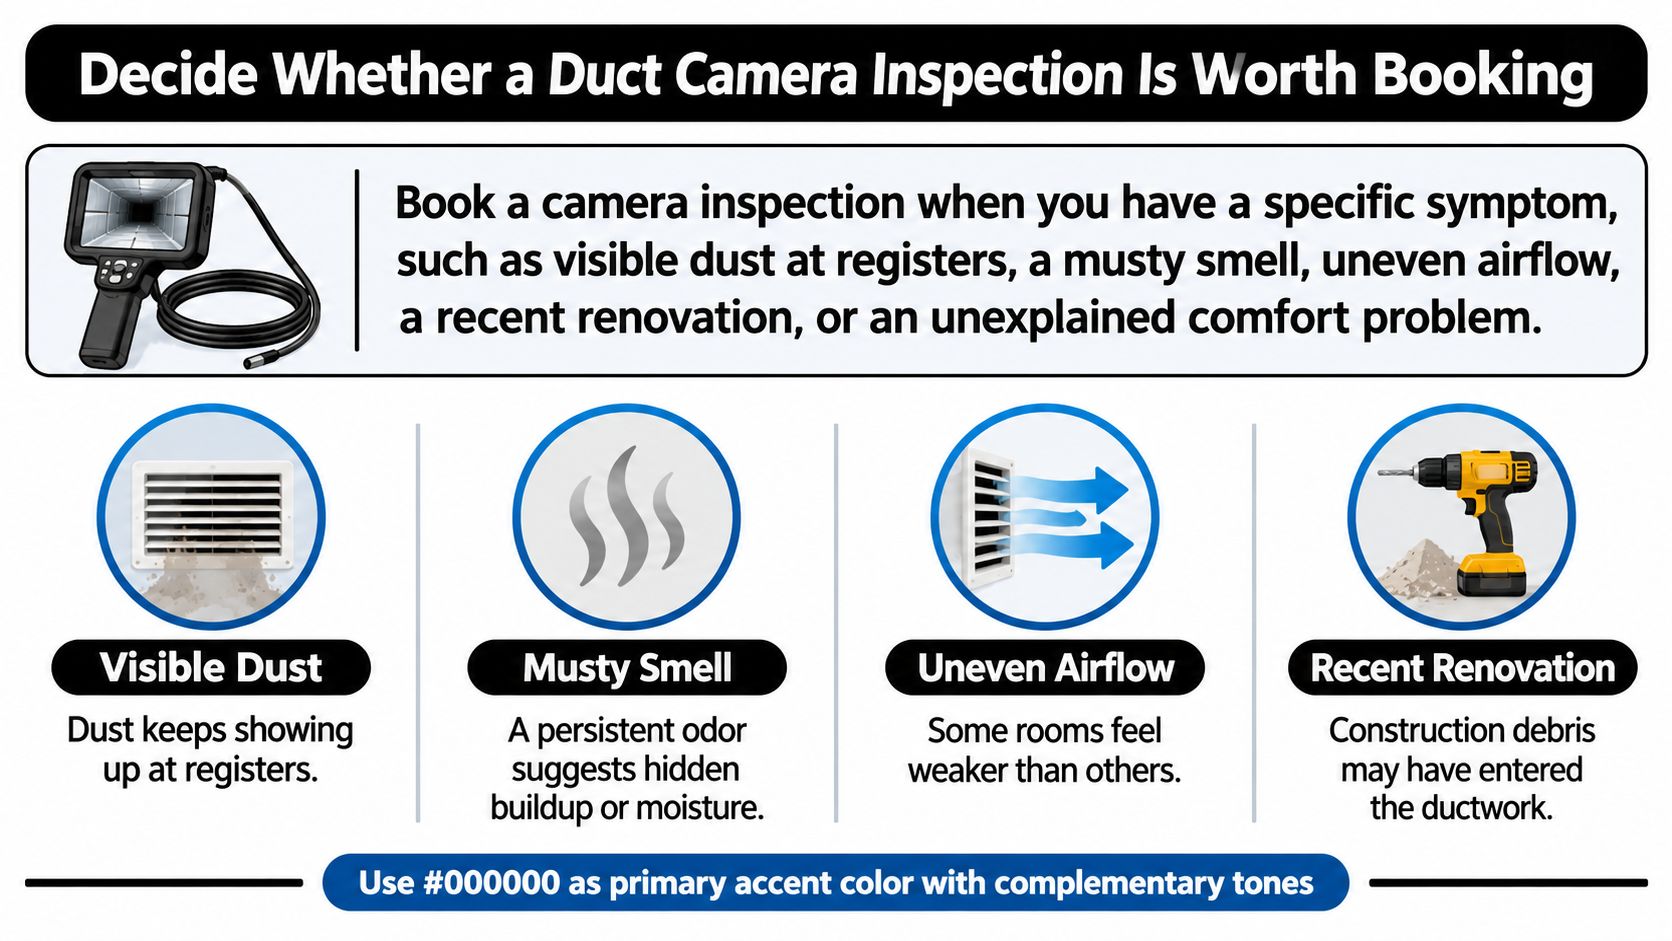
Book a camera inspection when you have a specific symptom, such as visible dust at registers, a musty smell, uneven airflow, a recent renovation, or when a facility needs a documented condition record.
Skip it when the only motive is curiosity. A video alone will not explain a high bill or a room that never feels right. Those questions still need airflow, pressure, and equipment checks.
Lint near the dryer is different. A camera look at the exhaust path is a low-cost safety step, and it still does not replace an airflow test. Consumer Reports, citing National Fire Protection Association figures, reports approximately 13,820 U.S. home fires caused by clothes dryers each year. Lint accumulation accounts for about 27 percent of those fires. The same figures attribute approximately seven deaths, 344 civilian injuries, and $233 million in property damage annually to dryer fires. Footage can show lint buildup, a crushed section, or another blockage in that path. It is evidence of a condition, not a performance test.
We have spent over 20 years in indoor air quality, HVAC, and duct cleaning, and packages can include a free dryer vent inspection and even free dryer vent cleaning. Call for current details. When cleaning follows the inspection, the work takes on average 2 to 3 hours, depending on the size of the home.
Questions to ask before you book
Which duct sections will be inspected?
Will supply and return branches both be included?
How will each camera location be recorded?
Will suspected growth be identified, rather than described as mold from the image alone?
Are airflow or pressure measurements part of the report?
Which areas are expected to be unreachable?
A longer checklist of air duct cleaning questions to ask helps when the visit may include cleaning, not only a look. List your symptoms first, then request a quote that names the sections to be inspected and the measurements the report will include.
Purified Air Duct Cleaning uses inspection cameras to document residential and commercial ducts before and after service across the Phoenix area, including dryer vent cleaning when lint is the concern. If you want footage tied to a real condition check, visit Purified Air Duct Cleaning and ask for a quote that lists the sections and measurements included.