How to Clean a Dryer Vent Duct A Practical Homeowner's Guide
- Jan 11
- 14 min read
Learning how to clean a dryer vent duct is pretty straightforward. You're essentially unplugging the dryer, disconnecting the duct, using a brush to break up all the packed-in lint, and then vacuuming out the mess. Think of it as a crucial bit of home maintenance that keeps your family safe and your dryer running smoothly.
Why Cleaning Your Dryer Vent Is So Important
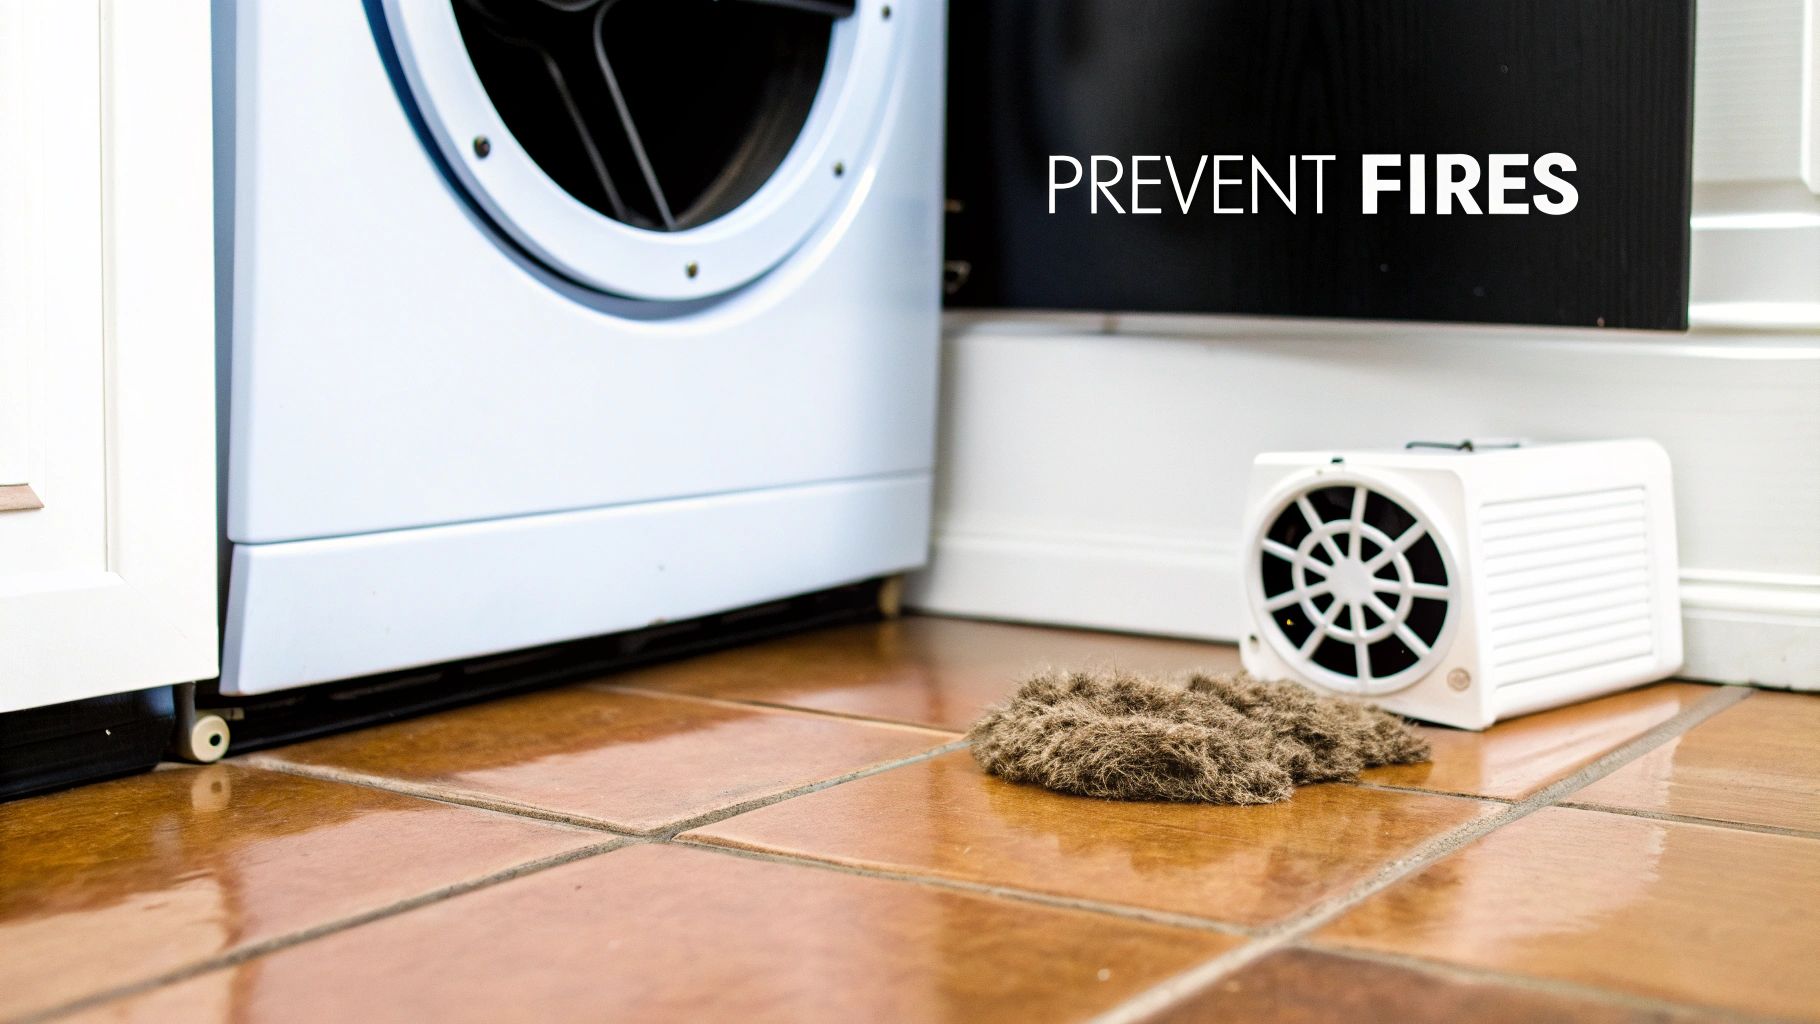
Let's be clear: cleaning your dryer vent is much more than just a chore to check off the list. It’s a non-negotiable safety measure that protects your home, your family, and your wallet. Every single load of laundry produces a surprising amount of lint, and that stuff is incredibly flammable. While your lint trap does a good job, it doesn't catch everything. Tiny fibers always slip past and start building a dangerous nest inside your ductwork.
This buildup is a serious fire hazard. According to the U.S. Fire Administration, thousands of house fires every year are sparked by clothes dryers, and about one-third of them are caused by a simple failure to clean the vents. These are completely preventable fires that result in tens of millions in property damage, hundreds of injuries, and even tragic fatalities each year. You can learn more about emerging safety trends and data on dryer vent safety from Air Duct & Beyond.
Beyond Fire Safety
Putting aside the critical risk of fire, a clogged vent duct also wreaks havoc on your dryer's performance and your bank account. When hot, moist air can't escape properly, your dryer has to fight against itself, running much harder and longer than it should. This leads to a cascade of problems you’ll definitely notice.
Skyrocketing Energy Bills: A dryer struggling to breathe uses a lot more electricity or gas. Cleaning the vent is one of the easiest ways to get back to peak efficiency and lower your utility costs.
Needless Wear and Tear: That extra strain isn't good for the motor or the heating elements. It can drastically shorten your dryer’s lifespan, leading to expensive repair calls or a premature trip to the appliance store.
Endless Drying Cycles: If you're running the same load two or three times just to get it dry, a clogged vent is almost always the culprit. Your clothes should be dry after one normal cycle.
Key Takeaway: A clean dryer vent isn't just about good housekeeping. It's a fundamental safety practice that saves you money, extends the life of your appliance, and, most importantly, removes a major fire risk from your home.
This guide will walk you through exactly how to clean your dryer vent duct, giving you the confidence to tackle this job yourself. Of course, if you're in the Phoenix area and would rather leave it to the experts, the team at Purified Air Duct Cleaning can make sure it’s done right. To dig deeper, check out the key benefits of dryer vent cleaning in our detailed article.
Assembling Your Dryer Vent Cleaning Toolkit
Before you even think about pulling your dryer away from the wall, the first real step is getting your tools lined up. Trust me on this: having everything you need within arm's reach is the secret to a smooth, frustration-free cleaning. It stops you from making that annoying mid-project run to the hardware store and makes the whole job safer.
First things first: safety. Unplug your electric dryer from the wall outlet. No exceptions. If you have a gas dryer, you have an extra step: find the gas supply valve on the pipe behind the unit and turn it off completely.
The Gear You'll Need to Get the Job Done
With the dryer powered down, it’s time to gather your supplies. While every dryer setup can be a little different, the tools on this list are the non-negotiables for doing the job right.
I've put together a quick checklist of the essentials. Having these ready to go will make a world of difference.
Essential Tools for Cleaning Your Dryer Vent Duct
Tool or Supply | Purpose | Pro Tip |
|---|---|---|
Dryer Vent Brush Kit | This is your primary weapon against lint. The flexible rods connect to reach deep into the ductwork. | Look for a kit with sturdy, screw-together rods. The cheaper, flimsy ones can snap off inside the vent, creating a much bigger problem. |
Power Drill | Attaches to the brush kit to spin the brush, aggressively scrubbing the inside of the duct. | Always run your drill in the forward (clockwise) direction on a low-speed setting. Running it in reverse can unscrew the rods inside the duct. |
Shop Vacuum | Sucks up all the lint you dislodge from the duct and cleans out the dryer's lint trap cavity. | A narrow crevice tool attachment is perfect for getting into the tight spaces inside the dryer and the duct opening. |
Screwdriver or Nut Driver | Used to loosen and tighten the metal clamps that hold the duct in place. | Check the clamp screw head before you start. It could be a Phillips, flathead, or a hex head. Having the right driver saves a ton of hassle. |
Work Gloves & Dust Mask | Protects your hands from sharp metal edges and keeps you from breathing in a cloud of dust and lint. | Don't skip these. That lint has been sitting there for years, collecting dust, dander, and who knows what else. |
With these tools, you're set up for the cleaning part of the job.
Reassembly Supplies You Cannot Skip
Getting all that flammable lint out is great, but putting everything back together securely is just as important for your family's safety. This is one place you absolutely cannot cut corners.
A common mistake I see is people grabbing standard grey duct tape to seal the connection. This is a huge fire hazard. The adhesive on that tape quickly breaks down from the heat and moisture, creating gaps where lint can escape and build up.
For a safe, long-lasting seal, you must use aluminum foil vent tape. It's specifically made to handle the high heat your dryer vent produces, ensuring a tight, secure connection.
While you're at it, give your clamps a good look. If they're rusty, bent, or weak, toss them and replace them with new, sturdy metal worm-gear clamps. They provide a much more reliable grip. For a few more pointers from the pros, check out these dryer duct work tips for quick results to make sure your reassembly is perfect.
The Complete Process for Clearing the Vent Duct
Alright, with your tools laid out and safety checks done, it’s time to get down to business. Actually cleaning out the dryer vent isn't overly complicated, but it does demand a bit of patience and a methodical game plan. The real goal here is to be thorough, tackling the clog from both inside and outside your home to get every last bit of lint out without damaging the ductwork.
First things first, you’ll need some room to work. Gently slide the dryer away from the wall so you can comfortably get behind it. You'll see two metal clamps on the flexible duct, one connecting to the dryer and one to the wall pipe. Loosen both and carefully wiggle the duct free. Prepare yourself; you'll probably find a surprising amount of lint packed right into these connection points.
The Initial Cleanout
Before you break out the brush kit, let’s do a quick preliminary clean. This is an easy win. Grab your shop vacuum with its crevice tool and suck up all the loose lint you can reach from the wall duct opening and the port on the back of your dryer. This simple step clears a ton of the surface-level gunk right away, which makes the deep clean that follows much more effective.
You can also use the vacuum to clean the inside of that flexible transition duct. Just take it easy, especially if you have the foil kind; they can tear in a heartbeat.
This visual guide gives you a quick look at how the main tools work together in the next steps.
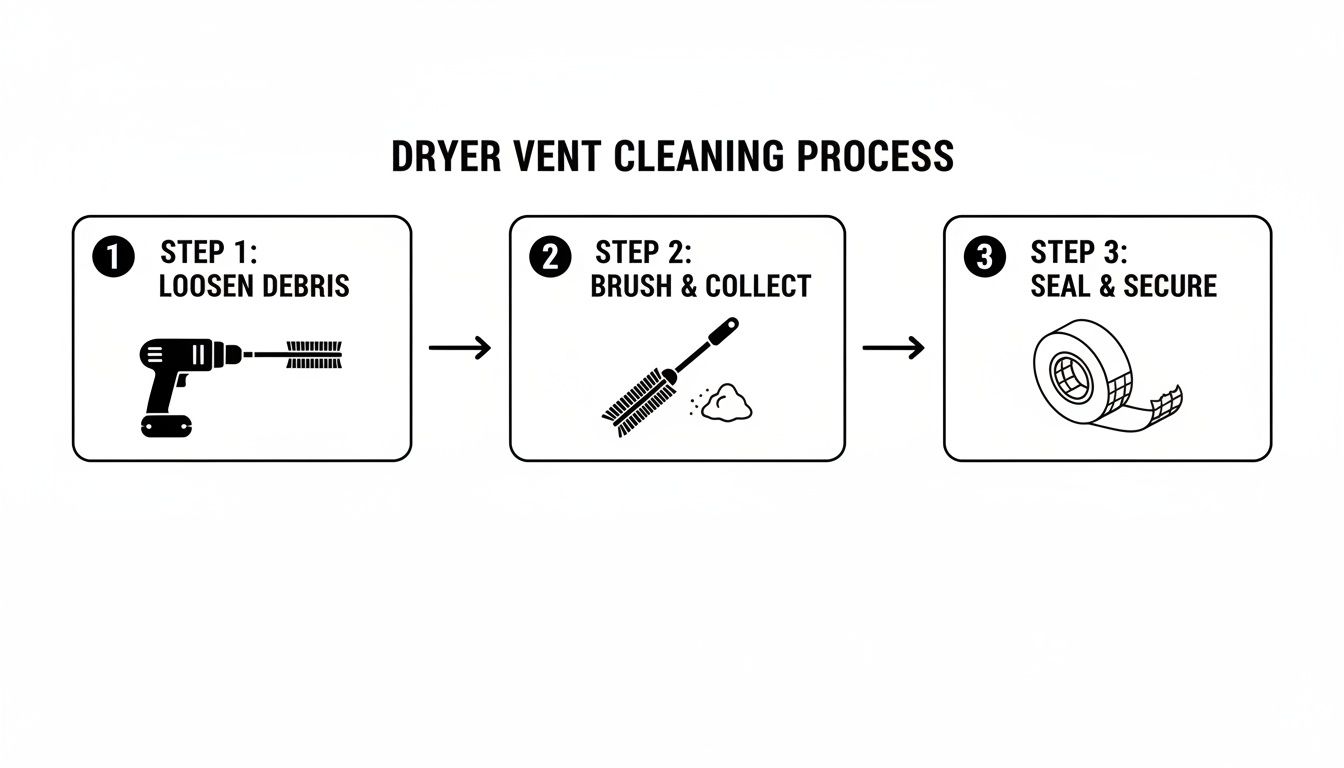
As you can see, the process is all about using the drill and brush to break up the blockage, collecting the debris, and then sealing everything back up tight.
Working the Brush Kit
This is where the real magic happens. Start by screwing together one or two sections of the flexible rods from your kit and attaching the brush head. Feed the brush into the duct opening inside the wall and start pushing it forward.
As you guide the brush deeper, keep attaching more rod sections. The moment you feel some resistance, you know it’s time to add a little power.
Pro Tip: When you connect the brush kit to your drill, set it to a low speed and only ever run it in the clockwise (forward) direction. If you run it in reverse, the rod sections can unscrew inside the vent. Trust me, trying to fish out a lost brush from inside your wall is a headache you absolutely want to avoid.
Here's a technique that has worked for me time and time again:
Work in Sections: Push the brush a few feet in, then fire up the drill for about 15-20 seconds. The spinning brush will scrub the duct walls and break apart those dense lint plugs.
Pull and Push: While it’s spinning, gently work the brush back and forth over that section. This helps knock loose any really stubborn patches.
Advance and Repeat: Push the brush a little deeper, add another rod, and do it all over again. Keep going until you can feel the brush hit the exterior vent cap on the other end.
To keep the mess under control, ask a helper to hold the shop vacuum hose right at the duct opening while you work. It’s a game-changer for catching the lint cloud that’s about to erupt.
Clearing the Exterior Vent
The last stop is outside. Find the dryer vent cap on the side of your house. It should have a little flap or a set of louvers designed to open when hot air pushes through.
With your gloves on, carefully clear away any lint, leaves, or other debris that’s built up around the opening. It’s not uncommon to find that a bird or rodent has tried to set up shop in there. Most importantly, make sure the flap or louvers can move freely. A stuck flap is a classic cause of bad airflow.
By cleaning thoroughly from the inside with the brush and clearing the exit point outside, you’ve created a completely open pathway. This comprehensive approach is the only way to guarantee that hot air, moisture, and flammable lint have an unobstructed escape route from your home.
Reconnecting and Testing Your Dryer System

You've done the hard part: clearing out all that packed-in lint. Now it's time to put everything back together and make sure all that work paid off. Getting the reassembly right is just as critical as the cleaning itself for keeping your home safe and your dryer running efficiently.
The first thing to focus on is the ductwork. When you reattach the transition duct from your dryer to the wall, you have to be careful not to crush it or create any sharp bends. Think of the duct as a highway for hot, moist air; any kink is like a major traffic jam where lint will immediately start to pile up again.
Gently guide the dryer back toward the wall, but leave enough room for a smooth, gentle curve in the duct.
Securing Your Connections for Safety
With the duct in the right position, it's time to lock it down. Whatever you do, don't reach for that roll of standard grey duct tape. It's just not built for the job. The adhesive breaks down under the heat from the dryer, and it will fail, creating a dangerous gap where hot air and lint can escape into your walls.
To create a secure, fire-safe seal, you've got two solid options:
Metal Worm-Gear Clamps: These are the metal bands you tighten with a screw. They create a strong mechanical grip that won’t loosen from heat or vibration.
High-Temperature Aluminum Foil Tape: This is a specialty tape made specifically for HVAC work. Its adhesive is designed to handle high temperatures, so the seal stays completely intact.
Make sure to tighten the clamps snugly at both the dryer outlet and the wall connection. This ensures a closed system that funnels all the exhaust safely outside. You can learn more about why a perfectly sealed system matters in our guide on proper clothes dryer venting made simple.
The Final Performance Test
Alright, everything's reconnected. This is the moment of truth. Plug your dryer back in and, if you have a gas model, turn the gas valve back on. Now, run the dryer on a short, air-only or fluff cycle for about five to ten minutes.
While it's running, step outside and check the exterior vent cap. You should feel a strong, steady blast of air coming out. If the airflow is weak or you barely feel anything, you might have missed a blockage. A powerful, consistent airflow is the tell-tale sign of a job well done.
This final check isn't just about confirming the clog is gone; it’s about seeing the immediate boost in your dryer's efficiency. A clean vent turns a routine safety task into a smart energy-saving move.
When a duct is clogged, a dryer has to work much harder, using 10–30% more energy to get a load dry. That can add up to 200 kWh of wasted electricity for a typical family over a year. This quick test confirms your appliance is back to peak performance, saving you money with every load you dry.
Knowing When to Call a Professional
While tackling a dryer vent cleaning yourself can be a satisfying and effective project, it's important to know when you're out of your depth. A standard DIY brush kit is great for straightforward jobs, but some situations really do call for an expert with professional-grade gear. Pushing your luck can turn a simple cleaning into a costly repair.
Knowing the signs that a job is bigger than you can handle is key to keeping your home safe.
For instance, if your dryer vent duct is unusually long, think over 35 feet, or snakes its way through your house with several sharp bends, a consumer kit might not make it all the way through. Even worse, the brush could get snagged on a turn and break off, leaving you with a much bigger problem than you started with.
Red Flags That Signal It's Time for a Pro
Pay close attention to what the vent system is telling you. If you come across any of these issues while you're working, it’s a clear sign to put down the drill and pick up the phone.
Suspected Nests: Finding bits of grass, twigs, or other nesting materials is a dead giveaway that a bird or rodent has moved in. These nests are often dense, compact, and stubborn, requiring specialized tools to pull them out without damaging the ductwork itself.
Visible Damage: During your initial check, if you notice the flexible duct behind your dryer is crushed, torn, or feels brittle and old, it needs to be replaced, not just cleaned. A professional will know the correct, modern materials to use and ensure it's installed to code.
No Airflow After Cleaning: You've run your brush through a few times, hooked everything back up, but the airflow outside is still just a weak puff of air (or nothing at all). This almost always points to a severe, impacted clog that your tools just couldn't break apart.
A professional technician isn't just using a bigger brush. They bring high-powered vacuums and compressed air systems that create intense agitation and suction, far beyond what a shop vac and a drill can do. This equipment blasts apart and pulls out the kind of hardened blockages that a simple brush would only pack down tighter.
Homeowners are becoming more aware of these fire risks, and it shows. The global market for dryer vent cleaning services is expected to hit around USD 2.5 billion by 2025. This growth is all about homeowners understanding that professional maintenance is a smart investment in safety and efficiency.
For those of us in Avondale and the greater Phoenix area, calling a service like Purified Air Duct Cleaning means you can be confident the job is done right. To get a better grasp of the specific dangers professionals are trained to handle, check out our article on how professional dryer vent cleaning prevents fires. And while this guide is all about dryer vents, it’s also helpful to understand the wider benefits of professional duct cleaning services for your home's overall air quality and HVAC efficiency.
Common Questions About Dryer Vent Cleaning
Even with a detailed guide, it's natural to have a few lingering questions. When it comes to something this important for your home's safety and your dryer's lifespan, you want to be completely sure you're doing it right. We get asked a lot of the same questions by homeowners, so we've gathered the most common ones here to give you that extra bit of confidence.
Think of it this way: you wouldn't skip an oil change for your car and expect it to run forever. Your dryer vent is no different. A little routine maintenance goes a long way in preventing a major headache, or worse, down the road.
How Often Should I Clean My Dryer Vent Duct?
The standard rule of thumb for most households is to clean your dryer vent duct once a year. But honestly, that’s just a starting point. "Average" doesn't apply to everyone, and you might need to do it more often.
You should definitely consider cleaning it every six months if you have:
A big family: More people means more laundry. More laundry means a whole lot more lint is being pushed through that duct, and it adds up fast.
Pets that shed: We love our furry friends, but their hair is a nightmare for dryer vents. It tangles with lint to form thick, heavy clogs that are much more stubborn than lint alone.
A long or complex vent: The longer the duct and the more bends it has, the more opportunities there are for lint to get snagged and start a blockage.
Your best bet is to just pay attention to how your dryer is performing. If clothes are taking longer to dry or the machine feels unusually hot, don't wait for your annual cleaning day. Those are clear signs it's time to act. For a deeper dive, check out our guide on how to tell if your dryer vent is clogged.
Are DIY Dryer Vent Cleaning Kits Effective?
Yes, for basic, routine maintenance, they absolutely can be. If your vent is short, straight, and easy to get to, one of those brush kits you attach to a drill can work wonders on the year's lint buildup. They are a solid choice for staying on top of the problem.
Where they fall short, though, is with trickier setups. If your duct is really long or has a few sharp elbows in it, a DIY kit might not cut it. The rods might not be long enough to clean the entire length, or they can have a hard time navigating the turns. Even worse, we’ve seen cases where flimsy rods get stuck or break off inside the vent, turning a simple DIY job into a major problem. That’s where professional-grade equipment really shows its value.
Can I Use a Leaf Blower to Clean the Vent?
Please don't. We hear this one a lot, and while it sounds like a clever shortcut, it's one of the worst things you can do. Sure, a powerful blast of air might force some loose lint out, but it’s just as likely to take damp, heavy lint and compact it into a solid brick further down the line.
The biggest risk with a leaf blower isn't just creating a worse clog. It's that the sheer force of the air can disconnect the duct sections hidden inside your walls or ceiling. If that happens, you’ll be blowing hot, moist, lint-filled air directly into your home’s structure, creating a hidden and extremely dangerous fire hazard.
What Is the Difference Between the Lint Trap and the Vent Duct?
It’s easy to get these two confused, but they have very different jobs. Think of them as a two-stage system.
The lint trap is the mesh screen you (should be) cleaning out after every single load of laundry. Its only job is to catch the big, fluffy stuff: the obvious clumps of lint from your clothes.
The dryer vent duct is the long pipeline that takes everything the lint trap misses, including hot air, moisture, and fine lint particles, and carries it safely outside your home.
Because the trap can't catch everything, those tiny particles eventually build up along the walls of the duct. That accumulation is exactly why the deeper cleaning we've been talking about is so essential.
If you've hit a snag, are dealing with a tough clog, or just want the peace of mind that comes from a professional job, we're here to help. The team at Purified Air Duct Cleaning serves homeowners all across the Phoenix area. Our certified technicians have the specialized tools to guarantee your dryer vent is completely clear, safe, and efficient.
Visit us online to schedule your service.https://www.purifiedairductcleaning.com