How to Clean Clogged Dryer Vent: how to clean clogged dryer vent essentials
- shawnpurifiedair
- 2 days ago
- 14 min read
Knowing how to clean out your dryer vent is a critical piece of home maintenance. It's not just about efficiency; it's about safety. The basic process involves disconnecting your dryer, using a special brush to clear out all the built-up lint in the ductwork, and then making sure you have a clear, strong airflow all the way to the vent outside. It's a skill every homeowner should have in their back pocket.
The Hidden Danger Lurking in Your Laundry Room
If you've ever caught a faint burning smell after a load of laundry or noticed your clothes are still damp after a full cycle, don't just write it off as a minor annoyance. Those are red flags. Many homeowners ignore these little warnings, but they're often pointing to a serious and growing problem hiding inside your walls: a clogged dryer vent, one of the most overlooked fire hazards in any home.
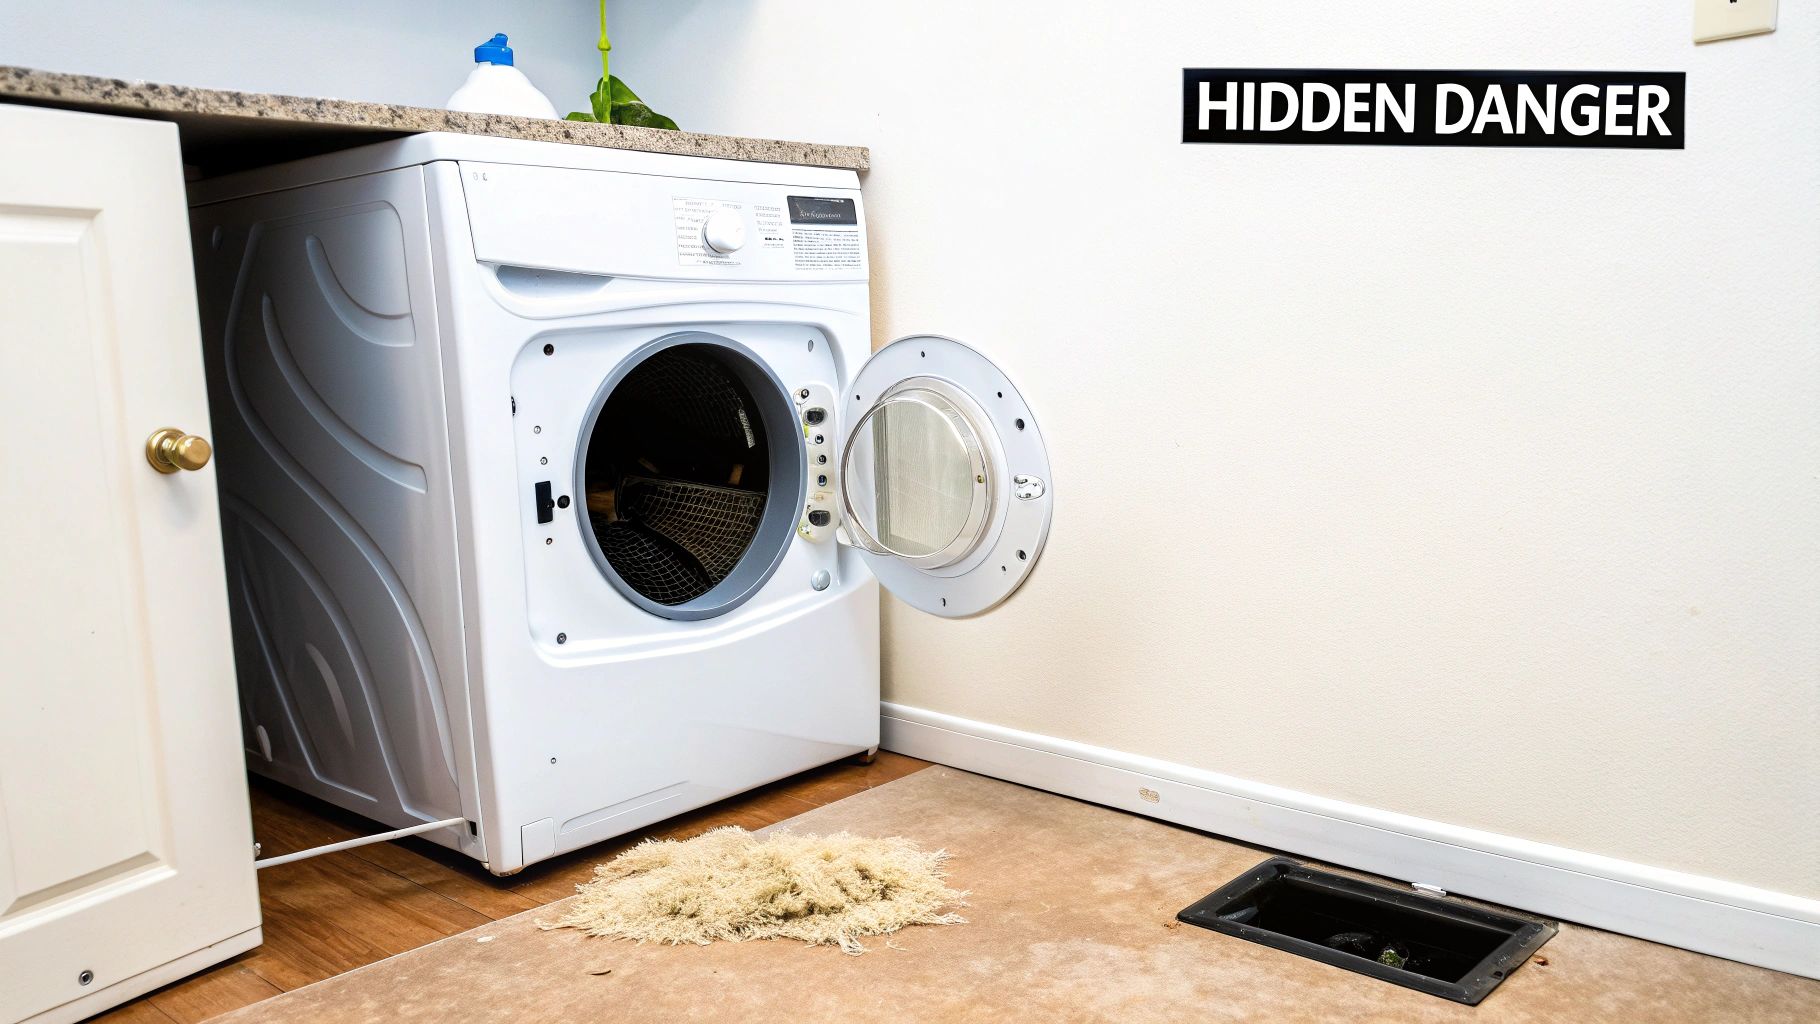
The real danger comes from the highly flammable lint that makes its way past your dryer's lint screen. Bit by bit, this lint builds up inside the vent duct, forming a dense, combustible blockage. When that happens, the hot, moist air from your dryer has nowhere to go. This trapped heat causes the appliance to work harder and overheat, creating the perfect conditions to ignite all that trapped lint.
Quick Clog Diagnosis Checklist
Use this checklist to quickly spot the tell-tale signs of a blocked dryer vent and understand the risk.
Symptom | What It Means | Severity Level |
|---|---|---|
Clothes take longer to dry | Poor airflow is preventing moisture from escaping. | Medium |
Dryer is hot to the touch | The appliance is overheating due to trapped heat. | High |
A burning or musty smell | Lint is scorching, or trapped moisture is causing mildew. | High |
Lint buildup behind the dryer | The exhaust system is blocked, pushing lint back out. | Medium |
Catching these signs early is your first and best line of defense against a much bigger problem.
Common Symptoms You Should Never Ignore
Spotting the signs of a clog early is everything. Keep a sharp eye out for these red flags, because they're your dryer's way of telling you the vent is obstructed and needs immediate attention.
Clothes take forever to dry. If one cycle isn't cutting it anymore, poor airflow is almost always the culprit.
The top of the dryer is hot. An overheating appliance is a big deal. That trapped heat is a major fire risk.
You notice a musty or burning smell. That strange odor in the laundry room could be from mildew growing in the trapped moisture or, worse, from lint starting to smolder.
There's lint everywhere except the trap. If you see lint collecting on the floor or walls behind the dryer, it means it can't get out the proper way.
A clogged dryer vent doesn't just make your appliance work harder; it creates the perfect storm for a fire. All that trapped heat, combined with bone-dry, highly flammable lint, turns a simple household chore into a genuine safety threat.
The statistics are pretty sobering. In the United States, clothes dryers are responsible for nearly 17,000 fires every year. The primary cause in a staggering 34% of those cases? Clogged vents. That's not just a statistic; it represents thousands of families whose homes are damaged or destroyed because of something as simple as lint buildup. For homeowners right here in Avondale, AZ, where we at Purified Air Duct Cleaning see this all the time, those numbers hit close to home. You can learn more by reading our guide on the dryer fire warning signs you can't ignore.
Beyond Fire: The Other Hidden Risks
While a fire is the worst-case scenario, a blocked vent can cause a whole host of other problems.
For homes with gas dryers, a serious clog can cause deadly carbon monoxide, a colorless, odorless gas, to back up into your home instead of venting safely outside. On top of that, all the trapped moisture can lead to mold and mildew growth inside your walls, which can tank your indoor air quality and lead to some pretty expensive repairs down the road.
When you understand all the risks, cleaning your dryer vent stops feeling like a chore and becomes what it truly is: an essential safety measure for your home and family.
Gathering Your Essential Cleaning Toolkit
Before you even think about tackling the vent itself, let's talk about getting your gear in order. Honestly, having the right equipment ready to go is half the battle. It’s what separates a quick, successful Saturday morning project from an afternoon of frustration and a giant, lint-covered mess.
The star of the show is your dryer vent brush. You've got a couple of options here, and the best choice really comes down to your home's specific vent setup. For a simple, short, and straight run, a standard manual brush can do the job. But if you're dealing with a longer duct or one that has a few twists and turns, a rotary brush kit that hooks up to your power drill is a game-changer. That spinning action gives you the muscle needed to break up stubborn, packed-in lint that a manual brush just can't handle.
Safety and Cleanup Gear
Now, let's cover the non-negotiables: your safety and cleanup plan. You'd be surprised how much dust and lint gets kicked up into the air, and that stuff is no fun to breathe or get in your eyes.
Dust Mask or Respirator: This is a must. It keeps you from inhaling all those fine lint particles.
Safety Glasses: Protect your eyes from any debris that might fly out, especially when you're working on the exterior vent cover.
Work Gloves: A decent pair will save your hands from getting nicked by any sharp metal edges on the ductwork.
For cleanup, a powerful vacuum is your best friend. A shop vac is perfect, but a regular household vacuum with a good hose attachment works too. The trick is to position the hose right at the vent opening while you're cleaning. This captures the lint as it gets dislodged, containing the mess before it even starts.
Here’s a little tip I’ve picked up over the years: keep a roll of painter's tape and a couple of old towels handy. You can use the tape to create a better seal between your vacuum hose and the vent opening. The towels are great for catching any stray lint that escapes, making that final cleanup practically effortless.
Choosing the Right Tools
When you're picking out a rotary kit, double-check that the flexible rods are long enough to reach the entire length of your vent. Most kits are modular, with several interlocking sections, so you can build it out to the length you need. I'd recommend reading a few product reviews to make sure the rod connections are solid; the last thing you want is for a piece to break off inside your wall.
And before you get started, a quick inspection is always a smart move. For a rundown on what to look for, check out our guide on how to check your dryer vent. Once you have the right toolkit assembled, you'll be ready to clear that clog with total confidence.
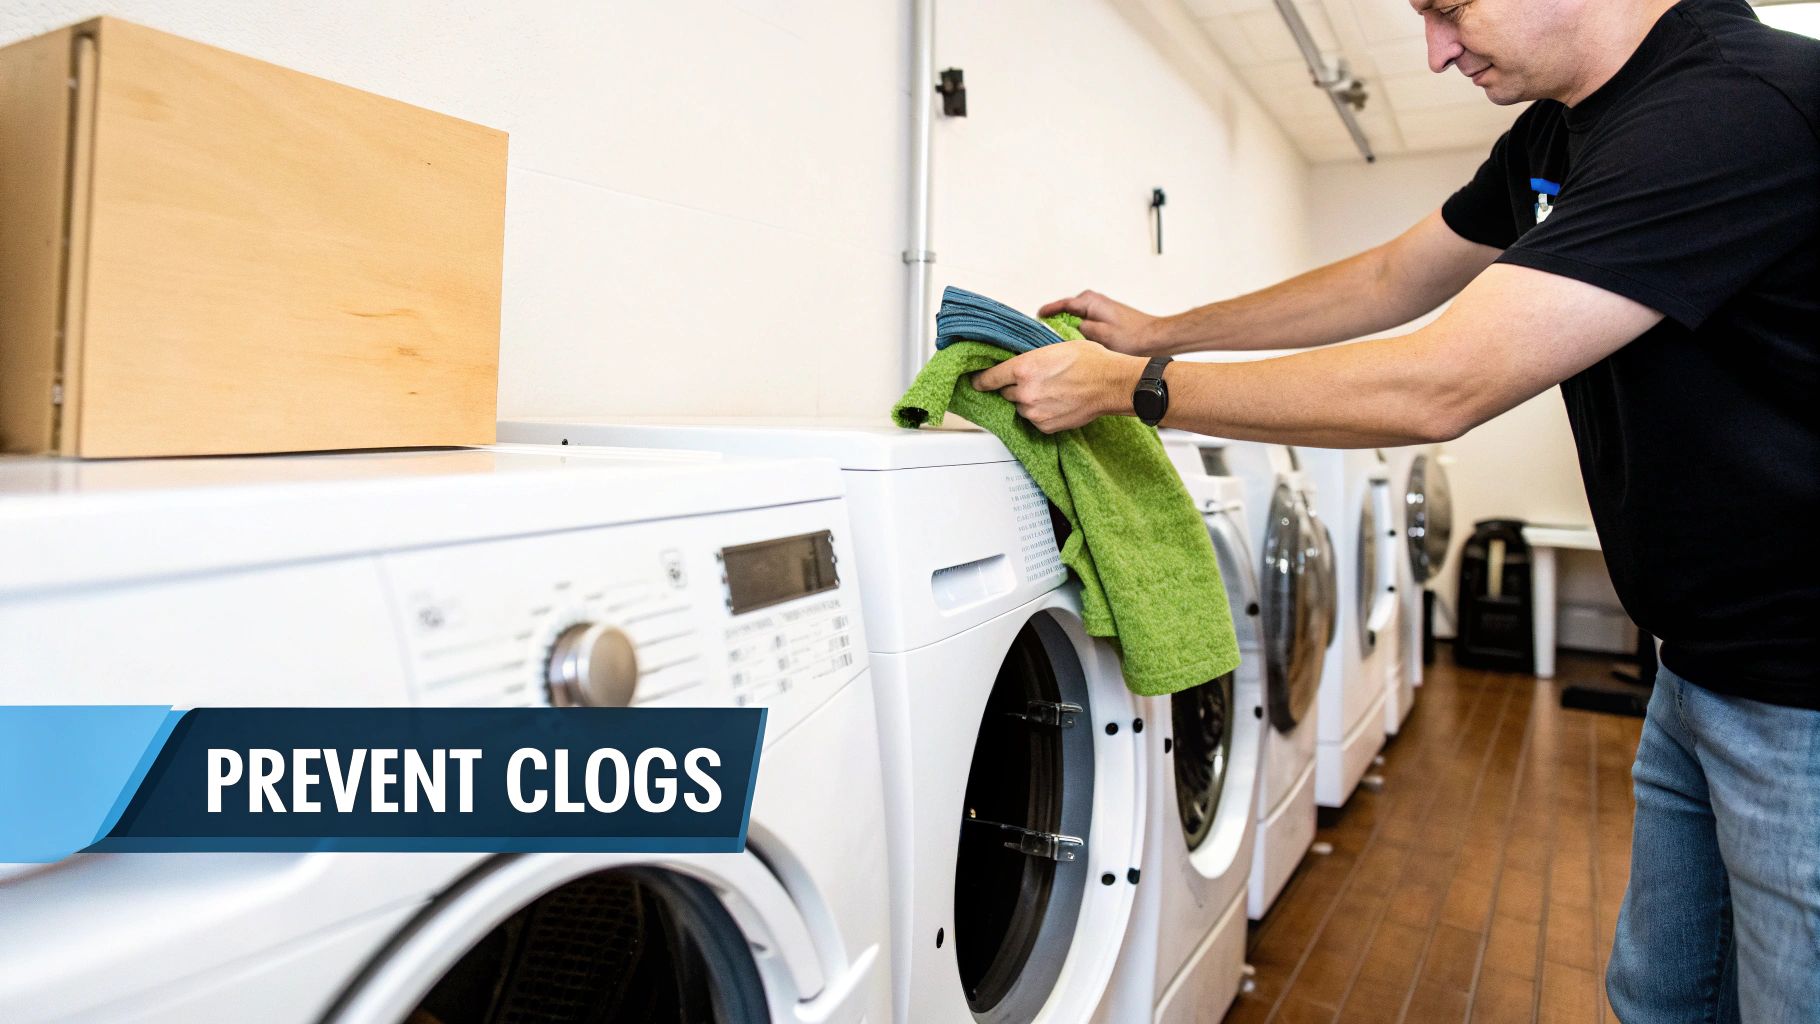
A Practical Walkthrough for Clearing Your Dryer Vent
Alright, you've got your gear lined up, so let's get our hands dirty. This is the part where we actually clear out that vent, and I'll walk you through it from start to finish. Following these steps will take a job that seems intimidating and make it completely manageable, and most importantly, safe.
First thing's first: safety. Before you even think about moving the dryer, unplug it from the wall. If you have a gas dryer, you also have to shut off the gas supply. Look for the valve on the gas line behind the dryer and give it a quarter turn so it's perpendicular to the pipe. That's the "off" position.
This whole process relies on having the right tools and using them correctly to get the job done efficiently.

This visual is a great reminder of the game plan: use the brush to break up the lint, the vacuum to suck it out, and wear your safety gear the whole time.
Detaching and Initial Cleaning
With the dryer safely disconnected, gently pull it away from the wall. You need enough space to comfortably work behind it. You'll see the flexible duct that connects the dryer to the wall vent, this is called the transition duct. It's usually held on by a couple of metal clamps. Grab your screwdriver or nut driver, loosen them, and pop the duct off both the dryer and the wall pipe.
Now, take a good look at that flexible duct. Is it one of those flimsy, foil-style ones that looks like a crinkled Slinky? If it’s crushed, torn, or brittle, this is the perfect opportunity to replace it with a sturdier semi-rigid metal duct. While you're there, reach in and pull out any obvious clumps of lint from the dryer's exhaust port and the pipe opening in the wall.
Tackling the Main Vent Line
This is where that rotary brush kit becomes your best friend. Screw the brush head onto the first flexible rod section. If you’re lucky enough to have a helper, have them set up the shop vac at the exterior vent opening outside. This will catch all the lint you're about to dislodge.
Working solo? No problem. Just position the vacuum hose at the indoor opening to suck up the debris as it comes loose. Start feeding the brush into the wall pipe. Connect your drill to the other end of the rod, and make sure it's set to a low, steady speed, spinning clockwise only. Work the brush in and out with a gentle motion as it spins to break up all that compacted lint.
Crucial Tip: Whatever you do, never reverse the drill's direction while the brush is in the vent. Spinning it counter-clockwise can cause the rod sections to unscrew from each other. You'll end up with a brush head stuck deep inside the ductwork, turning a simple DIY job into a major headache.
Keep adding more rod sections as you push the brush deeper into the vent, cleaning the entire run from the inside out. You’ll be amazed (and probably a little horrified) by the sheer volume of lint that comes flying out.
Final Checks and Reassembly
Once you’ve run the brush through the entire length of the vent, head outside and check the exterior vent cap. Clear away any lint that's built up around it and make sure the little flap or louvers can open and close freely. A stuck-shut flap is just as bad as a clog inside the pipe, so don't skip this last look. If you want to dive deeper into the risks, you can learn more about what happens when your dryer vent is blocked in our detailed post.
Back inside, it’s time to put everything back together. Reconnect the transition duct to both the wall and the dryer, making sure you get those clamps nice and tight to prevent any air leaks. Carefully slide the dryer back into its spot, being mindful not to crush or kink the duct you just reattached.
The last step is the test run. Plug the dryer back in and, if you have one, turn the gas supply back on. Run the dryer for a few minutes on an air-dry or low-heat setting (no clothes needed). Go back outside and put your hand in front of the vent. You should feel a strong, steady stream of air. That's the feeling of a job well done.
Smart Maintenance to Prevent Future Clogs
Now that you've put in the work to clear out your dryer vent, the last thing you want is for it to clog right back up. The goal now shifts from cleaning to prevention.
Smart, proactive maintenance isn’t about adding a bunch of new chores to your list. It’s about building a few simple habits that will dramatically extend the time between deep cleans and keep your dryer running efficiently day in and day out.
The single most powerful habit you can adopt is cleaning the lint screen after every single load. Seriously, don't wait until it looks like a gray felt blanket. Even a nearly invisible layer of lint can restrict airflow, making your dryer work harder and forcing more of those tiny particles down into the vent duct.
This one simple task, which takes all of two seconds, has a massive impact. Think of the lint screen as the first line of defense; keeping it totally clear is fundamental to stopping bigger blockages from ever forming.
Optimizing Your Ductwork for Better Airflow
Beyond the daily lint check, the physical layout of your ductwork plays a surprisingly large role in preventing clogs. Lint just loves to collect in places where airflow slows down or gets turbulent. This is exactly why you need to inspect the duct behind your dryer every so often.
Pull the machine out and look for any sharp 90-degree bends or sections that have been squashed flat against the wall. These create choke points, perfect little pockets for lint to snag and build up. Whenever you can, try to smooth out those turns into more gradual curves to give the air a clearer escape path.
If your home still has one of those flexible white vinyl or foil ducts, upgrading it is one of the smartest safety improvements you can make. Those materials are notorious for kinking, trapping lint, and, worst of all, they're flammable. Switching to a rigid or semi-rigid metal duct gives you a smooth, sturdy pathway that dramatically cuts down on future clog risks.
Routine maintenance is about more than just avoiding blockages. A clear vent directly translates to lower energy bills because your dryer doesn't have to run as long to get clothes dry. That efficiency boost also extends the life of the appliance itself, saving you from expensive repair calls or a premature replacement.
There's a good reason why proactive maintenance is becoming more common. The global market for dryer vent cleaning services is expected to hit nearly $2.5 billion by 2025. This isn't just a random trend; it’s a reflection of homeowners realizing that clogged vents can inflate energy use by 15-30%. With today's utility prices, that's a significant hit to the wallet. A professional cleaning can restore that peak airflow, often cutting drying times by 20-40%.
Creating a Sustainable Maintenance Routine
A little planning goes a long way. When it comes to your dryer vent, consistency is way more effective than one massive cleaning effort every few years.
Here’s a simple schedule you can follow:
Monthly Check: Once a month, take a quick peek behind the dryer. Just make sure the duct is still securely connected and hasn't been accidentally crushed.
Quarterly Inspection: Every three months, pop outside and check the exterior vent flap. Clear away any leaves, nests, or debris and make sure the flap opens and closes freely.
Annual Deep Clean: At least once a year, it's time to do the full cleaning process we walked through earlier. If you have a big family, pets that shed a lot, or do a ton of laundry, you might want to do this every six months.
By working these quick checks into your regular home care, you shift from reacting to problems to proactively preventing them. For a little more structure, you can grab our easy-to-follow preventive maintenance schedule template to help you stay on track. A few minutes of effort here and there ensures your dryer runs safely and efficiently all year long.
Knowing When to Call in a Professional
Doing it yourself is a great way to handle routine maintenance, but it’s just as important to know when a clog is beyond the reach of a DIY kit. There are certain jobs where you simply need to bring in a professional with the right tools and experience. Your home's safety depends on it.
The decision often boils down to how your vent system is built. If you've got a really long dryer vent, anything stretching more than 25 feet from the laundry room to the outside wall, your standard rotary brush probably won't cut it. It just doesn't have the length or the backbone to get the job done right. The same goes for vents with a bunch of sharp turns and funky angles; consumer-grade tools can easily get stuck or miss huge chunks of lint buildup in those tricky spots.
Red Flags That Demand an Expert
Sometimes, the signs are impossible to ignore. If you run into any of these issues, it's time to put down the tools and call for backup.
You Cleaned, but Nothing Changed: If you’ve given it your best shot and your dryer still takes forever to dry a load or feels dangerously hot, you're likely dealing with a deep, compacted clog that your equipment can't reach.
You Suspect Unwanted Guests: Dryer vents are a five-star hotel for birds and rodents looking for a warm, safe place to build a nest. If you spot twigs, droppings, or other signs of animal activity near the exterior vent, call a professional. They know how to safely remove nests and any biohazards left behind.
You Find Damaged Ductwork: During your inspection, you might find that the vent line inside your wall is crushed, kinked, or has come apart. This is a major fire hazard and needs professional repair, period.
Calling a professional isn't admitting defeat, it's making the smart, safe choice. Experts have specialized gear you just can't buy at the local hardware store, and they can guarantee a level of clean that restores your dryer's efficiency and gives you total peace of mind.
Professionals use tools like high-pressure air whips and tiny video inspection cameras that can snake through the entire vent line. This tech lets them see exactly what they're up against, confirm that every last bit of the blockage is gone, and spot hidden damage you’d otherwise miss.
There's a reason the professional dryer vent cleaning market is projected to hit $497.6 million globally by 2025. In the U.S., where 46% of people report high maintenance costs on older appliances, professional service is a no-brainer. A clogged vent can increase your energy bill by 25% and slash your dryer's lifespan by 30%, making a professional cleaning a wise investment. You can read the full research on these market trends to see the bigger picture.
When you’re up against a stubborn clog, calling a trusted local service like Purified Air Duct Cleaning is your best bet. Our technicians have the experience and high-end equipment to handle even the most difficult blockages, keeping your home safe and your dryer running like new. For more on this, check out our guide on how to protect your home with professional dryer vent cleaning services.
Your Dryer Vent Questions, Answered
Even after walking through the steps, you might still have a few questions lingering. That's completely normal. Let's tackle some of the most common things homeowners ask us about dryer vent cleaning to make sure you're feeling confident.
I get asked about cleaning frequency all the time. It's probably the biggest point of confusion, and getting it right is the key to preventing problems before they even start.
How Often Should I Really Clean My Dryer Vent?
For most families, a deep clean once a year is a great baseline. But this is definitely not a one-size-fits-all rule.
If you have a large family doing laundry constantly, or pets that shed a ton, you'll want to be more proactive. In those cases, checking the vent every six months is a much safer bet.
The best indicator is always the dryer itself. If your clothes are still damp after a full cycle, that's your vent screaming for help. Don't wait, clean it out right away to get your dryer running safely and efficiently again.
Can I Use a Leaf Blower for a Quick Clean?
I've heard this one a few times, and while it sounds like a clever hack, it's a really bad idea. Using a leaf blower can actually jam the lint tighter into the ductwork, turning a small clog into a major blockage.
Even worse, that powerful blast of air can easily disconnect the vent tubing hidden inside your walls. This creates a serious, hidden fire hazard where flammable lint and hot air can build up inside your wall cavity. It’s always better to use tools designed to pull lint out, not just blast it further down the line.
What Does Professional Dryer Vent Cleaning Cost?
On average, you can expect a professional service to cost somewhere between $100 and $200. The final price tag can shift based on where you live, how long and complicated your vent run is, and frankly, how packed with lint it is.
Try to think of it as a small investment in your home's safety and your wallet. That cost is easily offset by the fire prevention it provides, the money you save on electricity bills, and the extra years you'll get out of your dryer. Knowing how to clean a clogged dryer vent yourself is great, but knowing when to call in a pro is just as important.
For those really tough clogs, extra-long vents, or just for the peace of mind that the job is done right, don't hesitate to get professional help. The certified technicians at Purified Air Duct Cleaning have the specialized equipment to guarantee your dryer vent is 100% clear and safe. Protect your home and family by scheduling your service today.