How to Test Air Quality in Home A Practical Guide
- Jul 30, 2025
- 15 min read
Updated: Aug 8, 2025
When it comes to checking the air quality in your home, you've got three solid options: DIY test kits for specific worries like mold or radon, electronic smart monitors for continuous, real-time data, or calling in a professional service for a comprehensive analysis. The right choice really boils down to your specific concerns, your budget, and how deep you want to go.
Why Your Home's Air Quality Is So Important
It's a surprising fact for many homeowners, but the air inside your home can often be far more polluted than the air outside. Everyday items and activities can create a cocktail of invisible threats, lurking right where you should feel safest. Pinpointing these potential issues is the first, most crucial step toward creating a healthier home for your family.
Where do these pollutants come from? Think about that new furniture or carpet you just installed, or the fresh coat of paint on the walls. These can release volatile organic compounds (VOCs) for weeks, sometimes even months. Even routine things like using household cleaners, aerosol sprays, or cooking can pump chemicals and fine particles into the air you breathe.
Common Health Concerns from Poor Air
The effects of these pollutants aren't just theoretical; they show up as real-world health problems. If you or someone in your family has persistent allergies, asthma, or other respiratory issues that always seem to get worse indoors, poor air quality could be a major culprit.
Let's look at some of the usual suspects behind these health complaints:
Dust and Pet Dander: These are the classic allergens that love to hide in carpets, furniture, and especially inside your air ducts.
Mold Spores: Thriving in damp spots like basements and bathrooms, mold can trigger some nasty allergic reactions and respiratory irritation.
VOCs: These chemical gases can be behind everything from headaches and dizziness to more serious long-term health concerns.
Before we get into the nitty-gritty of testing, it's helpful to know exactly what you might be looking for. Here’s a quick rundown of the most common troublemakers we find in homes.
Common Indoor Air Pollutants and Their Sources
Pollutant Type | Common Sources | Potential Health Effects |
|---|---|---|
Volatile Organic Compounds (VOCs) | Paint, new furniture, cleaning products, air fresheners, flooring | Headaches, nausea, dizziness, long-term organ damage |
Mold & Mildew | Damp basements, leaky pipes, bathrooms, poorly ventilated areas | Allergic reactions, asthma attacks, respiratory infections |
Particulate Matter (PM2.5) | Cooking, burning candles, fireplaces, smoking, outdoor pollution | Lung irritation, cardiovascular problems, worsened asthma |
Carbon Monoxide (CO) | Malfunctioning furnaces, gas stoves, water heaters, attached garages | Fatigue, confusion, dizziness, and can be fatal at high levels |
Radon | Natural decay of uranium in soil, rock, and water; seeps in through foundation cracks | Increased risk of lung cancer (leading cause for non-smokers) |
Dust Mites & Pet Dander | Bedding, carpets, upholstered furniture, pets | Allergic reactions, sneezing, itchy eyes, asthma symptoms |
Knowing these sources and their effects can give you a better idea of what might be going on in your own home and help you choose the right testing method.
The connection between these pollutants and health is why learning how to test air quality in home is so crucial. It’s not just about finding problems; it’s about gaining peace of mind and taking control of your family's well-being.
The science behind indoor air quality testing has come a long way. Researchers now use sophisticated, data-driven statistical models to get a much more accurate picture of pollutant levels than old-school spot checks ever could. This modern approach gives us a better handle on the real risks in occupied homes, as detailed in this research on predictive modeling. This shift toward continuous, data-informed management is key to creating truly healthy indoor spaces.
For those of you dealing with constant sniffles and sneezes, you might want to check out our guide on how to improve air quality with air duct cleaning for allergies.
Choosing the Right Air Quality Testing Method
Figuring out how to test the air quality in your home isn't a one-size-fits-all situation. The right path really depends on what you're worried about, what your budget looks like, and how deep you need to dive into the data. Your goal will guide your choice, whether you're just trying to pin down a single suspected pollutant or you want a continuous, big-picture view of your indoor environment.
There are three main ways to go: DIY single-use kits, continuous smart monitors, and hiring professional indoor air quality (IAQ) services. Each one shines in different scenarios. For instance, a simple and affordable DIY radon kit is a smart move for just about any homeowner, given how widespread and serious that risk is. But if you want ongoing peace of mind, a smart monitor gives you powerful, real-time data on things like particulate matter (PM2.5) and VOCs.
Professional testing is the heavy-hitter, best saved for when you're dealing with persistent health issues, checking on the aftermath of a mold or water damage cleanup, or need certified proof for something like a real estate deal. You can find more on this in our complete guide to a home air quality test.
DIY Kits Versus Smart Monitors
Your first big decision is choosing between a one-time test and a device that's always on. Think of it this way: a DIY kit is like taking a single snapshot of your air, while a smart monitor is like having a live video feed.
DIY Single-Use Kits: These are designed to sniff out one specific pollutant, like mold, radon, or lead. They’re great for targeted concerns and are very cost-effective, but they only give you a picture of what was happening during that specific testing window.
Continuous Smart Monitors: These are electronic gadgets that keep an eye on multiple pollutants 24/7, including things like PM2.5, VOCs, CO2, temperature, and humidity. They give you a much more dynamic understanding of how everyday life, from cooking dinner to using cleaning sprays, affects your air.
This image shows just how seamlessly a modern monitor can fit into your home, working in the background to keep you informed.
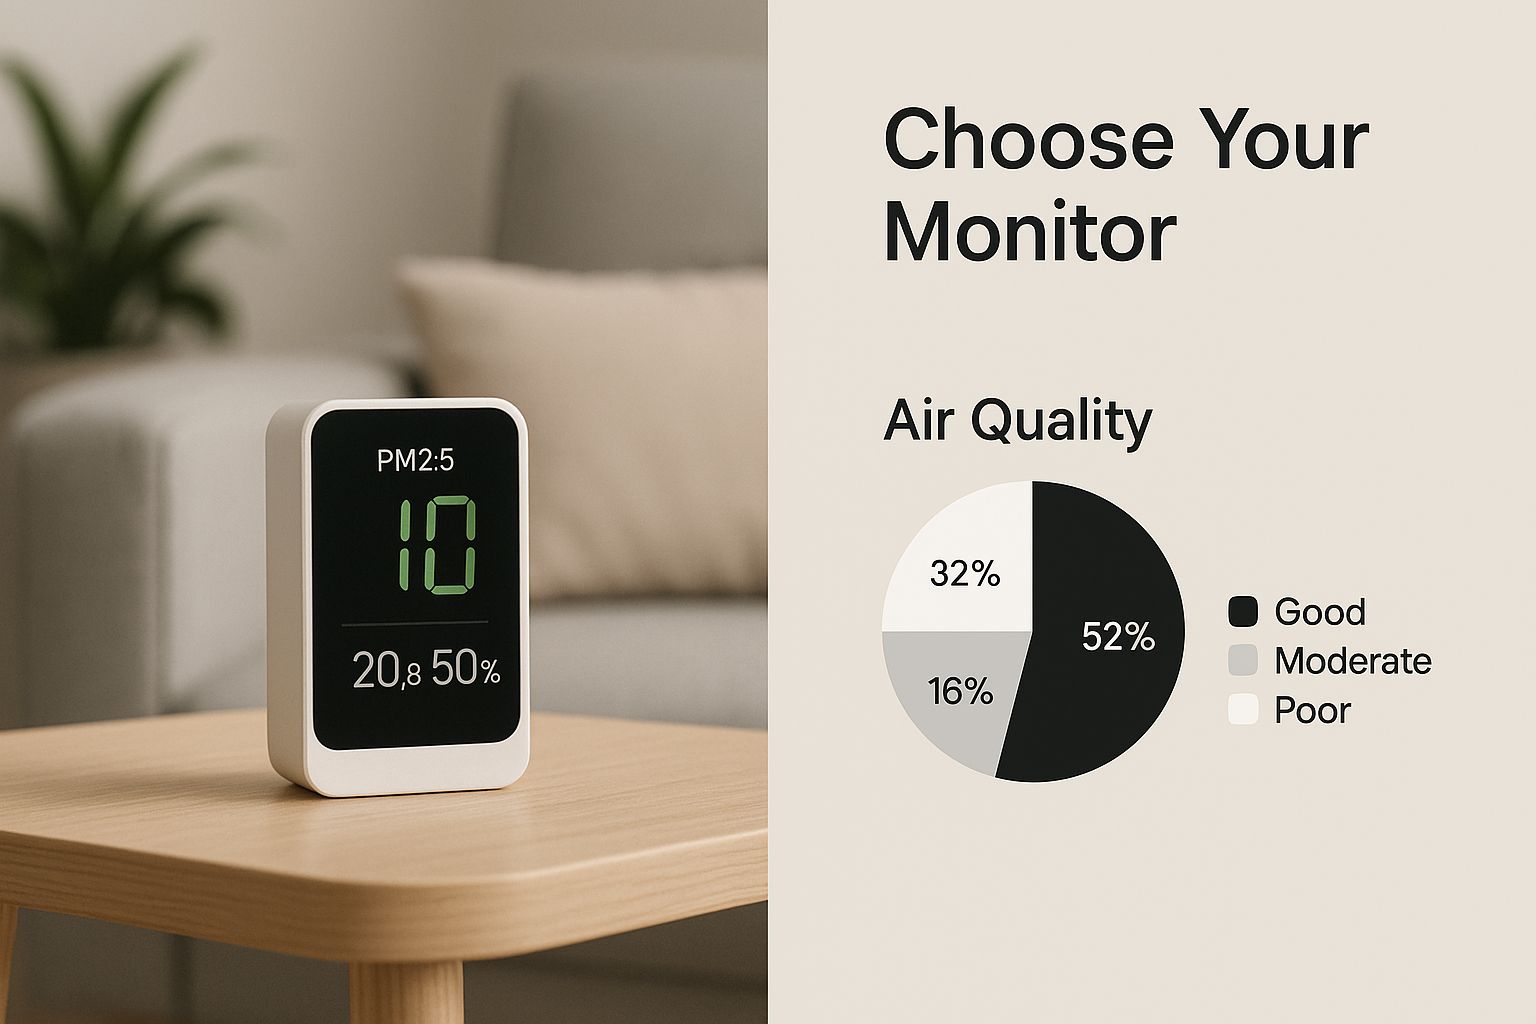
As you can see, these devices are designed to blend into your living space, providing constant data without being an eyesore.
To help you decide which route is best for your situation, let's break down the options side-by-side.
Comparison of Home Air Quality Testing Methods
This table compares the three main testing methods to give you a clearer picture of their strengths and weaknesses.
Testing Method | Best For | Typical Cost | Pollutants Detected | Pros & Cons |
|---|---|---|---|---|
DIY Single-Use Kits | Homeowners with a specific concern (e.g., radon, mold). | $10 - $100 | A single pollutant per kit (Radon, Mold, VOCs, Lead, etc.). | Pro: Very affordable, easy to use. Con: One-time snapshot, can have user error. |
Smart Monitors | Getting a continuous, real-time overview of general air quality. | $100 - $300+ | Multiple pollutants (PM2.5, VOCs, CO2, humidity, temp). | Pro: 24/7 data, identifies patterns. Con: Higher initial cost, not for specific toxins like lead or asbestos. |
Professional Services | Complex issues, unexplained health symptoms, or post-remediation verification. | $300 - $1,000+ | Comprehensive, tailored to concerns (e.g., specific molds, VOCs). | Pro: Highly accurate, certified results, expert recommendations. Con: Most expensive option. |
Ultimately, the best choice depends on balancing your need for detailed information with your budget. For many, starting with a DIY kit or a smart monitor is the most practical first step.
The Importance of Certified Accuracy
As smart monitors got more popular, a new problem popped up: how do you know if you can trust the numbers? Thankfully, the industry has stepped up. Since 2018, organizations have been creating formal protocols to make sure these sensors are actually accurate.
For example, ASTM International officially approved a standard test method for PM2.5 sensors in 2021. This means there's now a consistent, repeatable way to assess their performance. This push for certification is a huge win for homeowners, helping you pick a device with confidence. You can read more about these official ASTM test standards for air quality sensors.
When to Call the Professionals
DIY methods are fantastic tools, but they do have their limits. When you're up against something complex or potentially serious, professional testing is the only way to get definitive answers.
It’s time to call in a certified IAQ professional if:
You're dealing with persistent, unexplained health symptoms that seem to get better when you leave the house.
You suspect a hidden mold problem, like that musty smell you can’t track down.
You need official documentation after a major event like a flood, fire, or big renovation project.
You've had a radon mitigation system installed and need to confirm it’s actually working correctly.
A pro doesn't just show up with a consumer-grade gadget. They use specialized, calibrated equipment that provides a level of detail far beyond what you can get on your own. This gives you a precise diagnosis and, more importantly, a clear, actionable plan to fix the problem for good.
How to Get Accurate DIY Test Results
If you've opted for a DIY test kit or an electronic monitor, your technique is just as important as the device itself. Getting trustworthy data isn't as simple as just turning it on. Where you place it, when you test, and what's happening in your home can all dramatically affect the readings.
Think of it like taking a photo; you have to frame the shot correctly to capture what you actually want to see. The same logic applies here. Proper methods are essential if you want a reliable assessment of your home's air.
Strategic Placement for Reliable Readings
Where you put your testing device is arguably the most critical factor in getting a useful reading. After all, you want to measure the air you and your family are actually breathing.
This means placing your kit or monitor at breathing height, which for most people is about three to five feet off the floor. Setting it on a side table or a bookshelf in a high-traffic area like the living room or a bedroom is perfect. Just be sure to avoid putting it directly in a corner, right next to an open window, or near an air vent. Those spots can give you skewed, unrepresentative data.
A common mistake we see is people placing monitors on the floor or way up high on a shelf. Placing the device at breathing height ensures you're capturing pollutant levels most relevant to what your family is inhaling.
The duration of the test also matters quite a bit. Running a test for at least one hour helps smooth out any short-term fluctuations and gives you a much more representative sample of your home’s air. This scientific approach, from proper sample collection to data interpretation, is what allows homeowners to effectively pinpoint pollution sources. You can learn more about the best practices for indoor air quality monitoring techniques on ohsonline.com.
Avoiding Common Testing Mistakes
Timing your test is just as critical as placement. Certain everyday activities can create temporary pollution spikes that will throw off your results, making your air seem much worse than it actually is.
To get a true baseline reading of your home's air, try to avoid testing during or immediately after these events:
Cooking a big meal, especially if you're frying or broiling, which releases a lot of particulate matter.
Using strong cleaning products or aerosol sprays like air fresheners, which can cause VOC levels to skyrocket.
Running a vacuum cleaner that kicks up a lot of dust (unless you're specifically testing your filter's effectiveness).
Having just painted a room or installed new furniture, as off-gassing will be at its peak.
Let's say you're concerned about everyday VOC levels in a newly painted nursery. Wait a few days for that initial heavy off-gassing to subside before you start monitoring. This will give you a more accurate picture of the long-term air quality in that room. Similarly, if your main worry is potential mold in a musty basement, make sure the area is closed off as it normally would be, rather than airing it out right before you test.
Ultimately, accurate testing comes down to controlling the variables you can. By being mindful of placement, timing, and household activities, you can be much more confident in the data you collect. Of course, the cleanliness of your home's ventilation system plays a huge role in your baseline air quality. For those looking to take the next step, our guide on how to clean air ducts at home provides an easy-to-follow DIY approach.
Making Sense of Your Air Quality Report
Getting an air quality report back can feel a bit like trying to read a foreign language. You’re staring at a screen full of acronyms and numbers, and it’s all just data; it doesn’t become useful information until you know what it all means.
The most important part of testing your home's air is learning how to translate that data into a clear picture of your home’s health. Once you get a handle on the key metrics, you can turn those confusing numbers into a real, concrete action plan for a healthier home. This is where you connect the dots between the test results and practical solutions.
Decoding Key Air Quality Metrics
Whether your report comes from a professional service or a smart monitor you set up yourself, it will likely zero in on a few key pollutants. Let's break down the most common ones you'll see and what the numbers actually signify.
PM2.5 (Particulate Matter): These are incredibly tiny, inhalable particles that are smaller than 2.5 micrometers. They usually come from things like cooking, smoke, or even just dust. The World Health Organization (WHO) recommends keeping the long-term average below 5 µg/m³ (micrograms per cubic meter). If your levels are consistently high, it’s a major red flag.
VOCs (Volatile Organic Compounds): Think of these as chemical gases that off-gas from everyday items like paint, new furniture, and cleaning products. Your report will likely show a Total VOC (TVOC) level. A good goal is to stay under 500 µg/m³. If you see numbers climbing over 1,000 µg/m³, it’s a strong sign that you have a significant pollution source that needs to be found and dealt with.
CO2 (Carbon Dioxide): This is simply what we exhale. High CO2 isn't necessarily toxic, but levels above 1,000 ppm (parts per million) are a dead giveaway for poor ventilation. It’s a clear sign that stale, occupant-generated air isn't being swapped out with fresh air.
Understanding these benchmarks is what gives you the power to really assess your results. A PM2.5 reading of 25 µg/m³ isn't just a number; it's a clear signal that you have a particle pollution problem that needs to be addressed.
Key Takeaway: Think of your air quality report as a health checkup for your home. Don't just glance at the numbers. Compare them against established safety guidelines from organizations like the EPA and WHO to truly understand your home's risk level.
From Data to Actionable Solutions
The true power of testing lies in using the results to make smart, targeted improvements. Your report is essentially a roadmap that points you directly to the right solutions. No more guessing, now you can act with precision.
For instance, if your results show high PM2.5 levels, your first moves are pretty straightforward:
Upgrade your HVAC filter to one with a higher MERV (Minimum Efficiency Reporting Value) rating. A MERV 11 or 13 will do a much better job of capturing those fine particles.
Invest in a portable HEPA air purifier for the rooms you use most, like your bedroom and living room.
Be more mindful when cooking. Always use your range hood to vent smoke and particles outside where they belong.
On the other hand, if high VOCs are your issue, the playbook changes. This points to a chemical source, not just physical particles. Your focus should be on increasing ventilation by opening windows more often and playing detective to find the source. It could be anything from a new area rug to the strong cleaners you used last week.
Likewise, if your report comes back with high mold spore counts, your attention needs to shift to moisture control and hunting down hidden water leaks. If you start noticing the tell-tale signs of mold growth, it's a good idea to check out our guide on recognizing the symptoms of mold in your air ducts.
Every result has a matching action plan, empowering you to fix the root cause of your air quality issue.
When You Should Call an Air Quality Professional
DIY kits and home monitors are fantastic tools for getting a baseline read on your home's air. I use them myself for quick checks. But let's be clear: they have their limits. There are times when getting definitive answers and truly protecting your family means bringing in a certified air quality professional. Knowing when to make that call is a huge part of learning how to test air quality in your home the right way.

Sometimes, the problem is just too complex for a consumer-grade device to figure out. A pro doesn’t just measure the air; they become a detective, investigating your entire home's ecosystem to pinpoint the root cause. It's a level of detail and certainty that DIY methods simply can't deliver.
Clear Signs It Is Time for an Expert
If any of these scenarios sound familiar, it’s a strong signal to move beyond DIY testing and get a professional on the line. These situations often involve hidden or serious pollutants that need specialized gear and an expert eye to properly identify and fix.
You should consider calling a professional if you're dealing with:
Persistent Health Symptoms: Your family has ongoing allergies, respiratory issues, or headaches that magically seem to get better when you leave the house. That's a classic sign of an indoor environmental problem.
Suspected Hidden Mold: You smell that unmistakable musty, earthy odor, but you can't see any mold anywhere. Pros have tools like moisture meters and thermal imaging cameras to find hidden moisture sources behind walls where mold thrives.
Post-Remediation Verification: After a major event like a flood, fire, or professional mold removal, you need proof that the cleanup was done right and the air is safe again.
Real Estate Transactions: It’s becoming more common for buyers and sellers to want certified proof of a home’s air quality to ensure there are no surprises before closing the deal.
For a deeper dive into what might be causing these issues, you can learn more about how to tell if your home or business has poor indoor air quality in our related article.
What a Professional Assessment Involves
A professional air quality assessment is a whole different ballgame from setting a monitor on your coffee table. Certified inspectors show up with calibrated, lab-grade equipment to conduct a thorough investigation, giving you a complete picture of your indoor environment.
A professional report doesn't just give you numbers; it provides context, identifies specific pollutant sources, and delivers a clear, actionable plan for remediation. This expert guidance is what truly resolves serious air quality problems.
The process usually starts with a visual inspection of your home and HVAC system. Then, they'll take surface and air samples to test for specific contaminants and measure for a wide range of pollutants. After the on-site visit, these samples head to an accredited lab for a detailed analysis.
The final report you get will break down all the findings, compare them to established safety standards, and give you expert recommendations to fix any problems they found. This comprehensive approach gives you the confidence you need to tackle any issue head-on.
Common Questions About Home Air Quality Testing
Even after you get a handle on the testing methods and how to read the reports, some practical questions always seem to pop up. It's totally normal. Getting clear answers to these common queries will help you move forward with confidence, making sure you get the most out of your time and money.
We get these questions from homeowners all the time, so let's break them down with some straightforward answers to clear up any confusion.
How Often Should I Test My Air Quality?
This is a great question, but the honest answer is: it depends. There’s no one-size-fits-all rule, but I can give you some solid guidelines based on our experience to help you figure out a smart schedule for your home.
For starters, I always recommend an initial baseline test. You have to know your starting point. After that, a good rule of thumb is to re-test after any major event or change in your home's environment.
Think about testing again after things like:
A big renovation or even just a painting project that introduces new materials and chemicals.
Bringing home a new baby or if a family member with asthma or other sensitivities moves in.
You've had to fix a water leak or deal with any kind of flooding.
When it comes to specific high-risk pollutants like radon, which can fluctuate, doing an annual test is a smart move. Of course, a continuous electronic monitor is even better because it gives you a constant pulse on your home's air.
Can I Trust Cheap Air Quality Monitors?
This is a classic "you get what you pay for" situation. A super budget-friendly monitor can be a good entry point to simply become more aware of your air quality, but you have to know its limitations.
Cheaper monitors are often great for spotting big-picture trends, like seeing a spike in particles when you're searing a steak on the stove. But they almost always lack the high-precision sensors and third-party validation you’ll find in more expensive models. For example, they might not have official certifications based on ASTM standards, which are a key indicator of a sensor's accuracy.
Before you pull the trigger on any monitor, always check the sensor specifications. Dig into independent reviews to get a real sense of its reliability.
What Should I Do If My Test Results Are Bad?
Seeing a poor test result can be jarring, but try to see it as a good thing. You’ve successfully uncovered a problem you can now fix. If your DIY kit or monitor flashes a warning, don't panic. Start with the basics to get some immediate improvement.
Your very first move should be to increase ventilation. Seriously, just open the windows and doors. Letting fresh air in and pushing polluted air out can dramatically lower the concentration of many pollutants right away.
Next, focus on these simple, actionable steps:
Play Detective and Find the Source: If your VOCs are high, did you just use a heavy-duty cleaner? If particle counts are up, did you forget to turn on the kitchen vent while cooking?
Upgrade Your HVAC Filter: Swap out that basic filter for one with a higher MERV rating. A MERV 11 or 13 can capture a whole lot more of those tiny airborne particles.
Bring in an Air Purifier: A portable HEPA air purifier is your best friend here. Place one in the rooms you use most, like the bedroom and living room, to get continuous filtration.
Taking these initial steps can make a huge difference while you figure out any larger, long-term solutions that might be needed.
If you've found issues with your home's air or just want the peace of mind that comes from a professionally cleaned ventilation system, the team at Purified Air Duct Cleaning is here to help. Our certified technicians can make sure your ductwork isn't part of the problem. Learn more about our services and get a free quote today.