

AC Not Blowing Cold Air? Causes and Fixes That Work
The indoor fan is running, the thermostat is set comfortably low, and you're standing under a vent wondering why the house keeps getting warmer. Turning the temperature down again won't help if the equipment isn't removing heat.
An AC not blowing cold air needs a diagnosis before it needs refrigerant. Start by separating the symptoms into airflow, refrigerant, or electrical and control problems, then work through the safe checks before paying for a repair.
Match the Symptom to the Likely Cause
Symptoms, likely causes and first checks
Symptom | Likely cause | First check |
|---|---|---|
Warm air from vents, fan runs | Thermostat set to fan or setpoint too high | Mode set to cool and setpoint below room temperature |
Cool but not cold air, weak airflow | Dirty filter or blocked return grille | Filter condition and airflow at each supply vent |
Ice on indoor coil or refrigerant line | Low airflow, or low refrigerant after airflow is ruled out | Filter, then indoor blower operation |
Outdoor unit silent or not running | Tripped breaker, disconnect or control fault | Breaker panel and outdoor disconnect switch |
Outdoor unit running, supply air still warm | Blocked condenser, refrigerant leak or compressor fault | Debris around the outdoor coil, then technician |
Water dripping at indoor unit | Clogged condensate drain | Drain line and drain pan for standing water |
Treat this table as a starting point, not a parts diagnosis. A spinning outdoor fan doesn't prove the compressor is working, and air moving through the house doesn't prove the thermostat is calling for cooling. Likewise, water near the air handler may come from a blocked drain or melting ice, so look for both.
Restricted airflow deserves an early check because it's accessible and can imitate a more expensive failure. ENERGY STAR's heating and cooling guide states that inadequate airflow can reduce cooling-system efficiency by up to 15%. A loaded filter, dirty blower wheel, fouled evaporator coil, or obstructed duct can reduce the air crossing the indoor coil.
Separate air movement from heat removal
The indoor blower pushes household air across the evaporator coil, where the system absorbs heat. If too little air passes over that coil, cooling delivery falls even though you can hear the equipment running. Lowering the thermostat won't remove the restriction.
Compare the symptoms throughout the house. Weak air at every supply suggests a shared restriction or blower problem; a weak branch with otherwise strong airflow warrants closer attention to that duct. Strong airflow that stays warm points toward a different investigation, including outdoor heat rejection, controls, compressor operation, and refrigerant performance.
Practical rule: Check what the air is doing before deciding what the refrigerant is doing.
Ice makes this distinction especially important. It can occur with an airflow defect or a refrigerant fault, so a frosted copper line isn't permission to order a recharge. This guide to why AC coils freeze and how to fix them explains the overlapping symptoms and why thawing alone doesn't establish the cause.
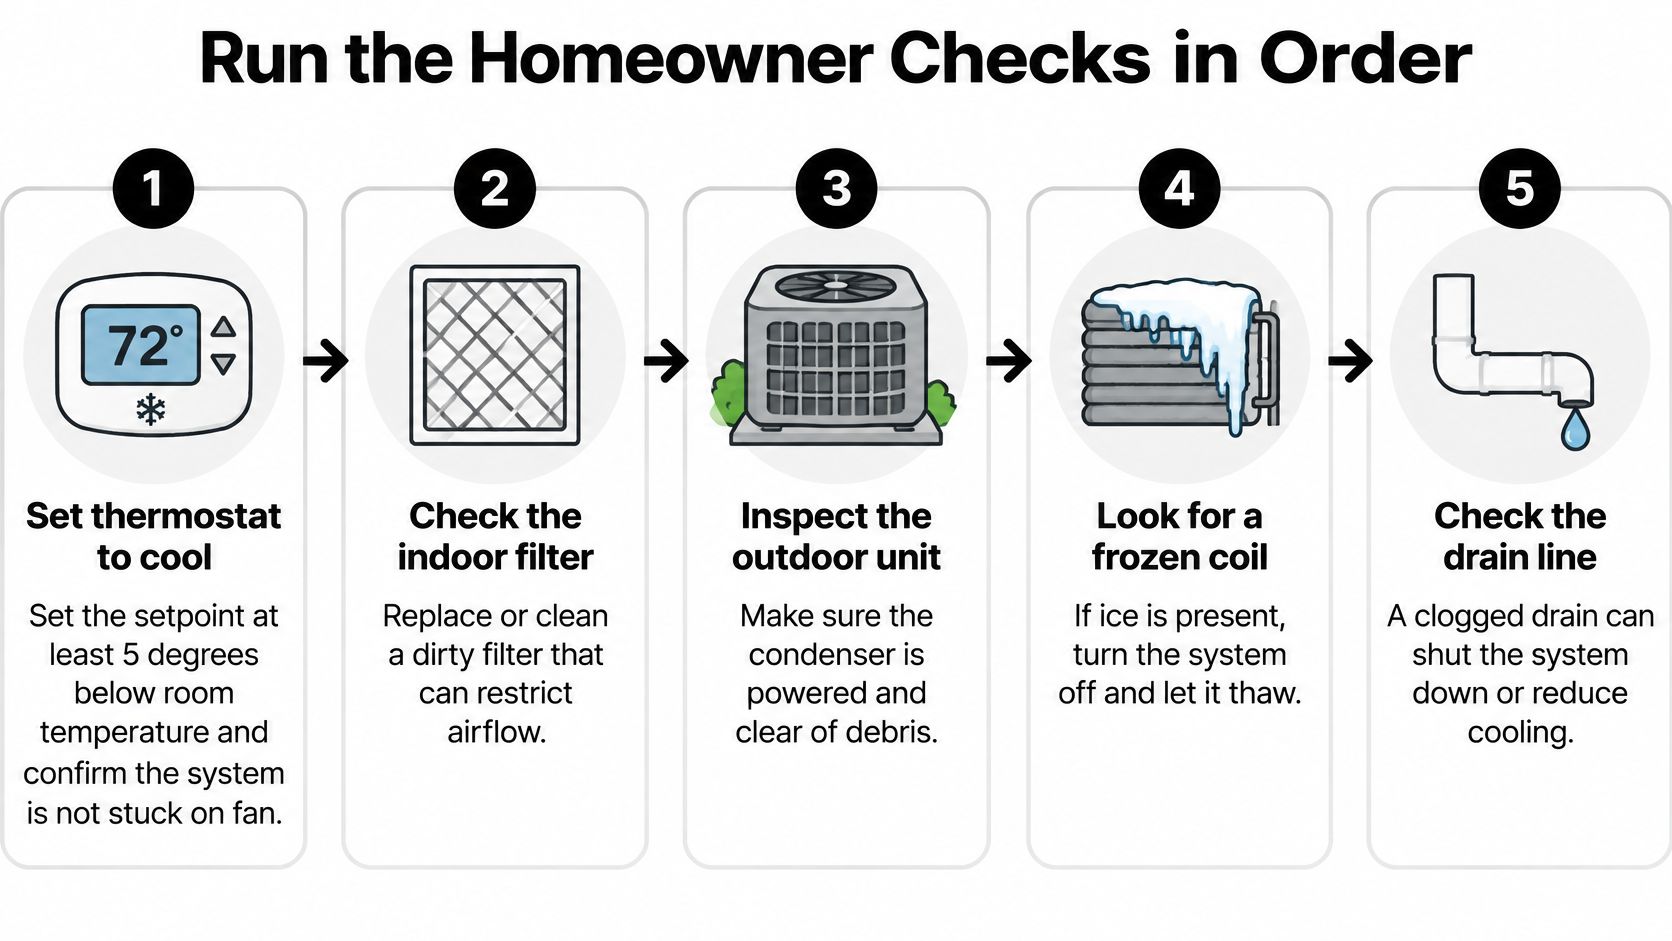
Run the Homeowner Checks in Order
Work from settings and accessible components toward observations that a technician can use. Don't remove electrical covers, reach through a condenser grille, or open the refrigerant circuit.
Set the thermostat to cool. For a clear test call, set the target at least 5 degrees below room temperature, and select auto rather than continuous fan operation. That separates actual cooling demand from the blower circulating room-temperature air.
Inspect the indoor filter. Switch the system off, remove the filter, and check for packed dust, damage, or a collapsed surface; holding it toward a light can help reveal loading, though dense filters aren't necessarily transparent. Match the replacement's dimensions to the filter rack and point its airflow arrow toward the blower, because size and orientation are separate requirements.
Clear supply and return openings. Move furniture, rugs, and stored items away from grilles, and open supply registers. A blocked return prevents air from reaching the equipment, while obstructed supplies limit delivery to rooms.
Confirm indoor blower operation. Restore operation and listen for the blower while checking whether air moves firmly from the supplies. If the blower is silent, struggles to start, or delivers little air with a clean filter, stop short of motor or wiring work.
Observe the outdoor condenser. Check whether its fan operates during a cooling call and whether leaves or other debris block the coil. If the fan doesn't turn, turn cooling off and switch off the outdoor disconnect only if it's safely accessible and you know how to operate it; don't open its enclosure or attempt to spin the fan.
Look for visible ice. Inspect accessible copper tubing and the exterior of the indoor coil cabinet without removing service panels. If frost is present, turn cooling off, protect the surrounding area from meltwater, and let the system thaw completely before retesting after an obvious airflow correction.
Check the condensate drain. Look for standing water in the accessible pan, a visibly blocked outlet, or water escaping around the cabinet. Clear only an accessible blockage using the equipment's approved procedure, and never bypass a drain safety switch.
Know what these checks can establish
Weak airflow directs attention toward the filter, blower, coil, or ductwork. Normal airflow with warm supply air directs attention toward the condenser, controls, compressor, or refrigerant circuit. Neither observation identifies a failed component by itself.
If dirt is visible around an accessible coil, review safe AC coil-cleaning methods before attempting anything. Delicate fins, cleaning chemicals, electrical components, and limited access make some cleaning jobs unsuitable for homeowners.
The U.S. Department of Energy's airflow and charge guidance calls for temperature-split and airflow checks before detailed refrigeration testing. A clean result from your inspection doesn't prove the system is healthy. It means the next useful step is instrument testing, not further guesswork.
Why Adding Refrigerant Rarely Fixes It
Warm air doesn't automatically mean the system needs a quick refrigerant top-off. Adding refrigerant can restore capacity when a technician confirms an undercharge, but adding it without establishing the cause can leave the original problem unresolved or create an overcharge.
According to ENERGY STAR's cooling-system guidance, an incorrect refrigerant charge can reduce efficiency by up to 20% and contribute to premature component failure. Both too much and too little refrigerant can impair performance. More isn't better.
What a complete refrigerant repair includes
A technician should first establish that airflow and coil condition support valid refrigerant measurements. Charging a system while its evaporator is starved of air can produce misleading readings and an incorrect adjustment.
When a leak causes the shortage, the proper sequence is to locate the leak, repair it, test the repair, and restore the manufacturer-specified charge. Depending on the repair, the work may also require recovery and evacuation before charging. The final check should confirm cooling performance under the operating conditions, not merely that a pressure gauge moved.
A temporary recharge and a completed repair aren't equivalent purchases. If a quote proposes adding refrigerant without leak investigation, ask what evidence established an undercharge and what will prevent the same failure from returning.
Refrigerant isn't a routine consumable. A recurring need for it calls for an explanation, not a standing refill appointment.
Signs worth reporting, not diagnosing yourself
After accessible airflow checks are satisfactory, these observations help a technician decide where to investigate:
Persistent frost: Ice that returns with a clean filter and confirmed blower operation warrants professional testing, but still doesn't prove low charge.
Oily residue: Oil around a refrigerant fitting can mark a possible leak location. Photograph it without loosening the connection.
Unusual hissing: Report where the sound comes from and whether it continues after shutdown. Sound alone can't confirm a leak.
Long operation with little cooling: Tell the technician whether this started suddenly or deteriorated gradually, and whether airflow changed at the same time.
A clean filter doesn't rule out a dirty evaporator, incorrect blower speed, or a damaged duct. That's why the technician needs measured airflow rather than a homeowner's reasonable impression that the air feels strong.
Refrigerant handling belongs to certified service personnel. Don't attach a charging kit, mix refrigerants, or intentionally release refrigerant into the atmosphere. Those shortcuts can damage equipment and make the eventual diagnosis harder.
Call a Certified Technician at These Triggers
Stop troubleshooting when the next step requires gauges, electrical measurements, or access behind a service panel. Homeowner work should stay with filter replacement, accessible vent clearing, approved drain maintenance, and removing loose outdoor debris with power off.
Stop DIY work when these symptoms appear
Warm air persists: The filter is clean, returns are unobstructed, and the condenser is clear, but the supply air still isn't cooling.
Ice returns: The system has thawed completely and an obvious filter restriction has been corrected, yet frost develops again.
The outdoor unit stays silent: A cooling call doesn't start it, or a breaker trips again. Don't keep resetting a protective device.
A leak is suspected: Oily fittings or unusual hissing require investigation without touching refrigerant connections.
Airflow remains weak: Clear vents and a clean filter haven't restored delivery, which can indicate a blower, coil, or duct restriction.
Burning smells, sparking, or water near electrical components justify shutting the system down immediately if you can do so safely. Don't continue operating it merely to collect more symptoms.
What useful professional testing looks like
A technician should measure return-to-supply temperature split and total airflow, inspect coil condition, and investigate duct restrictions or leakage where indicated. Once airflow is verified, refrigerant-side testing can assess charge, operating temperatures, and component performance. Electrical diagnosis may be necessary when the thermostat calls for cooling but the equipment doesn't respond correctly.
The ENERGY STAR maintenance checklist identifies blower, coil, electrical, and refrigerant checks as important parts of equipment service. Ask for the diagnosis and the post-repair test results, rather than accepting vent temperature as the only evidence of success.
For confirmed coil contamination, our HVAC coil cleaning uses advanced techniques and specialized equipment to thoroughly clean the coils. We bring over 20 years of experience in the Indoor Air Quality, HVAC, and Duct Cleaning industries. Duct cleaning is generally recommended every 3 to 5 years, adjusted for ductwork age and condition, system type, and household allergies or respiratory problems, not automatically prescribed for every cooling complaint.
Before calling, photograph the model and serial labels, note the filter size, and write a short symptom timeline. Understanding what HVAC maintenance includes also helps distinguish routine care from fault diagnosis.
While arranging service, compare temporary options carefully. EcoQuest Purifiers' resource on portable cooling for home and office can help you review supplemental equipment, but check its cooling method and room suitability rather than assuming it can replace central air conditioning.
Equipment Age and Repair Versus Replacement
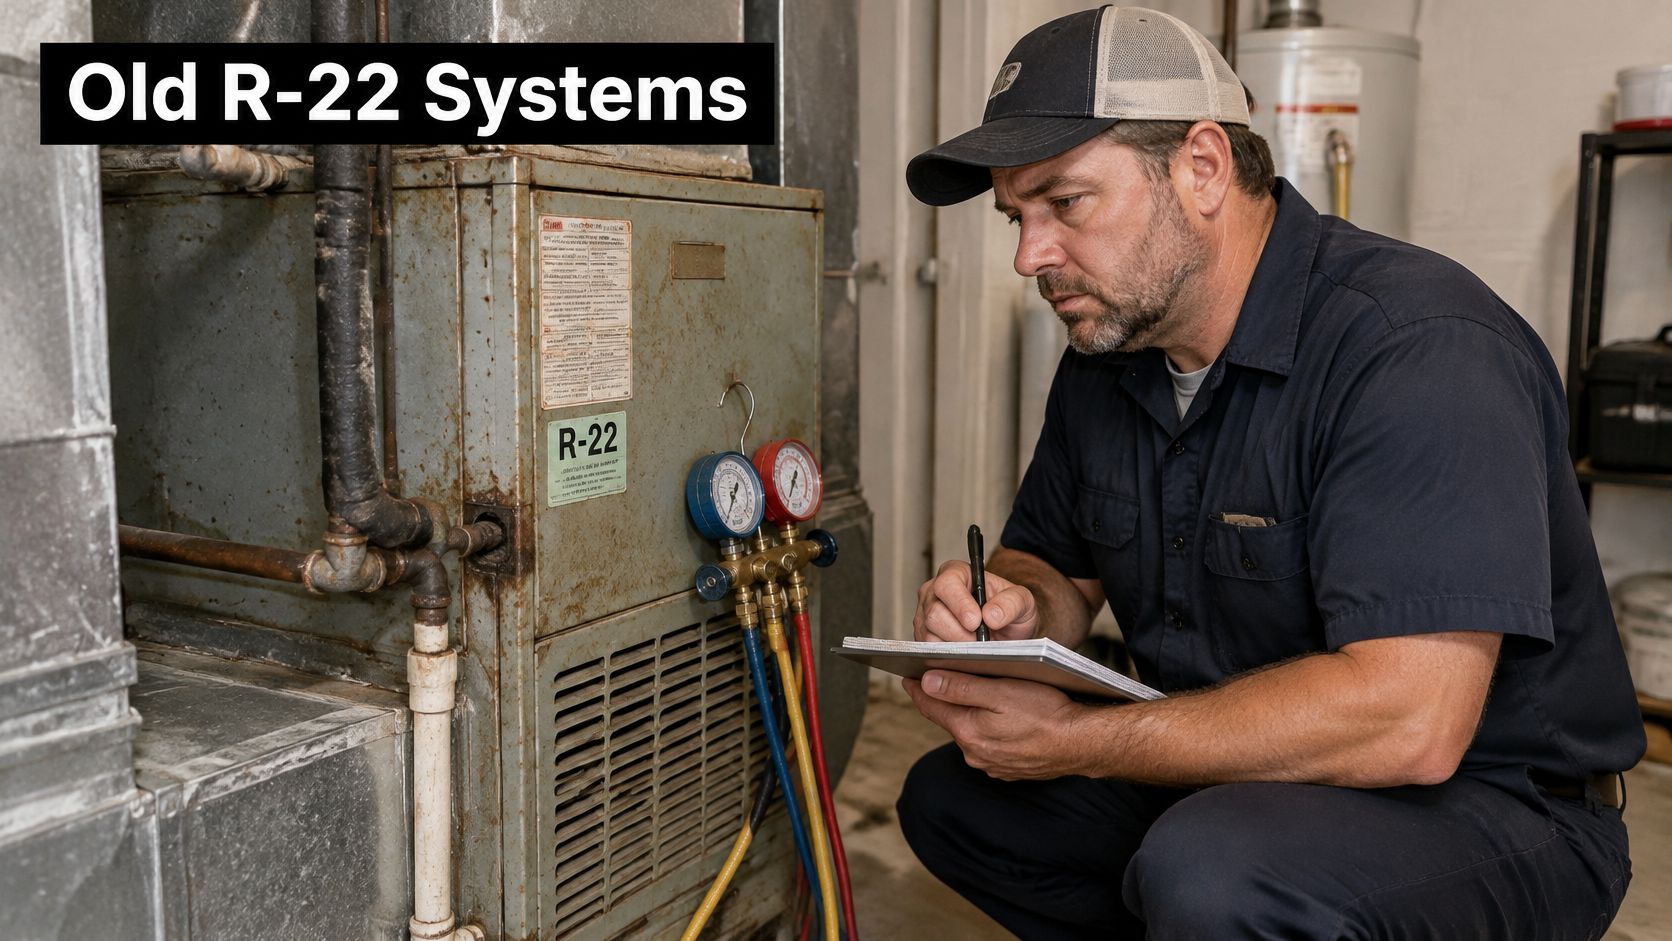
In the United States, production and import of new R-22 ended on January 1, 2020, according to the EPA's refrigerant phaseout guidance. Existing systems can still operate and be serviced using recycled, reclaimed, or previously produced refrigerant. The phaseout doesn't automatically make replacement necessary, but it changes the supply and compatibility questions behind a repair quote.
Refrigerant types and what they mean for repairs
Refrigerant | Status | Repair implication |
|---|---|---|
R-22 | New U.S. production and import have ended | Service relies on existing, recycled, or reclaimed supply; price and availability need confirmation |
R-410A | Common in existing equipment; not an approved retrofit for R-22 systems | Different pressures and a possibly incompatible indoor coil mean an outdoor-unit swap isn't a straightforward conversion |
R-454B or R-32 | Lower-GWP refrigerants used in newer equipment subject to transition requirements | Match the nameplate; confirm refrigerant and parts availability rather than substituting an older refrigerant |
The indoor equipment matters as much as the outdoor nameplate. R-410A isn't an approved retrofit for an R-22 system, and replacing the condenser alone doesn't establish that the coil, metering device, line set, and controls form a compatible installation. A replacement proposal should identify the matched equipment, not just the outdoor cabinet.
An indoor inspection can help document the equipment and its condition before you compare proposals.
Ask how the refrigerant transition affects your quote
EPA's technology-transition guidance describes restrictions affecting covered new residential and light-commercial air-conditioning and heat-pump equipment beginning January 1, 2025, with a global-warming-potential limit of 700. Newer equipment commonly uses lower-GWP A2L refrigerants such as R-454B or R-32.
The EPA materials also describe 2025 R-454B shortages and price spikes, and an installation allowance for certain pre-2025 R-410A equipment through January 1, 2026. Those historical provisions don't establish that a particular unit can legally be installed today. If a proposal includes older inventory, have the installer identify the currently applicable rule and confirm eligibility.
Don't assume every newer-system delay reflects a difficult diagnosis. A contractor may have identified the fault but still be waiting for a compatible component or refrigerant. Ask for an availability estimate tied to the actual model and refrigerant, and remember that U.S. rules don't describe requirements everywhere.
Compare the same questions on both quotes
Gather the model, serial number, manufacture date, refrigerant label, leak history, and indoor-coil information before approving work. Then compare repair and replacement proposals against the same criteria:
Fault and scope: What failed, where is the leak, and what work will correct it?
Compatibility: Does the quoted refrigerant match the nameplate, and are the proposed components approved together?
Availability: Are parts and refrigerant available, or would replacement create a longer interruption?
Remaining condition: Are the coils, compressor, electrical components, and duct system otherwise serviceable?
Verification: What operating measurements will demonstrate successful repair or installation?
An isolated repair on otherwise healthy equipment can be sensible. Repeated leaks, unavailable components, and broader deterioration can make replacement the more rational spend. Evaluate the full installation through system performance optimization, because new equipment won't correct an unresolved airflow defect by itself.
Preventive Maintenance That Keeps Cold Air Flowing
Start with a recurring filter check, not a standing refrigerant refill. DOE's air-conditioning guidance recommends cleaning or replacing filters every month or two during cooling season, with more frequent attention in dusty conditions or homes with pets, and checking the evaporator coil annually. Construction dust also warrants closer inspection rather than waiting for the calendar.
Use the schedule below as a practical starting point, then adjust it to the equipment manual, filter type, and actual condition. Filter replacement should respond to loading, not just elapsed time.
Maintenance schedule that prevents no-cooling calls
Task | How often | Who handles it |
|---|---|---|
Air filter check and replacement | Monthly check; replace every 1 to 2 months in cooling season, adjusted to condition | Homeowner |
Outdoor condenser debris removal | Every month during cooling season | Homeowner, with power switched off first |
Condensate drain clearing | Every few months and at each tune-up | Homeowner or technician |
Evaporator coil inspection and cleaning | Once a year; clean when inspection shows it's needed | Certified technician |
Full system tune-up with airflow and refrigerant check | Once a year | Certified technician |
Ductwork inspection for leaks and restrictions | At each tune-up, or when airflow drops | Certified technician |
Keep outdoor heat rejection working
Natural Resources Canada's home air-conditioning guidance recommends keeping the condenser clean and free of leaves and debris, clearing blocked condensate drain holes or tubes, and arranging service when performance deteriorates. It also warns that even a small refrigerant loss can cause a significant drop in efficiency.
Remove loose debris without bending fins or disturbing wiring. Don't direct a pressure washer at the coil, and don't assume a clean-looking exterior means the entire coil is clean. Dense contamination between coil surfaces may require professional access and cleaning.
If the condenser is clear but cooling deteriorates, schedule a diagnosis instead of waiting for the next routine visit. The indoor blower can keep moving air even when the equipment can't reject heat outdoors.
A maintenance appointment should verify operation, not simply leave the cabinet looking cleaner.
Make the schedule easy to follow
Record filter dimensions, replacement dates, drain observations, and service findings in one place. Property managers and homeowners coordinating multiple tasks can use HVAC scheduling tips from VerticalRent to organize reminders and service records. Keep the equipment manual alongside that log so recommendations remain specific to the installed system.
Choose a replacement filter the system can accommodate. An overly restrictive high-efficiency filter can worsen airflow if the blower and ductwork weren't designed for its pressure drop. Better filtration shouldn't come at the expense of adequate air movement.
Keep these habits simple:
Preserve condenser clearance: Maintain the open space specified by the manufacturer, including room for service access.
Set filter reminders: Inspect the filter when the reminder appears, then replace it according to condition and its instructions.
Keep vents open: Recheck supplies and returns after moving furniture, adding rugs, or reorganizing storage.
An annual professional tune-up provides an opportunity to catch blower, coil, and airflow problems before they interrupt cooling. Use the coil inspection to discuss cleaning when deposits or restricted airflow justify it. Keep duct cleaning on a condition-based maintenance schedule, after filter care and condenser checks, rather than treating it as the first response to warm air.
A documented HVAC system maintenance routine helps separate normal upkeep from a new fault. That distinction makes the next service call more productive and reduces the temptation to authorize an unsupported recharge.
Purified Air Duct Cleaning offers HVAC coil cleaning and air duct cleaning for residential and commercial properties across the Phoenix metropolitan area. If your AC isn't blowing cold air and an inspection points to dirty coils or contaminated ductwork, visit Purified Air Duct Cleaning to request a free quote for the cleaning work your system needs.