

Evaporator Coil vs Condenser Coil: Roles, Location and Care
Most homeowners answer the "which coil matters more" question with geography. The inside one or the outside one. That answer is accurate and nearly useless. The question that decides your summer budget is different: which side of a matched refrigerant circuit has stopped doing its half of the work, and can the part you replace still be matched to the part you keep?
Both coils belong to the same vapor-compression cycle. The evaporator coil sits indoors and absorbs heat and moisture from your air. The condenser coil sits outdoors and dumps that heat, plus the compressor's own electrical heat, into the yard. One absorbs, one rejects, and neither can be judged by appearance.
Here's the part most comparisons skip. A split system is engineered as a pair. Change one coil on its own and you can shift refrigerant charge, metering behavior, capacity and humidity control. That's why "the coil looks dirty, replace it" is sometimes the most expensive sentence a homeowner hears all year.
Evaporator Coil vs Condenser Coil at a Glance
The evaporator is the indoor coil where low-pressure refrigerant absorbs heat and moisture from indoor air. The condenser is the outdoor coil where high-pressure refrigerant releases that absorbed heat, plus the compressor's electrical heat, to outdoor air. Each coil performs only half of the heat transfer job, which is why a fault on either one shows up as a system problem rather than a coil problem.
Evaporator vs condenser coil at a glance
Attribute | Evaporator coil | Condenser coil |
|---|---|---|
Location | Indoor, inside the air handler or furnace | Outdoor, inside the condensing unit |
Refrigerant state | Low pressure, boiling and absorbing heat | High pressure, condensing and releasing heat |
Heat direction | Pulls heat and moisture out of indoor air | Pushes absorbed heat plus compressor heat outdoors |
Airflow driver | Indoor blower | Outdoor fan |
Typical buildup | Dust, biological film, condensate residue | Cottonwood, leaves, dirt clogging the fins |
Dirty-coil effect | Lower cooling, weak dehumidification, possible icing | Higher head pressure, higher compressor power, hot running |
Packaged systems | Shares one cabinet with the condenser and compressor | Shares one cabinet with the evaporator and compressor |
In a standard split system the indoor coil sits in the furnace or air handler, and the outdoor coil sits inside the condensing unit alongside the compressor. The U.S. Department of Energy home cooling guide lays out the split arrangement plainly: the blower moves indoor air across the evaporator, where the refrigerant absorbs heat and humidity, while a separate outdoor fan moves air across the condenser so that collected heat can leave the building. Packaged systems put the evaporator, condenser and compressor in one cabinet, which changes where you look but not what each coil does.
Symptoms split along the same line. A fouled evaporator shows up as weak cooling, weak dehumidification, and sometimes ice on the indoor coil or suction line, because the coil is starved of air. A fouled condenser shows up at the other end, as high head pressure, a compressor that runs hot and long, and a meter that spins faster in July.
What you should take from the table is a map. You can point at each coil, you can tell which side of the system a symptom implicates, and you know that neither coil produces anything useful without the other.
How Refrigerant Moves Heat and When Coil Roles Reverse
Refrigerant doesn't create cold. It moves heat, and the two coils are the pickup and delivery ends of that run. The U.S. Department of Energy technical support document on the refrigerant cycle breaks the loop into a sequence you can follow with your hand on the copper.
The video below walks the same loop visually, which helps before you look at a real unit.
Vapor leaves the evaporator. Refrigerant has boiled at low pressure indoors and picked up heat from your air, so what leaves the coil is vapor, not liquid. If airflow across the coil is restricted, the refrigerant can't collect enough heat, coil temperature drops, and frost starts forming. That's why a clogged filter can look like a refrigerant fault.
The compressor raises pressure and temperature. It squeezes the vapor until it's hotter than the outdoor air, which is the only reason heat will leave the coil outside. A compressor pushing against high head pressure draws more current for the same delivered cooling.
The condenser rejects heat and condenses the vapor. The hot, high-pressure vapor gives up heat to outdoor air and turns back into a liquid. Fouled fins, a slow fan or a blocked discharge keep that rejection from happening, and head pressure climbs.
The metering device drops pressure and temperature. A capillary tube or expansion valve flashes the liquid down to a cold, low-pressure mix before it reaches the coil. A restricted or mismatched metering device throws superheat off and either starves or floods the evaporator.
Cold refrigerant returns to the evaporator. The loop closes. The coil absorbs indoor heat again, and the moisture that condensed on its fins drains away through the pan and line.
One detail ties stages three and two together. The compressor's own electrical heat leaves the system through the condenser, so the outdoor coil is rejecting more than what came out of your living room.
The infographic below shows the same five stages as a loop, with the heat pump reversal built in.
When the coils swap jobs
Location doesn't permanently decide which coil is the evaporator. In a conventional air conditioner the indoor coil is the evaporator and the outdoor coil is the condenser, but a heat pump adds a reversing valve that changes refrigerant direction, as the Building Science Education heat pump chapter explains. In heating mode the exterior coil extracts heat from outdoor air and the interior coil releases it indoors. In cooling mode those roles flip back.
Coil priorities by system type and season
System | Coil roles | Check first | Note |
|---|---|---|---|
Conventional split AC, cooling | Indoor evaporator, outdoor condenser | Indoor coil if airflow is weak, outdoor coil if head pressure is high | Arizona summer load favors outdoor fin care |
Heat pump, cooling mode | Indoor evaporator, outdoor condenser | Same as conventional split AC | Roles match the conventional diagram |
Heat pump, heating mode | Outdoor coil evaporates, indoor coil condenses | Outdoor coil for frost and airflow | Roles reverse through the reversing valve |
Packaged unit | Both coils in one cabinet | Indoor return airflow and outdoor fan operation | Diagnose by measured readings, not appearance |
Identify the operating mode before anything else. Ice on the indoor coil during cooling is a symptom, not a diagnosis, and the guide to what causes AC coils to freeze covers the airflow and charge faults behind it.
Diagnosing Dirty Evaporator and Condenser Coils
A dirty coil reads like a refrigerant problem until the air side and refrigerant side are compared. Evaporator restriction cuts airflow, drops coil temperature, promotes icing and lowers delivered capacity. Condenser restriction raises condensing temperature and compressor power, so the outdoor side usually fails louder under peak load.
Why the outdoor side punishes you harder: the ASHRAE Handbook refrigeration chapter notes that increased condensing temperature reduces capacity, increases power demand and can overload the compressor motor.
A technician diagnoses by comparing numbers, not by squinting at fins. On the evaporator side that means entering and leaving air temperature, suction saturation temperature, superheat and pressure drop. On the condenser side it means entering air temperature, discharge pressure, condensing saturation temperature, subcooling and fan airflow. Fouling on either coil forces a larger refrigerant-to-air temperature difference to move the same heat, which is why appearance is only a clue.
Cleaning is also not a hose-and-go job. HVAC coil cleaning uses advanced techniques and specialized equipment to thoroughly clean the coils, because the wrong pressure on a fin pack flattens fins and makes airflow worse than it was, and because an evaporator wet with biological film needs different treatment than a condenser packed with debris.
Symptoms, likely coil and first check
Symptom | Likely coil | First check |
|---|---|---|
Warm air from vents, system runs long | Evaporator, airflow restricted | Filter, blower speed, air temperature drop across the coil |
Ice on the indoor coil or suction line | Evaporator | Airflow at the return and supply, signs of low refrigerant charge |
Humid indoor air, weak dehumidification | Evaporator | Coil surface condition and condensate drain |
Hot outdoor unit, high head pressure | Condenser | Discharge pressure and condensing temperature |
Higher electric bill, compressor running nonstop | Condenser | Fin condition, fan speed, clearance around discharge |
Compressor trips on high pressure | Condenser | Fan operation, fin cleanliness and refrigerant charge before blaming the compressor |
Coil looks dirty but cooling is normal | Either | Measured pressures and temperatures, not appearance |
A coil that stays damp and never drains is also a biological surface, which is why a wet coil belongs in both the efficiency diagnosis and the indoor-air diagnosis; HVAC mold risks for Florida homeowners shows what is at stake when moisture sits inside an air handler. When the complaint is that the house will not cool, start with the AC not blowing cold air walkthrough before assuming a coil has failed.
A visual diagnosis gets expensive at this stage. A coil condemned for dirt alone can lead to a one-coil swap, and the replacement-compatibility trap is real: indoor and outdoor coils are selected as a matched refrigerant circuit, so changing only one side can alter capacity, pressures, superheat and subcooling. Before approving a coil, confirm the fault is fouling rather than charge, airflow or a mismatched replacement already in the system.
Visible dirt alone never proves which coil is causing a fault. Measured pressures and temperatures do.
Maintenance Needs for Each Coil
Start with the filter, because it's upstream of everything on the indoor side. A restricted filter starves the evaporator, drops coil temperature, and turns a clean coil into an iced one. Confirm the indoor blower runs at the speed the equipment expects, and keep the condensate drain clear so the moisture the coil pulls out of your air leaves the system instead of sitting in the pan.
For the evaporator itself, routine homeowner care stops at the filter, the blower and the drain. Dust and biological film that have bonded to the fins need a proper coil cleaning rather than a spray bottle and a prayer, since a bent fin blocks airflow permanently and a rinsed surface can push residue into the drain pan.
The condenser checklist is work you can do from outside:
Clear the fins. Wash gently from the inside out where the design allows, and don't flatten fin faces with a pressure nozzle.
Confirm the outdoor fan runs at the right speed and that the blade is clean and balanced.
Keep discharge air unobstructed. Plants, stored patio cushions and fence panels within a foot or two of the discharge cut airflow and raise head pressure.
Verify refrigerant charge at service time. Charge changes pressures on both sides, so a system that's low looks like two dirty coils at once.
Cottonwood, leaves and dirt are condenser problems, which is why outdoor coils clog fastest in spring and early summer. Dust and biological film are evaporator problems, which is why indoor coils fail year after year. The cleaning target differs by coil, and so does the access.
The check that fooled you: a coil can look spotless and still fail to perform. Only measured pressures and temperatures tell you whether heat transfer is actually happening.
Homes that run the system hard through long humid stretches do better on a twice-yearly cooling service rhythm, and the reasoning behind twice-yearly cooling maintenance in humid homes applies directly to how quickly evaporator film and condenser debris rebuild. When you're ready to price the cleaning itself, the HVAC coil cleaning solution guide covers what gets applied and why the chemistry differs between an indoor coil and an outdoor one.
This checklist covers routine care. Measured faults, meaning high head pressure, icing, or air that won't dehumidify, belong in the diagnostic sequence rather than on a weekend to-do list.
Why Condenser Temperature Drives Summer Energy Use
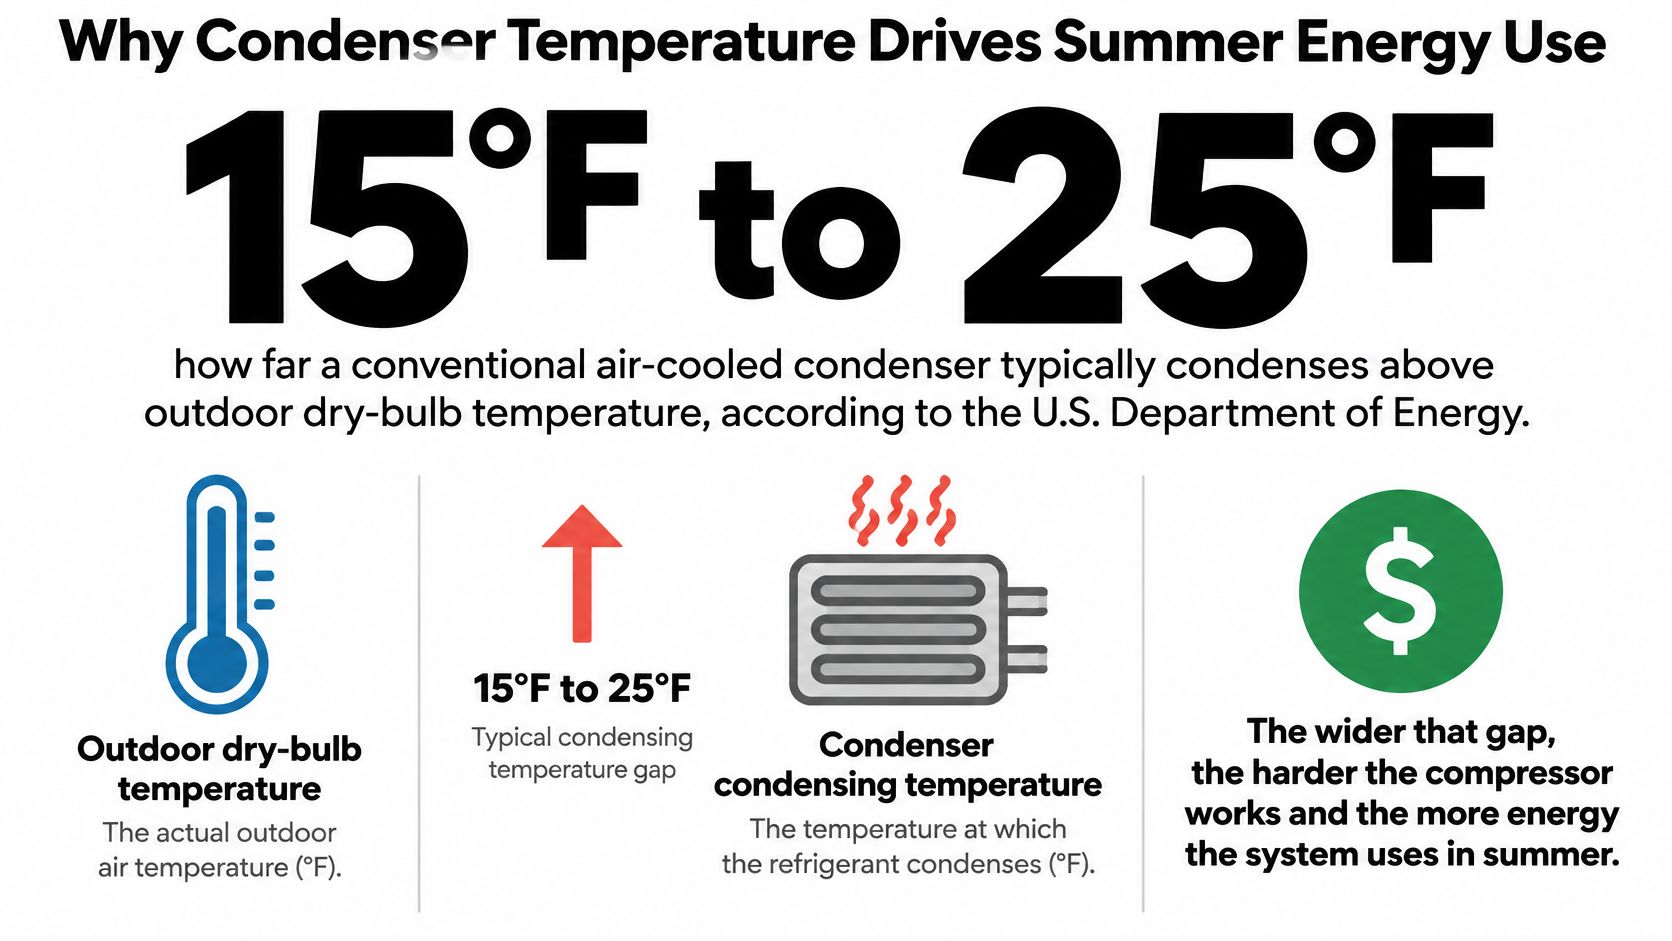
The outdoor coil sets the compressor's workload, and the U.S. Department of Energy puts numbers on it. Conventional air-cooled condensers typically condense at temperatures 15°F to 25°F above outdoor dry-bulb temperature, while evaporative condensers track outdoor wet-bulb temperature and can run 20°F to 40°F lower during peak periods in hot, dry climates (U.S. Department of Energy evaporative condenser guide). Every degree of that gap is compression lift the system pays for in electricity.
That evaporative figure comes with a boundary. Evaporative condensers are commercial and industrial equipment, built for facilities that can run dedicated water supply, water treatment and ongoing service on the water side. A residential split system has no retrofit path to that design, so the lower condensing temperatures describe what large plants achieve, not what a backyard condenser can become.
For the air-cooled unit you own, the controllable lever is liquid subcooling. At unchanged suction and discharge pressure, each additional degree of subcooling returns a modest capacity gain, which is why clean fins, correct fan operation, unobstructed discharge air and a verified charge protect real output rather than surface appearance.
The evaporator still matters, since it is where heat and moisture leave the air and where airflow sets delivered capacity. The condenser is usually the coil carrying the peak-summer electrical demand, though, and that is the argument behind routine HVAC system efficiency service on the outdoor side before the hottest stretch of the year.
A high-SEER condenser also only reaches its rated performance next to a compatible indoor coil. The outdoor unit and the evaporator operate as one refrigerant circuit, so the efficiency printed on the nameplate assumes a matched partner on the other end of the line set.
Replacing One Coil Without Breaking the System Match
Replacing a single coil is the most common way a homeowner accidentally downgrades a system that was working. A split system operates as one matched refrigeration circuit, with the indoor coil and outdoor unit engineered around each other. Swap the indoor coil without matching the outdoor unit and refrigerant charge, metering behavior, capacity, efficiency and humidity control can all shift at once. A dirty coil alone doesn't settle the replacement question.
Refrigerant rules now sit on top of the hardware question. The EPA set a GWP limit of 700 for residential and light-commercial air-conditioning and heat-pump systems, with major restrictions beginning January 1, 2025, and it states that homeowners may replace a faulty component, including an indoor coil or condensing unit, with a similar R-410A component, while new split systems installed after January 1, 2026 must use refrigerant below the 700-GWP threshold (EPA HFC transition rules). In plain terms, the refrigerant printed on the existing nameplate decides whether a like-for-like part is still realistic.
Matching is measurable, and the numbers punish sloppy pairing. Manufacturer test data cited in federal coil-matching material shows a 14.0-SEER outdoor condensing unit paired with a 14.0-SEER evaporator coil achieving a full 14.0-SEER system, while a comparable 13.0-SEER pairing achieved 13.0 SEER (EPA coil-matching document). Pair a high-efficiency condenser with the wrong indoor coil and its rating exists only on the spec sheet. The trap runs deeper than the SEER label, because a coil that physically bolts in can still meter refrigerant for a different circuit.
The decision order I'd use:
Clean first when airflow and pressures are the only problem. Fouling is reversible, and a matched system shouldn't be broken up over dirt.
Replace like-for-like when the failed part matches the existing refrigerant and circuit, and the rest of the equipment has life left in it.
Replace both units together when refrigerant type, equipment age or parts availability make a matched pair the realistic path rather than a patch.
Evaporator coil replacement cost ranges
Cost item | Typical range | What it covers |
|---|---|---|
Part only | $600 to $2,000 | The evaporator coil itself |
Labor | $400 to $1,500 | Removal, installation and recharge work |
Total replacement | $1,000 to $3,500 | Part plus labor for a like-for-like evaporator coil |
Those ranges come from a 2025 evaporator coil replacement cost guide published by HVAC.com, and it prices the indoor side only. Ask for the outdoor side in writing before you compare totals, because a matched pair quote and a single-coil quote are different projects.
The trap in one line: the cheapest coil is the one that breaks the match, and the match is what you actually bought.
For an older system with a corroded evaporator, weigh repair against full replacement on equipment age and expected future service cost rather than the invoice in front of you. A like-for-like coil makes sense while the outdoor unit still has life and the existing refrigerant can still be serviced. Once either condition fails, the cheaper invoice becomes the expensive decision.
Confirm Which Coil Is Failing Before You Book Service
A technician's truck rolling up doesn't tell you which coil is at fault, and neither does a dirty fin face. Work the order below before you commit to anything.
Note the symptom and the season. Cooling complaints point at the indoor coil and airflow first. Heating complaints on a heat pump point outside.
Check the filter, then watch both fans. Confirm the indoor blower and the outdoor fan both run, and that nothing is sitting against the discharge grille.
Ask for measured pressures and temperatures on both sides. Entering and leaving air, superheat, subcooling and condensing temperature. If a quote arrives without a single reading, it's a guess with a price tag.
Choose the action with the decision order. Clean, replace like-for-like, or replace both units.
Get a written quote before work starts, with the part, the refrigerant and the labor separated.
That's how a homeowner stops paying for the wrong coil. A visibly dirty coil isn't proof of the fault, and measured readings are what separate a cleaning from a replacement. The rest of the HVAC system maintenance picture follows the same logic: clean what's fouled, measure before you swap parts, and keep the circuit matched.
Both residential and commercial services come with free quotes, given over the phone or through a free walk-through at a commercial space, so you can get the failing side named and priced without guesswork. The same readings also let you compare two quotes on equal terms instead of comparing two different stories.
Leave this with three things: a named coil, a measured reason, and a next action that matches it.
If your coil readings point to a dirty evaporator, a clogged condenser, or both, Purified Air Duct Cleaning handles HVAC coil cleaning for homes and businesses across Avondale and the Phoenix metro, with the access and pressure each coil type needs. We can inspect the coil you suspect, clean the side that's failing, and quote the work before anything starts. Visit Purified Air Duct Cleaning to book a free quote and confirm which coil is costing you money.