

How to Clean Residential Air Ducts at Home
You switch on the air conditioner after a long cooling season, and a puff of dust drifts from a bedroom register. You wipe the grille, look into the opening, and wonder whether the rest of the ductwork looks the same.
Learning how to clean residential air ducts starts with deciding whether that dust belongs to a cleaning problem, a filter problem, or a damaged HVAC system. The useful job is controlled source removal, not stirring up hidden debris and hoping a household vacuum catches it.
When Residential Duct Cleaning Is Worth It
Dust blowing from a register deserves a closer look, but it isn't proof that duct cleaning will fix allergies. First check whether the material is loose inside the duct, sitting on the grille, or entering through a poorly fitted filter.
The U.S. EPA's homeowner guidance doesn't recommend routine duct cleaning because studies haven't conclusively shown that dirty ducts increase household particle levels or that cleaning prevents health problems. Cooking, smoking, outdoor pollution, cleaning products, and everyday activity can contribute exposure that cleaning ducts won't resolve.
Separate deposited dirt from airborne exposure
In an EPA field study, mechanical cleaning removed adhered dirt, and supply-air rates increased by 4% to 32% in eight of nine homes, but indoor particle concentrations and microbial density didn't consistently decline. That distinction matters: removing a deposit is a measurable result, while promising healthier air throughout the house is a much broader claim.
Consider cleaning when inspection reveals substantial debris, pest contamination, or material being released into rooms. Mold-like growth and water damage require professional assessment, including correction of the moisture source.
Use the warning signs below to distinguish a cleaning candidate from a repair or remediation job.
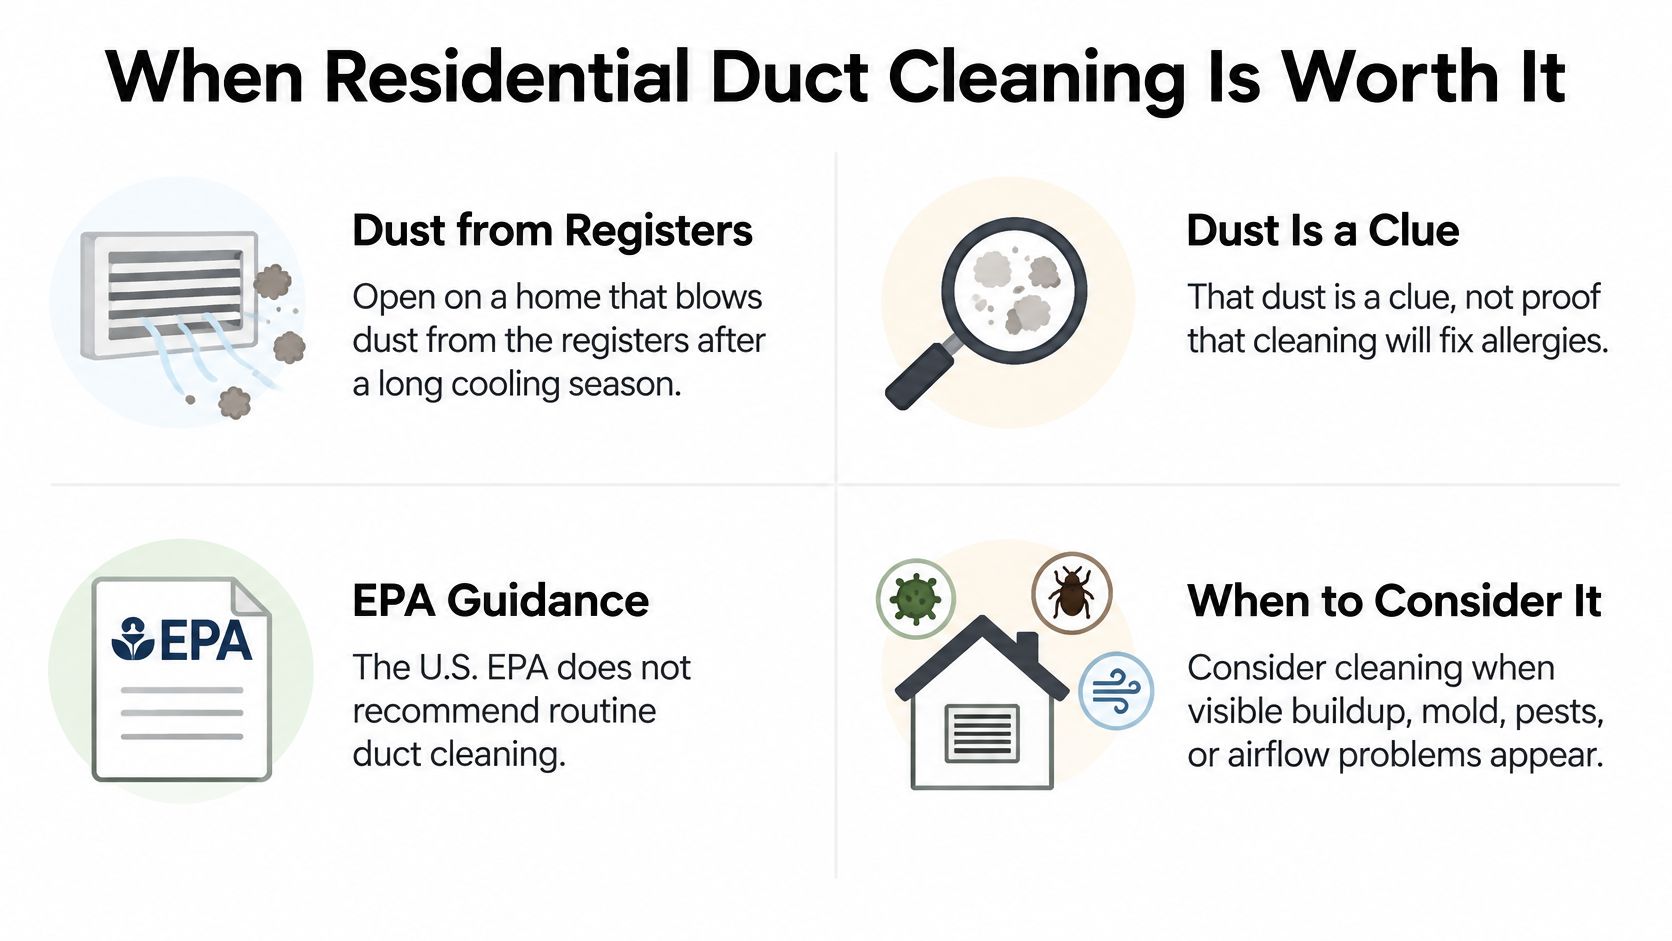
When to clean residential ducts and when to stop
Situation | What you can see | Next move |
|---|---|---|
Heavy dust or debris | Gray film or clumps inside metal ducts, weak rooms | Clean the full system |
Mold-like growth or water damage | Dark patches, wet insulation, a soaked drain pan | Stop DIY and hire |
Rodents or insects | Droppings, nests, chewed flex duct | Hire and close entry points |
Light dust only on registers | Dust returns within days of wiping | Replace the filter and control sources |
Crushed, kinked, or leaking ducts | Gaps, sharp bends, rooms that never get cool | Repair or seal before cleaning |
Fiberglass board or lined metal | Soft yellow lining inside the duct | Use soft tools only, or hire |
A thin gray film alone isn't the same as heavy accumulated debris. Likewise, a warm bedroom doesn't establish that dust is restricting its duct. Check the branch for damage before treating weak airflow as a cleaning diagnosis.
Decision rule: Choose the next action from the condition you can document, not from how long it's been since someone cleaned the vents.
A musty odor also needs tracing. A wet coil cabinet, blocked condensate drain, or return pulling air from an attic can require a different repair. Use our explanation of duct-cleaning frequency to weigh condition and household needs without putting an otherwise clean system on an automatic cleaning cycle.
Tools Time and Safety Before You Open a Vent
Before removing a grille, set out a HEPA-filtered collection vacuum or suitable rented negative-air collector, hoses and adapters, screwdrivers, drop cloths, painter's tape, a flashlight, a correctly sized replacement filter, and a phone for photographs. You will also need an N95 respirator, eye protection, and gloves. Keep a soft-bristle brush for delicate surfaces and reserve a stiffer brush for bare sheet metal. A small compressor with an air whip is optional, but it does not replace effective collection.
Shut down and prepare the room
Turn off the system at the thermostat, then cut power at the breaker and applicable service disconnect. Confirm that the blower has stopped. Leave electrical compartments closed, and do not reach near components if you cannot confirm they are isolated.
Move furniture away from registers, cover nearby belongings, and keep children and pets out of the work area. Close doors to rooms you are not cleaning, while leaving the collection equipment the airflow it requires. Arrange tools so dusty attachments do not cross clean flooring.
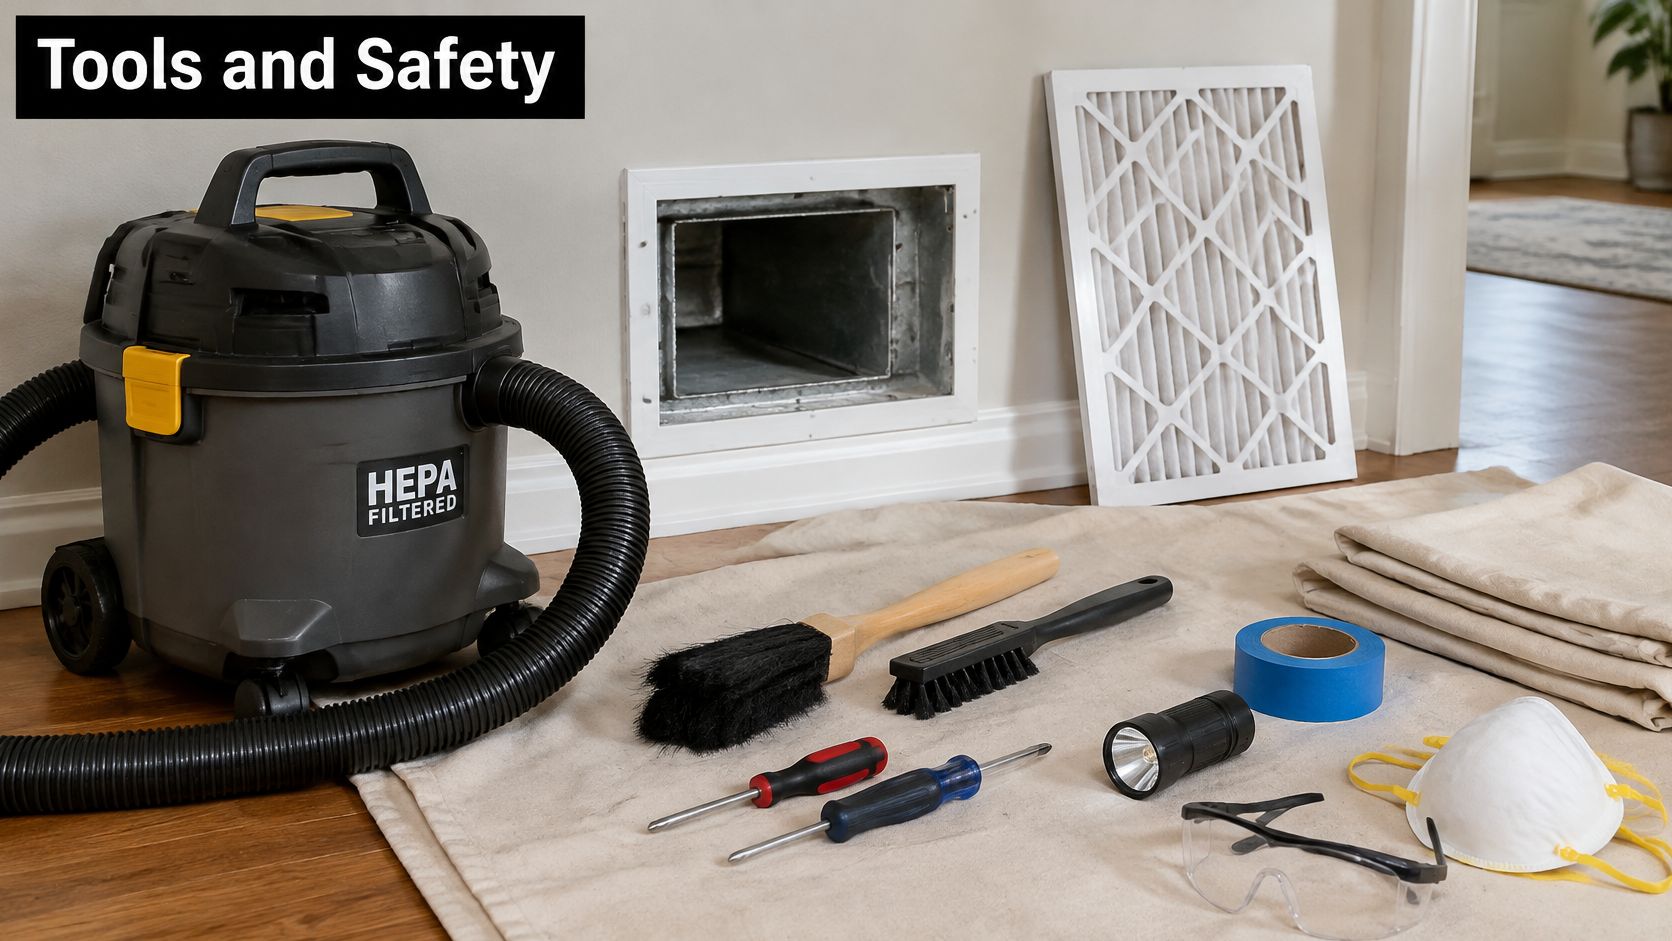
The NADCA homeowner cleaning-method guidance describes continuous collection, controlled agitation, and outdoor exhaust or HEPA filtration as safeguards during cleaning. Never brush or blow debris while suction is off. Without active collection, loosened material has no controlled route out of the system.
An aftermarket filter does not automatically make a vacuum a sealed HEPA collection system. Check the housing, seals, exhaust arrangement, and equipment specifications. Match the collector and attachments to the job, and price them before deciding whether DIY work makes sense.
Time for DIY versus professional cleaning
DIY time depends on access, how long setup and containment take, and whether you can inspect each branch. These are planning ranges, not guaranteed completion times.
Scenario | Typical time |
|---|---|
Small single-story home, DIY | 3 to 5 hours |
Two-story home with flex duct in a hot attic, DIY | A full day |
Typical home, professional crew | About 2 to 3 hours |
For the DIY estimate, allow time to protect the room, set up collection, work through accessible ducts, and clean up. A professional service averages about 2 to 3 hours from start to finish, depending on home size. A quote can help you compare that service time with your available time and the equipment required.
Before committing, price the collector, adapters, protective equipment, replacement filter, and access-panel materials. A shop vacuum alone does not establish that you can collect debris effectively throughout the system. The 2026 dust collection guide for contractors offers general equipment-selection context, but shop-dust equipment still needs to be checked for this application. For a rental option, consult this HEPA vacuum rental guide.
If you cannot maintain collection while agitating debris, limit DIY work to accessible grille cleaning and filter care. Duct cleaning is one source-removal step, not a substitute for filter maintenance, sealing leaks, or addressing moisture at the coil.
How to Clean Supply and Return Ducts
A proper cleaning follows the connected air path, rather than treating each visible vent as a separate job. Supply ducts deliver conditioned air to rooms; return ducts bring room air back to the equipment.
The NADCA residential HVAC cleaning guide describes source removal using agitation and extraction under negative pressure, with attention to the air handler and connected components. This is a method for removing documented contamination, not a treatment guaranteed to prevent illness.
The visual below summarizes the overall workflow before you work through the detailed sequence.
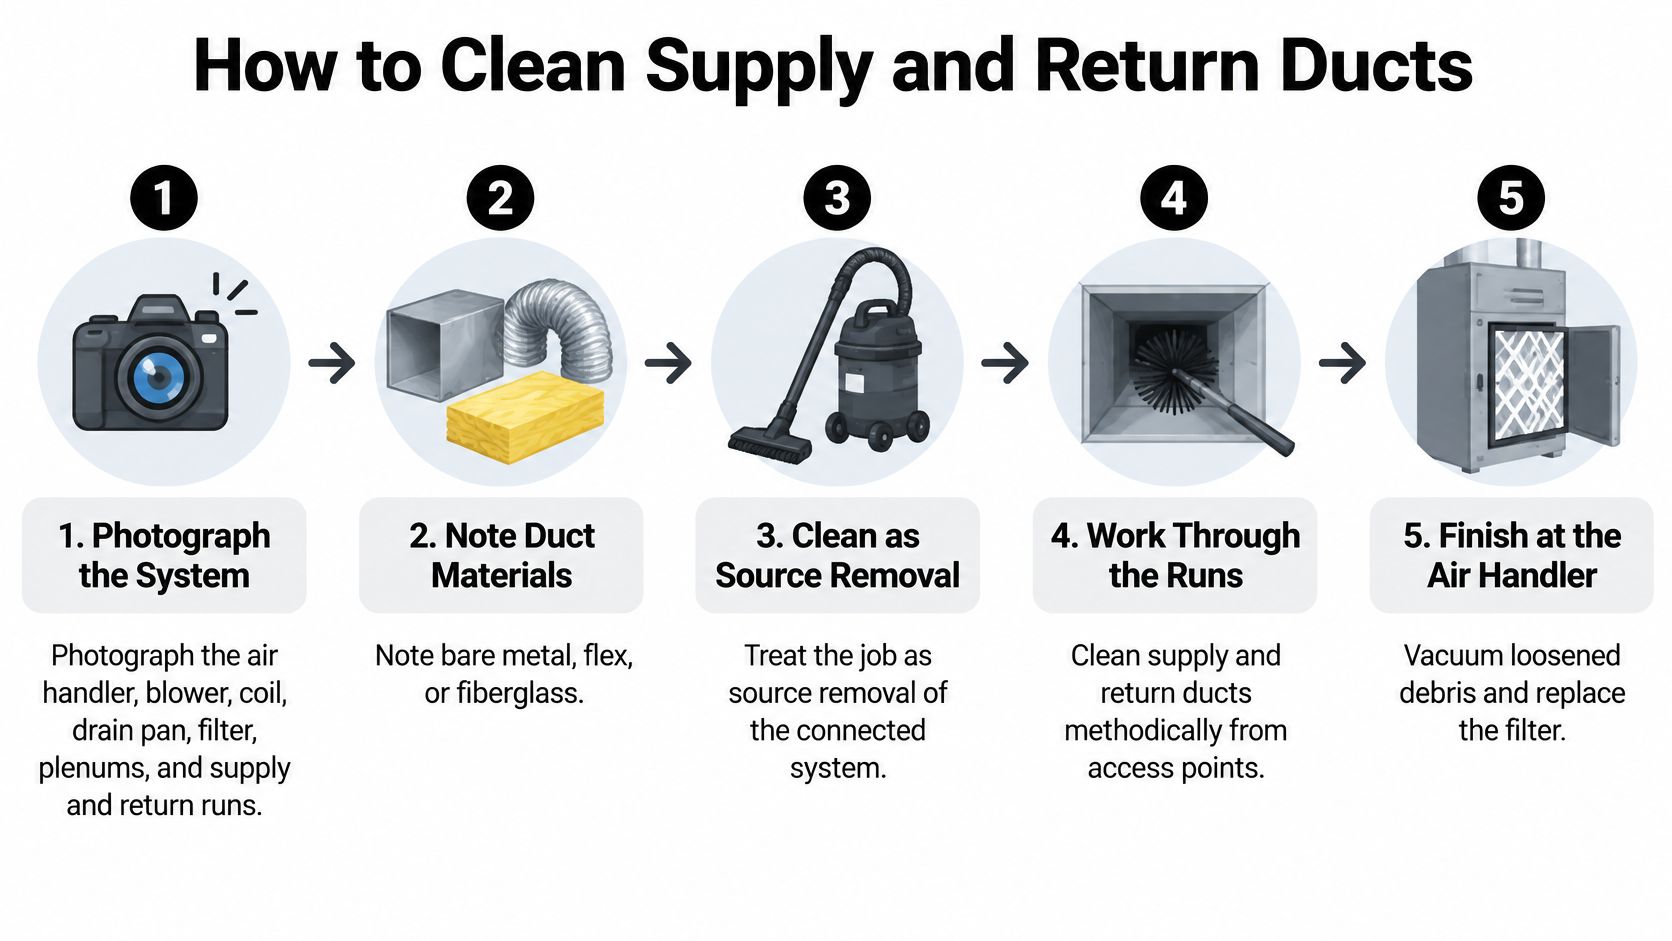
Work through the connected system
Photograph and identify the components. Document the air handler, blower, coil, drain pan, filter, heat exchanger where accessible, plenums, and supply and return runs. Identify bare metal, flexible duct, duct board, and internally lined metal before selecting tools. Don't dismantle combustion equipment.
Protect floors and furnishings, then remove the grilles. Label grilles and screws by room so adjustable registers return to their original locations. Keep their dampers in the original position unless you're correcting a known obstruction.
Use safe service access. Prefer existing openings that allow tool movement and visual inspection. A new panel belongs only in suitable, clearly identified metal duct where you can avoid concealed wiring, coils, refrigerant lines, and structural connections. Don't cut blindly into a cabinet or flexible duct.
Connect the collector and establish continuous negative pressure before disturbing deposits. Exhaust outdoors where the discharge won't reenter the house, or use properly configured HEPA filtration for indoor exhaust. The suction must capture loosened material rather than push it into occupied rooms.
Start at the farthest accessible branch and move toward the collection point. Use controlled strokes rather than forceful scrubbing. Soft-bristled tools protect fiberglass surfaces from abrasion and fiber release. Stop if lining crumbles or flex duct begins to tear; our flex-duct cleaning guidance explains the material-specific concerns.
Complete every accessible supply branch, then every return pathway. Include the plenums and blower compartment within the planned scope. Don't reach into blower wheels or electronics with a powered tool, and leave components requiring disassembly or balancing to a technician.
Vacuum and wipe the grilles separately. Remove loose material before wiping washable surfaces with a lightly damp cloth. Dry each grille before reinstalling it, and avoid letting wash water run into the duct.
Leave a packed, inaccessible, or mold-like coil deposit for professional service. Don't force a duct brush through coil fins. Record the unfinished component so a clean branch isn't mistaken for a completed system.
Install the new filter and close every access opening. Use correctly fitted sheet-metal closures or appropriate access panels, with mastic or approved foil tape at suitable joints. Check that fasteners don't create hazardous protrusions and that insulation remains intact.
Reassemble the system before restoring power. Run the fan and check for dust puffs, rattles, loose panels, and unfamiliar airflow noises. Shut it down if the work has created a new problem.
Keep the method controlled
An air whip can reach around some obstructions, but uncontrolled compressed air can scatter debris beyond your collection zone. Use it only when the equipment arrangement supports capture and the duct material can tolerate it.
This video provides another visual reference for the cleaning process.
A branch you can't reach isn't a branch you've cleaned. Mark inaccessible sections on your photo record and arrange appropriate access rather than reporting the system as finished.
Coil Drain Pan and Chemical Add On Rules
Inspect the evaporator coil and drain pan only through a panel designed for service. If the cabinet must be forced open, refrigerant lines obstruct access, or electrical components prevent safe work, leave the panel closed and arrange HVAC service.
Keep power isolated during inspection and cleaning. Coil fins bend easily, so scraping them with a stiff duct brush can create a new airflow restriction.
Give moisture components their own treatment
Inspect the coil face. Shine a flashlight across the fins. For accessible, light surface dust, use a soft brush with the fin direction, not across it. If a cleaner is appropriate, choose a product specifically labeled for that evaporator coil and its materials.
Protect electrical parts. Keep liquid away from control boards, wiring connections, and the blower motor. A no-rinse label doesn't mean you can saturate the cabinet; follow the stated application and operating requirements.
Leave heavy contamination alone. A packed coil or mold-like deposit needs professional assessment and cleaning. Restricted fins reduce heat transfer, and aggressive DIY work can damage the coil.
Check the pan and drain. Remove accessible residue and inspect for standing water, corrosion, or leakage. A cooling system produces condensate during operation, but water shouldn't remain because the outlet is blocked.
Clear a reachable outlet carefully. Where the condensate line has an accessible outdoor termination, a wet vacuum may remove a blockage. Don't confuse the condensate drain with another pipe, defeat a trap, or force debris back toward the equipment.
A wet pan can support contamination even when the ducts themselves have little deposited dirt. Drying the visible surface isn't a repair if the drain remains blocked or the pan doesn't drain correctly.
For product selection and access considerations, use our HVAC coil-cleaning solution guide. Record what you cleaned, what remained inaccessible, and whether drainage resumed.
Refuse chemicals that hide unfinished work
A pleasant smell isn't evidence that a duct is clean.
Don't fog fragrances, biocides, ozone, sealants, or encapsulants through vents to mask leftover dirt. Physical removal comes first, and any proposed chemical needs a specific purpose, a suitable application, and documented justification.
An evidence review indexed in the EPA's HERO database found insufficient evidence that ordinary duct cleaning improves indoor air quality, health, energy savings, or HVAC performance, and noted that pollutant levels can sometimes rise after cleaning. That uncertainty is a reason to control disturbance, not to add more treatments.
Don't treat residential UV or photocatalytic devices as proof that symptoms will improve. Correct identifiable sources instead: fit the filter properly, keep outdoor intakes clear of pollution sources, control construction dust, and maintain housekeeping.
If a chemical is justified, document its name, application location, reason for use, and label restrictions. Decline treatment when the proposed benefit is vague or the product isn't suitable for the surface.
Inspection Failures and a Maintenance Schedule
Judge the completed job by what you can inspect, not by how dark the vacuum's contents look. Dust in a collection tank doesn't establish that every connected component received attention.
Check the finished work
Before photographs and material identification: The record shows the original deposits and distinguishes metal, flex, and lined surfaces.
Collection before agitation: Suction was established before anyone loosened material.
Completed component coverage: Every reachable branch and the air handler received the agreed work, with omissions recorded.
After photographs: Comparable views show no remaining loose piles in accessible areas.
Intact insulation: Lining isn't torn, abraded, or left wet.
Normal operation: The reassembled system runs without new whistles, rattles, or dust discharge.
A vent-only visit can leave the trunk and blower compartment untouched. Other failures include abrasive tools on fiberglass, unfiltered discharge into a bedroom, wet lining without a drying plan, and perfume applied to dirty metal.
Acceptance check: Compare the same locations before and after, with similar lighting and camera angles.
Separate cleaning from airflow repairs
According to the ENERGY STAR heating and cooling guide, approximately 20% of air moving through a typical duct system can be lost through leaks, holes, and poorly connected ducts. Removing dirt doesn't close those openings.
Duct shape matters too: the Department of Energy duct-retrofit guide reports that compressing flexible duct by 15% can increase pressure loss by approximately 400% to 800%. A clean but crushed branch can still deliver poor airflow.
Inspect accessible connections, insulation, supports, and bends while they're visible. Seal suitable leaks with mastic or approved metal foil tape, not cloth duct tape. Repair disconnected or damaged sections rather than wrapping tape around an unresolved mechanical problem.
Residential duct and filter upkeep schedule
The filter intervals below follow ENERGY STAR's guidance cited above. Annual visual checks are a practical household planning routine, not a requirement for annual cleaning.
Task | How often | A pass looks like |
|---|---|---|
Filter inspection | Monthly during heavy heating or cooling | No heavy loading; filter sits tight, with light visible where its design permits |
Filter replacement | At least every 3 months, sooner if dirty | Correct size with no gaps around the frame |
Look inside a return | Once a year as a household inspection routine | No new clumps, mold-like growth, or nests |
Full duct cleaning | Every 3 to 5 years only if dirty, remodeled, or after pets or smoke warrant inspection | Documented debris was removed, not a clean system on a timer |
Coil and drain pan | Once a year as a household inspection routine | Pan drains without retained standing water; condensate line flows |
Accessible leaks and crushed flex | When rooms are uneven or ducts are open | Mastic or foil tape on suitable leaks; flex isn't kinked |
We generally recommend considering duct cleaning every 3 to 5 years, depending on ductwork age and condition, system type, and allergies or respiratory problems in the home. That interval isn't a promise of symptom relief or a reason to clean ducts that inspection shows are already clean.
Hire a Pro or Finish the Job Yourself
Hire when you find mold-like growth, pest contamination, water damage, torn lining, or inaccessible trunks that would require blind cutting. A soaked drain pan also warrants finding the drainage fault before proceeding with duct work.
DIY is reasonable only when the contamination is ordinary dust, the duct material is sound, access is practical, and you can maintain controlled collection. Knowing how to remove a grille doesn't mean you have the equipment to clean the system behind it.
Compare scope before price
A written scope should identify the air handler, coil, drain pan, plenums, supply and return runs, and grilles. It should distinguish inspection from cleaning and explain how inaccessible or damaged components will be handled.
Our negative-pressure method uses a portable HEPA-filtered machine after grilles and dirty filters are removed. We take a step-by-step approach to evaluating residential problems rather than assuming every dusty register needs the same treatment.
Use these decision checks when comparing written proposals:
Collection method: The proposal explains pressure control and whether exhaust goes outdoors or through suitable HEPA filtration.
Component coverage: Included work and exclusions are named, particularly around coils and blower assemblies.
Chemical justification: Each proposed treatment has a written purpose rather than being bundled as automatic sanitizing.
Business identity: Contact details and the company named on the quote are consistent and verifiable.
Our air-duct cleaning questions to ask provides a scope checklist. For an unfamiliar contractor, Recepta.ai's guidance on how to spot red flags in unfamiliar companies adds useful business-verification steps.
Keep dryer safety separate
Dryer exhaust isn't part of the supply-and-return HVAC cleaning method. The National Fire Protection Association dryer-fire report identifies failure to clean as the cause of 32% of U.S. home clothes-dryer fires during 2014 to 2018. Lint removal needs its own inspection and work scope.
This week, photograph an accessible return and the coil through its service opening, without dismantling equipment. Note the duct material, filter size, and visible moisture. Use those observations to choose controlled DIY cleaning, a repair, or professional assessment before paying for work.
We offer residential air duct cleaning and HVAC coil cleaning, with step-by-step evaluation to match the work to your home's condition. Visit Purified Air Duct Cleaning to request a quote and discuss your photographs, access concerns, and the components that need attention.