A Homeowner’s Guide to Correct Dryer Venting
- Jan 25
- 15 min read
Updated: Jan 26
Proper dryer venting is way more than just hooking up a tube and calling it a day. It’s a crucial safety system that requires specific materials and careful routing to get all that hot, moist, lint-filled air safely outside your home. When this process is overlooked, it creates a serious fire hazard and can wreck your dryer.
This guide will walk you through the essentials of keeping your home and family safe.
The Hidden Hazard in Your Laundry Room
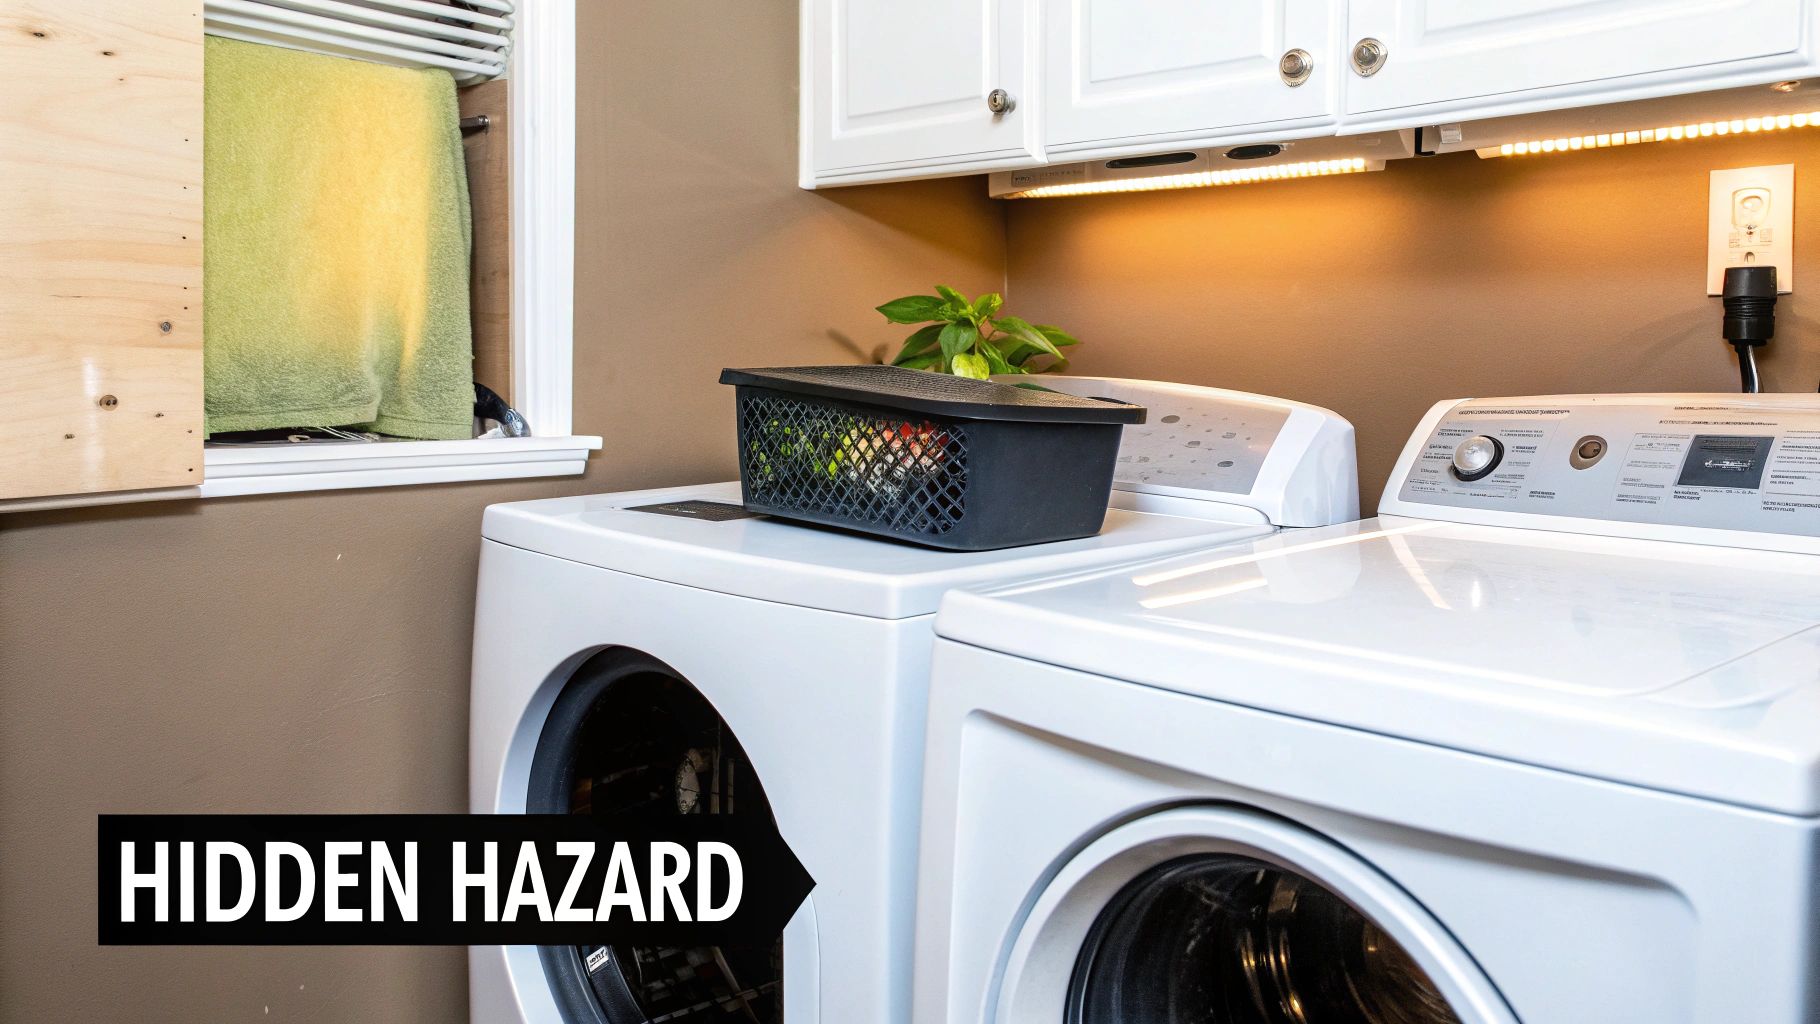
That growing mountain of laundry is a familiar sight for most of us. While doing laundry feels like a mundane chore, the real risk isn't the workload; it's the unseen danger lurking behind your dryer. When venting is installed incorrectly or isn't maintained, a routine appliance can turn into a disaster waiting to happen.
This isn't just another item for your to-do list; it's a critical home safety check. A clogged, blocked, or poorly installed dryer vent can lead to several serious issues that put both your property and your family at risk.
Understanding the Primary Risks
The most immediate danger is, without a doubt, fire. Lint, that fluffy byproduct of drying clothes, is highly flammable. Over time, it builds up inside the vent duct. If airflow gets restricted, the dryer is forced to work harder and harder, generating excessive heat that can easily ignite all that accumulated lint.
Beyond the fire risk, a blocked vent traps hot, moist air inside your home, which leads to a cascade of other problems:
Appliance Damage: The constant overheating puts a massive strain on your dryer's heating element and motor. This can lead to premature failure and some seriously expensive repair bills.
Moisture and Mold: All that trapped moisture has to go somewhere. It often seeps into your walls and insulation, creating the perfect damp environment for mold and mildew to thrive.
Carbon Monoxide Leaks: This is especially dangerous for gas dryers. A blocked vent can prevent toxic carbon monoxide (CO) from exiting your home, leading to a silent and deadly buildup of the odorless gas.
The statistics are sobering. According to the U.S. Fire Administration, clothes dryers are responsible for about 2,900 home fires every single year. The leading cause? A failure to clean the dryer vent, which accounts for a shocking 34% of these blazes.
This is why understanding correct dryer venting is absolutely essential. It’s a proactive step that protects your home from a completely preventable disaster. In our guide on preventing dryer fires at home, we dive deeper into the specific maintenance steps you can take. Taking the time to ensure your system is installed correctly and kept clean is one of the most important things you can do for your home's safety.
Choosing the Right Materials for Your Dryer Vent
The ductwork connecting your dryer to the outside is your first and most critical line of defense against a fire. Think of it as a dedicated highway for hot, moist, lint-filled air. If that highway is built with cheap, flimsy materials, you’re creating the perfect conditions for a traffic jam, and that’s how disasters happen. Getting this part right is non-negotiable for a safe and proper installation.
Unfortunately, many homes, especially older ones, are still rigged with flexible, white plastic or vinyl ducts. If this is what you see behind your dryer, you need to replace it immediately. This stuff is a serious safety hazard. Its accordion-like design is a lint magnet, creating dangerous blockages in no time. Worse yet, plastic can’t handle the heat from a clogged dryer; it can easily melt or even catch fire.
Another common offender is the flexible foil duct. While it might seem a step up from plastic, it suffers from the same ribbed interior that snags lint and suffocates airflow. It’s also incredibly easy to crush or kink when you push the dryer back against the wall, instantly creating a hazardous bottleneck.
Why Metal Ducting Is the Only Safe Choice
When it comes to safety and efficiency, metal is the only way to go. This isn't just an opinion; it's what building codes and appliance manufacturers demand. The smooth interior walls of metal ductwork allow lint and air to flow freely, drastically cutting down the risk of clogs and helping your dryer run the way it was designed to.
There are two types of metal ducting we recommend:
Rigid Metal Ducts: This is the undisputed champion of dryer venting. With a perfectly smooth interior, it provides the path of least resistance for exhaust. It's tough, won't sag over time, and offers the highest level of safety you can get.
Semi-Rigid Metal Ducts: This type gives you a bit more flexibility, which is handy for navigating tight spaces or making that final connection from the wall to your dryer. While it does have some ridges, they are far less pronounced than what you'd find on a foil duct, and it holds its shape much better when bent.
It's worth repeating: plastic and vinyl ducts are not up to code. The International Residential Code (IRC) is very clear, mandating smooth-interior metal ducts specifically to minimize fire risk.
Dryer Vent Ducting Material Comparison
The performance and safety gap between the right materials and the wrong ones is huge. Seeing them side-by-side makes it obvious why the choice matters so much for your home's safety.
Material Type | Safety Rating | Lint Buildup Risk | Best For |
|---|---|---|---|
Rigid Metal | Excellent | Very Low | The entire vent run, especially long, straight sections. |
Semi-Rigid Metal | Good | Low | Transitioning from the dryer to the wall or navigating bends. |
Flexible Foil | Poor | High | Not recommended; easily crushed and promotes lint buildup. |
Plastic or Vinyl | Dangerous | Very High | Never use this material; it is a major fire hazard. |
Take a quick look behind your dryer. If you spot that white plastic tube or a flimsy, crushed foil vent, you've found a problem that needs immediate attention. Swapping it out for rigid or semi-rigid metal is one of the single most important things you can do to protect your home from a dryer fire. You can find more expert tips in our guide on proper clothes dryer venting made simple. The small investment in the right materials pays for itself with priceless peace of mind.
How to Map the Safest Route for Your Dryer Vent
Once you've got the right materials, the next puzzle piece is figuring out the best path for your dryer vent to take to get outside. Think of it like a highway for hot, damp, lint-filled air. The safest and most efficient route is always the path of least resistance.
Your goal here is simple: create the shortest, straightest possible line from your dryer to the exterior of your home. This isn't just a friendly suggestion; it has a direct impact on how well your dryer works and how safe your home is. A long, winding route with lots of turns forces your dryer to work way too hard, leading to overheating, higher energy bills, and a serious risk of lint buildup. A short, direct path? That's how you get maximum airflow and efficiency.
Keeping the Vent Run as Short as Possible
Most dryer manufacturers and local building codes agree: the total length of your dryer vent should not exceed 35 feet. But it's not as simple as just measuring the duct. Every bend and turn you add creates resistance, which is like adding "virtual" feet to the total length.
Here’s a good rule of thumb to follow when planning your route:
For every 90-degree elbow, subtract 5 feet from your total 35-foot maximum.
For every 45-degree elbow, subtract 2.5 feet.
Let's say your plan involves two 90-degree turns. Right off the bat, your maximum straight duct length is down to just 25 feet (35 - 5 - 5 = 25). This is exactly why a straight shot through an exterior wall is almost always better than a long journey up into the attic or through a crawlspace.
Pro Tip: Whatever you do, never vent your dryer into an enclosed space like an attic, garage, or crawlspace. This is a recipe for disaster. It pumps a massive amount of moisture and fine lint into these areas, creating a perfect breeding ground for mold and a huge fire hazard. We've seen the damage it can cause firsthand. You can learn more about the specific dangers and see why you should avoid venting your dryer to the attic in our detailed guide.
Designing a Smooth and Secure Path
Mapping the route is about more than just distance. You have to visualize the whole system to sidestep common issues that kill airflow. The perfect path is both short and completely free of sags, kinks, or unnecessary bends.
For instance, if your laundry room is on an interior wall, you might be tempted to run the vent down through the floor and across a long crawlspace. A much safer and more efficient alternative might be to go straight up and out through the roof. It’s often a much shorter and more direct route.
Once the path is planned, it's time to secure the duct sections. This is a step where a lot of DIY jobs go sideways.
This chart breaks down why your material choice is the foundation for a safe and effective system.
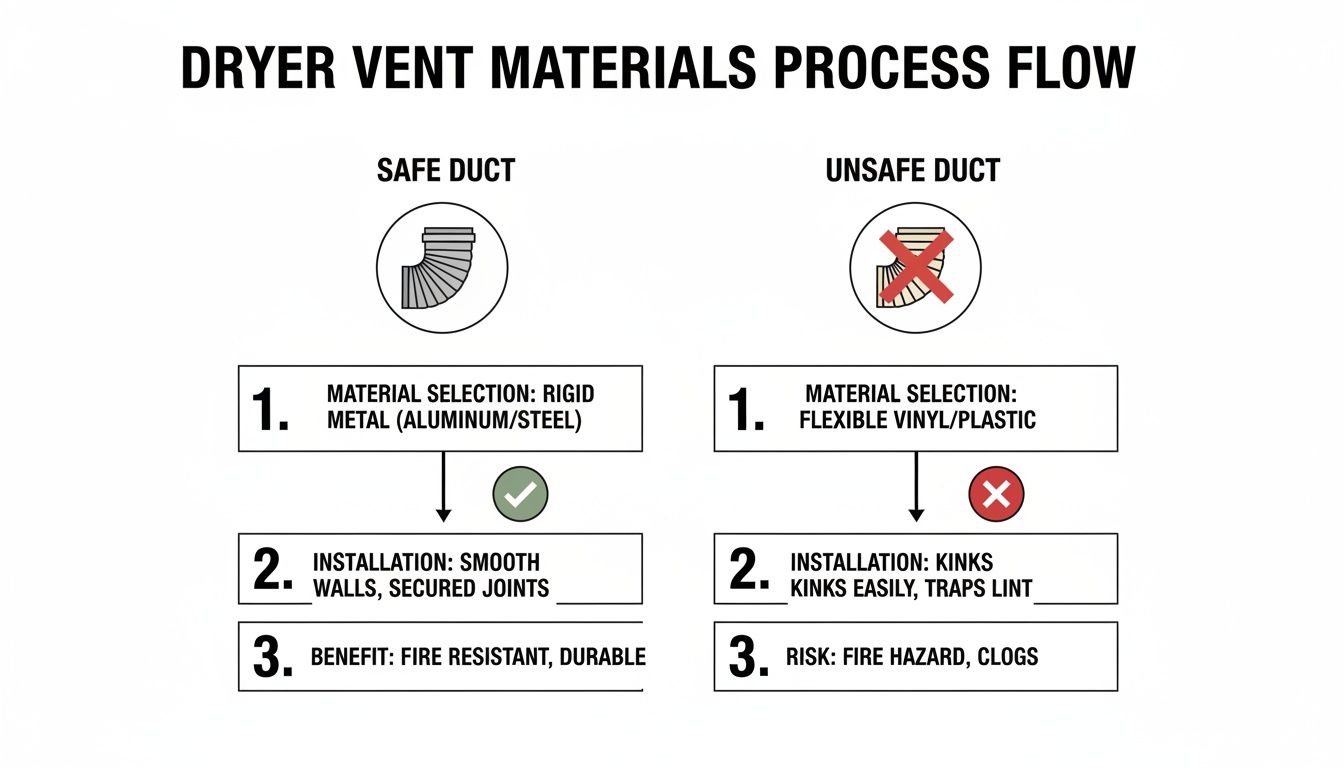
As you can see, rigid metal is the only way to go for a safe, professional installation, while those flimsy vinyl ducts are a known hazard.
To connect sections of your metal ducting, you need to use metal foil tape, often marked as UL 181B-FX. This tape is specifically made to handle the heat and moisture inside a dryer vent.
Do not use standard gray duct tape. It's a common mistake, but despite the name, it's not meant for ducts. The adhesive will dry out and fail from the heat, letting the seams pop open. Those gaps will leak hot, moist air and lint into your walls, creating a hidden fire risk you won't see until it's too late.
Properly securing your ductwork means creating a completely sealed system from the dryer to the outdoors. Taking the time to map the shortest route and using the right tape will ensure your dryer runs efficiently and, most importantly, safely for years to come.
Installing the Exterior Vent Hood Correctly
You’ve done the hard work of routing your dryer vent, but the job isn't quite finished. The final piece of the puzzle, where the vent exits your home, is just as critical as the ductwork itself. This termination point is your system's only gateway to the outdoors, and getting it right is non-negotiable for safety, dryer efficiency, and keeping pests from making your vent their new home.
The exterior vent termination, usually called a vent hood or cap, does two things. It gives the hot, moist, lint-filled air a clear path out, but it also blocks rain, critters, and cold drafts from getting in. This is where your choice of hood really matters.
Selecting the Best Exterior Vent Hood
The only type of exterior vent hood you should ever consider is one with a built-in damper or flap system. It’s a simple design: when the dryer is running, the force of the exhaust pushes the flap open. As soon as the cycle ends, the flap falls closed, sealing off the opening.
What you must absolutely avoid are vent hoods with a screen or grid over the opening. It seems like a smart way to keep bugs and mice out, but in reality, these screens are a massive fire hazard. Lint sticks to the mesh like glue, and it doesn't take long for a thick, stubborn clog to build up. This blockage is just as bad as a crushed duct: it traps heat, forces your dryer to overheat, and creates a serious fire risk.
Most building codes, including the International Residential Code (IRC), flat-out prohibit screens on dryer vent terminations. The only safe and compliant design is one that allows lint to pass through freely, which means a simple damper, not a mesh screen.
Key Installation and Clearance Guidelines
Once you've got the right hood, installing it in the right place is the next hurdle. You can't just stick it anywhere on the side of your house. There are specific clearance requirements you have to follow to prevent exhaust from seeping back into your home or causing other problems. For a more detailed look at the entire process, check out our guide to venting a dryer through the wall.
When you're ready to install, stick to these essential clearance rules:
Ground Clearance: The bottom of the vent hood needs to be at least 12 inches off the ground. This keeps it clear of landscaping, mulch, and snow drifts that could block it.
Window and Door Clearance: Keep the vent at least 3 feet away from any windows or doors that open. You don't want all that moist, linty air getting sucked right back inside.
Utility Meter Clearance: Make sure there's a 3-foot buffer between the vent and any gas meters, electric meters, or other utility boxes.
Air Conditioning Unit Clearance: The vent must be at least 3 feet away from your central AC unit. The hot exhaust can get pulled into the condenser, clogging the fins with lint and tanking its efficiency.
Nailing the exterior vent hood installation is the final step in creating a safe, effective system. By choosing a screen-free, dampered hood and following every clearance rule, you give your dryer the breathing room it needs and protect your home from fire and unwanted guests.
Warning Signs of a Clogged Dryer Vent

Your dryer is surprisingly good at telling you when something's wrong. You just need to know what to look for. Long before you have a major breakdown or a fire, an appliance with a clogged vent will give you subtle, and sometimes not-so-subtle, cues that it’s in distress. Catching these red flags early is the key to fixing a restricted airflow problem before it becomes a serious hazard.
Think of it as a quick diagnostic check for your laundry room. Just by paying attention to how your dryer is working with each load, you can spot the early symptoms of a clog and take action. These warning signs are your home's built-in safety alerts, and ignoring them can lead to expensive appliance damage, moisture problems, and even a house fire.
Performance and Sensory Clues
The clearest signs often come directly from your laundry and the dryer itself. When the vent is blocked, all that hot, moist air gets trapped inside. This crushes the dryer's efficiency and puts a massive strain on its internal parts.
Keep an eye (and nose) out for these tell-tale symptoms:
Clothes Are Still Damp: This is the number one giveaway of bad ventilation. If you find yourself running the same load through two or three cycles just to get it dry, a clogged vent is almost always the reason.
The Dryer Feels Unusually Hot: The top of your dryer should get warm during a cycle, but it should never be scorching hot to the touch. That excessive heat is a clear signal the machine is overheating because it can't push the hot air out.
A Noticeable Burning Smell: Lint is incredibly flammable. When it piles up inside a hot vent, it can start to smolder. A distinct burning smell in your dryer is a serious warning that demands immediate investigation.
A dryer that takes twice as long to dry a load of clothes can cost you an extra $20 to $30 per month in electricity. The inefficiency caused by a clogged vent hits both your wallet and your home's safety.
Environmental and Visual Indicators
Sometimes the problem shows up outside the dryer. A blocked vent can completely change the environment in your laundry room and even leave visible clues on the exterior of your house. These signs are easy to miss but are dead giveaways that your vent system needs help.
Check your surroundings for these clues:
Excessive Lint Around the Outdoor Vent: Take a walk outside while your dryer is running. You should feel a gentle puff of warm air, but you shouldn't see lint caked around the vent opening or sprinkled on the ground. That's physical proof of a clog.
High Humidity in the Laundry Room: A healthy vent sends all the moisture from your clothes straight outside. If your laundry room feels like a sauna during a cycle, it means that humid air is backing up into your home instead.
The Vent Flap Doesn't Open: Go look at the exterior vent hood while the dryer is on. If that little damper flap isn't opening, it means the airflow is too weak to push it open, a sure sign of a major blockage somewhere in the line.
Catching any of these signs early is your best defense against a bigger problem. A quick inspection can reveal an issue that might otherwise go unnoticed until it's too late. The moment you spot one of these warnings, it's time to stop using the dryer and get that vent system inspected and cleaned.
DIY Maintenance vs. Calling a Professional
Knowing your limits is a huge part of keeping a dryer vent system safe and working correctly. Some tasks are perfect for a weekend warrior, but others come with risks that make calling in a pro the only smart, safe choice. It really comes down to your vent's specific layout and how comfortable you are with this kind of home maintenance.
Most homeowners can absolutely tackle the basic, routine checks that keep a system from getting clogged up in the first place. These simple jobs don't need special tools and make a massive difference in stopping lint buildup at the source.
Here’s what you can confidently handle yourself:
Cleaning the Lint Screen: This is non-negotiable. The lint screen needs to be cleaned out after every single load of laundry. A clogged screen is the very first step toward dangerous airflow restriction.
Washing the Lint Screen: At least twice a year, pop the screen out and give it a good wash with soap and water. This removes the invisible film left behind by fabric softeners that can block the mesh over time.
Inspecting Visible Ductwork: Take a quick look at the duct right behind your dryer every so often. Check for any kinks, obvious damage, or connections that have come loose. A simple visual check can spot a problem before it gets serious.
When to Bring in an Expert
While DIY cleaning is great for the parts you can see and easily reach, it’s really only half the battle. Certain situations bring in complexities and safety hazards that are best left to a trained technician who has the right equipment for the job.
You should pick up the phone and call a professional for any of these scenarios:
Long or Complex Vent Runs: If your vent has a long way to go, snakes up through the roof, or has several sharp turns, a standard DIY brush kit just isn't going to cut it. Professionals use high-powered vacuums and flexible rotating brushes that can navigate the entire length of the duct, no matter the route.
Stubborn Blockages: Sometimes, the clog is more than just lint. Our technicians have pulled out everything from bird and rodent nests to kids' toys and other debris that completely block the line. These require special tools to dislodge without damaging the duct.
Code and Safety Compliance: A professional will make sure your entire system, from the transition duct behind the dryer to the exterior hood, meets all local building codes for proper dryer venting. This is critical, especially if you live in an older home or suspect the original installation wasn't done correctly.
You're Unsure or Uncomfortable: If you have any doubt about what you're doing or the condition of your vent, calling an expert is always the safest bet. There's no shame in it; it's about protecting your home and family.
At the end of the day, the goal is a clean, unobstructed vent. For many homeowners here in the Phoenix area, understanding the real benefits of professional dryer vent cleaning services brings peace of mind. A pro can clean the entire system from end to end, making sure there are no hidden fire hazards lurking in your walls.
Common Questions About Correct Dryer Venting
Even with a solid plan, a few questions always seem to pop up during a dryer vent installation. I hear them from homeowners all the time. Getting these details right is what separates a safe, efficient setup from a major fire hazard waiting to happen.
One of the biggest questions is about how long the vent can actually be. The rule of thumb is to keep the total duct run under 35 feet. But here’s the critical part most people miss: you have to "pay" for every turn. A sharp 90-degree elbow is like adding five feet of pipe, and a 45-degree bend adds two and a half feet. Those bends create resistance and slow down the air, so you have to subtract that "equivalent length" from your 35-foot budget.
Answering Your Top Concerns
Another one I get asked constantly is about using screws to connect the duct pieces. The answer is always a hard no. You should never, ever use screws on the inside of the ductwork. Think about it: each screw tip pokes into the pipe, creating a tiny ledge that’s perfect for snagging lint. Over time, that small snag becomes a massive, dangerous clog. The right way to do it is to seal every joint with metal foil tape for a smooth, airtight connection.
Then comes the maintenance question: how often does the vent really need a good cleaning?
For most families: A professional cleaning once a year is the gold standard.
For heavy use: If you have a big family and the dryer is running nearly every day, bumping that up to every six to nine months is a smart move.
The most important thing is being consistent. Don't wait until you notice your clothes are taking forever to dry. Proactive cleaning is your best defense against both fire risk and unnecessary wear and tear on your dryer.
Finally, let's talk about those cheap-looking plastic or vinyl transition ducts you see at the big box stores. Are they ever okay to use? Absolutely not. These materials are a serious fire hazard. They can't handle the heat from the dryer, and their flimsy, ribbed design is a lint magnet. Only use rigid or semi-rigid metal ducting for the entire system, from the back of your dryer all the way to the outside wall.
If you want to be certain your dryer vent system is safe, efficient, and up to code, leave it to the pros. The team at Purified Air Duct Cleaning offers complete inspections and cleanings to protect your home. Schedule your service in the Phoenix or Avondale area today by visiting us at purifiedairductcleaning.com.