How to Clean Dryer Vent Without Moving Dryer: A Practical Guide
- shawnpurifiedair
- Dec 29, 2025
- 13 min read
You can absolutely clean out your dryer vent without having to move the dryer. The trick is to use a specialized cleaning kit that comes with a rotary brush and flexible rods. By working from both inside (where the duct hits the wall) and outside (at the exterior vent cap), you can knock loose and clear out dangerous lint buildup along the entire length of the vent.
Why In-Place Dryer Vent Cleaning Is a Game Changer
Let's be honest, the thought of wrestling a heavy, awkward dryer away from the wall is enough to make anyone procrastinate on this critical maintenance chore. The good news? You often don't have to.
Cleaning your dryer vent in place isn't just about convenience. It’s a practical way to consistently protect your home and keep your appliance running efficiently without the backbreaking work.
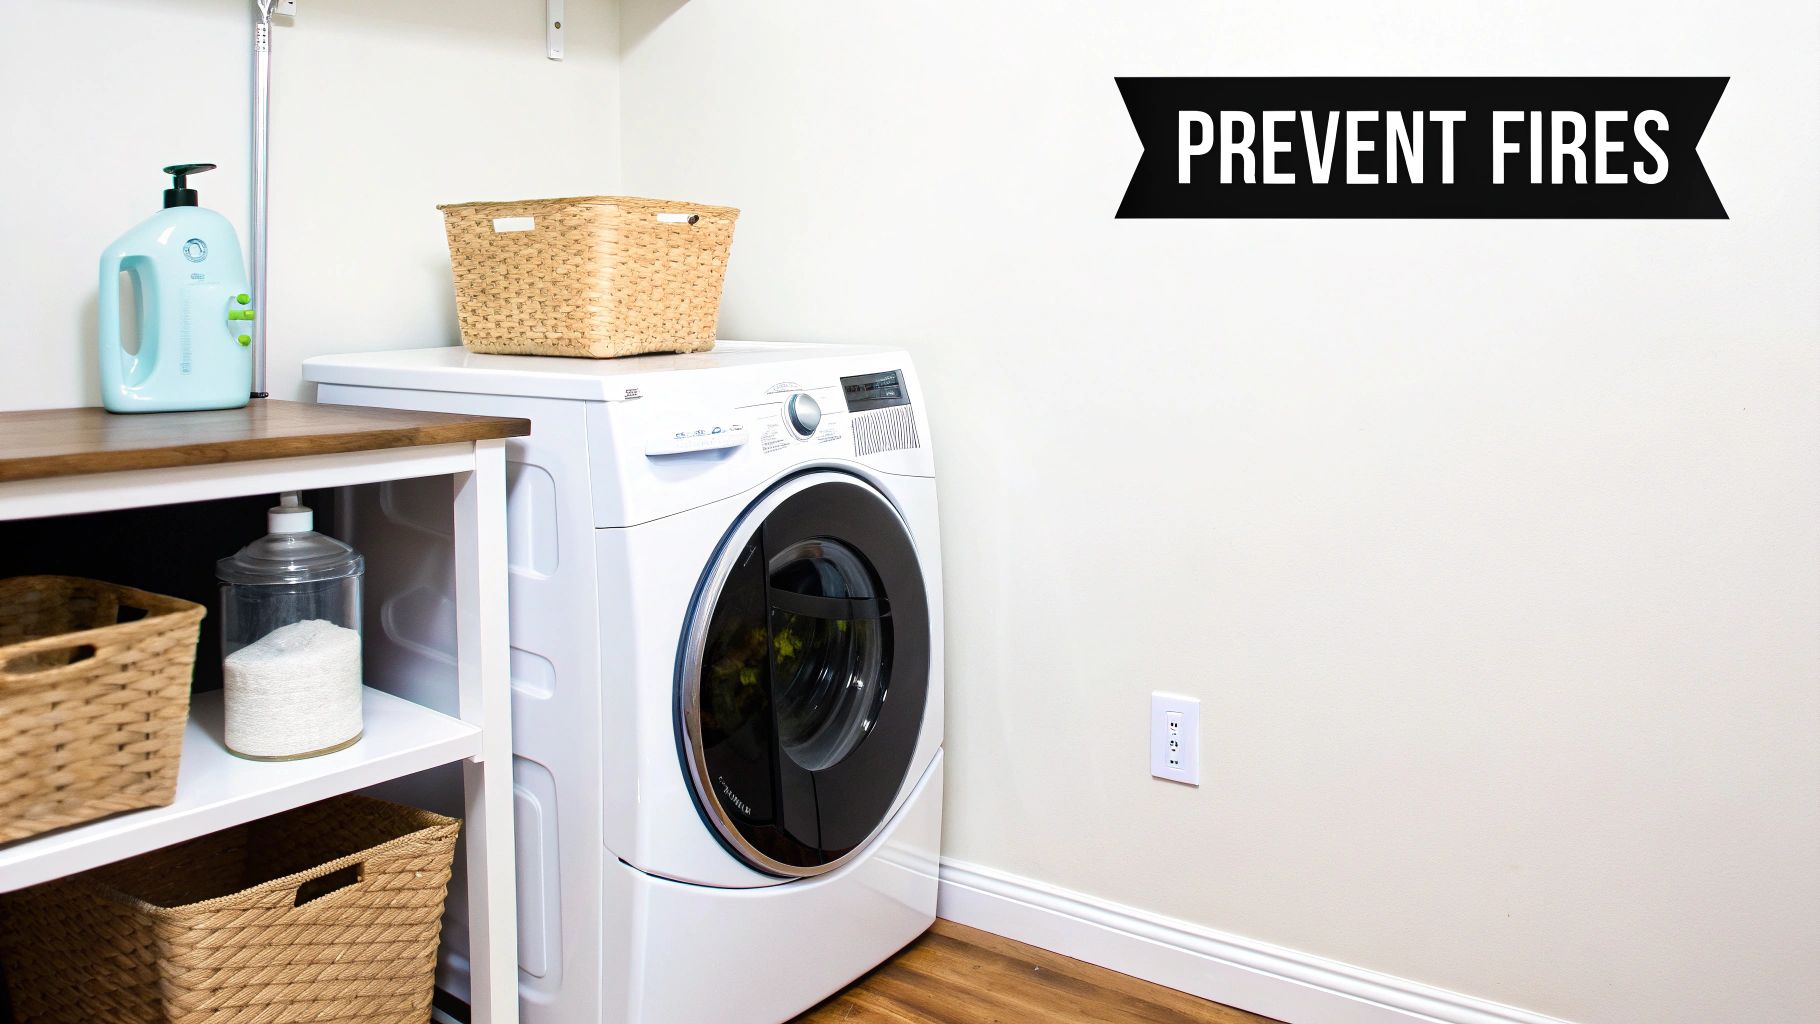
This simple task directly tackles a major fire hazard that’s surprisingly common in laundry rooms. According to the National Fire Protection Association, nearly 17,000 clothes-dryer fires happen in U.S. homes every year, and lint buildup is a leading cause. These fires lead to devastating property loss and, tragically, hundreds of injuries and deaths.
The reality is that many of these dangerous blockages are completely reachable without ever budging the dryer, especially if you're dealing with a short duct run or an easily accessible exterior vent.
The Real Benefits of a Clean Vent
Beyond just preventing fires, a clean vent offers tangible perks you'll notice right away. A clear pathway lets hot, moist air escape easily, meaning your dryer doesn't have to work as hard or run nearly as long.
If you want a better handle on the whole system, our guide on what a dryer vent is and why it matters breaks it down.
The immediate advantages are about more than just safety:
Lower Energy Bills: An efficient dryer sips electricity or gas instead of guzzling it. That translates directly into savings on your monthly utility bills.
Faster Drying Times: With unobstructed airflow, your clothes dry much quicker. That means less time spent on laundry chores.
Longer Appliance Lifespan: Easing the strain on the dryer's heating element and motor helps fend off premature wear and tear, saving you from expensive repair calls or a full replacement.
By setting aside a little time for this task, you’re not just cleaning a duct. You're investing in your home’s safety, boosting your appliance's performance, and cutting down on needless expenses.
Cleaning your vent without moving the dryer is also a great way to save yourself the hassle of moving a heavy appliance. Here’s a quick look at the benefits.
Key Benefits of Cleaning Your Vent In Place
Benefit | Impact on Your Home |
|---|---|
No Heavy Lifting | Avoids the risk of scratching floors, straining your back, or damaging the dryer. |
Saves Time | You can get straight to the cleaning without a lengthy prep and repositioning process. |
Accessibility | Perfect for dryers in tight closets, stacked units, or spaces where moving isn't an option. |
Consistent Maintenance | Makes the task less intimidating, so you're more likely to do it regularly. |
Ultimately, knowing how to clean your dryer vent without moving the machine is empowering. It turns a job most people dread into a manageable, and incredibly important, part of your regular home maintenance.
Alright, before you dive headfirst into cleaning that dryer vent, let's get your gear in order. Showing up to the job unprepared is a surefire way to get frustrated and end up with a half-cleaned vent. Think of it like cooking a big meal; you wouldn't start without having all your ingredients prepped and ready to go. A little prep work here will make the entire process so much smoother.
The absolute star of the show is a dryer vent cleaning kit. These things are made specifically for this job, usually packing a good rotary brush and a bunch of flexible rods you can screw together. As you connect more rods, you can push that brush deeper and deeper into the vent, getting to all the lint hiding way back in the pipe.
Core Cleaning Equipment
When you're picking out a kit, don't just grab the cheapest one. Look for one with rods that are both flexible and durable, since the last thing you want is for one to snap off inside your vent. The brush head needs to be tough enough to break up that stubborn, caked-on lint but not so aggressive that it could tear up older, more fragile ductwork.
Dryer Vent Cleaning Kit: This is your must-have. It comes with the brush and flexible rods you need to reach deep inside the vent. Most kits are designed to attach to a power drill, which gives you the spinning action needed to really tear through lint buildup.
Vacuum Cleaner: You'll need a vacuum with a good, long hose attachment. A shop-vac is the MVP here because of its power, but a regular household vacuum will do the trick for sucking up all the lint you dislodge.
Power Drill: You can technically spin the rods by hand, but trust me, a cordless drill makes the job about ten times easier. It delivers the consistent, high-speed rotation that really breaks apart dense clogs.
Essential Safety and Finishing Gear
Let's talk safety for a second, because you're going to be stirring up a lot of fine dust and lint. Don't blow this part off; these simple items are non-negotiable.
That cloud of lint isn't just fluff, it can irritate your lungs and may even contain mold spores if there's been any moisture in the vent. A little bit of protective gear is a small price to pay for your health.
You'll also want a few other things on hand to wrap up the job like a pro. A screwdriver will likely be needed to take off the exterior vent cover, and having some quality duct tape is always a good idea in case you find any small tears in the transition hose. For a deeper dive into professional techniques, you can find some great pro tips for quick results over on our blog.
Finally, grab your personal protective equipment:
Dust Mask: A good mask is essential to keep from breathing in all that fine dust, lint, and whatever else has been living in your vent.
Gloves: A simple pair of work gloves will protect your hands from grime and any sharp metal edges on the duct or vent cover.
Goggles: You'll thank me for this one when debris starts flying. A pair of safety glasses or goggles keeps all that junk out of your eyes.
Tackling the Vent From Inside Your Home
Alright, let's get to the main event: cleaning the vent from inside your laundry room. This is where the real work happens and where you'll clear out the bulk of that dangerous lint buildup. A little prep and a steady hand are all you need to get this done right without turning your laundry room into a lint snow globe.
First thing's first: safety. Before you even think about touching the ductwork, unplug your dryer from the wall. If you have a gas dryer, you absolutely must shut off the gas supply. Look for a small valve on the gas line behind the machine and turn it so the handle is perpendicular to the pipe.
Disconnecting and Preparing the Duct
With the power and gas safely off, you can turn your attention to the transition duct, which is the flexible, often foil-like tube connecting your dryer to the wall vent. Your goal is to carefully detach it from the wall.
Most of these are held on with a simple metal clamp. You can usually loosen it with a screwdriver or a pair of pliers. Once it's loose, gently wiggle the duct off the wall pipe. Go slow here, as older ducts can be brittle and tear easily. It’s a good idea to have your vacuum hose right there, ready to suck up any lint that immediately spills out.
Having your tools laid out and ready to go makes the whole process smoother. This little graphic gives you a quick rundown of the essential gear.
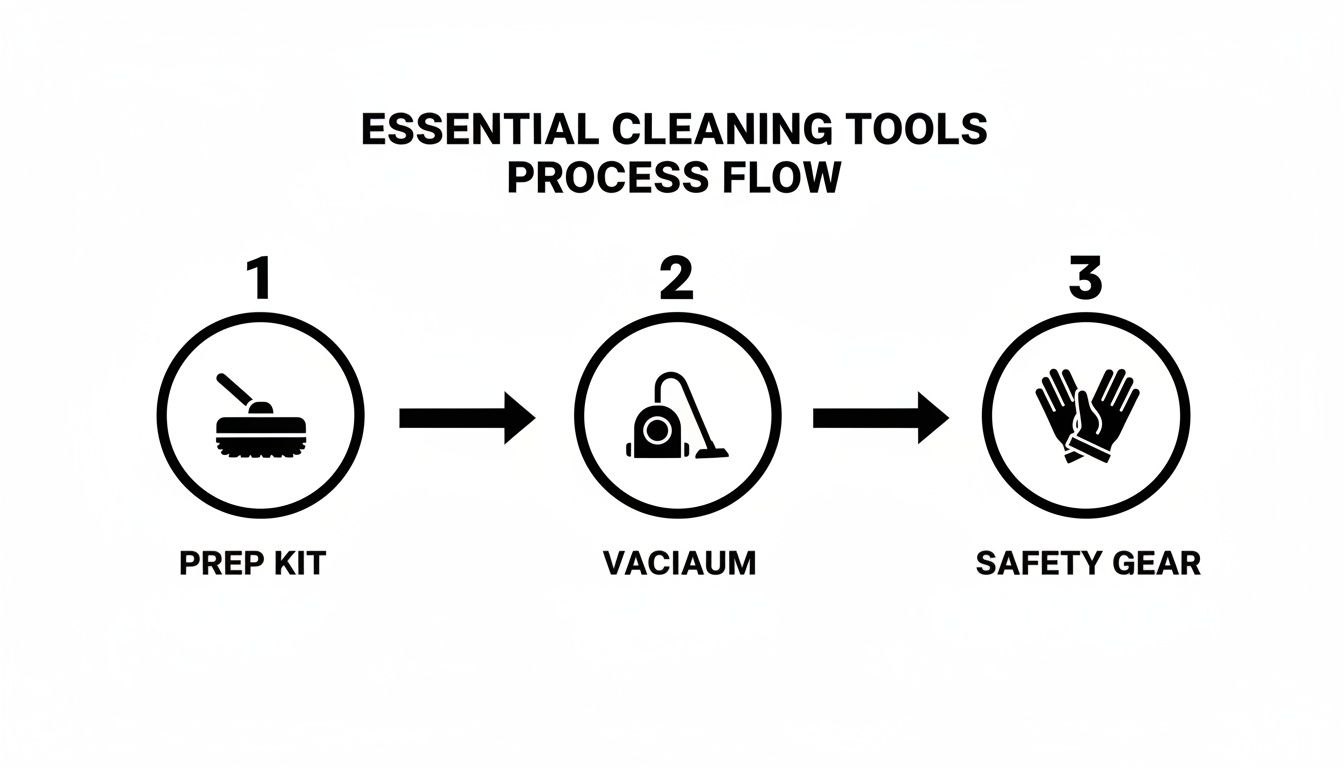
As you can see, it really boils down to three things: the right cleaning kit, a decent vacuum, and your safety gear.
Using the Rotary Brush Kit Effectively
Now you’re ready to start cleaning. Take the brush head from your rotary kit and insert it into the vent opening in the wall. Attach the first flexible rod to the brush, then connect the whole thing to your power drill.
Start feeding the brush into the duct, adding more rod sections as needed to extend your reach. Keep your drill spinning at a low-to-medium speed as you push deeper into the vent.
Pro Tip: This is critical. Always keep the drill rotating clockwise. If you run it in reverse (counter-clockwise), the threaded rods can unscrew and come apart inside your wall, turning a simple cleaning job into a major headache.
You'll feel some resistance when the brush hits a thick patch of lint. Just work it back and forth gently in that spot. Let the spinning brush do the heavy lifting, as there's no need to force it. The bristles are designed to scrape the lint off the duct walls effectively.
Managing the Mess for a Clean Finish
Your vacuum is your best friend during this part of the job. You'll want to hold the vacuum hose right up to the wall opening, next to the spinning rods. This will capture all the lint as the brush breaks it loose, keeping it from blowing all over your room.
If you don't have a helper to hold the vacuum, a little duct tape can work wonders to secure it in place. For longer vents, it’s best to work in sections.
Here’s a simple rhythm to follow:
Push the brush in a few feet: Guide the spinning brush about three or four feet into the vent line.
Slowly pull it back: Keep the drill spinning clockwise as you slowly retract the brush.
Let the vacuum do its thing: Pause for a second to let the vacuum suck up all the debris you've just pulled toward the opening.
Keep repeating this process, adding more rods until you've cleaned the entire length of the vent. You'll know you're done when you feel the brush hit the exterior vent cover. Once the inside is clear, you're ready for the final steps outside. For more ways to make sure you've got good airflow, you can learn more about how to check a dryer vent quickly and safely with some of our other guides.
Tackling the Job From the Outside In
After you've done the heavy lifting from the inside, it's time to head outdoors to finish the job. This two-pronged attack is really the secret sauce for getting your vent completely clear, and it’s a crucial part of cleaning a dryer vent without ever having to move the dryer. If you skip this, you could leave a final blockage right at the exit, which undoes all your hard work.
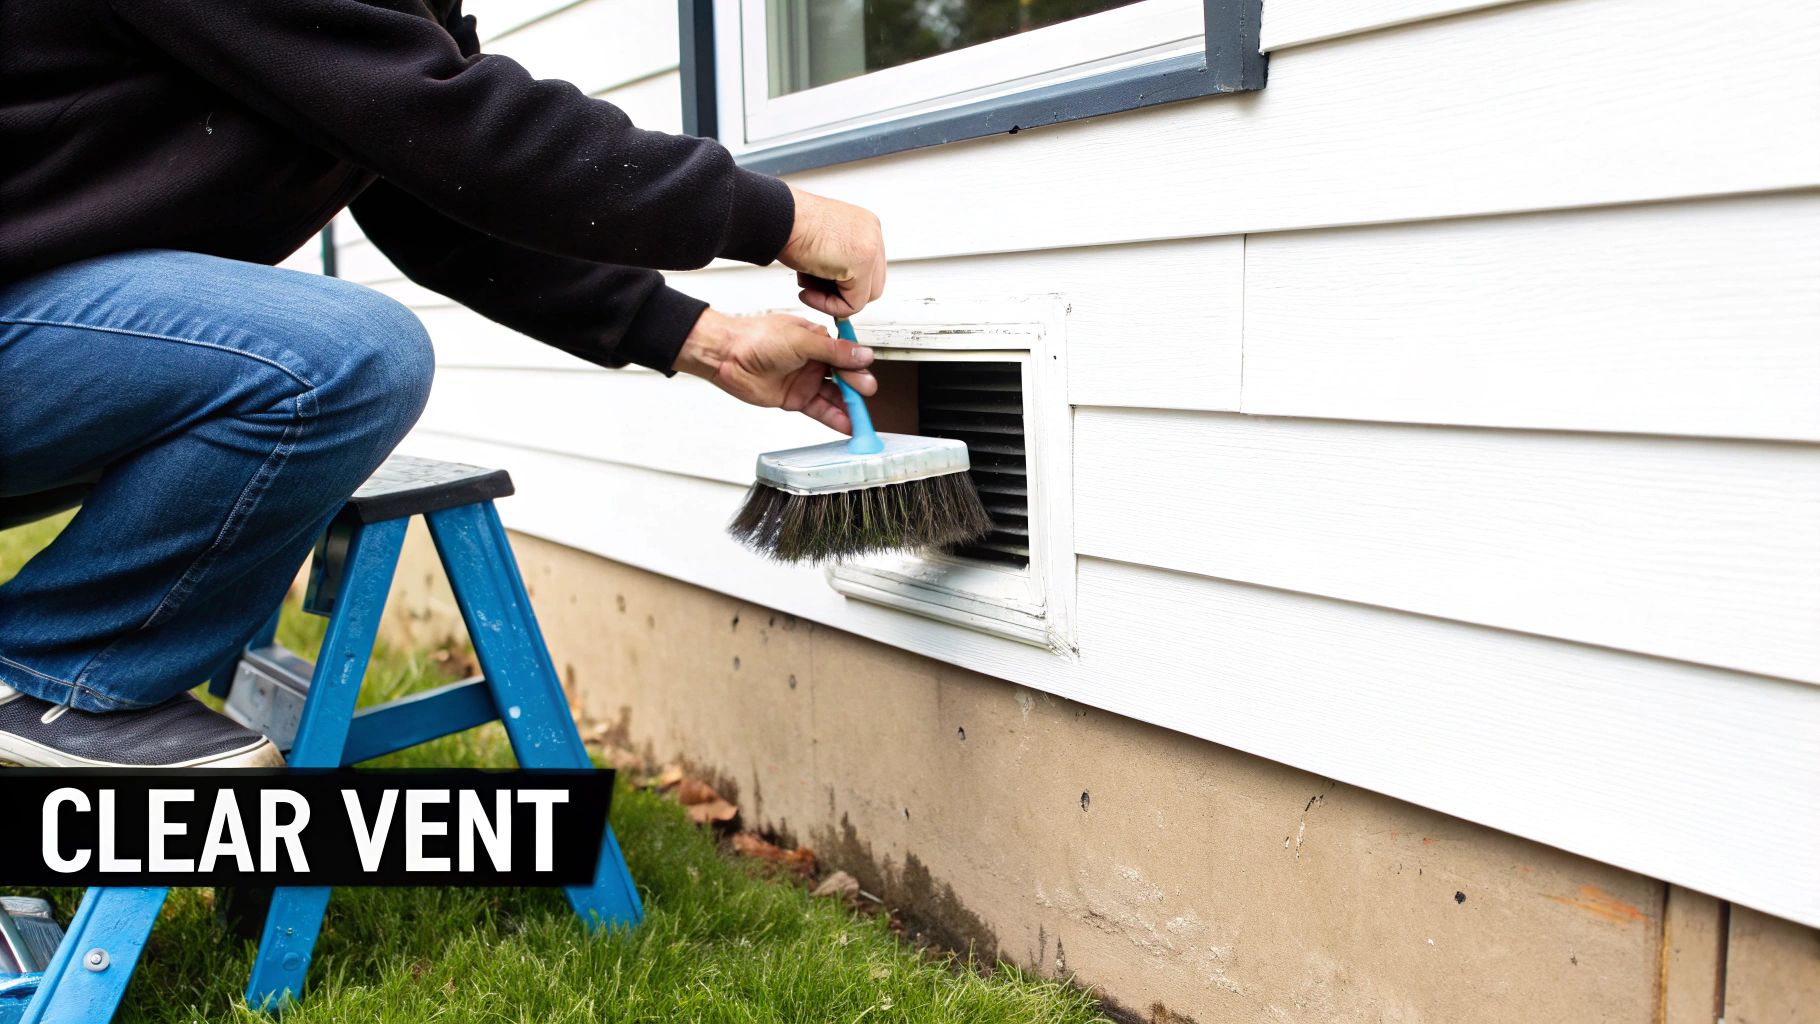
Your first mission is to find the exterior vent cap on the outside of your house. It's usually a small plastic or metal cover with louvers (flaps). Depending on your home’s layout, it might be near the ground or higher up on a wall, so you might need a sturdy stepladder to get to it safely.
Accessing and Clearing the Vent Cap
Once you’ve located the vent, you'll need to open the cover. Some just pull right off, but others are secured with a couple of screws that a screwdriver will handle easily.
Be ready for what you might uncover. This spot is a prime collection point for all sorts of gunk, often creating one last stubborn plug.
You’ll probably need to clear out some common culprits:
Caked-on lint that’s mixed with moisture and hardened into a dense mat.
Leaves and twigs that have blown into the opening over the seasons.
Small animal or bird nests, which are not only a serious blockage but also a major fire hazard.
Throw on some gloves and pull out any of the bigger debris by hand. For the finer, packed-in lint, a small brush or your vacuum’s hose attachment will work wonders.
The state of your exterior vent tells a story about the health of your entire system. If you see a thick blanket of lint clinging to the outside, it’s a dead giveaway that the vent has been struggling to breathe for a long time.
Pushing Debris Back Towards the Inside
Now, it’s time to repeat the process from indoors, but in reverse. Insert your rotary brush and the first rod into the exterior opening. Connect your drill and, just like before, always keep it spinning clockwise as you start feeding the brush into the vent.
This time around, your goal is to push any leftover lint back toward your laundry room. That way, you can easily vacuum it up from the interior opening you were just working on. This final pass ensures the entire duct is clear from end to end. You'll probably be surprised at how much extra lint you dislodge. For a deeper dive into safe venting setups, our guide on proper clothes dryer venting made simple is a fantastic resource.
Before you button everything back up, give the vent cap itself a quick inspection. The flaps, or louvers, need to move freely. If they’re stuck open, pests can get inside; if they’re stuck shut, they’ll trap moist air and lint. A quick wipe-down will ensure it functions perfectly before you screw it back on.
Confirming Your Success and Knowing When to Get Help
So you’ve put in the work, and now it’s time for the moment of truth. How do you know if you really cleared the clog? Thankfully, you don’t need any fancy equipment for this part; a quick, simple test will tell you everything you need to know about your dryer’s newfound airflow.
Once you have the transition duct back in place, head outside to the exterior vent. Get someone to start the dryer on a cool setting like "Air Fluff" (no heat needed). You should feel a strong, steady blast of air coming out of the vent. If the little flaps on the vent cap are pushed wide open and fluttering with force, that's a fantastic sign you’ve successfully done the job.
Reading the Signs of Success
A properly cleaned vent delivers immediate, noticeable results. Beyond just feeling that strong airflow, you'll see a huge difference in your dryer's performance. Suddenly, those heavy loads of towels and jeans will actually dry in a single cycle.
This is about more than just convenience. A restricted vent chokes your dryer, forcing it to run longer and work harder, which drives up your energy bills. Clearing out that impacted lint can slash drying time by up to 30% and seriously boost its efficiency. Over a year, those savings really start to add up.
The ultimate confirmation is a dryer that runs cooler and finishes a load of laundry in a single cycle. When your machine no longer feels scorching hot to the touch and your clothes are perfectly dry, you know the job is done right.
When DIY Isn’t Enough
Knowing how to tackle this job without pulling the dryer out is a great homeowner skill. But it’s just as important to recognize when you’re facing a problem that a DIY kit just can’t handle. Some clogs are just too stubborn or too deep for standard tools.
You should think about calling in an expert if you're seeing any of these red flags, especially after you've already tried cleaning it yourself:
Clothes Still Take Forever to Dry: If you've cleaned the vent and your drying times are still ridiculously long, the clog might be packed too densely or lodged deep inside an elbow joint your brush can't reach.
The Dryer Still Overheats: A dryer that keeps shutting off mid-cycle or feels dangerously hot is a major warning sign. This points to a severe airflow problem that needs professional-grade equipment to solve.
A Burning Smell Persists: It’s normal to smell a faint burning odor during the first cycle after a cleaning, since that’s just leftover dust burning off. But if that smell is strong and doesn't go away, there’s likely still a dangerous amount of lint built up near the heating element.
Some vent systems are just inherently tricky. If your vent run is unusually long, we're talking over 35 feet, or has a bunch of sharp turns and elbows, a standard DIY kit probably won't have the muscle or the length to get the job done right. Pros come armed with high-powered vacuums and compressed air systems that can blast through anything.
Bringing in a professional isn't giving up; it’s making a smart safety call. They have the right tools to diagnose and fix complex blockages safely, protecting your appliance and, more importantly, your home. While you're focused on home safety, you might also want to check out some of the best ways to clean your home's exterior to keep your entire property in top shape.
Common Dryer Vent Cleaning Questions
Even with the best instructions, you're bound to have a few questions when you tackle a job like this for the first time. It's completely normal. Getting clear answers to these common hang-ups will give you the confidence to get the job done right and safely.
Let's dive into some of the most frequent questions we hear from homeowners.
How Often Should I Really Clean My Dryer Vent?
This is probably the number one question people have, and the answer isn't one-size-fits-all.
The general rule of thumb is to clean your dryer vent at least once a year. For many households, that’s perfectly fine. But that's just a starting point. Your laundry habits and home environment are what really dictate the schedule.
You'll want to bump that up to every six months if you're dealing with:
A big family: More people equals a mountain of laundry, and that means a whole lot more lint.
Constant use: If your dryer is running four or more times a week, that vent is working overtime and will clog up much faster.
Shedding pets: All that pet hair loves to mix with lint, creating dense clogs that are tough to clear.
Ultimately, your dryer will tell you when it's time. Are your clothes still damp after a full cycle? Is the top of the dryer hot to the touch? Those are dead giveaways that your vent is clogged and needs attention. You can learn more about this in our essential guide covering why dryer vent cleaning is so necessary.
Can I Just Use a Leaf Blower Instead of a Brush Kit?
It’s an idea that seems brilliant in theory. Why not just blast all that lint out with a powerful gust of air? It’s fast, easy, and you already have one in the garage.
Unfortunately, this is one shortcut you absolutely want to avoid. A leaf blower can take all that loose lint and compact it into a solid, dense plug, especially around corners and elbows in the duct. You could easily make the problem much, much worse.
Even more concerning, a leaf blower can be powerful enough to disconnect the ductwork hidden inside your walls. If that happens, you’re now venting hot, moist, lint-filled air directly into your wall cavity, which is a massive fire hazard.
A proper rotary brush is designed to physically break up and scrape the caked-on lint from the duct walls. Then, the vacuum’s suction pulls it all out safely. A leaf blower should only ever be used after a thorough brushing to gently clear away any remaining loose debris from the outside vent cap, never as your main cleaning tool.
A clogged dryer vent isn't just an inconvenience; it can lead to costly appliance repairs and create a serious safety risk in your home. If you've run into a stubborn clog or just want the peace of mind that comes with a professional job, the certified technicians at Purified Air Duct Cleaning are ready to help. We use specialized equipment to guarantee your vent is completely clear, restoring your dryer's safety and efficiency.
Visit us at https://www.purifiedairductcleaning.com to get your free quote today.